
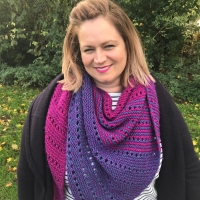
Welcome to my tips and tricks post for the rainBOOM! Wrap.

Choosing Your Yarn Pack
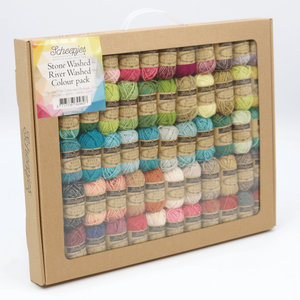
When Scheepjes first released their Stone and River Washed colour packs in 2018, they were a roaring success, selling out in short order. I know that there are a lot of you who bought a pack just to look at, or to display, or to use, but no sure what to actually make with it.
Also, since then Scheepjes has brought out 8 new ochre based river washed colours, and the packs have been out of stock almost everywhere for a little while now.
Some great news is, the packs are all available to purchase again, and the new packs all contain the 8 new colours!
As a result of this, I’ve created two versions of the rainBOOM! pattern. One using the original pack, and the other with the 8 new colours blended in!
So it doesn’t matter which pack you have, there’s a rainBOOM! for you.
Getting Started
While the pattern is straight forward with only a couple of different stitches being used, there are a few little parts which you might find a little bit tricky.
I’ve created a couple of videos if you want to have a look. The first shows you how to get started, by making your magic ring and working the first few rows back and forth:
You’ll see that in the pattern I’ve noted that at the beginning of each row you should chain 2. This never counts as a stitch. When changing colours, feel free to use a standing treble (US double) crochet if you prefer. I’m a ch2 kinda girl myself.
Matching Gauge
Once you get going, the pattern is really very simple. You just need to pay close attention to your gauge (or tension), because if you crochet loosely you’ll need to go down a half or full hook size. The wrap is made using a 5 mm hook although the yarn itself calls for a 3-3.5mm. I did this on purpose. I wanted to increase the drape, as if you’re working with a 3mm hook, the fabric will remain quite dense and not drape as well.
If you find your stitches to be very open and loose, and you’re unable to match gauge, please do try again with a smaller hook because otherwise you will come into trouble when it comes to making your diagonal rows – there is only very little yarn left over after making each set of rows when matching gauge.
Working the diagonals
Speaking of the diagonal rows, I’ve made a second short video to show you how and where you need to increase and decrease to make sure you get a flat parallel edge:
In the instructions you’ll see:
Repeat rows Repeat rows 38, 37 and 38 (as a set of three rows) 16 times, changing colour every 3 rows
This means you should work sets of three rows; starting with row 38, then repeat row 37 and 38 again. These three rows make up your diagonal stripes. What it basically means is, on the first row of the set you increase, work to the last 2 then decrease in the last two. Then turn and work row 37 by decreasing in the first 2, then working to the last, increasing in the very last stitch. Turn one more time and work row 38 again, increasing in the first stitch, and then work each stitch across as normal to the last 2, then decrease. From there, tie off and weave in the ends.
Repeat this for each colour of the diagonal stripes, except the last colour. With that last colour you need to only work 38 then 37, leaving a long tail (about 40cm) to whip stitch the diagonal to the first triangle.
Don’t forget: when making the diagonals, you will always start each set of three rows on the longest side, and tie off on the shortest.
Tassels
Once you’re all finished, it’s time to add the tassels, which are arguably my favourite part. What you should do is, gather up all the remaining ends and divide them into warm and cool colours, and then with lengths of between 30 and 40 cm, knot them double stranded onto each end of the wrap.
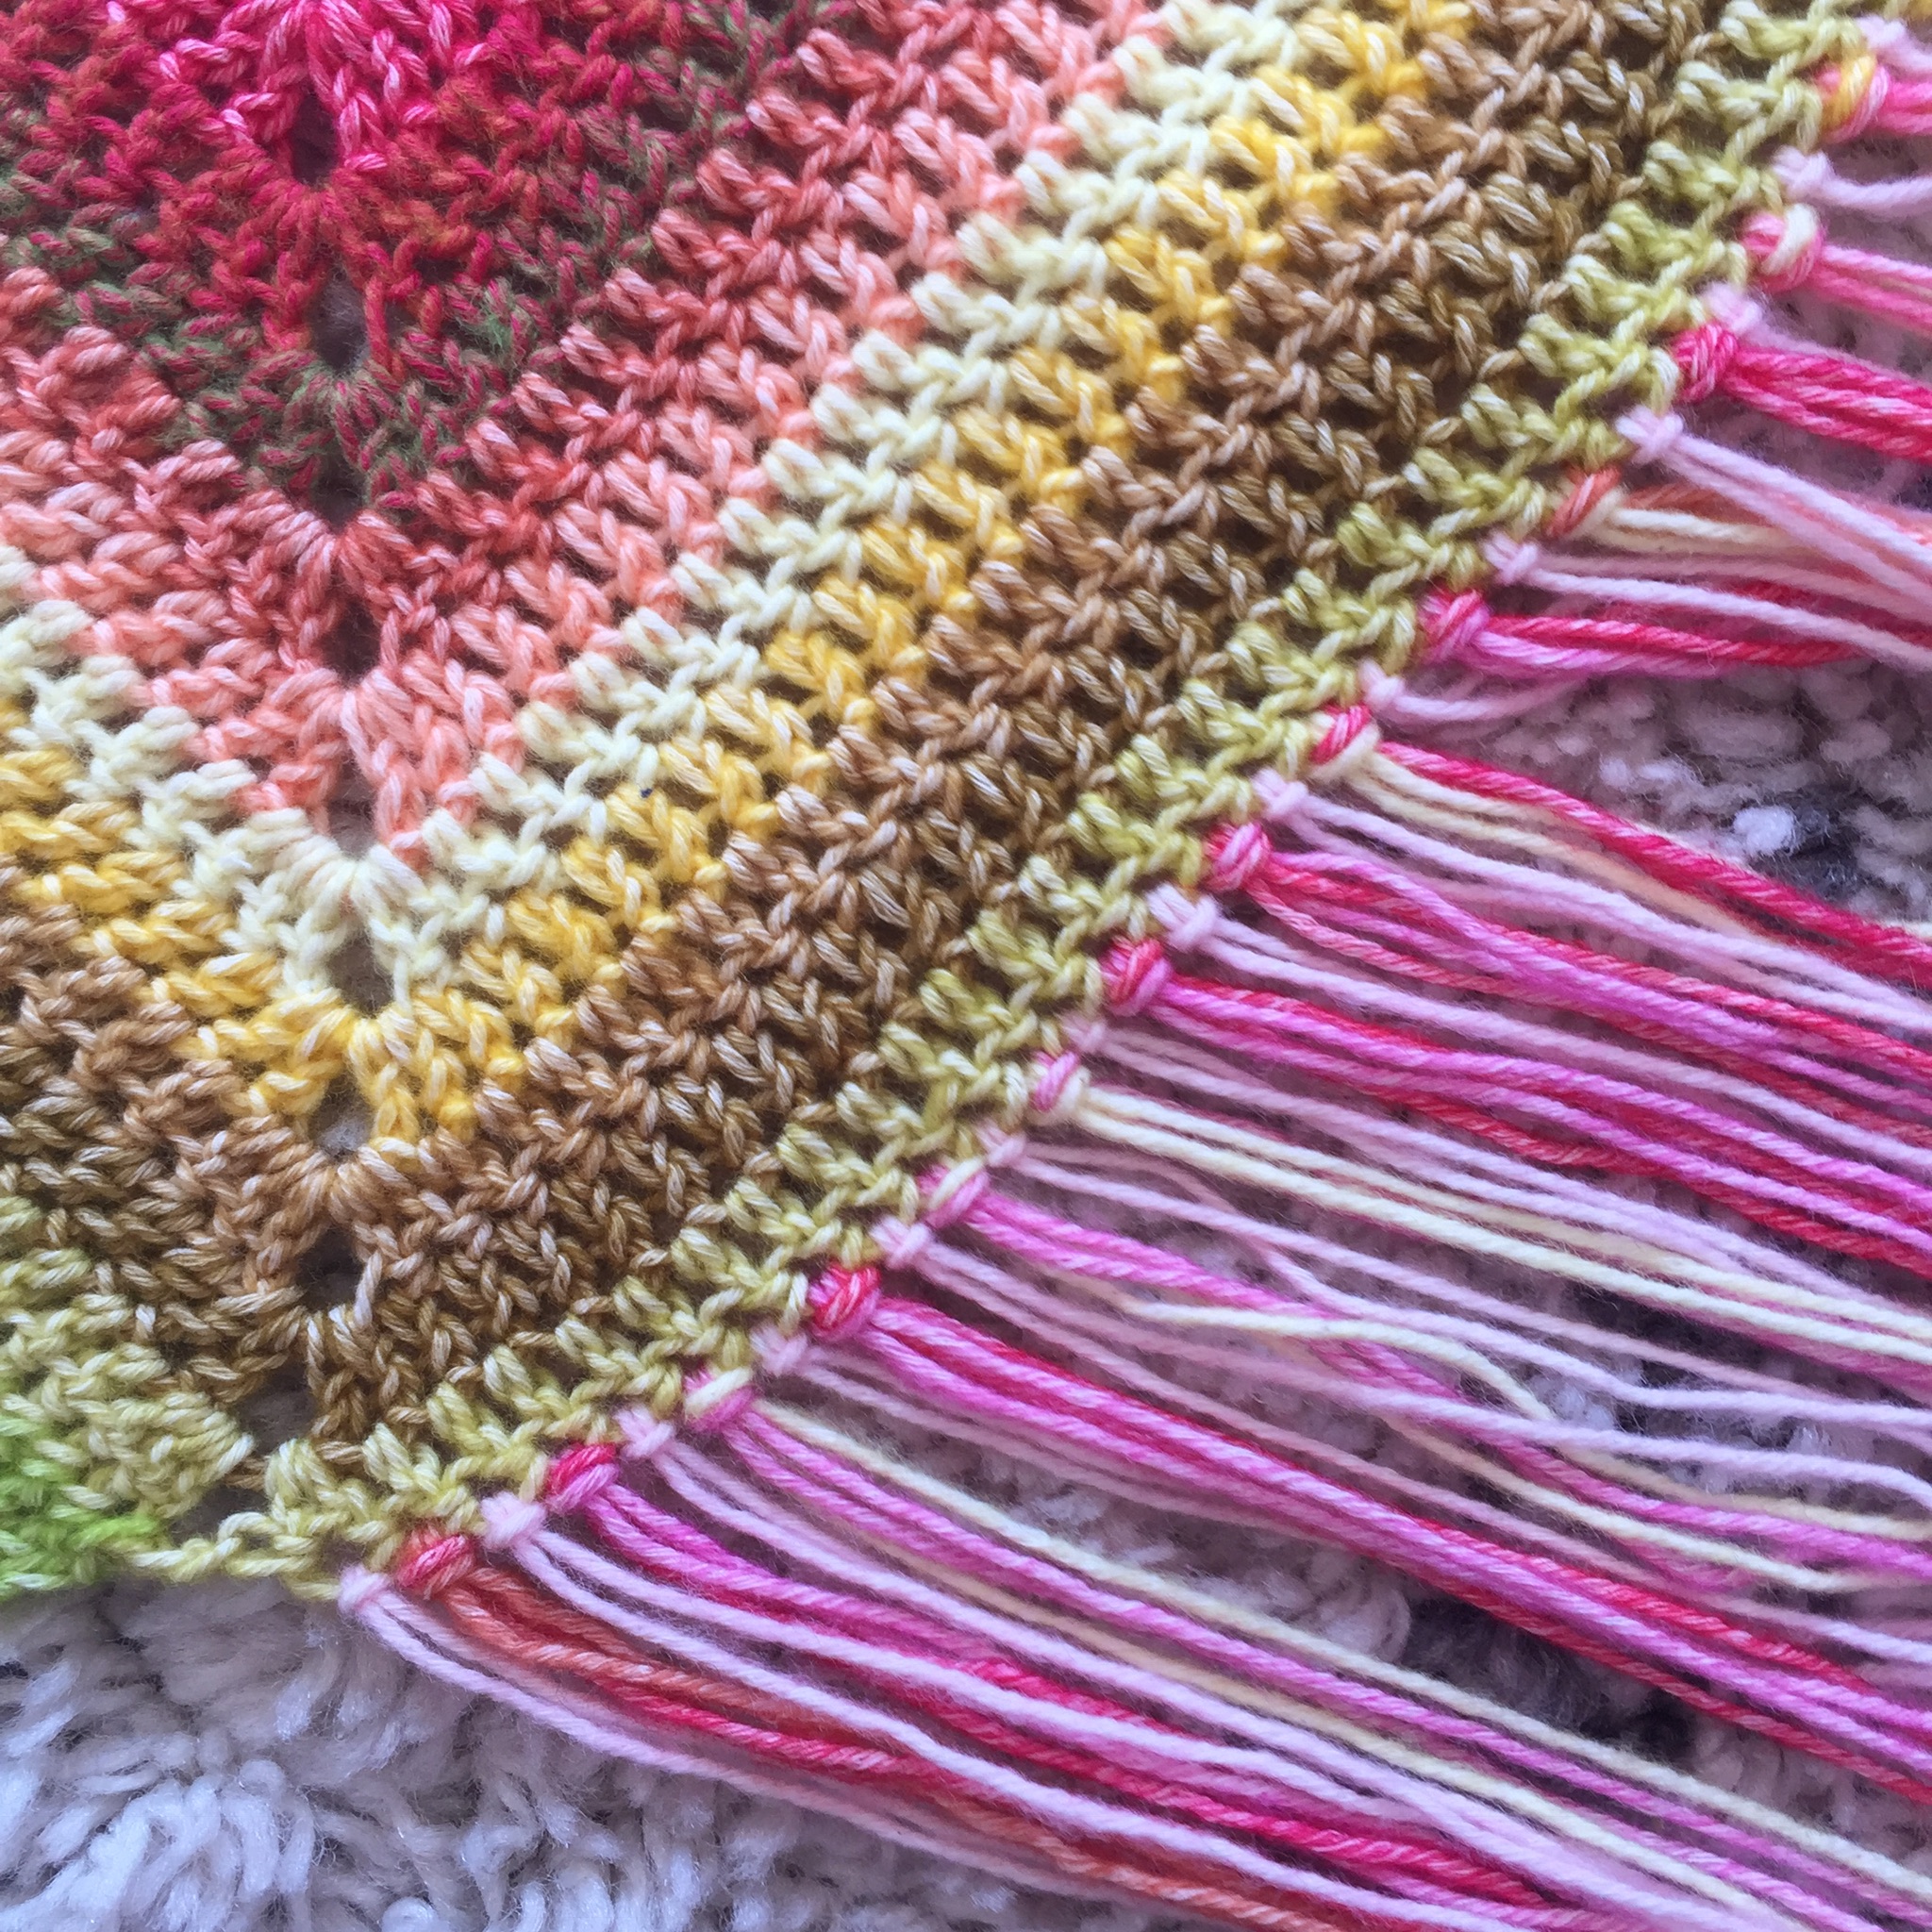
I didn’t bother cutting my tassels perfectly. I just broke each into lengths and left the ends to be soft and layered, but if you prefer, you can trim them all to the same length once you’re done.
Blocking
We all agree that blocking is essential to finishing off your crochet project to that higher level, and the rainBOOM! Wrap is no exception. Your long sides may have small bumps from your ch2 at the beginning of each row, so what you should do is soak your rainBOOM! in a tepid wool wash bath, and squeeze out the excess, pinning the wrap out making sure you pull your long sides so the bumps become invisible and the stitches are able to relax beautifully.
Alternatively, if you’re impatient like I am, pin your rainBOOM! out while it’s dry, making sure the sides are all straight, and your tassels are laid out smoothly, then using a spray bottle with a mixture of your favourite wool wash and water and soak it that way. Then the rainBOOM won’t take quite as long to dry and the results are just as good.
Either way, at least a day’s patience is needed because the stone/river washed takes a while to dry thanks to the cotton content.
Get the yarn
Have you purchased your yarn for this yet? There are loads of fabulous retailers all over the world where you can buy your yarn packs. Scheepjes has a complete list on their website and I have a few recommendations for you too:
Wool Warehouse* ships all over the world
Deramores* also ships globally
Black Sheep Wools* in the UK
Caro’s Atelier* is my local yarn shop here in Almere
Be Inspired in South Africa
Knotty House* in North America
BelleMae Yarns and Knit Spin Weave in Australia
You can also shop the yarn via my designer shop on Deramores.com! From there you can also get your hands on kits for more of my patterns with yarn + patterns all in one place.
Over to you!
Now I want to open the floor to you! Do you have any tips for others making the rainBOOM! Wrap? Or alternatively, do you have any questions that you’d like me to answer that aren’t covered here?
Let me know in the comments below, or head to either the International or Dutch Facebook groups where there are a bunch of people who are on hand basically round the clock to help each other out. Don’t you just love the community that Scheepjes has created for their customers?


Hello, thank you for this amazing pattern. I have got to the middle diagonal section and I am getting very confused! I am doing two rows of each colour instead of three as my tension is too loose. Can you Please advise me on the increases and decreases at the start and ends of the rows? I am getting in a right muddle and have frogged it about 10 times already! The pattern is written in a three row repeat and I can’t seem to work out how to adapt it to just doing two rows of each colour. Also how many stitches should there be in each diagonal row? Thank you very much for any help or advice 😃
Hey Sara,
When working a two row repeat, remember to always start and end on the long side. Join, immediately increase, work to the short side, decrease in the last. Turn, immediately decrease, then work to the last and increase again before cutting the yarn.
Don’t forget to work the ends away as you go, it’ll save you a LOT of time at the end! XX
Thank you so much for your help. All finished now and looking beautiful
I can’t find the video showing how to do the diagonals!
Are there finished dimensions that I should block to? I haven’t see them. Thank you!
What method did you use to end one color and begin the next? What did you do to weave in the ends as you went along? There seem to be several ways of doing these things and I’m not sure which would be best in this setting. I haven’t done color changing like this before. Thanks for creating this beautiful pattern!
I simply slip stitch and cut the yarn when changing to a new colour, then I join the new colour with a slip stitch and a chain 2. But you can also use a standing treble if that’s your preference. Using a tapestry needle I sew the ends in, through one of the top loops for about 10 stitches. I then wrap the end of the new colour around my working yarn with each yarn over for as long as I need, this also hides the previous colour which I’ve just sewn in.
Pingback: rainBOOM! Wrap – Czech Translation | MissNeriss
These tutorials can be so helpful. This one is too fast, and assumes we all are experts.
Hi Camille, you’re right, it is fast. You can use your YouTube settings function to slow it down. However, it’s not intended to be a replacement to the pattern. Good luck!
Regards, Nerissa
>
I also find the tutorials much too fast. In addition, the teacher’s hands are often covering what she’s doing. Because of this, I don’t think slowing things down would be all that helpful, because so much is obscured.
I know the MAL is long over, but there may be many, such as myself, who are starting very late. If it were possible to redo the tutorials, taking these comments into account, I’m sure there would be many grateful crocheters.
the chain 2 at the beginning of each row??????????
this is not in the pattern. should we be doing it?
thanks
Hi Mary, it’s all in the notes.
Regards, Nerissa
>
I dont understand how to work the swatch. I want to get the gauge right but not sure what to do
The best thing to do is to make a 20 stitch by 20 row swatch in trebles (US DC). I posted my swatch on Instagram, check it out there.
Regards, Nerissa
>
Thanks. I started the pattern yesterday but have already run out of wool and couldn’t finish a row. Will frog it and try with a smaller hook. Now I know how to do the swatch will try that.
Thanks
Mary