
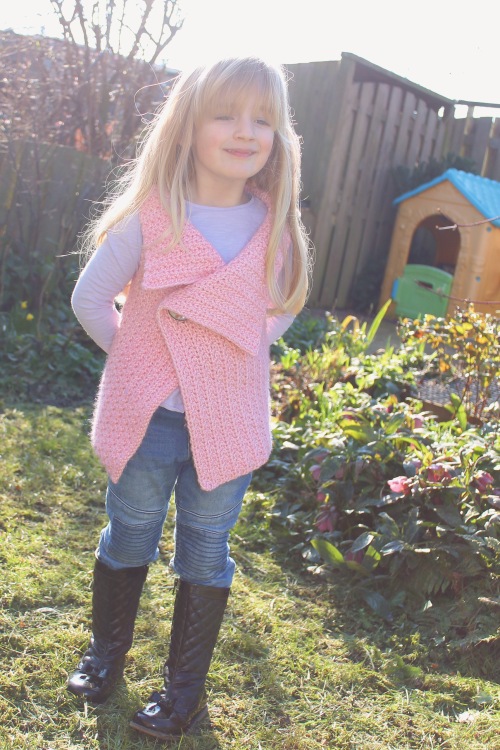
Here we are, finally. The kid’s version of my seriously popular Peek-a-Boo Button Wrap is ready.

Making this wrap reminded me just how much I love the Stone Washed yarn. It is such a beautiful yarn to work with. No splitting, froggable, soft, warm – oh so warm, and beautiful colours. The soft Rose Quartz pink I used for this was the perfect choice for my daughter. She’s a pink girl, through and through.
Right, let’s get on with it.
What You’ll Need
Scheepjes Stone Washed XL in 860 (Rose Quartz) – 5 balls (more if your gauge is different)
4 cm bamboo button – you can pick these up at any good craft store, or online
Size 5mm hook (or hook to obtain gauge). My favourite is the Clover Amour.
Measuring Tape
Scissors
Tapestry Needle
Eucalan wool wash
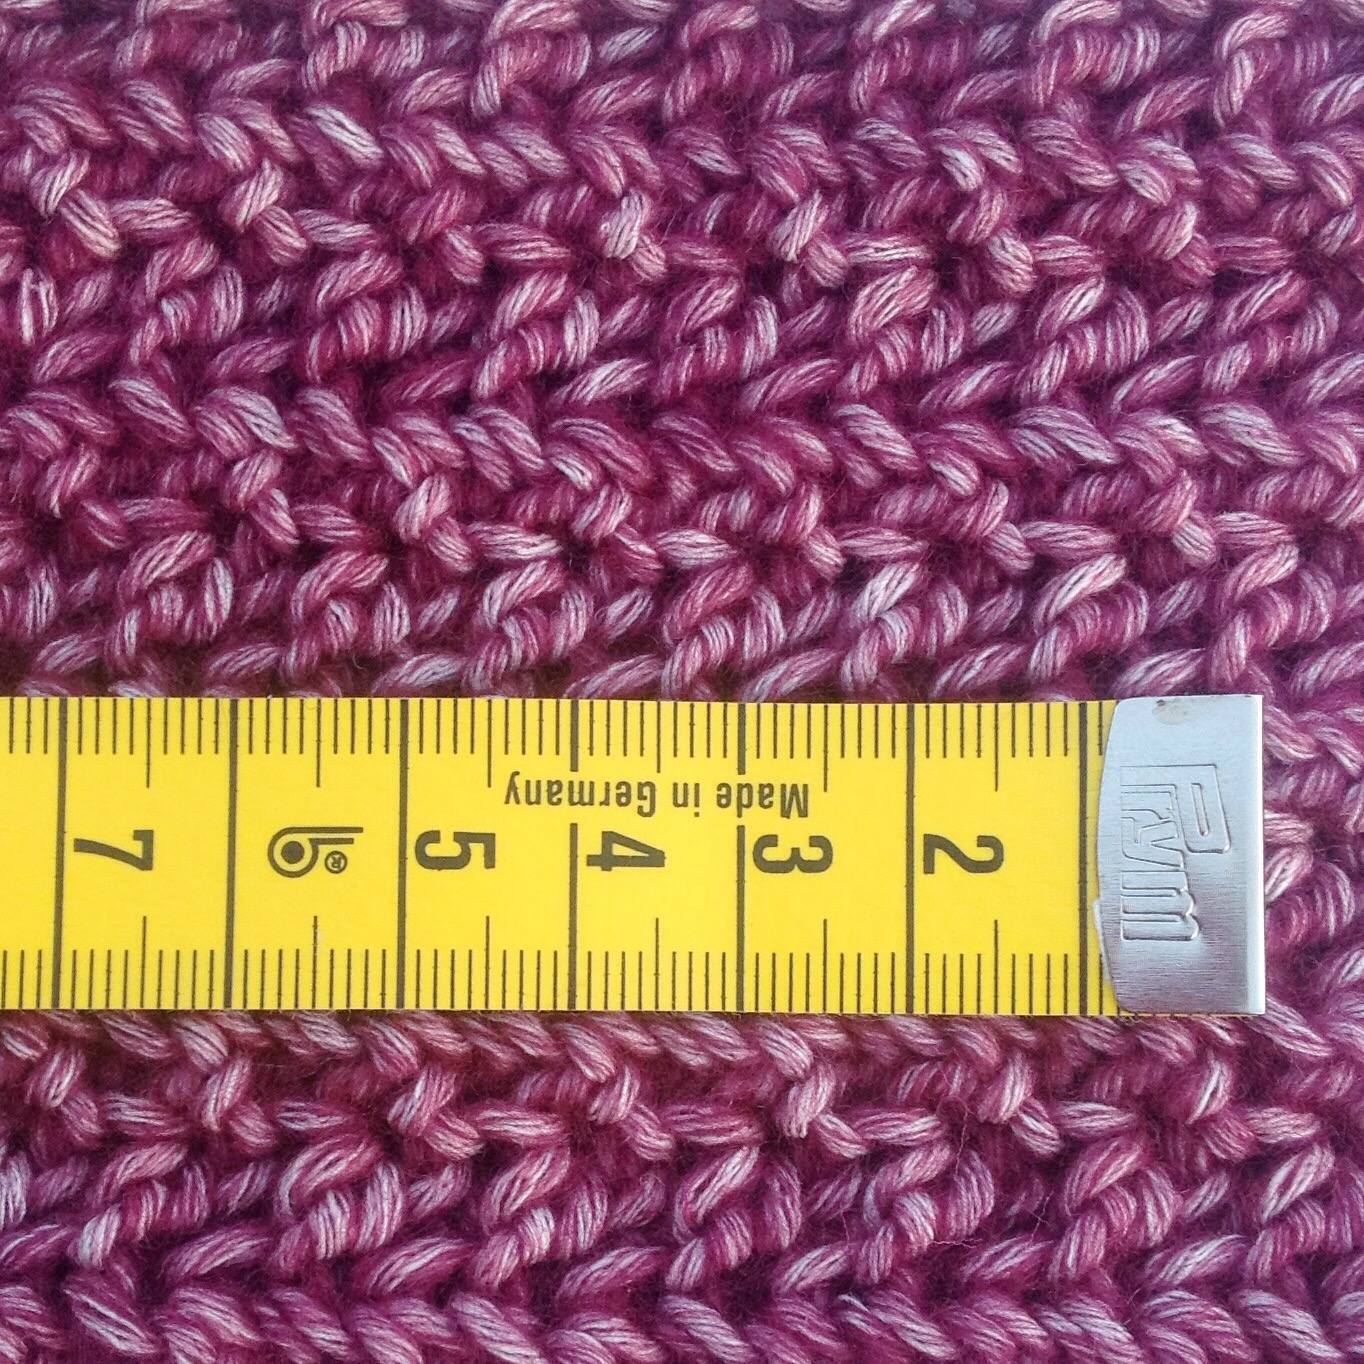
Gauge
8 stitches x 5 rows = 5cm x 5cm

Stitches
Note: All stitches are in US terms
Chain (CH)
Half Double Crochet (HDC)
Half Double Crochet Back Loop Only (HDCBLO)
Half Double Crochet Front Loop Only (HDCFLO)
Notes
In this tutorial I’m going to give the instructions on how to make a Peek-a-Boo Button wrap in a size to fit a 4-6 year old. I will also give you a schematic so you can easily see what measurements you will need to make a wrap for older kids or younger kids.
My friend Esther from It’s all in a Nutshell has made a fantastic instructional video on how to create the stitch and her brilliant method of tracking her progress. You can see it here:
Instructions
- Loosely, chain 74 for the base chain, plus 2 to start the 1st row.
- HDC into the 3rd loop from the hook, and all the way across. The stitch count should be 74. CH2 and turn. Note, the CH2 does not count as a stitch.
- HDC into the back loop (HDCBLO) of the first stitch, then into the front loop (HDCFLO) into the next. Repeat this alternating back loop/front loop pattern all the way across. CH2 and turn.
- You should have ended the previous with your last stitch into the front loop of the stitch. On this row you need to make sure that if the stitch from the previous row was in the front loop, this row needs to be in the back loop. This creates the lovely texture and drape that makes this wrap so beautiful. If you ensure your stitch count is even, it is easy to manage – you will always start the row in the BLO and finish in the FLO. So, HDCBLO in the first stitch, HDCFLO in the next. Repeat across, CH2, turn.
- Repeat for a total count of 16 rows (or 16 cm – 1 row should be about 1cm high). Now we will make the first arm hole. The first stitches of the row will form the collar height, so in the HDCBLO/FLO pattern, crochet 14 stitches. Then CH15 and skip 15 stitches, HDCBLO into the next. Then continue the FLO/BLO pattern all the way across. CH3, turn.
- To close the sleeve, HDCBLO/FLO all the way across to the beginning of the chain from the previous row, then HDC 15 times around the chain, HDCBLO into the next stitch, and repeat the HDCFLO/BLO pattern to the top.
- Now you’ve closed the sleeve, you’re working across the back of the wrap. Repeat the HDCBLO/FLO rows for another 25 rows, then repeat steps 5 and 6 for the second armhole.
- Crochet another 18 rows and then we will make the button hole. This is a place where you can make a few personal adjustments – if the child is handy, you can do a fitting at this point, so see if it’s the right place to place the button hole. A smaller child may need the button hole a few rows earlier, and larger children perhaps a few rows later.
- We’ll work from the bottom up to make the button hole for this size (if you add or subtract rows, you may need to work from the top, but the principle is the same). HDCBLO/FLO for 40 stitches, CH4, skip 4, HDCBLO in the next. HDCFLO/BLO to the end, CH2, turn.
- HDCBLO/FLO to the chain, work 4 HDC around the CH4 from the previous row, then HDCFLO in the next. HDCBLO/FLO across.
- Work another 4 rows (or until you run out of yarn), tie off and weave in the ends.
Wetblock using Eucalan, or another wool wash, pin out on blocking boards, stretching as needed, and wait impatiently for it to dry.


Below you can see the schematics of the measurements of the entire wrap in the size that I have described above. Using these measurement points, you can very easily customise the wrap to your own size.
To get the total height, take a tape measure and measure from the base of the skull to mid hip. The button should sit over the breast/chest and the closure should be slightly off centre.

 This design has been created with the specific use of Scheepjes Stone Washed XL in mind.
You can pick the yarn up at any great Scheepjes retailer in the Benelux, Wool Warehouse or Deramores internationally, and Paradise Fibers in the US.


I like the wrap but cm and meters are very hard I wish you would do inches also