
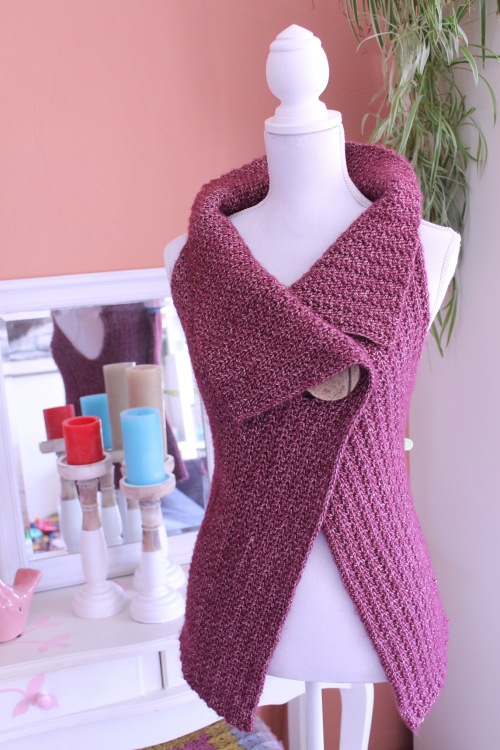
Here it is, what you’ve been waiting for – the pattern for the Peek-a-Boo Wrap!
I’ve made this for you in four different sizes, from Small through to XL.
Here you can find a written pattern for size Medium, and below you can find a chart which will give you the measurements and stitch counts for sizes Small, Large and XL.
For the Dutch speakers among us, I’ve also had the design translated. You can find it here. Veel plezier!
You can pick up the yarn at Scheepjes retailers all over the Benelux including Caro’s Atelier*, or internationally from Wool Warehouse* and Deramores*.
And even better, Esther from It’s all in a Nutshell has created a video tutorial, which is enormously helpful!
Are you ready?
What You Need
Scheepjes Stone Washed XL in 850 (Garnet) – 12 balls for size M (I used 11, but get an extra to be safe)
S = 10 balls (each ball of Stone Washed XL has 75 metres)
M = 12 balls
L = 15 balls
XL = 17 balls
7cm bamboo button – you can pick these up at any good craft store, or online
Size 5mm hook (or hook to obtain gauge)
Measuring Tape
Scissors
Tapestry Needle
Eucalan wool wash
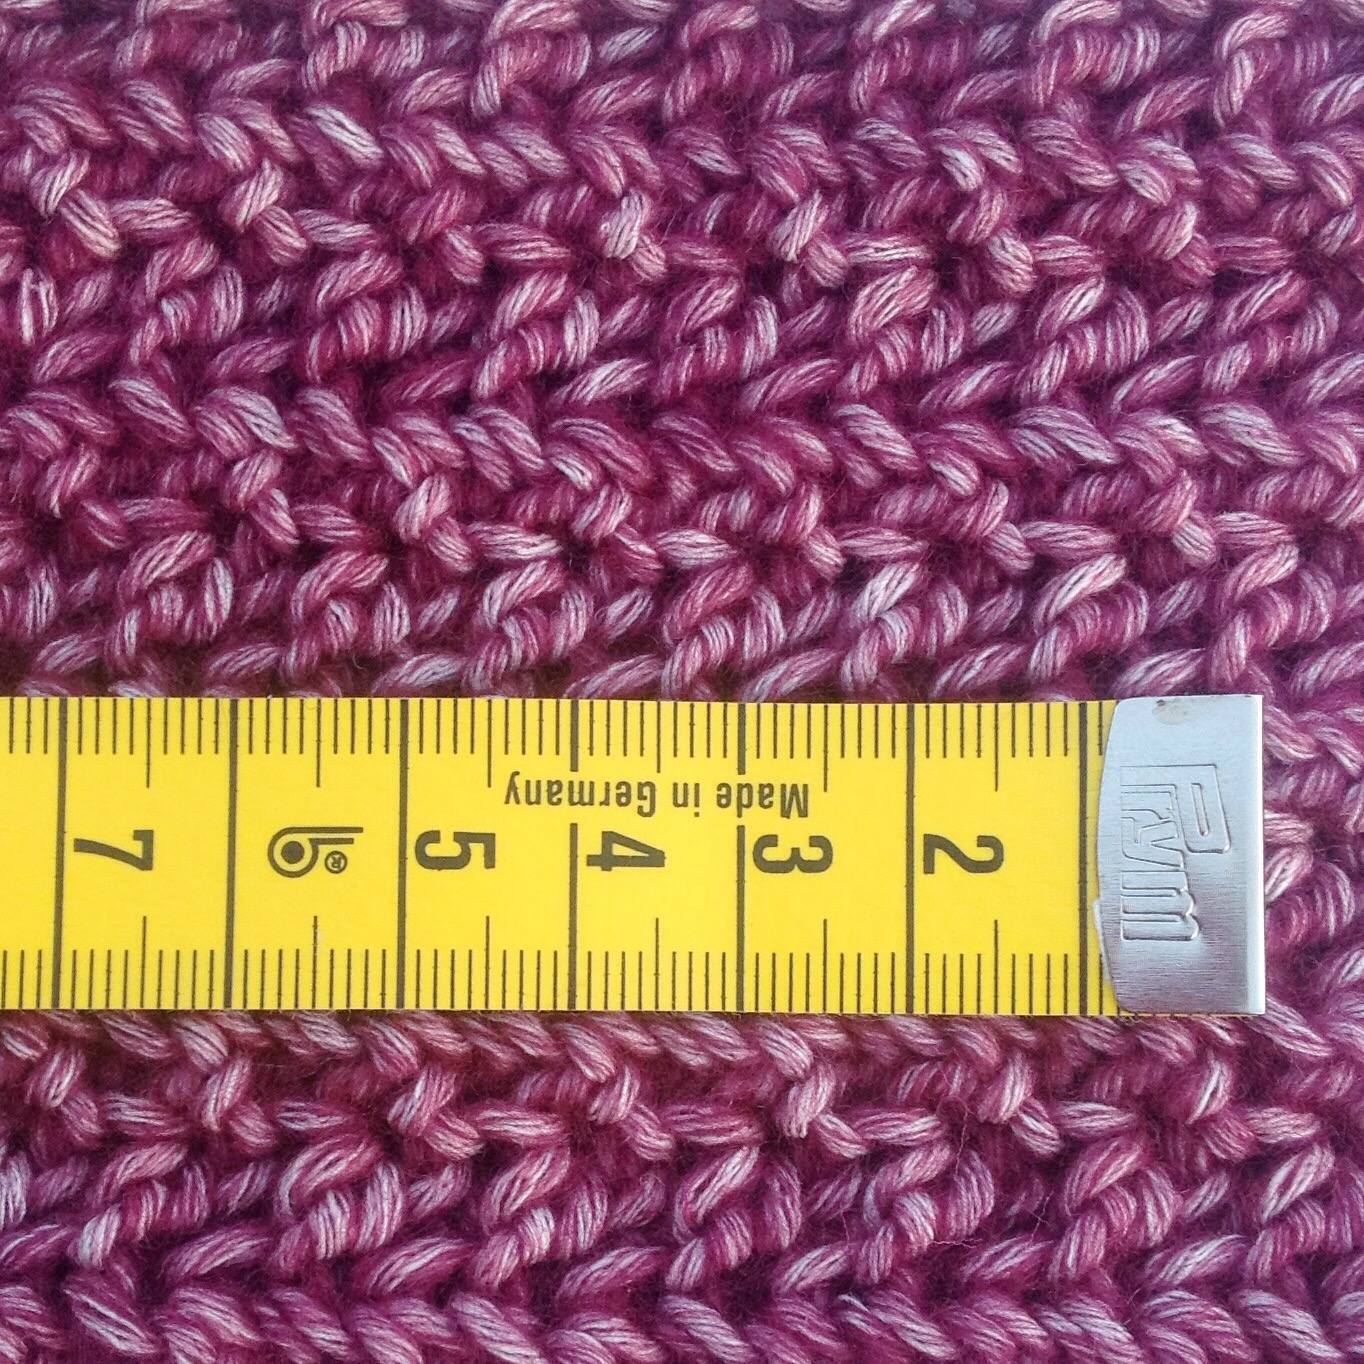
Gauge
8 stitches x 5 rows = 5cm x 5cm

Stitches
Note: All stitches are in US terms
Chain (CH)
Half Double Crochet (HDC)
Half Double Crochet Back Loop Only (HDCBLO)
Half Double Crochet Front Loop Only (HDCFLO)
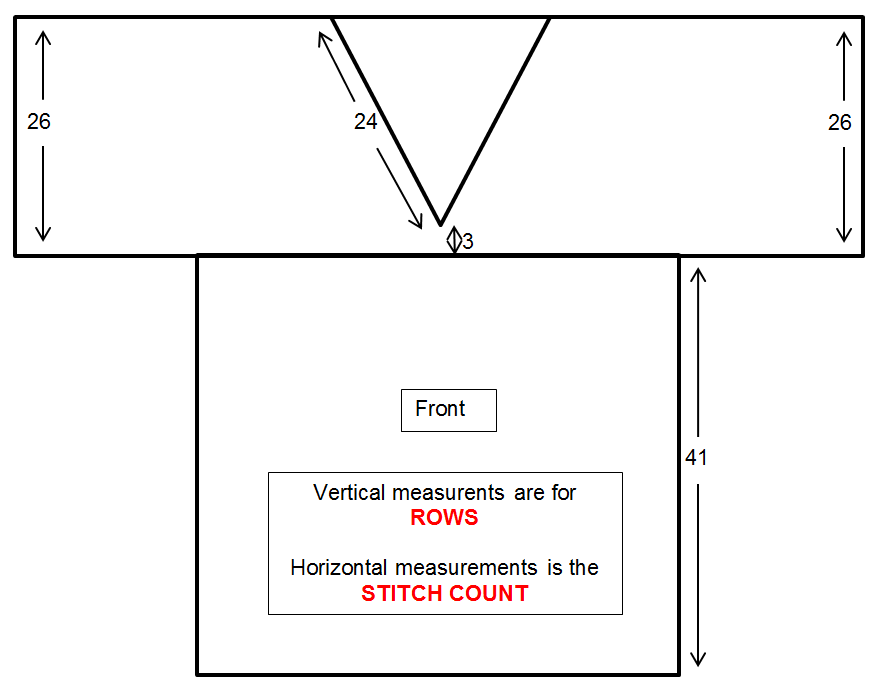
Size Medium
- Chain loosely 119 stitches. If you’re a tight crocheter, consider going up a hook size to make sure that the chain isn’t too tight.
- HDC into the third chain from the hook, and all the way across (a total of 117 stitches across). CH2, turn.
- HDCBLO in the first stitch, HDCFLO in the next. Repeat this front and back (HDCBLO/FLO) format all the way across, CH2, turn. Note: It’s important to ensure that you have an odd number of stitches to make it easier to achieve the texture of the stitches. If you finish the row in the back loop, when you start the next row, start in the front loop and vice versa. You’ll find very quickly as you go that the look of the wrap will be different if you don’t maintain the BLO then FLO stitch pattern in alternating stitches.

- Repeat this pattern building rows for 25cm.
- Now we are going to make the first sleeve. Follow the HDCBLO/FLO pattern for 20 stitches, then CH 35, skip 35, then continue the HDCBLO/FLO pattern all the way to the end. Make sure you double check that you stitch into the BLO or FLO correctly (if the stitch in the row below was FLO, you need to stitch into the BLO).
- HDCBLO/FLO to the chain from the previous row, then HDC 35 into the chain, then continue the HDCBLO/FLO to the end. the short end becomes the collar of the wrap.
- Repeat step 3 for a further 37cm and then we will make the next sleeve. Making sure you start from the top of the collar and work down (add a row if you need to), repeat steps 5 and 6.
- Continue building the final front panel, for 25cm, then we will make the button hole.

- Starting from the top of the collar, repeat the HDCBLO/FLO pattern for 37 stitches. Chain 7, skip 7 stitches, then repeat the HDCBLO/FLO pattern all the way to the end.
- HDCBLO/FLO to the chain from the previous row, then HDC 7 into the chain, then continue the HDCBLO/FLO to the end.
- Build a further 7 rows, or complete your ball of yarn. Tie off, weave in ends.
- Sew button on the opposite end of the garment to the button hole 9cm from the end, 25cm from the top.

- Block, stretching a little (especially the length) and you’re done!


Size Chart
You can switch out the stitch counts and centimetres in the written pattern above for the numbers in the chart below, depending on your required size.
| SMALL | MEDIUM | |||
| CM | Rows | CM | Rows | |
| Length | 70 | Chain 117 + 2 | 70cm | Chain 117 + 2 |
| Back | 32 | 32 | 37 | 37 |
| Front (button) | 20 | 20 | 25 | 25 |
| Front (button hole) | 27 | 27 | 32 | 32 |
| CM | Stitch Count | CM | Stitch Count | |
| Start Sleeve | 12.5 | 20 | 12.5 | 20 |
| End Sleeve | 20 | 32 | 22.5 | 35 |
| Start Button Hole | 23 | 37 | 23 | 37 |
| Button Hole Size | 7 | 7 | ||
| LARGE | X-LARGE | |||
| CM | Rows | CM | Rows | |
| Length | 75cm | Chain 123 + 2 | 75cm | Chain 123 + 2 |
| Back | 42 | 42 | 47 | 47 |
| Front (button) | 30 | 30 | 35 | 35 |
| Front (button hole) | 37 | 37 | 42 | 42 |
| CM | Stitch Count | CM | Stitch Count | |
| Start Sleeve | 15 | 24 | 17.5 | 28 |
| End Sleeve | 25 | 39 | 27.5 | 43 |
| Start Button Hole | 25 | 40 | 25 | 40 |
| Button Hole Size | 7 | 7 | ||
*Affiliate Link


