Tag Archives: haakpatroon

Rainbow Ridge Deken – Nederlands Haakpatroon

Hoi hoi!

Ik heb de Nederlandstalige versie van mijn Rainbow Ridge Blanket toegevoegd! Het is hieronder, en ook op Ravelry/Lovecrafts te vinden als je liever een PDF printvriendelijke versie willen gebruiken.

styled shot of crochet blanket

Verkooppunten

Kijk op de Scheepjes website, bij je lievelings LYS of:

Caro’s Atelier*
Wool Warehouse* (buiten Europa)


Materialen

6 bollen Scheepjes Softfun in 2622 Latte
1 Scheepjes Softfun minis colour pack in pastel
5 mm haaknaald (deken)
4 mm haaknaald (rand)
6 mm haaknaald (hv toer om de rand te beginnen)

Afmetingen

100 x 70 cm na opspannen (kan iets kleiner uitvallen door spanning in het garen)

Stekenverhouding

18 stn en 19 rijen meten 10 cm in patroon. Houd de stekenverhouding goed in de gaten, want je hebt weinig speling met deze kleine bolletjes.
Afkortingen

(NL termen)
L losse
Hv halve vaste
S(tn) steek/steken
l-open lossen opening
St stokje(s)
SOv sla-over vaste (zie speciale steken)
HK hoofdkleur (2622 Latte)
K(1) kleur (1)
Herh herhalen
VK Voorkant
AK Achterkant

Notities

Je haakt het patroon in rijen heen en weer, met de SOv techniek (zie Speciale steken). Daarna haak je de dubbele rand in toeren.

Elk rij begint met een l1. Dit telt niet als een steek.

Herhalingen

[(…)] herhaal de instructies tussen haakjes het totaal aantal keer aangegeven.

Sorteer de kleuren in deze volgorde:

K1: 2514 Rose
K2: 2513 Light Rose
K3: 2620 Starfish
K4: 2466 Peach
K5: 2518 Canary
K6: 2496 Banana
K7: 2640 Mint
K8: 2639 Green Tea
K9: 2630 Arctic
K10: 2646 Glacial Mist
K11: 2658 Lavender
K12: 2657 Orchid

Speciale steken

SOv (Sla-over vaste) is een techniek waarmee we een steek met twee draden tegelijk haken. Met de eerste kleur, steek naald in steek en sla de draad om de haaknaald. Haal de lus op. Met de tweede kleur, sla draad om van voor naar achter (houd de tweede kleur voor de eerste), met de eerste kleur, sla draad om en haal de eerste kleur door alle lussen.. Zie video instructies hier. Ook op Youtube.
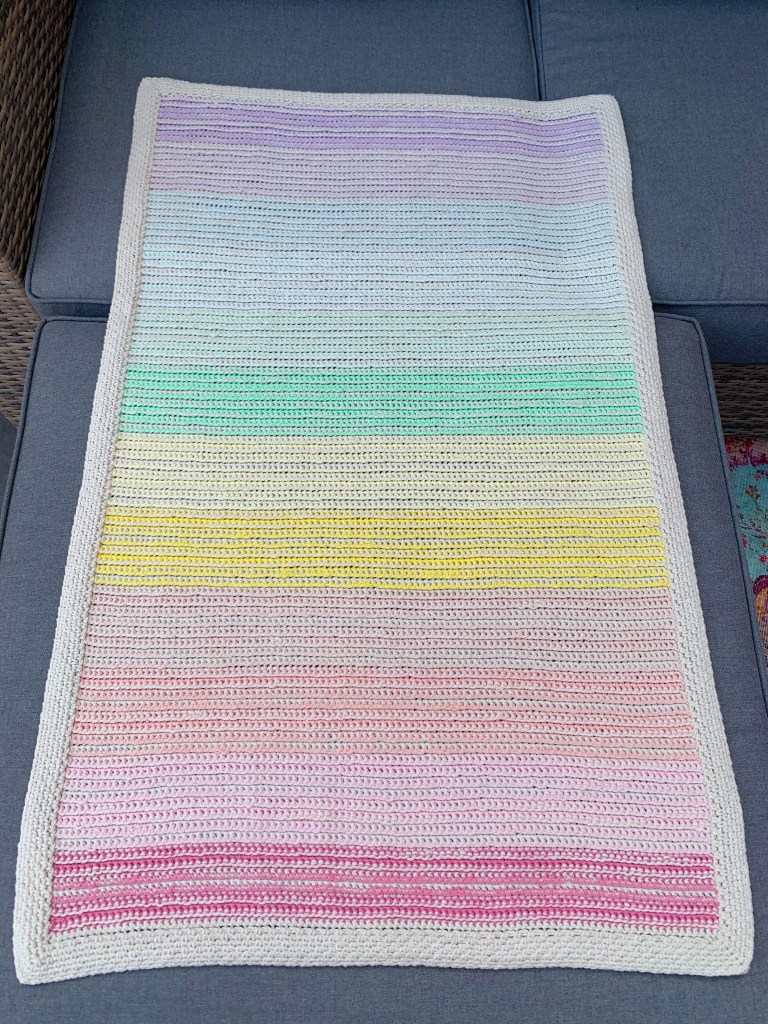
Crochet blanket from above

Instructies

Rij 1 Met HK, 102l, 1v in derde l en alle l tot einde van rij, keer om. (100 stn)
Rij 2 Met K1 als leidende kleur, samen met HK, l1, SOv in alle stn tot rij-eind, keer om.
Rij 3-6 Herh Rij 2.
Rij 7 Met HK als leidende kleur, herh Rij 2.
Rij 8-10 Herh Rij 7.
Rij 11-14 Herh Rij 2, knip draad K1 af.
Rij 15 Wissel naar K2, met HK als leidende kleur, herh Rij 7.
Rij 16-18 Herh Rij 7.
Rij 19 Met K2 als leidende kleur, herh Rij 2.
Rij 20-22 Herh Rij 2.
Rij 23 Met HK als leidende kleur, herh Rij 7.
Rij 24-26 Herh Rij 7.
Rij 27 Met K2 als leidende kleur, herh Rij 2.
Rij 28-30 Herh Rij 2, knip draad K2 af.
Rij 31-46 Met K3, herh Rij 15-30.
Rij 47-62 Met K4, herh Rij 15-30.
Rij 63-78 Met K5, herh Rij 15-30.
Rij 79-94 Met K6, herh Rij 15-30.
Rij 95-111 Met K7, herh Rij 15-30.
Rij 112-127 Met K8, herh Rij 15-30.
Rij 128-143 Met K9, herh Rij 15-30.
Rij 144-159 Met K10, herh Rij 15-30.
Rij 160-175 Met K11, herh Rij 15-30.
Rij 176-191 Met K12, herh Rij 15-30. Knip draad K12 af.

Rand

De rand haak je in toeren, eerst met een 6 mm en daarna een 4 mm haaknaald.

Toer 1 Deze toer wordt de VK. Met HK en 6 mm haaknaald, keer om, 2l, 1hv in elke s tot einde van rij (dit is nu de hoek), 2l, roteer 90 graden, 1hv in elk rij-eind, zo dichtbij de zijkant als mogelijk, tot de volgende hoek, 1hv in de hoek, 2l, roteer 90 graden, 1hv in elke l tot de volgende hoek, roteer 90 graden, 1hv in elk rij-eind tot de laatste hoek, sluit met een hv in eerste s.

Toer 2 Met 4 mm haaknaald, 1l, 1v in de hoek-open [(1l, sla 1 s over, 1v in l-open) tot hoek-open, 2l, 1v in l-open], herh tot einde van toer, sluit toer niet in laatste l-open, maar haak hv in v.

Toer 3 1hv in elke s tot hoek-open, 1l, [(1l in l-open, 1l) tot hoek-open, (1v, 2l, 1v) in hoek-open], herh tot einde van toer, 1l, sluit af met hv in v.

Toer 4 Herh Toer 3, maar voeg 1 extra herh van (1l, v, 1l) toe voordat je de toer sluit met een hv.

Toer 5 Herh Toer 4, hecht af.

Omdraaien naar AK Hecht aan in in AK van dezelfde hoek als Toer 1 van de rand, en haak Toer 1 opnieuw, maar nu in de AK van de hv van Toer 1 (VK). Herh daarna Toer 2-5 (deze bevinden zich dus aan AK).

Omdraaien naar VK We sluiten nu de dubbele rand en verbergen alle draadjes daarin als volgt: 1l, 1v in l-open van zowel laatste AK als laatste VK toer, [(1l, 1v in l-open van beide toeren) tot de hoek-open, (1v, 1l, 1v in beide toeren) in hoek l-open], herh tot einde van toer, sluit af met een hv.

Hecht af, weef alle eindjes weg, span op maat op.

close up of crochet blanket rolled

*affiliate link

Jasper V Pattern – XL


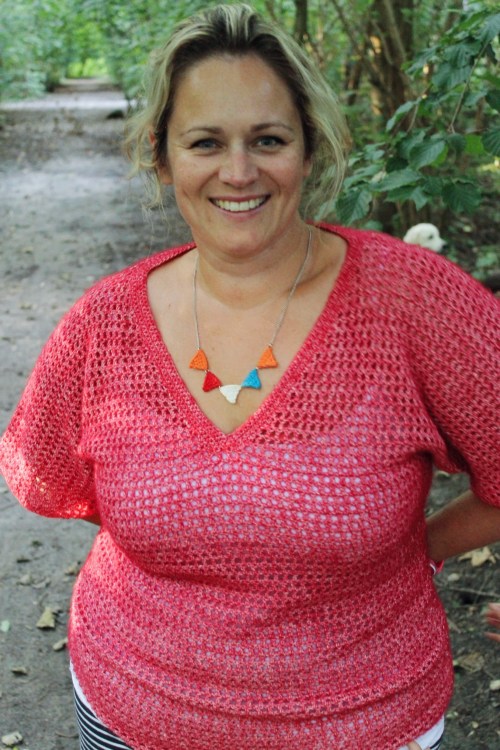
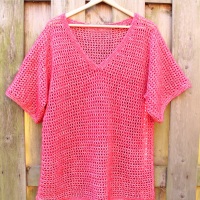
The Jasper V!  I loved all the ideas so much that everyone came up with, but one that stuck with me was the use of Jasper and V-Neck.  In the end it was simple and the Jasper V has been born!

Today I’m sharing the pattern for the XL size with you.  This is the first garment pattern I’ve written and stay tuned for more sizes.  I just wanted to get this out to you as soon as I possibly could!

So without further ado, let’s get to it!  For any questions, please send me an email using the contact form and I’ll get back to you to assist, OK?  If you find mistakes, please do the same.  Because it’s a free pattern, I’m the only tester so I’m relying on your help – thanks in advance!!

You can also find a printer version right here:

Printer Friendly Version of the Jasper V

This pattern assumes that you know crochet basics, like Chain, Single Crochet, Half Double Crochet and Double Crochet stitches.  You will also need to know how to do the Foundation Single Crochet stitch (FSC).  If you’ve never seen an FSC, you can find a great tutorial video here.  Alongside the FSC, you will also need to know how to do the Mesh Stitch, which is essentially Double Crochet, chain 1, skip 1, Double Crochet into the next stitch.

To keep a beautiful clean straight edge going up the sides, I use this brilliant technique that I found; I recommend you use it too.

All measurements are in centimetres and crochet terms are US based.

This is an original design by Nerissa Muijs.  Please do not reproduce this pattern or sell this pattern as your own work.  Please share it on your social networks, linking it back to the original source.  Please also feel free to sell items made from this pattern and please credit me by linking my website: missneriss.com.  All images are the property of Nerissa Muijs, and if you would like to repost the originals, please send me a message to ask my permission before the fact.

Jasper V - free pattern size XL on missneriss.com #scheepjes #scheepjeswol #stonewashed #jasper

Written Instructions

Abbreviations

FSC:    Foundation Single Crochet
SC:      Single Crochet
HDC:   Half Double Crochet
DC:      Double Crochet
CH:      Chain
SK:      Skip 1 stitch
MS:     Mesh Stitch

Gauge

21 stitches across x 9 rows high = 10cm2

Materials

  • Scheepjeswol Stone Washed (or similar 4 ply/sock) yarn – 1080 metres
  • 5mm hook; or hook to obtain gauge. I crochet tightly, so consider this when making your gauge swatch, which you will need.
  • Tapestry needle to sew in ends and seams.
  • Stitch markers.
  • Measuring tape to ensure that the sizing is correct for your body.
  • Pins (either ordinary pins, or even stitch markers will do).

 Size

This pattern is for a size XL garment.  The finished circumference (bust/hip measurement) is 110cm (43 inches) around and the length from top to bottom is 68cm (27inches).

Instructions

Row 1:  FSC x 105 (55cm)
Row 2:  CH 3 (counts as first DC and chain), skip 1 stitch, (DC, CH1, SK1) x 50, DC in the last.  Turn.
Row 3:  CH3, SK1, (DC, CH1, SK1) x 50
Repeat row 3 until your work is 43 cm long (41 rows).

Begin the sleeves:
Chain 35 (18cm), tie off and cut the yarn.
Re-attach at the other side, chain 37.  DC into the 3rd CH, CH1, SK1, DC into the next.  Repeat across to the last stitch of the other sleeve (179 stitches, or about 90cm end to end).  Repeat this row for a total of 3 rows and then start the V-neck.

Mark the middle stitch and crochet to the 2nd DC before the marker.  This becomes the decrease.  CH3 and turn (this counts as DC and SK1).  DC into the next DC stitch.  Crochet across to the edge of the sleeve.  CH3, turn.  Repeat that row, always stopping at the top of the CH 3 from the previous row, for 24 rows (23cm).  Tie off and attach yarn to the other sleeve, repeating the action again.

Once the V is complete, do not tie off.  Instead, MS across to the centre edge of the V.  Chain 48, attach at the first stitch on the other sided of the V and MS to the far edge of the sleeve.  This is now the beginning of the back of the top.

Repeat the MS rows for 26 rows in total; essentially the reverse of the front without the V.  After 26 rows, tie off and re-attach the yarn 37 stitches in.  CH3, SK1, (DC, CH1, SK1) x 50 for 105 stitches, turn and repeat for 41 rows (or 43cm).

Now the body of the top is complete and it is time to create the edging and sew it all together.  Lie the top flat, so that the front and back edges all line up, pin the top together and whip stitch it up both sides and under the sleeves.  Try it on and admire your reflection.  You look awesome.

For the edging, Attach the yarn at the join on one side of the bottom of the top and HDC all the way round (210 in total).  Join, CH2 and repeat.  The final row will be a SC row, just to firm it up and prevent excessive stretch.

The sleeves follow much the same rule.  Join at the seam and HDC around. HDC in the side of each stitch, and also in each space between rows.  Repeat the HDC row, then complete a SC row to finish it off. Do the same for the other sleeve.

With the edging, be sure that you keep your tension to be consistent with the shape of the top.  If the edging is too loose, crochet a little tighter or considering going down a hook size.  Same for if it is too tight.  Blocking will help, but can only do so much if the edging is too tight.

The final piece is the V. there should be 2 DC posts each side of your centre stitch marker.  Attach your yarn to the top of the DC furthest from the centre (this will replicate a CH1 and bring the two edges together) and SC into the first stitch of the V.  SC all the way up the side, crocheting into each stitch and into each gap, ensuring you stitch into the stitches, not around them.  The final stitch should be a Slip Stitch into the top of the DC stitch on the body of the top.  Turn, SC into each stitch around, with the final stitch being a Slip Stitch into the next DC space on the body of the top. Turn and repeat for a total of 5 rows.  Tie off and whip stitch the V together for two or three stitches, to keep the rows at the bottom of the V straight while wearing the top.

Making sure the V sits just right... #scheepjes #scheepjeswol #stonewashed #missneriss #crochet

Tie off, sew in all the ends as securely as possible, soak in Eucalan for a couple of hours then block until dry.  Because it is two layers, allow for a long drying time.

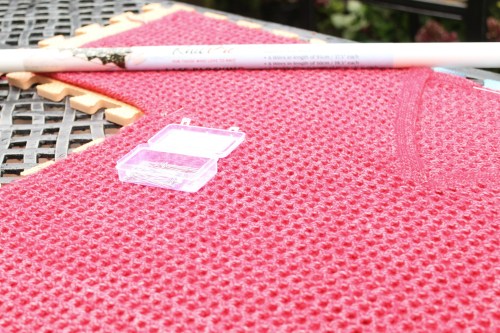
On the blocking board, using my new Knit Pro blocking wires - what a cool idea! #scheepjes #stonewashed #missneriss #crochet #scheepjeswol

Jasper V Diagram - Front

Jasper V - Back

Don’t forget to parade around in front of your friends in your new top, you look amazing!

Help!