Category Archives: Tutorials

Koala Lovey – Free Crochet Pattern

It’s Pattern Day!

Are you ready, do you have your yarn?

close up of koala lovey

GET THE YARN

Scheepjes Cahlista is an aran weight yarn, made with 100% cotton. I’m using two balls of colour 074 Mercury, and you will also need a single ball of the complementary colour. Have a look at the Scheepjes Website for colour inspiration and stockists, there are more than 100 colours to choose from!

You can order the yarn online from my local yarn store Caro’s Atelier*.

Internationally there’s Wool Warehouse* (global shipping) and if in the US check out Dot’s Yarn Den.

Note: this version of the pattern uses UK terms. If you would like to access US terms or printable PDFs in both UK and US terms, you can purchase the patterns from either Ravelry or Lovecrafts.com for a small fee.

Please share your projects using #KoalaLovey in the socials and tag me everywhere!

Let’s go!

Materials

MC: Scheepjes Cahlista in 074 Mercury – 2 balls (100% cotton, aran weight, 50g, 85m)
CC: Scheepjes Cahlista in your choice – 1 ball (100% cotton, aran weight, 50g, 85m)
Scrap black, preferably Scheepjes Cahlista – about 2 metres
I used 385 Chrystalline and 256 Cornelia Rose in my samples.
4mm hook (amigurumi parts)
6mm hook (mini-blanket)
5mm hook (border of mini-blanket)
Toy filling (or you can stuff the head with scrap yarn or anything you have at home that will be a bit squishy)

Tension

Mini-blanket: 16 rows and 17sts over 10 cm in YUdc

Head: not important, but stitches should be tight, so use at least a hook size down from what the yarn recommends.

Measurements

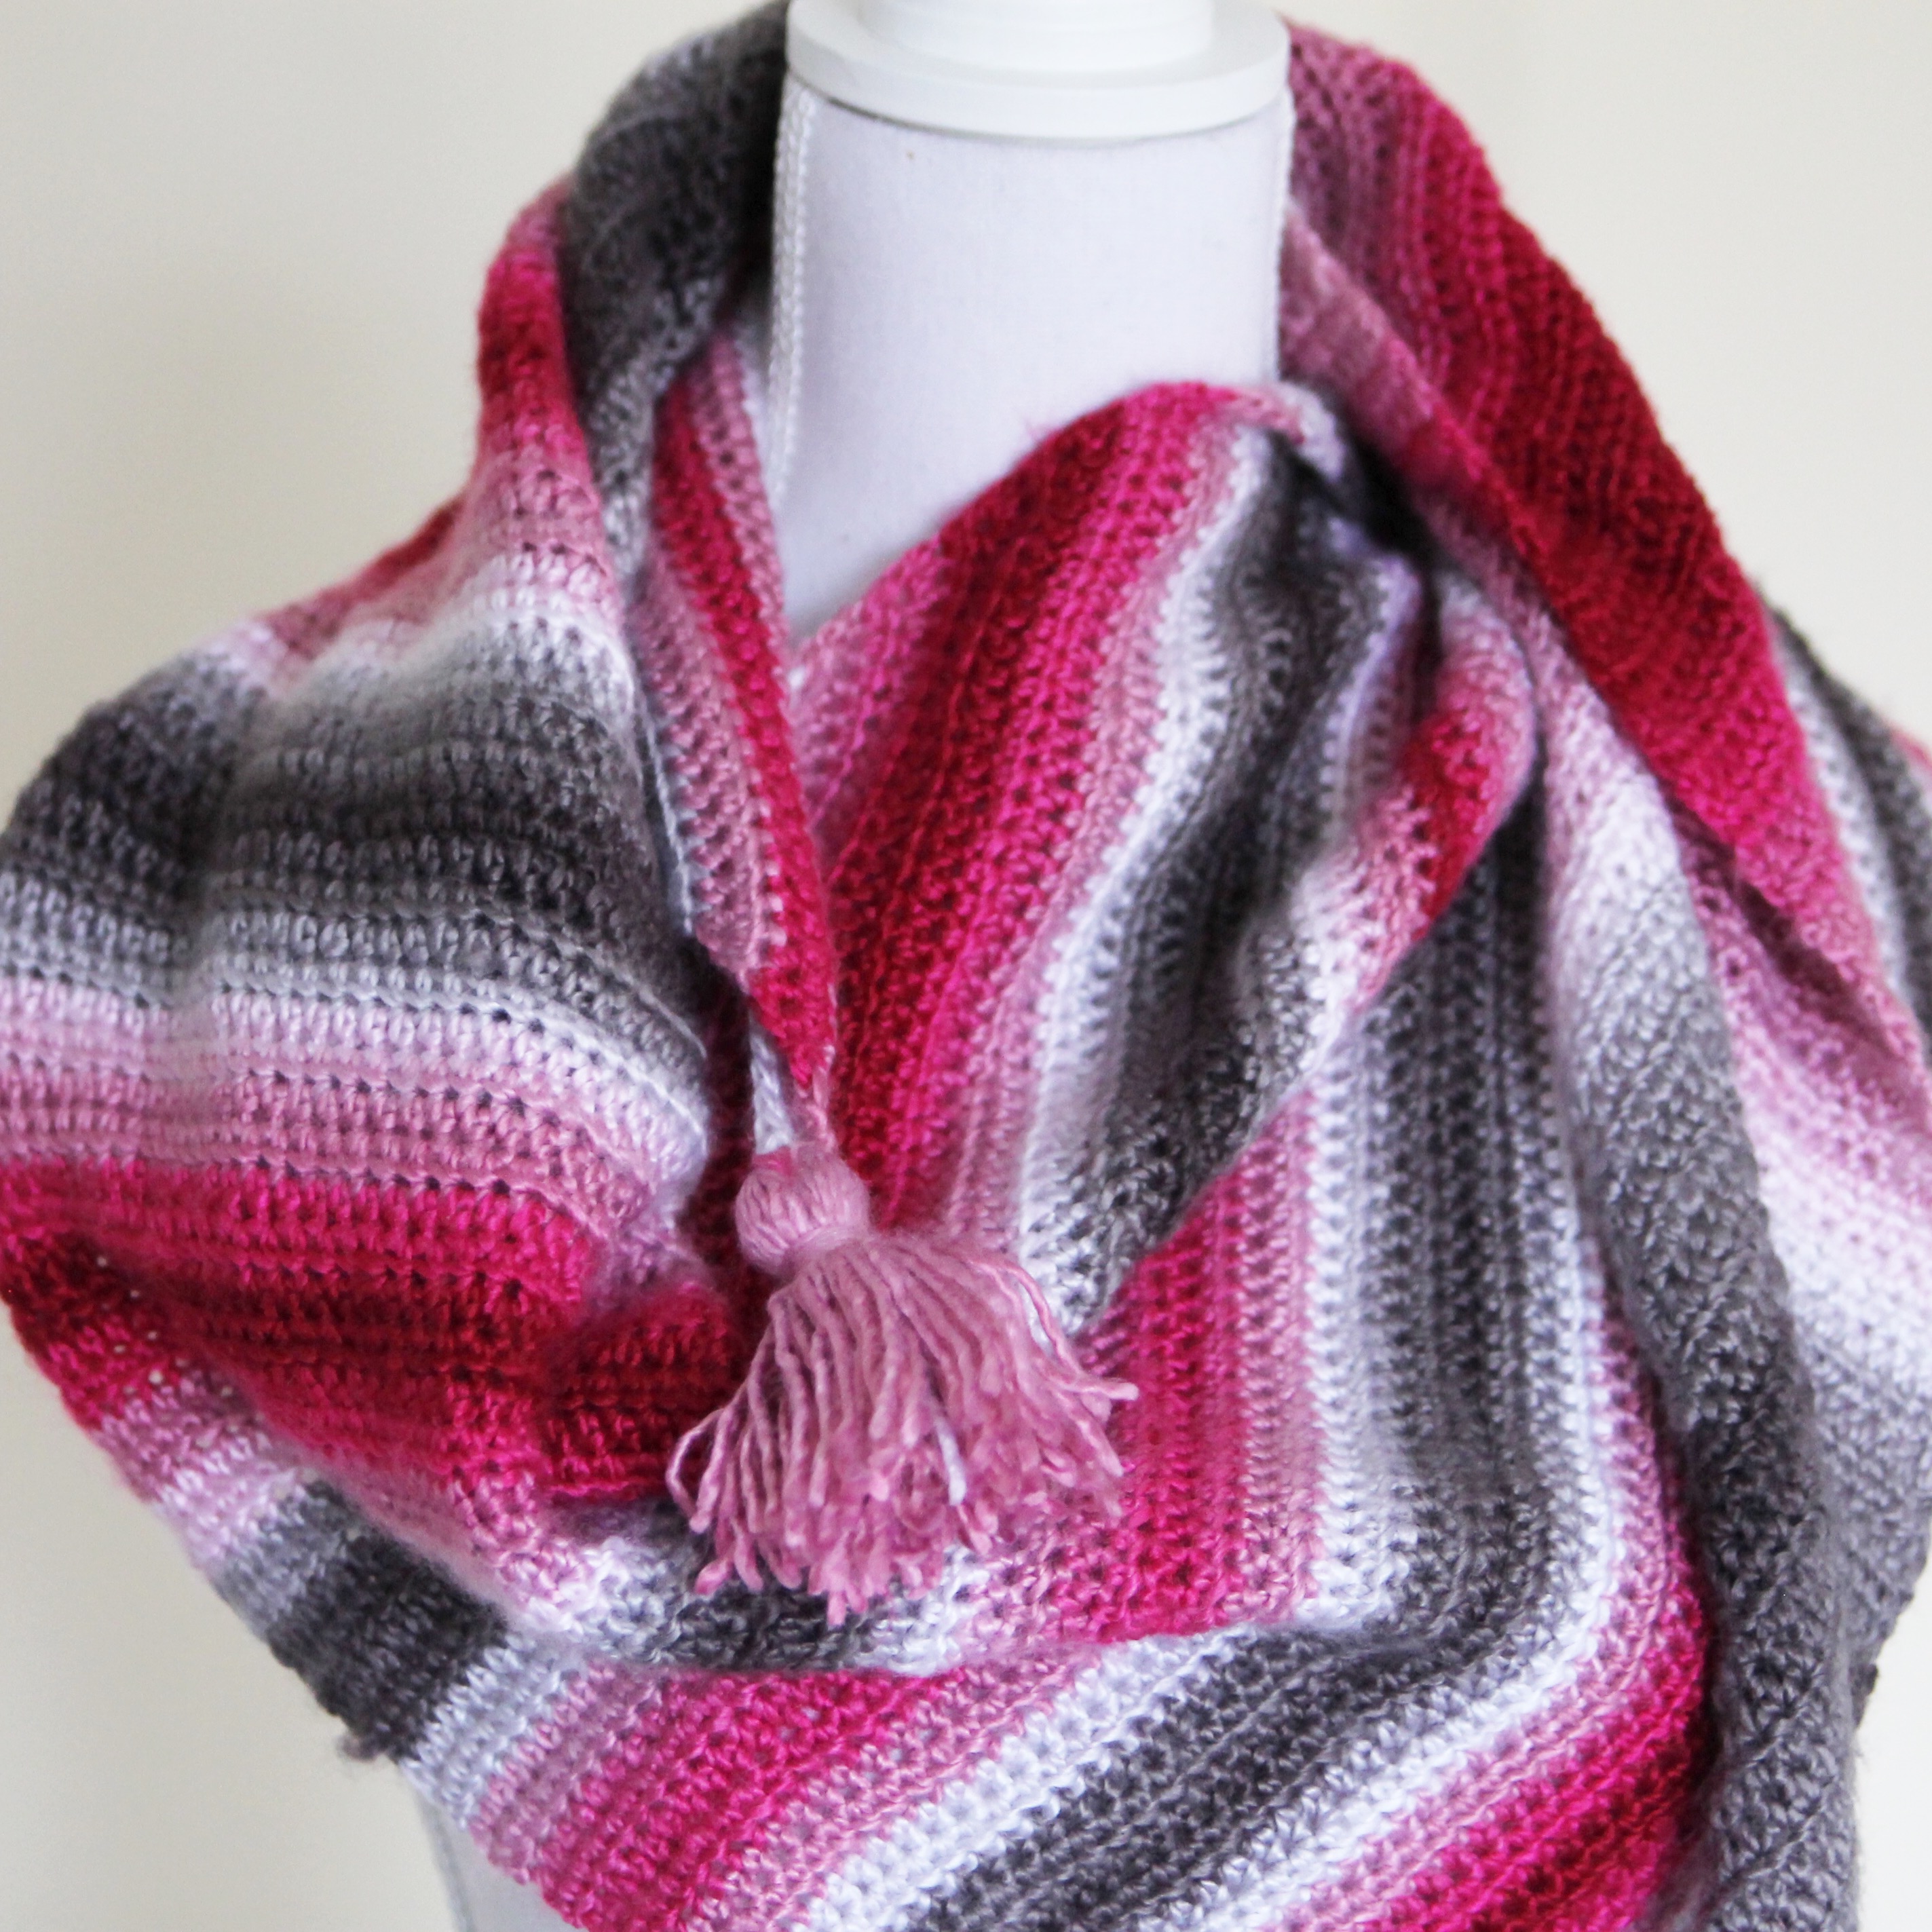
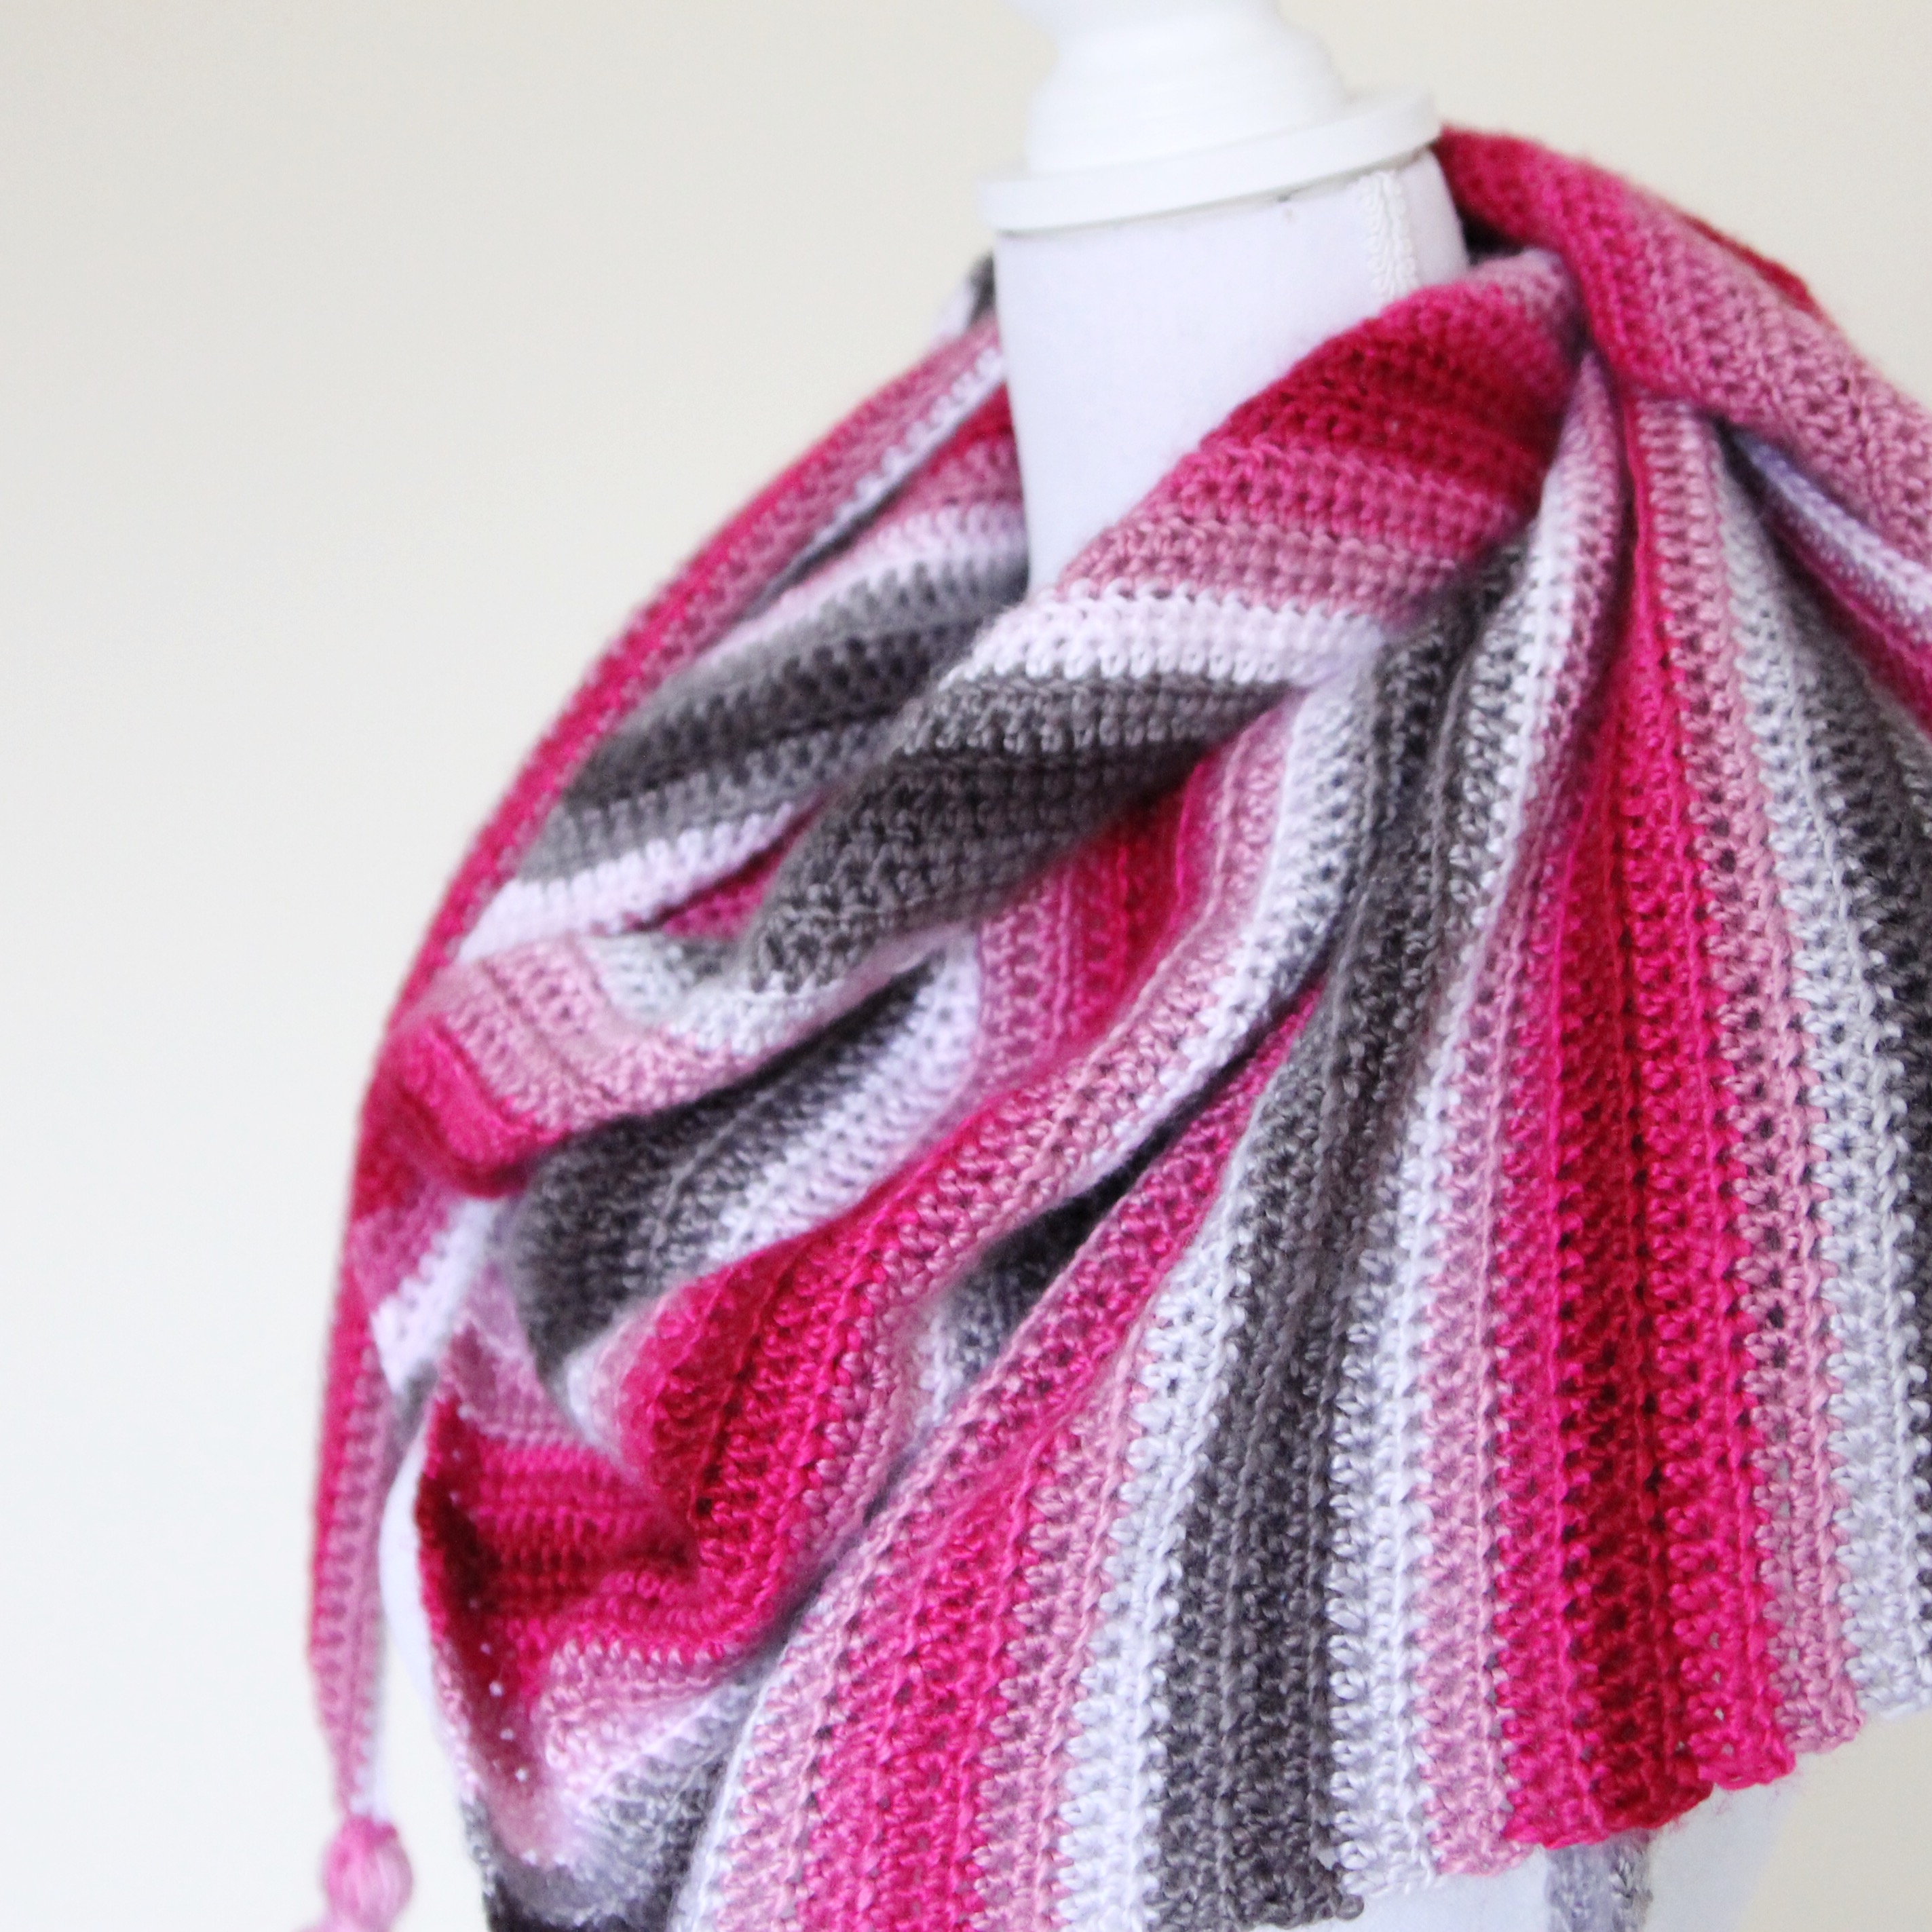
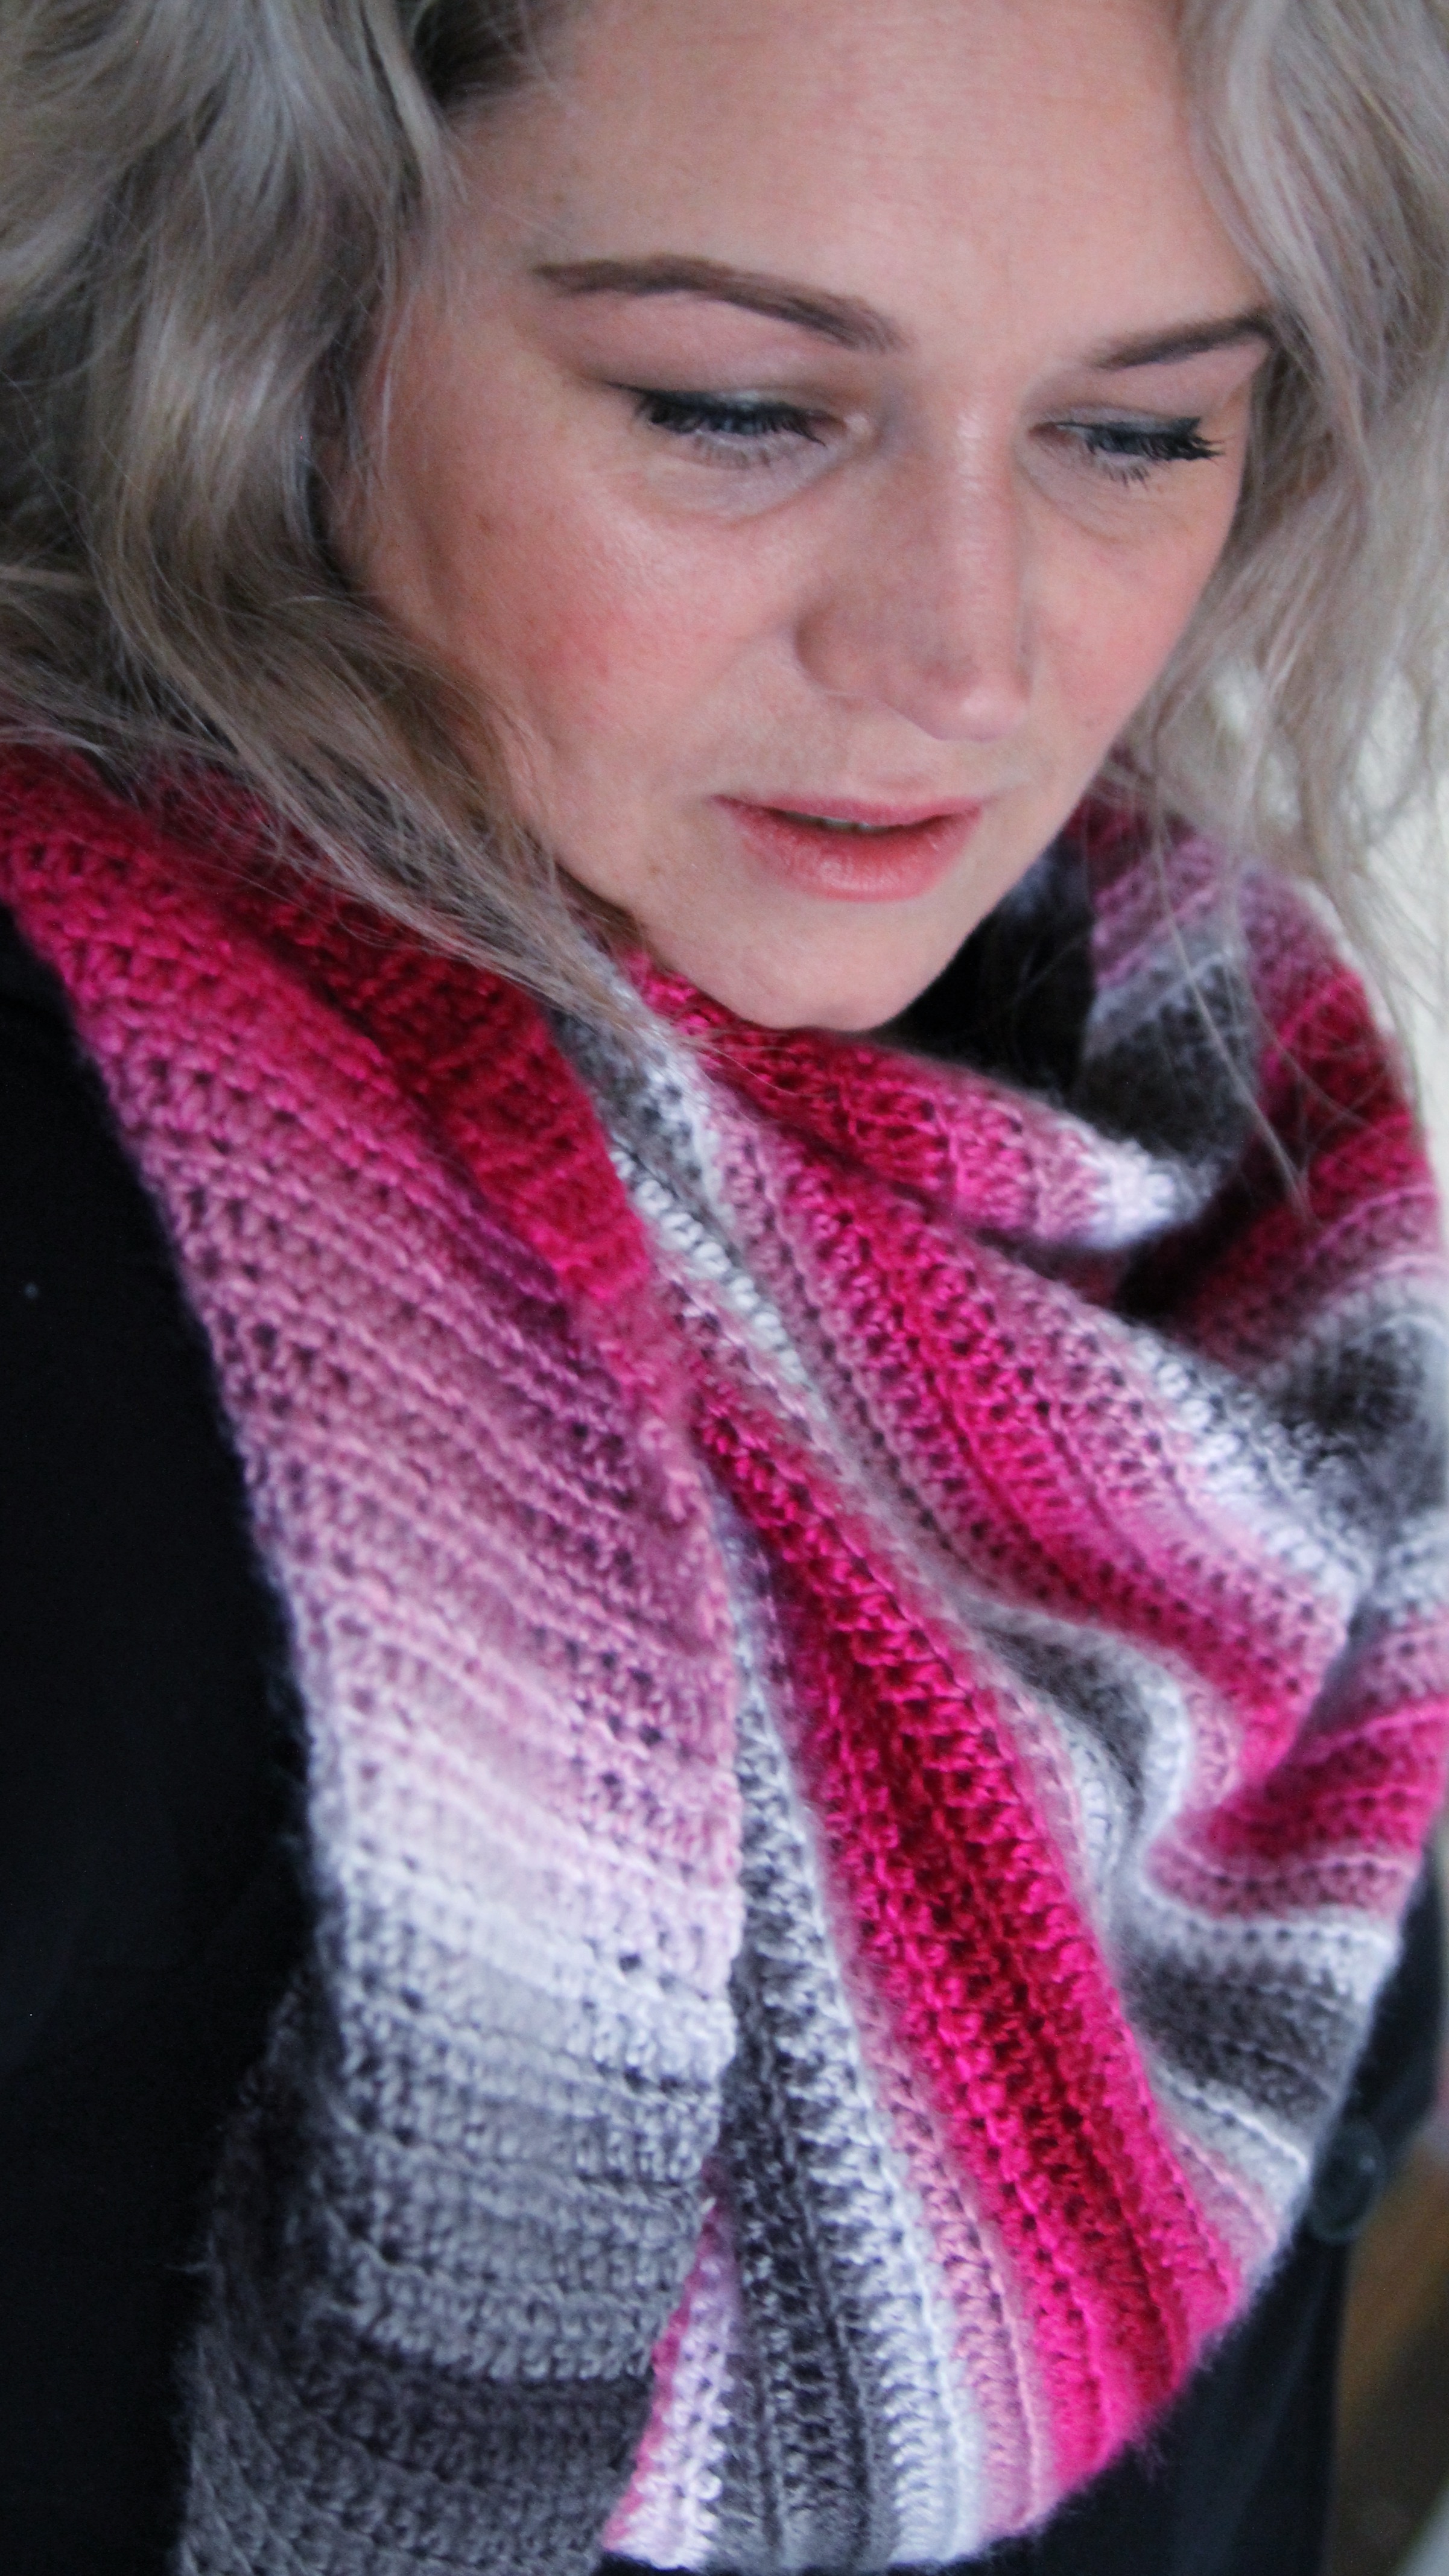
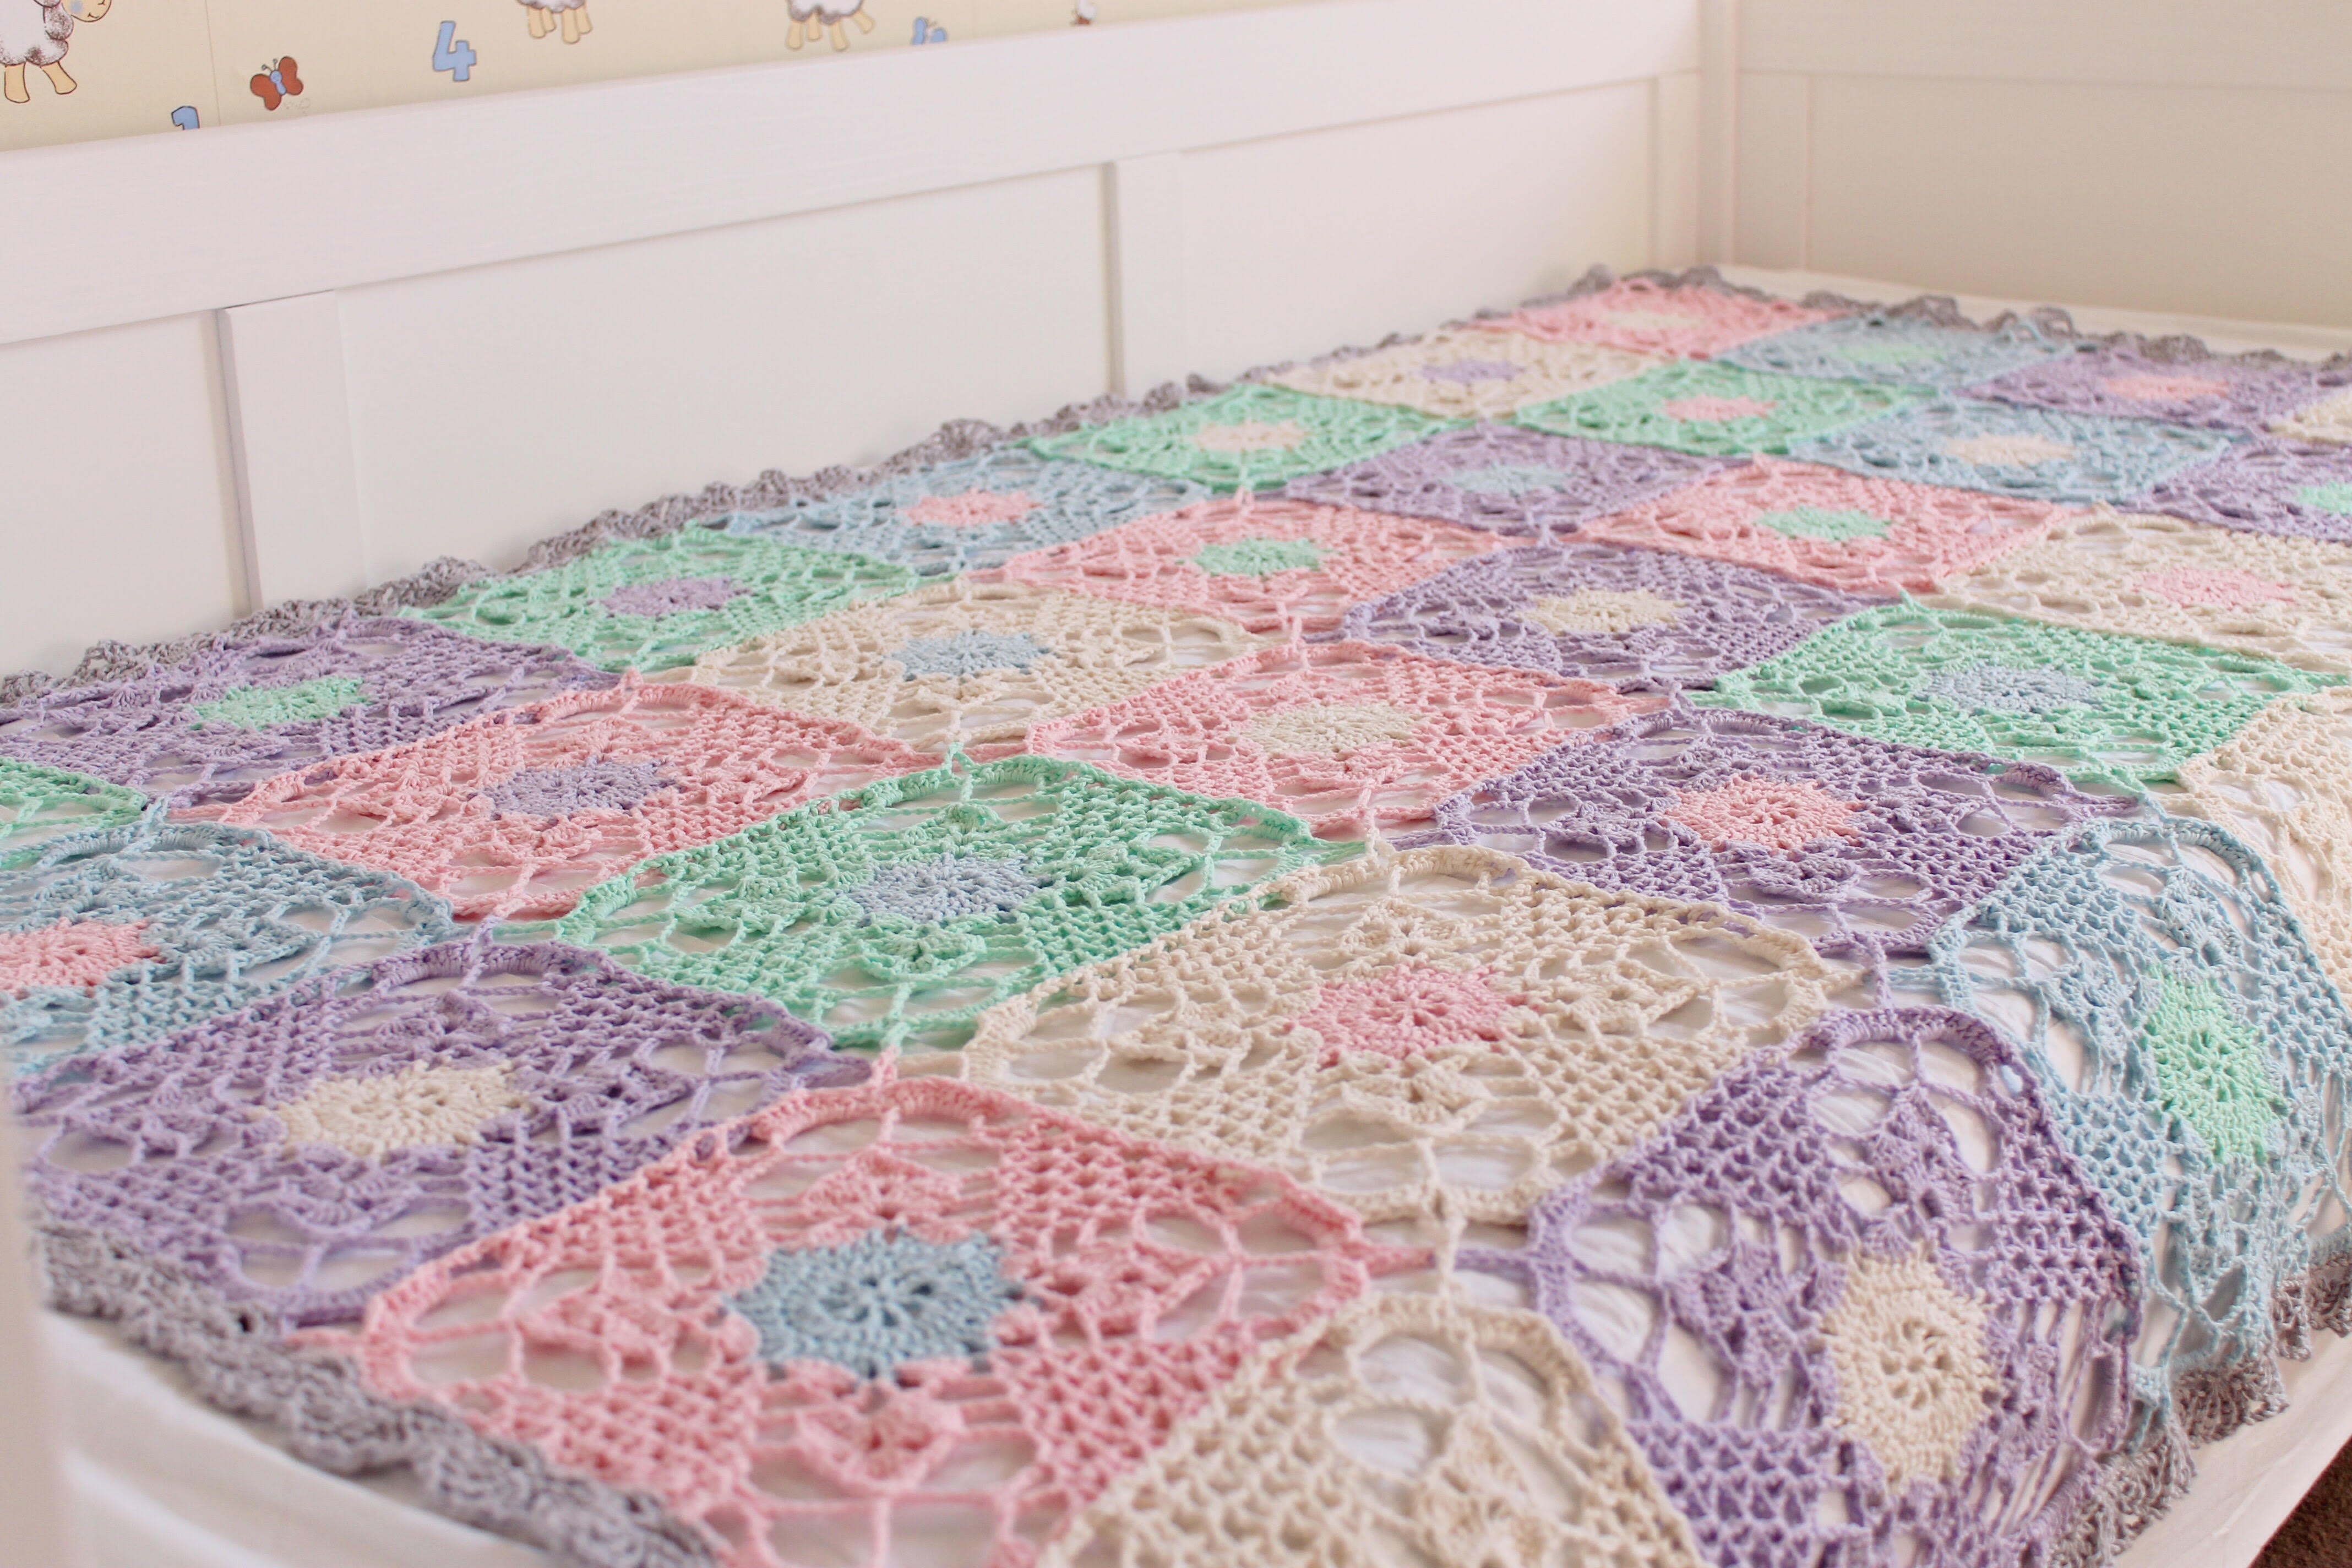
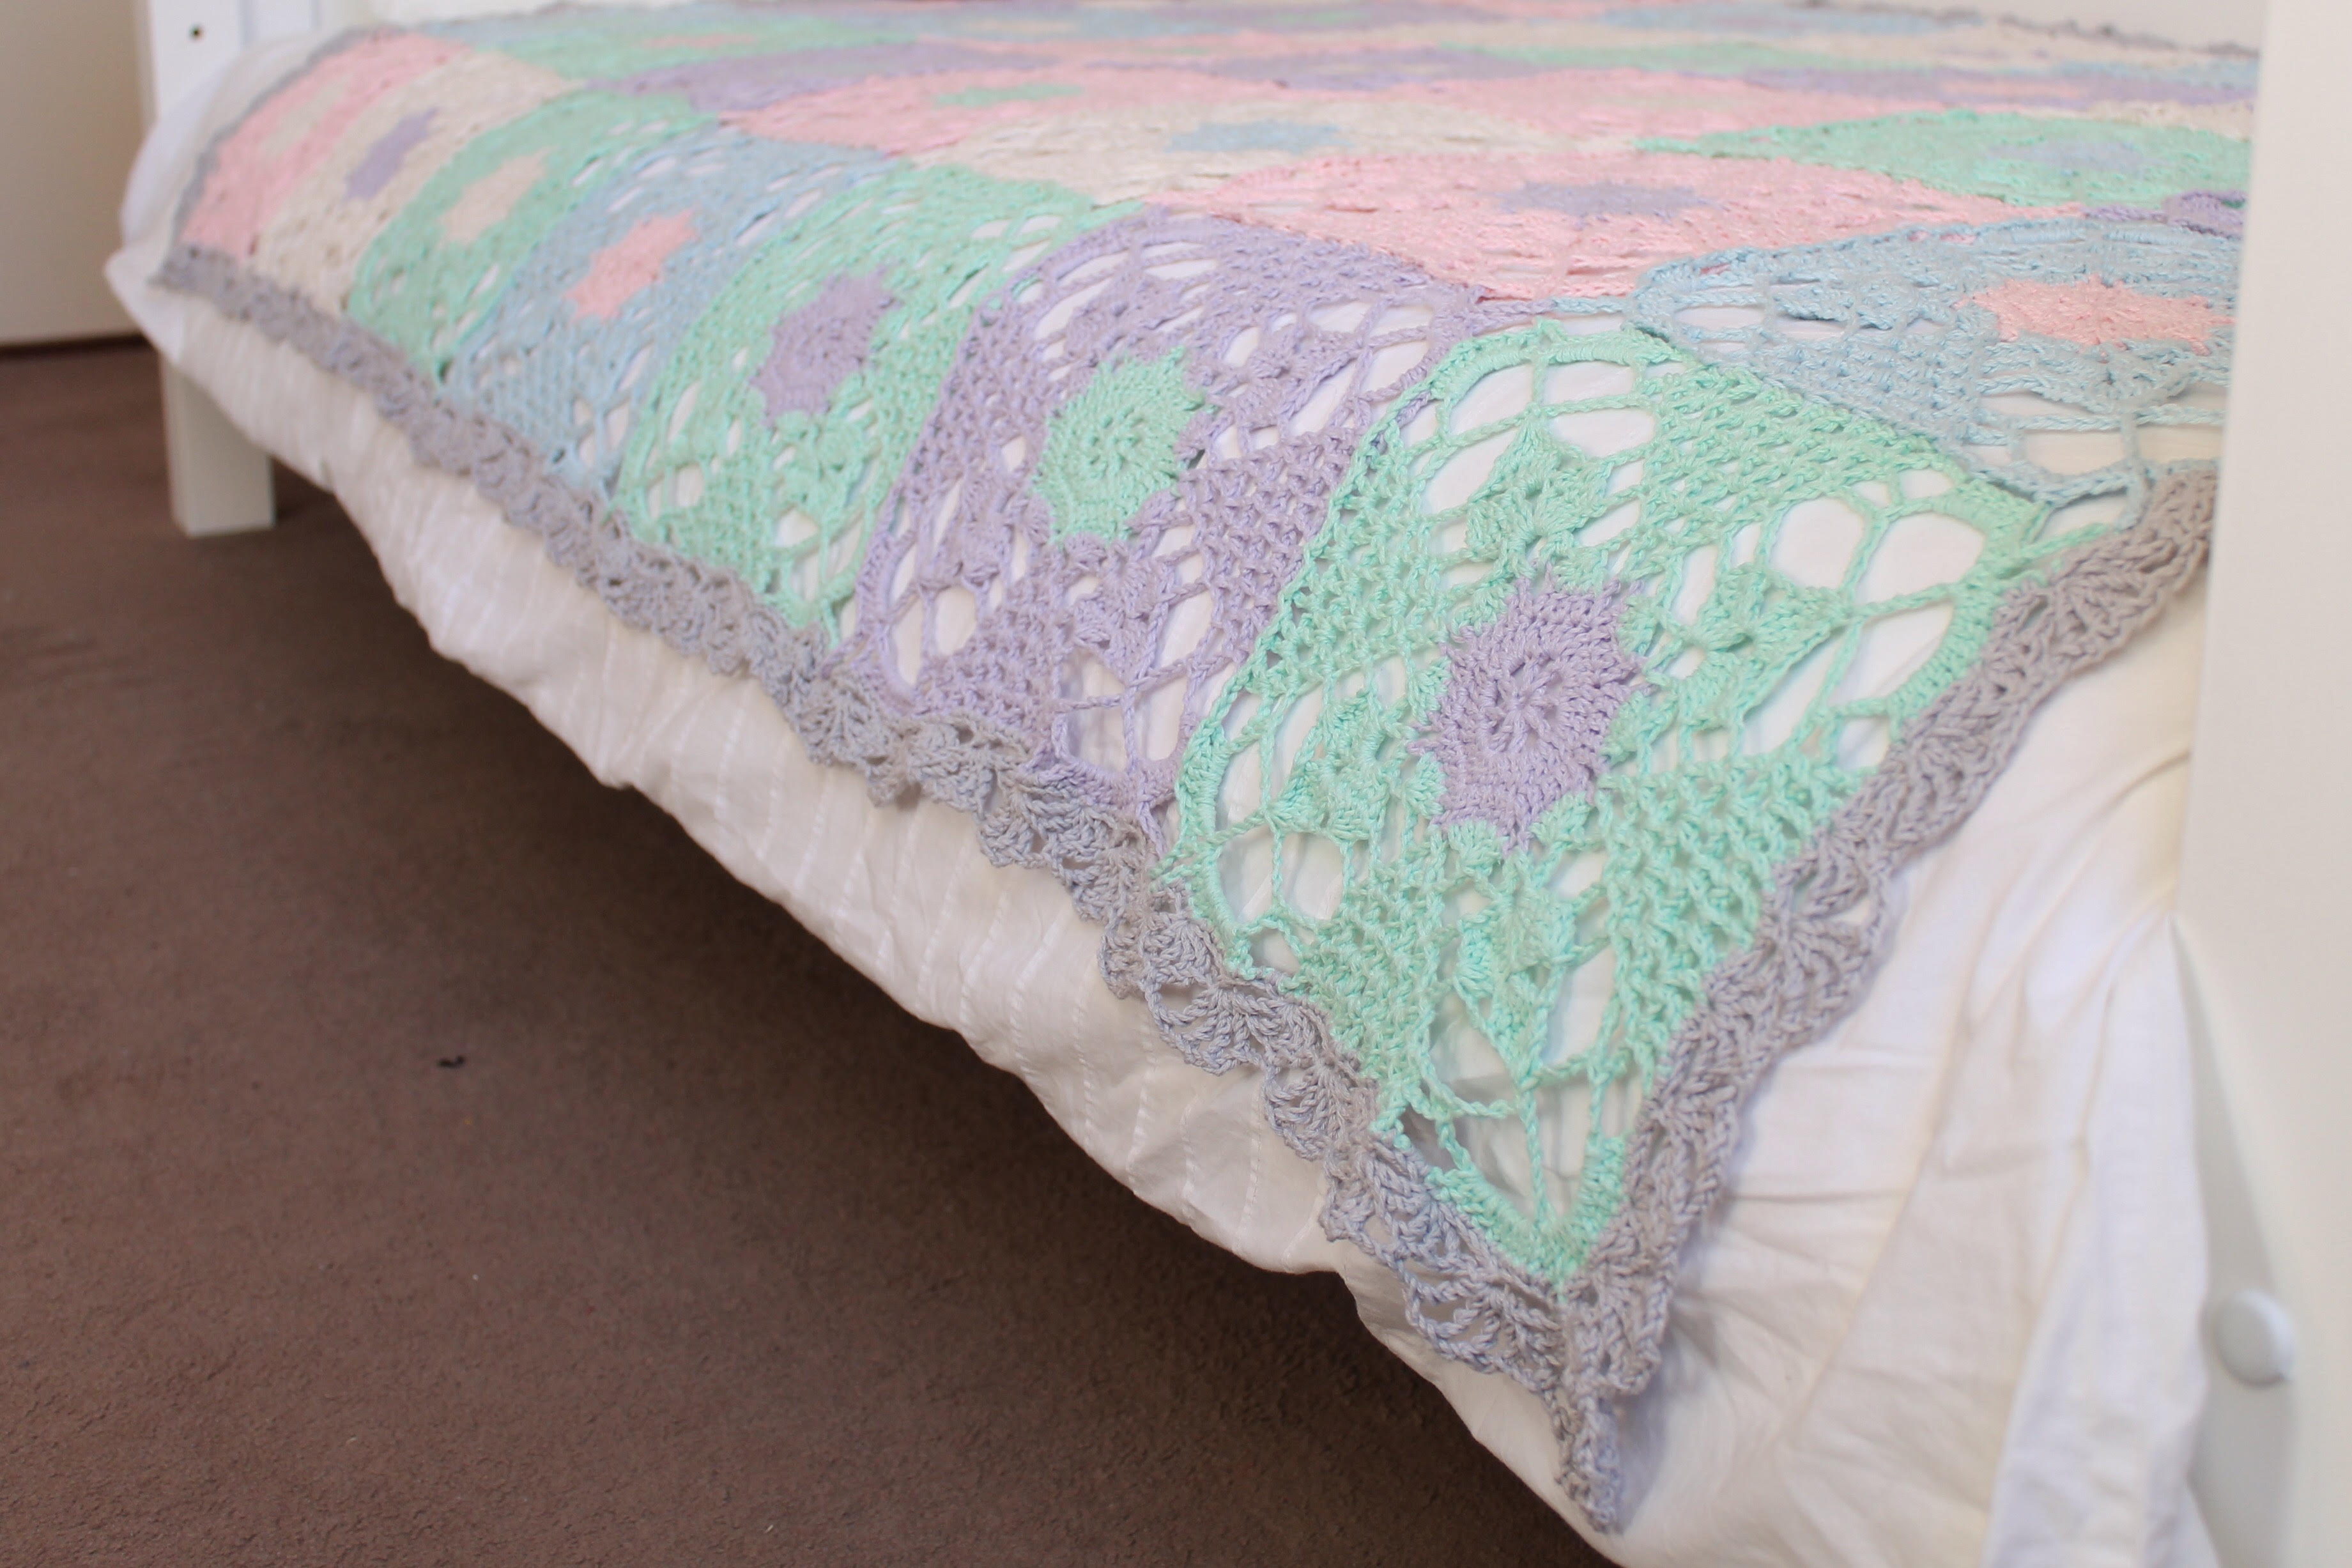
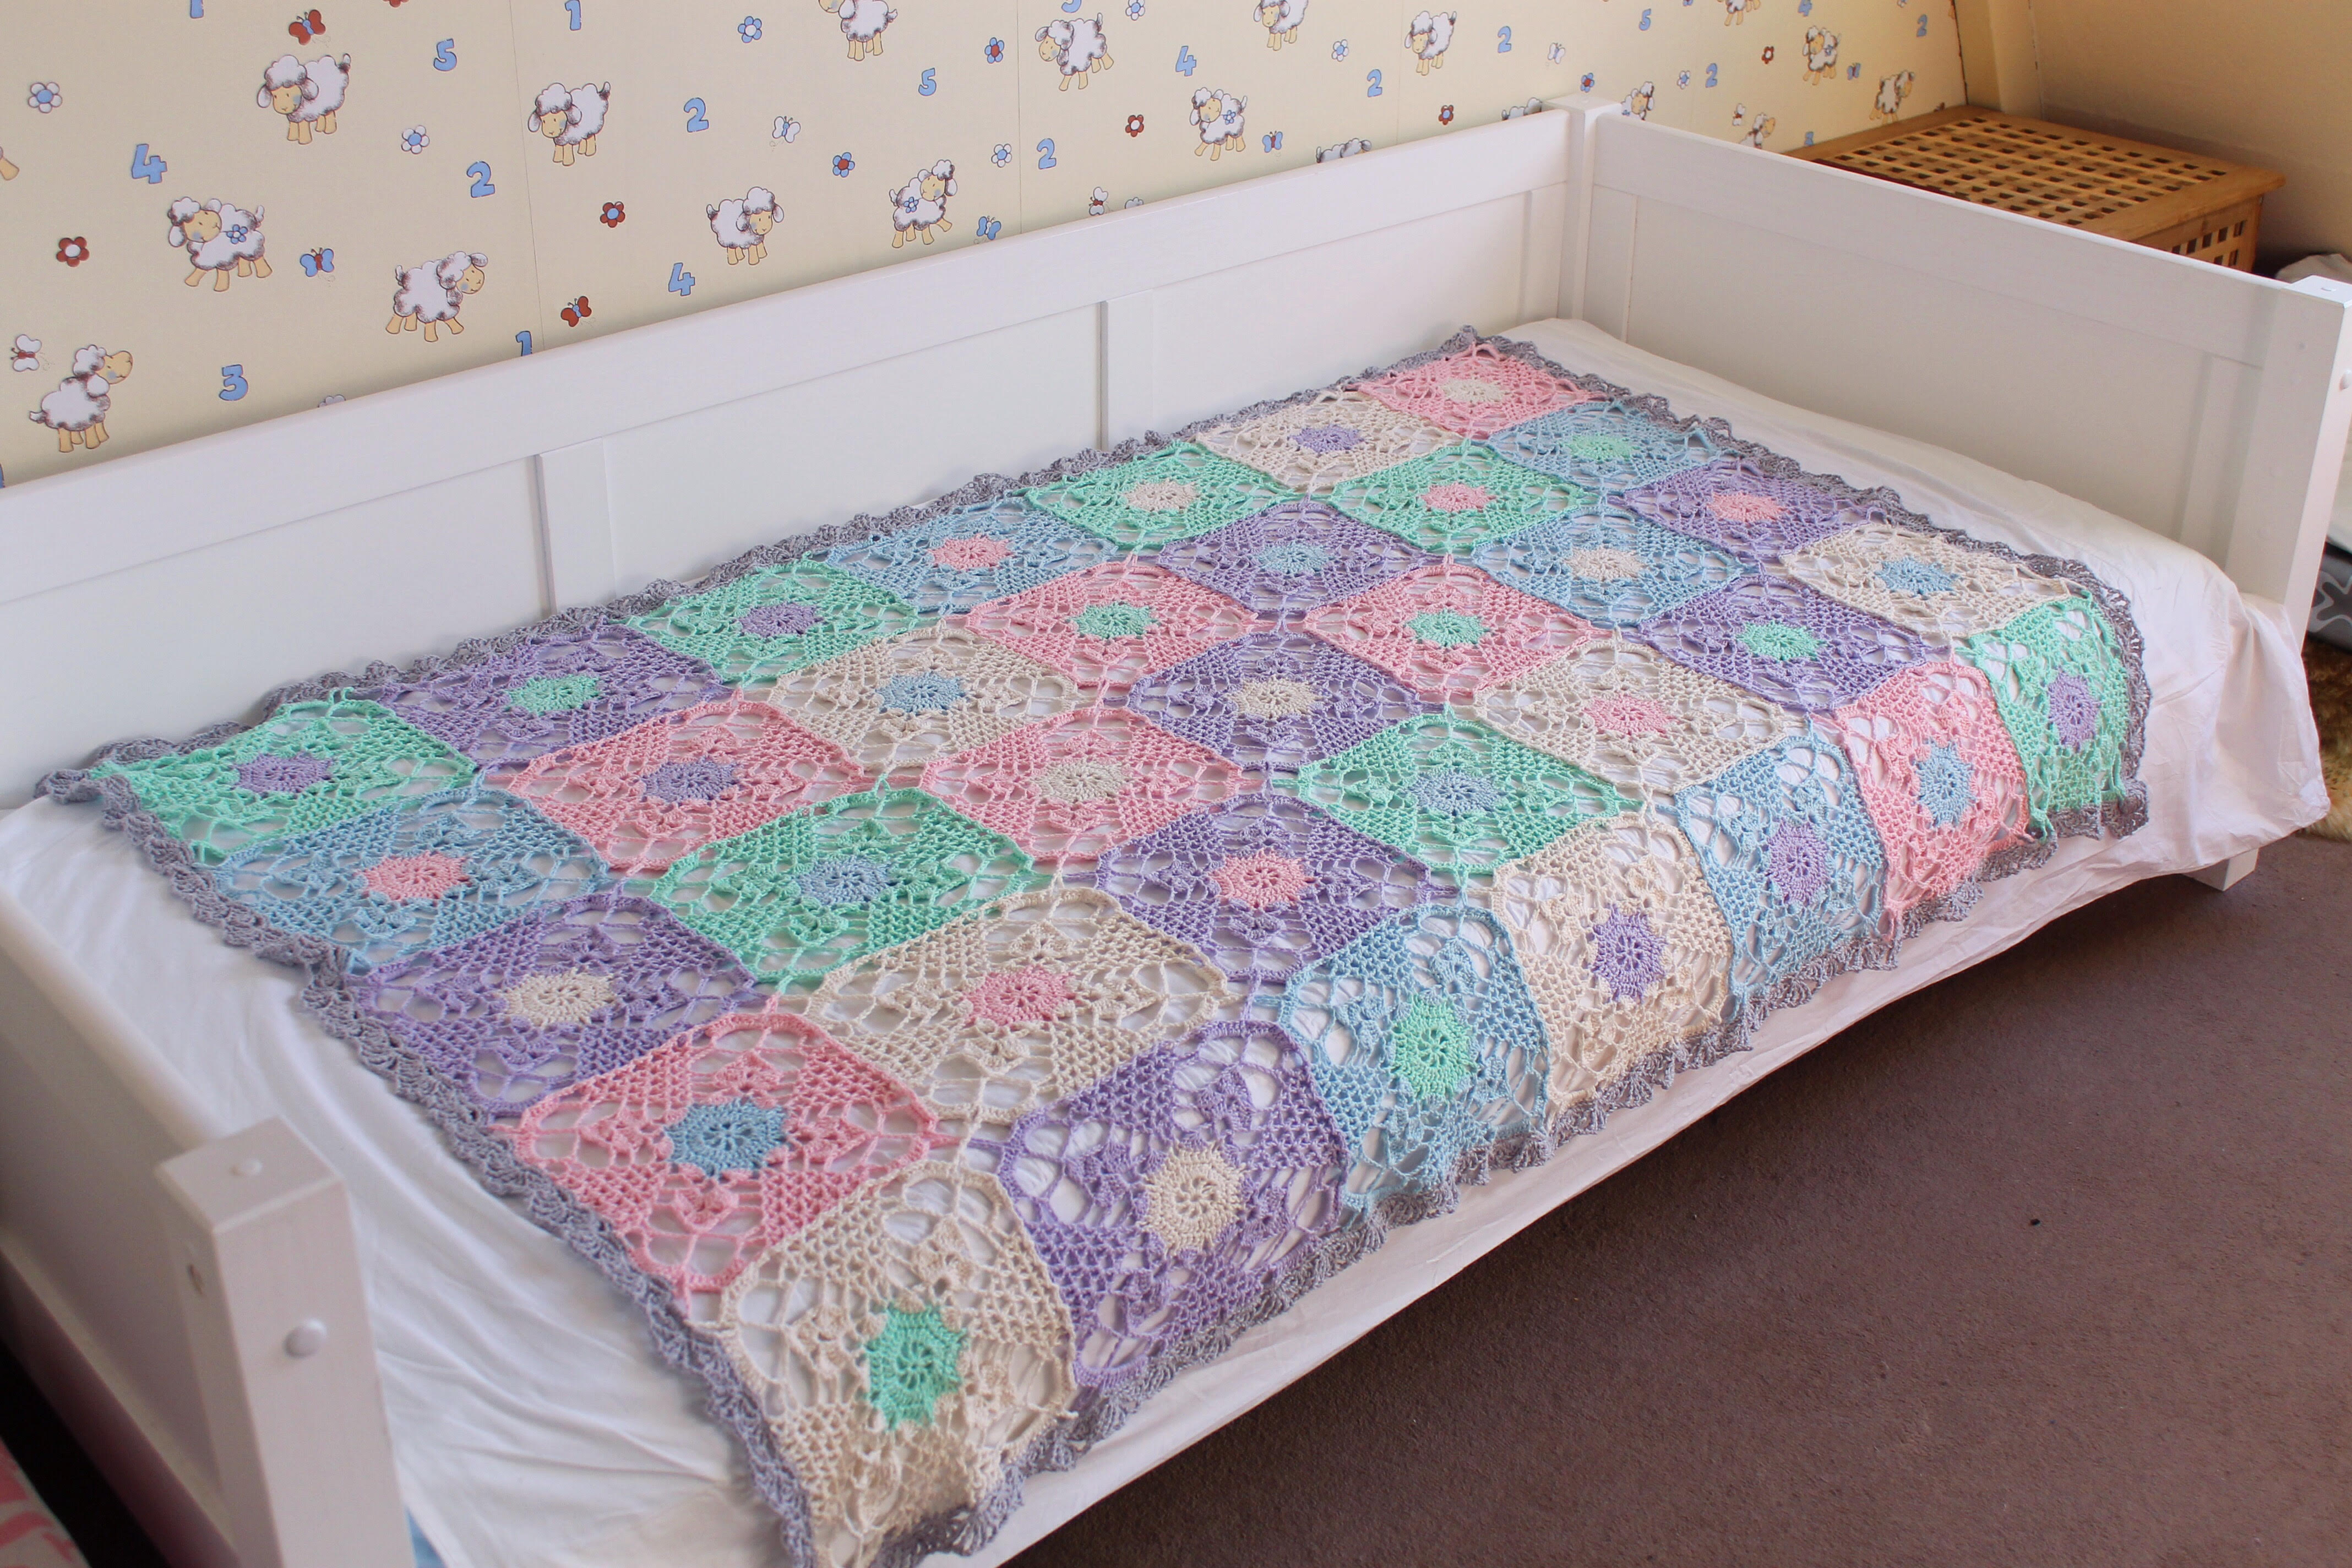
Mini-blanket – 30 x 30cm blocked

Abbreviations

(UK terms)
Ch chain
MR magic ring
Ss slip stitch
St(s) stitch(es)
Ch chain
Dc double crochet
DcInc double crochet increase (2 sts increased in 1 st)
Dec double crochet decrease (1 st worked decreased over 2 sts)
HtrInc half treble crochet increase (2 sts increased in 1 st)
Tr treble crochet
YUdc yarn under double crochet
MC main colour
CC contrast colour.
Rep repeat
Pm place marker
Rm remove marker
Flo front loop only
Blo back loop only

Pattern Notes

This pattern is worked both amigurumi style in continuous rounds (with no joining) and sewn together to make the koala’s head, and also back and forth in rows using the yarn under colourwork technique to make the mini-blanket.

Work instructions inside parentheses (…) the indicated number of times.

Special Abbreviation

YUdc (yarn under double crochet) is a colourwork technique using two strands of working yarn. To work the stitch insert hook with mc, yoh, pull up a loop, with cc yoh from front to back (keeping cc in front of mc), with mc yoh, pull through 3 loops.

Check out the short instruction vid here.

Instructions

Koala head

Working in rounds, with MC and 4mm hook

Round 1 6dc in MR (mark first st and move marker up each round to keep track of starting point) (6)
Round 2 6dcinc (12)
Round 3 (inc, dc) six times (18)
Round 4 (inc, 2dc) six times (24)
Round 5 (inc, 3dc) six times (30)
Round 6 (inc, 4dc) six times (36)
Round 7-17 36dc (36)
Round 18 dec twice, pm second dec, 14dc, dec twice, pm second dec, 13dc, dec, rm. (32)
Round 19 dec, pm, 12dc, dec twice, rm, pm second dec, 11dc, dec, ss. (28)

Cut yarn, leave tail long enough to sew top shut when assembling.
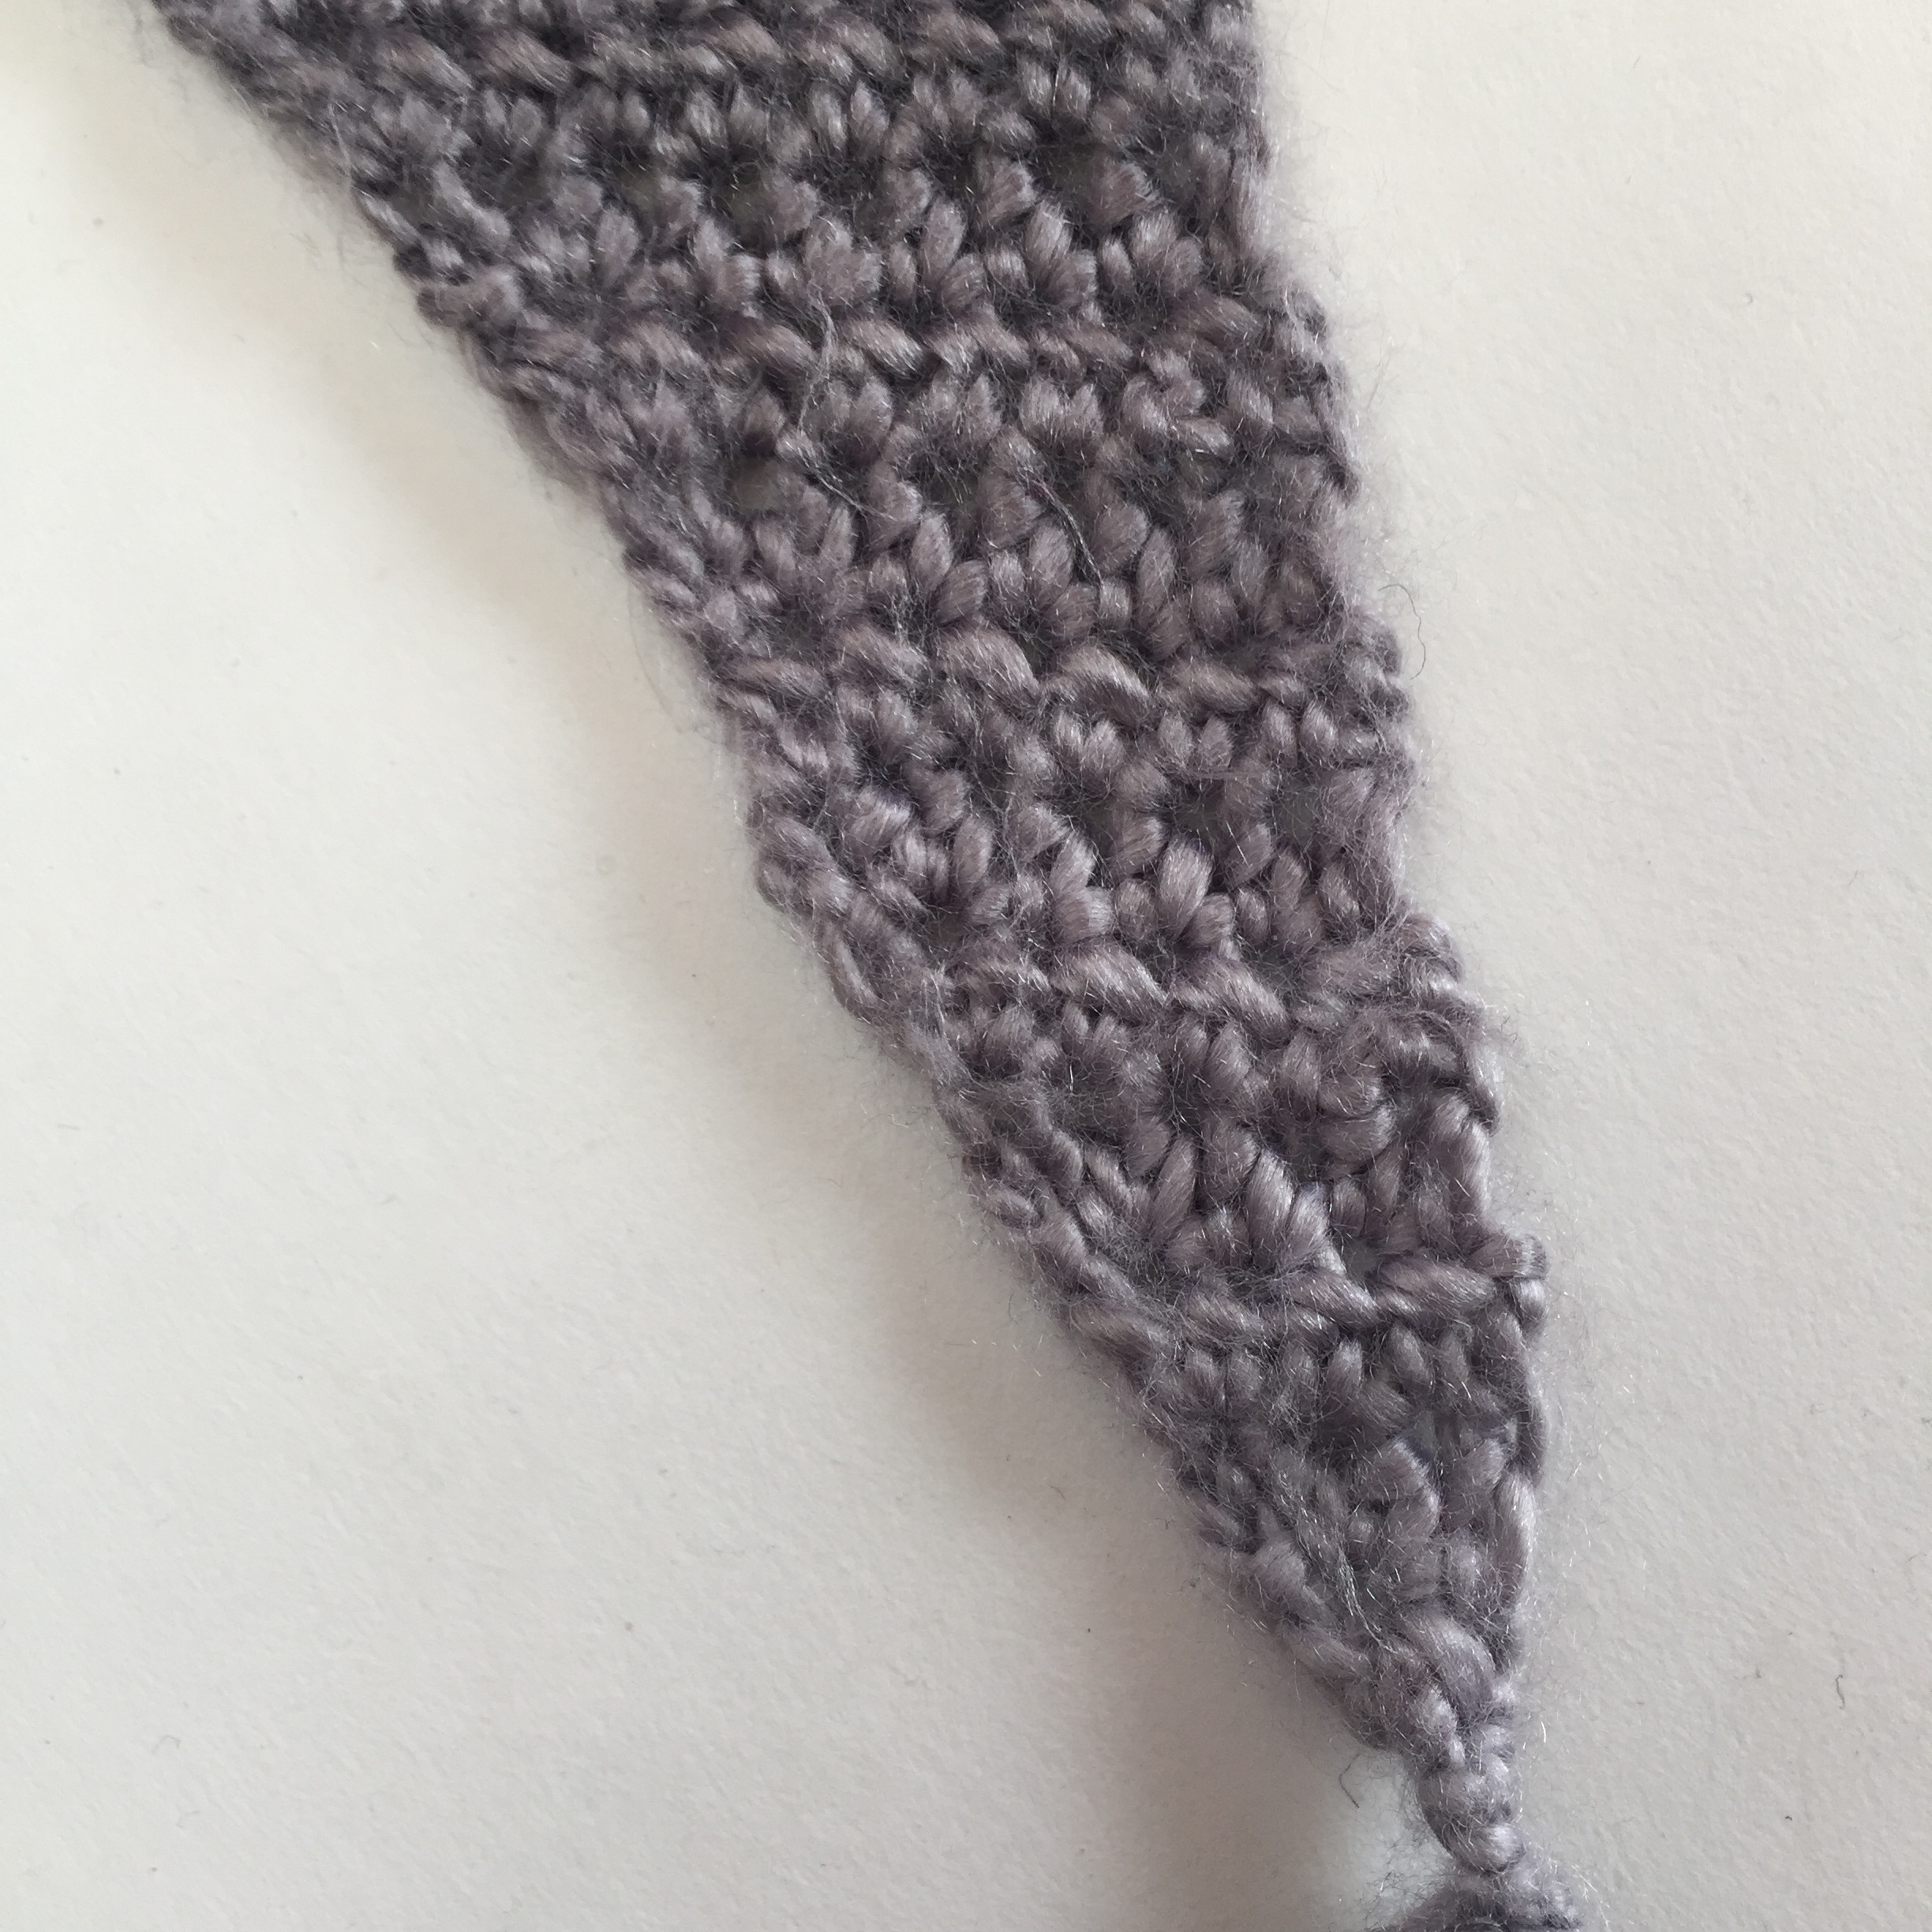
Ear

(make 2)
Working in rounds, with MC and 4mm hook

Round 1 6dc in MR (6)
Round 2 6dcinc (12)
Round 3 (inc, dc) six times (18)
Round 4 inc, pm in second st of inc, 8dc, inc, pm in second st of inc, 9dc (20) (starting point is moved by 1st )
Round 5 20dc
Round 6 inc, pm in second st of inc, 9dc, inc, pm in second st of inc, 10dc (22) (starting point is moved by 1 st)
Round 7-10 22dc. Ss (22)

Cut yarn and leave tail to sew to head when assembling.

close up of koala lovey head ready for assembly

Nose

Working in rounds, with black and 4mm hook

Round 1 6dc in MR (6)
Round 2 6dcinc (12)
Round 3 (3htrinc, 3dc) twice, ss to join (18)

Cut yarn, leave long tail to sew to head and make eyes.

Mini Blanket

Working back and forth in rows using both MC and CC, 6mm hook

See short video tutorial here.

Row 1 MC, ch42
Row 2 YUdc in third loop and each ch across to end (40)
Row 3 ch1 (does not count as a st), YUDC to end (40)
Row 4-42 rep row 3 (40)

Cut MC and continue working the border in CC.
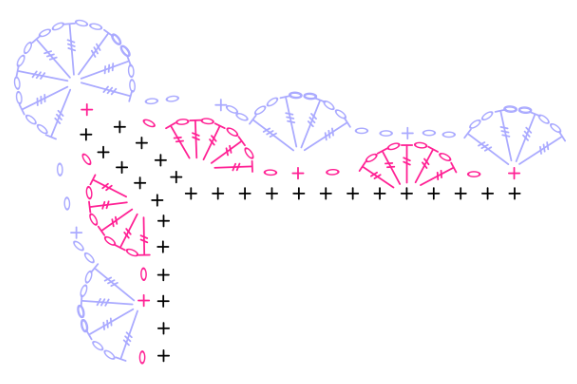
Border

Working in rounds 5 and 6mm hooks

Round 1 turn, with 6mm hook, work 40ss loosely across to corner, ch1, 40ss across the rows (note, there are two more rows than border sts, so you will need to “lose” two sts). Continue around to end and ch1 and ss to 1st st of the round.
Round 2 change to 5mm hook, ch2, working into the ss, [tr to corner ch (tr, ch1 tr) in flo of corner ch], rep around to end, ss to join. Cut yarn.
Round 3 flip your work so the back is facing you, ss to join at a corner, ch2, tr in the back of the ss from round 1, rep round 2.
Round 4 now we’ll join the two rounds. Ch1, dc in the flo of round 3 sts and the corresponding blo from round 2 sts to join the two rounds together. Rep to corner, 3dc in the corner ch, then rep all the way round to end. Ss to join, cut yarn, weave in ends and block.

Assembly

pieces of koala lovey head to be assembled

Position nose 7 rounds below opening at mid-point between markers, sew to head.  Make eyes 1 st to the side of the nose, 3 sts wide and slightly angled (1 round) upwards at the outer side. Fasten the eye loop on row below to fix it in place.

close up of koala lovey nose for assembly
close up of koala lovey eye and nose for assembly

Stuff the head with toy filling and sew shut. Attach ears to side of head on an angle, 3 sts in from the sides of the sewn shut head.

close up of koala lovey eye, ear and nose for assembly

Sew the head to the middle of the blanket, either using the leftover yarn tails, or a new length of yarn, using round 3 of the head as your guide.

close up of koala lovey head
Koala lovey crochet toy lying on a bed

*Affiliate link

Advertisement

Free Crochet Pattern – Jan’s Scarf

90C8345E-1557-4F85-A870-987CF2BA9BF3 (1).jpg

I know you’ve been following the progress on my skies project over the last few weeks and today we’re launching the pattern!

The pattern below uses UK crochet terms. A pdf version of this pattern in your choice of UK or US terms is available to purchase on Ravelry for €2.50, with a Dutch translation to follow soon.

To purchase the yarn, head to one of the following sites:

Scheepjes has all the stockist listed on their website, so you can find one local to you.

Wool Warehouse* and Deramores* ship all over the world, Knotty House* is in North America, Black Sheep Wools* in the UK, and of course my local store is Caro’s Atelier* here in Almere.

IMG_1235 (1).JPG

What You’ll Need

3 hanks of Scheepjes Skies Light*
Colour 1: Cirrocumulus 109
Colour 2: Cirrus 110
Colour 3: Cumulus 111
3.5mm (E/4) hook or hook to obtain tension
Tapestry needle
Blocking mats and pins

Measurements

215 cm long (point to point) x 30 cm wide

Tension

26 sts and 13 rows to measure 10 x 10 cm over shell st

Abbreviations

(UK terms)

Ch chain
Sts stitches
Yoh yarn over hook
Sp(s) space(s) between shell stitches
Tr treble crochet
2trInc two treble crochet in one stitch to increase
Tr2tog 2 treble crochet stitches decreasing into one stitch
Puff-st puff stitch (yoh, insert hook, pull up a loop, yoh, insert hook, pull up a loop, yoh, pull up a loop, yoh, pull through all loops. Do not ch1)
Shell 3 treble crochet stitches in 1 stitch
Ss slip stitch
Rep repeat

Notes

This pattern is worked back and forth in rows, increasing at one end and decreasing at the other.  The increases and decreases will always be worked at the same end each row, creating an oblong shape.

We also work puff stitches.  A great video tutorial can be found here: https://www.youtube.com/watch?v=5O8QtxZFYGo. It’s important to note that often when completing a puff stitch, a ch1 is worked.  For this pattern, we do not work the ch1.

At the beginning of each row work a ch2. This does not count as a stitch.  The first instructed stitch is always worked into the very first stitch of the row.

It can be that the stitch pattern and count doesn’t exactly match up to the instructions; this is because it can be easy to add or lose a stitch at the decrease end if not careful.  Don’t worry too much, just keep an eye on it and don’t decrease over a couple of rows to get your stitch count back up (or down) to the right number.  Blocking and adding the fringe at the ends will disguise any “wonkiness.”

Take care using Scheepjes Skies, It’s a gorgeous, naturally dyed yarn using indigo.  It’s not colour fast, and if left in the sun the colour will fade.  Treat your wrap and yarn with extra special care.

You can also substitute the pack of Skies Light minis to complete this pattern, although there is less yarn in a full set of minis compared to three full hanks.  Note: I have not tested this pattern using the minis, but from a maths perspective I recommend skipping rows 5 – 6, and 36 – 37. You may also need to skip a shell stitch row in the middle section (colour 2 below) to have 4 rows instead of 5. There may not be enough yarn leftover to make a long fringe, so bear this in mind.

img_1236.jpg

Instructions

Colour 1

Row 1 ch 301 (299 +2)

Row 2 ch2 (does not count as a st here or throughout), 2trinc in the 3rd ch from the hook, tr into each ch to and into the 3rd last, tr2tog in the last 2 ch, turn.

Row 3 ch2, tr2tog, (puff-st, tr) to and into the 2nd last st, 2trinc, turn.

Row 4 ch2, 2trinc, tr to and into the 3rd last st, r2tog, turn

Row 5 ch2, tr2tog, (ch1, miss 1, tr) to and into 2nd last st, 2trinc, turn

Row 6 rep row 4

Row 7 rep row 3

Row 8 rep row 4

Colour 2

Row 9 ch2, tr2tog, miss 1, (shell, miss 2), rep to and into 3rd last st, miss 1, 2trinc, turn

Row 10 ch2, 2trinc, shell in each sp to sp before the last shell of previous row, miss shell, tr last, turn

Row 11 ch2, tr, miss 1st shell, shell in next and all sps to last sp, 2trinc last tr, turn

Row 12 ch2,  2trinc, shell in each sp to the last shell, miss the last shell, tr last st, turn

Colour 1

Row 13 ch2, tr2tog, tr to and into 2nd last st, 2trinc, turn

Row 14 ch2, 2trinc, (puff-st, tr) rep t and into 3rd last st, tr2tog, turn

Row 15 rep row 13

Row 16 ch2, 2trinc, (h1, mist 1, tr) rep to and int 3rd last st, tr2tog, turn

Row 17 rep row 13

Colour 2

Row 18 ch2, 2trinc, miss 1, (shell, miss 2) rep to and into 4th last st, miss 1, tr2tog, turn

Row 19 ch2, tr, miss shell, shell in each sp to last sp, miss 1 st, 2trinc, turn

Row 20 ch2, 2trinc, shell in each sp to last shell, miss last shell, tr last st, turn

Row 21 rep row 19

Row 22 rep row 20

Row 23 rep row 19

Colour 3

Row 24 rep row 4

Row 25 rep row 5

Row 26 rep row 4

Row 27 rep row 3

Row 28 rep row 4

Colour 2

Rows 29-32 rep rows 9-12

Colour 3

Rows 33-37 rep rows 13-17

Row 38 rep row 14

Row 39 rep row 13

Tie off, use the left over yarn to cut 20cm lengths to fold in half and knot into each row to create a fringe.

Block and enjoy!

Please add your projects to Ravelry, and if you use the minis for this I will certainly love to hear how you go and I can adjust the tips based on your feedback!

IMG_1232 (1).JPG

*affiliate link

Get Squared – Meet Jenny King

Today I’m talking about a fun project that I completed just before Christmas, an innovative design which astounded me in its simplicity and speed, and you know how much I love speedy projects!  However, you also know that I like a long blog post, so perhaps go grab a cuppa quickly. It’s a big one!

Towards the end of 2017 the creative director at Scheepjes introduced me to fellow Australian designer Jenny King, and her magical garment making workshop Get Squared.  Essentially, we take a few very simple measurements, punch it into the formula Jenny has created, take any yarn, grab a 6mm hook and within a few hours – really, a few hours – you’ll have a garment.

Get Squared by Jenny King https://www.jennykingdesigns.com/

Image: Jenny King

I mean, of course I was skeptical.  A garment in a few hours?  Not a chance.  But then she pulled out her own example, after just two hours of work, and I was blown away.

Of course I had to try this for myself, so I ordered a pile of Scheepjes Cahlista, asked a friend for her measurements, and went to town.

Get Squared by Jenny King https://www.jennykingdesigns.com/

It was at about this point that I realised I had my measurements wrong.  I had noted the correct measurements of my friend, and I had the correct magic number from Jenny’s formula, but I hadn’t measured my work properly!

Usually it would be around this time that I would have screamed, screwed it up into a ball and thrown it across the room, but that bottom half in my pic was less than an hour’s work!  So I happily ripped it all back, measured correctly and merrily went on my way again.

Within a couple of short evenings in front of Netflix I was here:

Get Squared by Jenny King https://www.jennykingdesigns.com/

Only the sleeves and edging to go, which was done in a jiffy.  I’m not even kidding, I’ve never made a garment this quickly before.  I truly have at least three half done garments in a box somewhere that I just can’t face.  It’s too much work.  But this was a dream!

Get Squared by Jenny King https://www.jennykingdesigns.com/

When I gave it to my friend at Christmas, we discovered that the sleeves are too long, and I should have taken her inner arm measurement as well, but it’s easy to fold them back, and the cardigan looks great!

Jenny’s Get Squared is terrifically innovative.  Using her magic formula, anyone can make a garment, with just about any yarn, in basically any size, by grabbing a few simple measurements.  It’s a comprehensive video course, where you will learn to make 5 different garments.  I love a good long cardi, so I chose the Gossamer cardigan, but there is a basic sweater, a bolero and a couple of variations, including creating a round neck and a V, and a cross-over.  The course itself is $39.90 AUD (so that’s about 26 euros) and it’s adaptable, once you have the foundation down, you’ll be able to make any garment you can imagine.

Once I was done, I had to reach out to Jenny to share my cardi, and to tell her just how happy I was.  While I was at it, I also talked her into a little interview!

Here’s Jenny:

img_0232-400x600

Tell us about you, how you came to crochet, and how that evolved to designing and your own yarn!
I was 8 years old and I wanted a bun cover like ballerinas wore I their hair. So I nagged my aunt to show me how to crochet. I learnt how to chain and double crochet from her. Later my cousin from the other side of the family was making a granny square blanket and he showed me how to do that. I made it into a 4 square poncho and put a funnel neck on it. No one told me I couldn’t so I just did.

And what about Get Squared?  How did that evolve?  I’m  blown away by your formula and would love to hear how you came up with it.
Trial and error and a lot of experience. I owned a yarn store then and noticed that I could vary the sizes of many of the garments by changing the hook or the amount of rows if working from the top down. Many people who could Crochet only did granny square blankets because they only know how to go around and around. Many didn’t know what the stitch was called and liked the blankets because they were easy relaxing Crochet. I wondered if I could marry the 2 ideas and started playing. It was a bit of an epiphany with lots of hard work checking and rechecking the maths. I probably did my first top down published design in 1999 and quite a few in between so that is where the experience came from. Then I experimented with every yarn I had on hand from lace weight to chunky and it kept on working. It was like magic

I’ve made the Gossamer cardigan so far, and was astonished at how quickly it works up.  I had even gotten half way down the body and realised it much too big so had to rip it back, but what would usually have left me swearing and potentially abandoning the entire project wasn’t a problem because I knew that within a few hours I’d be almost finished.  Was the speed by design, or is a happy coincidence?
The beauty of the granny stitch is that it is quick, you work into the Big Holes as I call them so it is no effort. The J hook/6mm also helps. We are making fabric that drapes. Of course speed is important, if we want a new garment we want it now. I think that is why people churn out blanket after blanket until the family has had enough. So I wanted to put that ease if sticking into garments that people love. I used a lace weight yarn in my gossamer cardigan and you used a chunky cotton yarn and they both look wonderful. That is the beauty of Get Squared I think.

Kids Squared has just been released, and I’m so happy – I can’t wait to use your formula to create outfits for my daughter – tell us about how that came about?
It was in the back of my mind as the first top down garment I ever made was for my son who is now 33. But I had to put it on hold until Get Squared was done and I had explored every single design shape I could; I ended up with 90 Get Squared garments. I made my first Kids Squared garment 5 years ago at the same time but it is only this year that I teamed up with Scheepjes to finally get all the designs filmed and written

The Get Squared concept is based on the Granny (shell) stitch.  I think I’d love to use the V-stitch for my next garment.  How flexible is it to adapt to using other stitches, do you think?
It is very adaptable. I have devised about 8 stitch variations so far. And I that will be my next video. I have done quite a few designs already; it is very exciting. In saying that nothing is as speedy as the granny (shell)stitch. The V stitch will work either in the chain space or in the middle tr of the shell. Only the drape alters. It is all about making the fabric. I want people to make clothes quickly and easily and wear them out so I will do anything to get that to happen effortlessly and stylishly.

What can we look forward to seeing from you next?
Get Squared the New Stitches, or the “next generation” I may call it . I have started working on it. It will use the magic sizing of Get Squared so that it will fit up to 64 inch bust, and have the same simplicity without seaming but it will look so different. It is a whole other design journey. What fun!

Thanks so much for joining us today, is there anything else you’d like to share?  Tips or tricks?
If you ever have to seam up for Crochet designs can I recommend you explore the chain seaming technique which is shown isn’t the Kids Squared video or as a free PDF at my site. It may just change your world.

And finally, where can we find you online?
www.jennykingdesigns.com

Thanks Jenny! (I’ve already downloaded her seaming technique pdf, I’m excited to see it in practice.)

Jenny also sent me some of the images from the Kids Squared series to share with you, and here are a couple that I cannot wait to make for Raina!

Kids Squared by Jenny King https://www.jennykingdesigns.com/Kids Squared by Jenny King https://www.jennykingdesigns.com/

For my cardigan I used about 10 balls of Scheepjes Cahlista in 393 Charcoal which you can pick up at Wool Warehouse*, Caro’s Atelier* or any of the great Scheepjes stockists n the Benelux.

Full disclosure: I was gifted the Get Squared workshop by Jenny, but all the opinions are my own, and I have happily purchased the Kids Squared series as a result.

*Affiliate link

Spring Motif – Photo Tutorial

It feels as though Spring has raced on by, and we’re hurtling headlong into an Australian style summer!  Although, that’s pretty optimistic, summer will likely only last this week, but I can never help myself.  I always get excited when the temperatures crack 20 degrees…

As promised, I’ve put together a little set of instructions to make the Spring Motif.  I decided to make this one a photo tutorial for you.

What You’ll Need

4 mini 25g skeins of Scheepjes Catona in colours:

  • 226 Light Orchid
  • 114 Shocking Pink
  • 385 Chrystalline
  • 280 Lemon

3mm hook
Scissors
Tapestry needle
Blocking mat(s) and pins

Note: I’m using US terms for this tutorial and the pattern is worked in rounds, slip stitching to join each round, and changing colours almost every round as well.  Try to weave in ends as you go, to save work at the end.

Round 1:

12 DC (double crochet) stitches into a MR (magic ring). SS (slip stitch) to join.

12 DC (double crochet) stitches into a MR (magic ring).  SS (slip stitch) to join.

Round 2:

Begin the round with a standing DC, DC into the same stitch, then work 2 DC into each stitch around, ending with 24 stitches.

Begin the round with a standing DC, DC into the same stitch, then work 2 DC into each stitch around, ending with 24 stitches.

Round 3:

Add the next colour with a standing DC, ch (chain) 1, DC in the same stitch. Miss 1 st, then V-stitch (DC, CH1, DC in the same stitch) in the next. Repeat the V-stitch around, with one stitch between each.

Add the next colour with a standing DC, ch (chain) 1, DC in the same stitch.  Miss 1 st, then V-stitch (DC, CH1, DC in the same stitch) in the next.  Repeat the V-stitch around, with one stitch between each.

Round 4:

Join the next colour with into the chain space of the V-stitch and work 2 DC clusters (YO, pull up a loop, YO, pull through 2 loops, insert hook into same stitch, pull up a loop, YO, pull through 2 loops, YO pull through all loops) into each V-Stitch with ch3 between each one.

Join the next colour with into the chain space of the V-stitch with half of a standing DC (ie. do not pull through all loops to complete the stitch, keep two loops on the hook.  Alternatively, chain 2) and work 2 DC clusters (YO [yarn over], pull up a loop, YO, pull through 2 loops, insert hook into same stitch, pull up a loop, YO, pull through 2 loops, YO pull through all loops) into each V-Stitch with ch3 between each one.

Round 5:

Join next colour to the middle loop of the cluster with a HDC (half double crochet). in the ch space, work a DC, Htr (half treble - YO twice, insert hook, pull up a loop, pull through two loops, YO, pull through all loops), a Tr (treble crochet), Htr and a DC. HDC into the top loop of the next cluster. Repeat this around in each ch space, slip stitch to join.

Join next colour to the middle loop of the cluster with a HDC (half double crochet). in the ch space, work a DC, Htr (half treble – YO twice, insert hook, pull up a loop, pull through two loops, YO, pull through all loops), a Tr (treble crochet), Htr and a DC.  HDC into the top loop of the next cluster.  Repeat this around in each ch space, slip stitch to join.

Round 6:

Join next colour to the top of any HDC with an SC (single crochet). CH3, sc into the Tr from the previous round. CH3, sc into the next HDC. Repeat this around, SS to join.

Join next colour to the top of any HDC with an SC (single crochet).  CH3, sc into the Tr from the previous round.  CH3, sc into the next HDC.  Repeat this around, SS to join.

From here we can go a few different ways. To make the coaster, don’t cut the yarn from finishing round 6.  Instead, change to a 3.5mm hook and continue by working 3 sc into each ch space, and an SC into the top of each SC from the previous round.  Instead of joining, make 2 continuous rounds of slip stitches, into the back loops only.  After the two rounds of slip stitches, join, cut the yarn and weave in the ends.

Another option is to create the doily that I shared pics of last week:

spring motif doily

I’ll share instructions with you later in the week on how to make that.

The last option is to go even further and join all the motifs to make a table runner or a throw, or even a shawl.  More on that coming soon too.  But for now I’ll leave you with the motif instructions,

Scheepjes has a huge list of suppliers throughout the Benelux, otherwise worldwide you can order from Wool Warehouse* and for North Americans don’t forget: Knotty House* in Canada is also now stocking Catona!

*Just a note: this post contains a couple of affiliate links which if you choose to use when feeding your yarn habit will earn me a small commission.  This helps me keep up the freebies and doesn’t cost you a thing. Thank you!

Free Pattern: Cherry Blossom Shawl(ette) – and the Winner is….

I’m so excited to be able to announce the winner of the three skeins of Scheepjes Wanderlust in your favourite colour to…..

— Jacomine Oosterhoff! —

Jacomine, you have mail!  Make sure you let me know where to send your three balls of Zanzibar.

img_1008-1

Thank you so much to everybody who took the time to enter and to tell me about your wanderlust.  I had the best time reading all of your comments.  And the wanderlust has kicked in here properly.  We’re discussing holidays, and I just can’t make up my mind where I want to go.  Well, I do know where – I want to go to North America and road trip in the west.

Also a massive thank you to Scheepjes for working with me on this giveaway.  The never-ending support from the team is just wonderful.  I love working with these guys!

Right.  Now.  Onto the pattern.  This is one of the simplest crochet designs, I assure you, once you get started, you can do it with only half an eye on it.  That means you get to actually watch Timothy Olyphant in Santa Clarita Diet instead of just listening to him.  Winners all round, here!

Cherry Blossom shawl, free crochet pattern

Materials

Measurements

180cm on the longest side – this is a scalene (asymmetrical) triangle shawl.

Tension

8 stitches = 5cm
7 rows = 5cm

Abbreviations

(US terms)
Ch chain
HDCInc half double crochet increase (two stitches in one stitch)
2HDCTog two half double crochet together (two stitches together)
rs right side
ws wrong side

Notes

At the end of each and every row, chain 2 and turn.  This does not count as a stitch.
Increase in every row: the first stitch on the right side, and increase in the last on the wrong side.
Decrease in every 4th row, in the last two stitches of the right side.
Save about 1 metre of both the starting and ending colours to make tassels.

Cherry Blossom Shawl(ette) free crochet pattern by missneriss

Instructions

  1. (ws) ch3.  2 hdc in the 3rd ch from the hook.  ch2, turn (in this and every row.  This instruction won’t be repeated from here on in).
  2. (rs) hdcInc in the 1st, hdc in the next (3)
  3.  (ws) hdc, hdc in the next, hdcInc in the last (4)
  4. (rs) hdcInc, hdc in the next, 2hdcTog (4)
  5. (ws) hdc in the next 3, hdcInc (5)
  6. (rs) hdcInc, hdc in the next 4 (6)
  7. (ws) hdc in the next 5, hdcInc (7)
  8. (rs) hdcInc, hdc in the next 4, 2hdcTog (7)

Continue in this four row pattern (repeat rows 5-8) until you run out of yarn.

Cherry Blossom Shawl(ette) free crochet pattern by missneriss

Tie off and weave in the ends.

Add more skeins to make the shawl bigger.  there’s no need to really block, but if you like, feel free.  Make sure that the colours match when adding new skeins.  There’s no need for wastage – you’ll be able to match what you pull out at the end of each skein.

img_1006-1

I hope you enjoy the pattern, it’s so quick and satisfying!

Edited to add: Here is how the shawl looks lying out flat on the ground.  You can see that the increase side curves ever so slightly.  Do try to keep those stitches loose to avoid any curling.Scalene shawl by MissNeriss

*Affiliate link

10 of the Best: Crochet Flower Motifs

10 of the best: Crochet Flower Motifs

Today I want to share with you some of my favourite flower motifs.  All of these are free online tutorials and you can head directly to each by clicking on the designers names or the images.

Enjoy!

Crochet Puff Flower Motif

I’m sure I’ve posted about this one before, I just love how delicate it is.

http://www.ravelry.com/patterns/library/crochet-puff-flower-motif

Crochet Flower Puff Stitch Pattern

By MyPicot

These puff stitch flowers are so satisfying and look great in a mercerised cotton.

http://mypicot.com/0035.html

Blanket in Bloom

By Alice by Day

It’s the way that these all come together to make a shawl that I love the most about this one.

http://alicebyday.blogspot.nl/2015/02/another-blanket-in-bloom.html

Taanvi’s Flower Crochet Motif

By Pink Mambo

You can easily make this with a chunky or lace yarn and it will be beautiful regardless.

http://i0.wp.com/pinkmambo.com/wp-content/uploads/2015/08/Taanvis-Flower-main-photo.jpg?resize=700%2C700

Crochet Pointy Flower

By Cheri’s Creations

The texture is gorgeous.  I’d love a blanket made from this motif.

http://cherilicious-cherisblog.blogspot.nl/2013_07_21_archive.html

October Square

By Patricia Stuart

I love all of Patricia’s squares, but this one is my fave.

http://pukado.blogspot.nl/2014/10/crochet-mood-blanket-2014-october.html

Japanese Flower Motif

By Happy In Red

The Japanese Flower was one of my first ever motifs when I relearned to crochet.  I skipped the grannies and went straight to this.  Not very well, obviously!  Esther does a much better job.

http://happyinred.blogspot.nl/2016/03/crochet-japanese-flower-scarf-in-alpaca-rythm.html

Egyptian Star Flower

By MissNeriss

I made this tapestry motif, inspired by a trip to Egypt.

Egyptian Star Flower Stool by MissNeriss

Flower Power Mandala

By RedAgape

I love mandalas, but I especially love open lacy mandalas.  This one is a fantastic example.

http://redagapeblog.com/2015/11/22/crochet-flower-power-mandala/

Sophie’s Universe

By Dedri Uys

The Game Changer. If you haven’t made a Sophie you’re missing out on the Trans Siberian of crochet – glorious surprises with each leg of the journey.

http://www.lookatwhatimade.net/crafts/yarn/crochet/sophies-universe-cal-2015/sophies-universe-cal-2015-information/

And Dedri has worked tirelessly to turn Sophie into a book!  I’m getting my copy in a few weeks when I see Dedri in person (I must tell her), I can’t wait!  You can get your own copy at Wool Warehouse*.

http://www.lookatwhatimade.net/crafts/yarn/crochet/sophies-universe-cal-2015/sophies-universe-book/

*Affiliate link

Yarn Wrapped Christmas Bauble Lights – how to

I can’t help it.  The week leading up to Christmas is when I get all my inspiration.  Why can’t it come in November like everyone else?!

This one is really fun, and is a great craft to do with kids.  It’s how to make your very own yarn wrapped Christmas baubles.  You can hang them in the tree, or you can string them onto a set of lights, like I have (make sure you use LED lights which don’t heat up!).

img_0608

This took about an hour all up, and I left the baubles to dry overnight, although they were dry within a few hours.

img_0610

What you’ll need

  • Two balls of Scheepjes Maxi Bonbon in your chosen colours, available from Wool Warehouse*.  Hot pink and gold is my 2016 Christmas palette, but you can choose whichever colours you like.
  • White craft glue.  I used what I had on hand, which was Mod Podge.
  • Sponge or brush to apply the glue.
  • Water balloons.  If your summer was as good as hours, you’ll have plenty lying around unused.
  • Something to hang your baubles to dry – I used a coat hanger.
  • Battery operated LED fairy light string.

Instructions

  1. Take your balloons and blow them up to be about 6cm in diameter, and tie them off making sure they are as round as you can possibly make them.
  2. Take a little of the glue and dab it around the balloon.  This makes it a bit sticky so the yarn will stay put.
  3. Start wrapping the yarn.  Hold a long tail in your hand, and hold onto the knotted end of the balloon and slowly wind the yarn around the balloon as if you’re winding a skein of yarn.  Keep wrapping until you have good coverage, and still some space to allow light to shine through.  Two balls of Bonbon will make 10 baubles.
  4. Cut and tie the yarn off to the other end, leaving a long double stranded tail to hang up to dry later.
  5. Take the glue and start dabbing it all over the bauble, until the yarn is completely soaked.
  6. Hang them to dry overnight.
  7. When dry, pop the balloons and pull them out of the bauble – this can be a bit fiddly as water balloons are meant to break easily, remember.
  8. String them onto lights and hang as decoration.

img_0609

Alternative glue option: you can soak the yarn in the glue before you start winding onto the balloon, but this also causes more mess.  Which I don’t like.

img_0612

DIY Yarn wrapped Christmas bauble lights - last minute Christmas decoration ideas and tutorials from @missneriss #yarn #scheepjes #bonbon

DIY Christmas Bauble - a yarn wrapping tutorial by @MissNeriss

Merry Christmas!

*Affiliate link


#rusticlacesquare Blanket is Finished!

It has taken me months and months, but finally, it’s finished!

unnamed (55)

It’s absolutely beautiful.  Spectacular even.  I really struggled to capture the beauty in photographs, to be honest.

#rusticlacesquare blanket with edging border tutorial on missneriss.com

I used the joining method that Marianne from MaRRose-CCC came up with, which is essentially genius.  The blanket just grew beautifully and the joins are virtually invisible which I just love.  Especially as I hate joining motifs.

unnamed (52)

Once the blanket was done I had to come up with an border.  I searched the internet high and low for inspiration, but to be honest, there aren’t a lot of examples out there.  Cornel Strydom used a simple scalloped edging, which I loved, but wasn’t quite right for me.

In the end I went digging through my crochet stitch bibles, and found an edging that I liked, but wasn’t quite right either, so I decided to modify it slightly.

#rusticlacesquare blanket with edging border tutorial on missneriss.com

Here’s a close-up:

unnamed (51)

So how did I do it?  It’s really very simple.

The pattern works on a 10 stitch repeat, so first of all, what you need to do is do a lap around the blanket in single crochet stitches, to get the edging into multiples of 10.  Each finished square has loose loops at the corners, I joined those with one SC around both loops.  I had to fudge it a little bit, because the squares themselves don’t have quite the right stitch count.  I crocheted into each stitch, and in the chain sections I crocheted one stitch less than the chain.  So when the last round of the square has a chain 3, I single crocheted 2 stitches into that space.  Make sense?  Otherwise the edging will become too ruffly.

On the second round, start at a corner, skip the next 4 stitches, Treble Crochet into the fifth.  Chain 1, and TC, Ch1, 4 more times.  Skip 4 stitches, SC into the next, skip 4 stitches, TC, CH1 5 times into the next.  Repeat that fan pattern all the way around.  there should be a SC at each corner, so there is a fan on each side of the corner.

The third and final round, start at a corner and Double Treble, CH2 8 times into the SC in the corner of the previous round.  SC into the middle TC from the previous round, CH2, DTC (Double Treble Crochet), CH2 4 times into the SC stitch between fans from the previous round. SC into the middle TC from the previous round.  Repeat this all the way round, making sure that you have the 8 DTC stitches in each corner.  If you take a look at the pic above, you’ll see what I mean.

I cobbled together a chart.  It’s not fabulous because I’m still getting my head around the Stitchworks software, but it will help you get the idea.

C:UsersNerissa MuijsDesktop2016-02-17_1145.png

I’m so happy with the results, I just love the blanket. I just want to wrap myself in it, with a cup of tea and enjoy the sunshine.  You know what?  I’m going to do just that. #enjoyeverymoment


#rusticlacesquare blanket with edging border tutorial on missneriss.com

For this project I used Scheepjes Linen Soft.  I used almost 5 balls of each colour, and just over two for the border.  I have enough yarn leftover to make at least one matching cushion, when I get the chance.

ETA:  If you haven’t seen or made the square for yourself already, here’s the chart:

wpid-4493016b2e75b00c4f3e080b2d64b3fc.jpg

If you don’t read charts, I’ve found a written description by Crochet Tea Party on Ravelry.

You can pick up the yarn at Scheepjes retailers all over the Benelux, or internationally from Wool Warehouse.

Chunky Crochet Brioche Cowl Reveal and How To

Chunky Crochet Brioche Cowl - free pattern available from missneriss.com.

It’s here!  Last week I was showing you the gorgeous Scheepjes Vinci yarn that I was working with, and this week here’s the result!  A beautiful crochet brioche cowl that has barely left my neck since it was completed.

Chunky Crochet Brioche Cowl - free pattern available from missneriss.com.

I even had to take a selfie or two at the top of a mountain!

Chunky Crochet Brioche Cowl - free pattern available from missneriss.com.

It was so cold up there, I needed that cowl let me tell you!

One of the cool things about this cowl, and what the photos don’t really show you (except that top one up there) is that the cowl is reversible!  So, if you prefer vertical colour stripes like I do, you wear it that way, but if you’re more into horizontal, just flip it over and you have a totally different accessory.

So, let’s get down to business.  I’ve created a pdf of the pattern for you.  The pattern also has a photo tutorial on how to do the crochet brioche stitch.  What would you think about possibly seeing a video tutorial?  Should I finally dip my toes in and make one?  Let me know in the comments.

As always, please do share your projects with me on social media.  You know I’m all over Instagram like a bad smell, so tag me @miss__neriss (that’s with two “_”) and also use the hashtag #obsessedwithcrochet.  This is a little community I’m going to build, with more info coming soon…

Click the heading below to be taken to the pattern, and I hope you enjoy!!

Chunky Crochet Brioche Cowl Pattern Free Download

Chunky Crochet Brioche Cowl - free pattern available from missneriss.com.

Don’t forget: you can pick up the yarn at Scheepjes retailers all over the Benelux, or internationally from Deramores, Wool Warehouse, and at Paradise Fibers in North America!

Show and Tell: New Yarn, New Crochet Brioche Design

Hello from Amazing Austria!
Alpbach forest by missneriss

Alpbach Forest by MissNeriss
I’m lucky enough to be on holiday in one of the most beautiful places on earth and because I’m really not a skier, I made sure I brought these beauties along with me!

Scheepjes Vinci in colours 9 and 21
This is the lovely Scheepjes Vinci, a 60/40% wool/acrylic blend that is just the softest bulky yarn ever. It has the warmth of wool and the softness of acrylic, which I love. Especially as I’m wool-sensitive and a bit of a Merino snob as you know!

The yarn calls for an 8mm hook (or needles), but for this project I’m going up a couple of sizes to a 10mm hook.  I’m also using colours 9 and 21 for this project.

So what am I making? Well from the title you already know that it’s crochet brioche, and you know I’m in the Alps and I’ve already made a Brioche Beanie, so because I need to keep warm I’m making a cowl!


I love the knit look and the reversible pattern of the crochet brioche, it’s just so versatile!

It won’t be long and I’ll have more photos of the finished cowl, and not to mention: the tutorial!

You can pick up the yarn at Scheepjes retailers all over the Benelux, or internationally from Deramores, Wool Warehouse, and at Paradise Fibers in North America!