Category Archives: Free

Legacy Mandala – Free Crochet Pattern

Ready to start working on your Legacy Mandala pattern? Here we go!

Below is the pattern using UK terminology. You will be able to get your hands on the US version via a pdf from my Ravelry store or LoveCrafts. I’ll work on an NL translation too, but this will take time.


GET THE YARN

You’ll need two skeins of Scheepjes Legacy No. 6 in off-white (ecru) and a wire hoop. I found my 90cm hoop at Lampenkapmaterialen.com here in Almere, but there are places that you can find them everywhere; have a look to see what’s local.

For the yarn, Scheepjes has a full list of stockists on their website, you can search for one close to you.

In Europe head to Caro’s Atelier*
In the UK Black Sheep Wools*


Materials

Scheepjes Legacy Nr. 6 (100% mercerised cotton, 100g, 240m), colour 089 off-white x2 balls
90cm wire hoop.

Measurements

90cm in diameter when stretched onto hoop

Abbreviations

UK terms

ch chain
ch(1)-sp chain space
dc double crochet
dcblo double crochet back loop only
tr treble crochet
dtrcl double treble crochet cluster
rep repeat
ss slip stitch(es)
ssblo slip stitch back loop only
st(s) stitch(es)

Repeat Format

[(….)] x times Work the instructions between parentheses and brackets the total number of times stated.

Pattern Notes

This pattern is worked in rounds, slip stitching to join. The last ch round is worked around the hoop. You can increase or decrease the diameter by adding or removing a set of repeats between rounds 15-24.

Instructions

Round 1 (tr, ch1) 11 times in a magic ring, ss to join
Round 2 ch1 (does not count as a st), 22dc (in each st and ch-sp), ss to join
Round 3 ch6, dc next, (dc, ch5, dc) 10 times, ss to join
Round 4 ss to top of ch, (ch5, ss to top of next ch) 11 times
Round 5 ch1, (5dc in ch5-sp, miss ss) 11 times, ss to join
Round 6 3ss, (ch6, miss 4, ss) 11 times
Round 7 3ss, (ch6, ss to next ch6-sp) 11 times (ss to first ss of the round to join)
Round 8 4ss (ch7, ss to next ch6-sp) 11 times (ss to first ss of the round to join)
Round 9 ch3, 2dtrcl in the first st, (ch4, ss to middle of ch7-sp, ch4, 3dtrcl in next ss) 10 times, ch4, ss in ch7-sp, ch4, ss to join
Round 10 (ch5, 3dtrcl in next ss, ch5, ss in dtrcl from prev round) 11 times
Round 11 ch3, 2dtrcl in the first st (ch6, ss to 3dtrcl from prev round, ch6, 3dtrcl to next ss), 10 times, ch6, ss in 3dtrcl, ch6, ss to join
Round 12 ch1 (does not count as a st), [dc, ch12, miss (ch6, ss, ch6)], rep 11 times, ss to join
Round 13 ch1, (miss dc, 12dc in ch12-sp) 11 times, ss to join
Round 14 (ch7, 6ssblo) 11 times
Round 15 4ss to top of ch, (ch6, ss to next ch) 11 times, ss to join
Round 16 4ss, (ch7, ss to ch6-sp) 11 times, ss to join
Round 17 4ss, (ch8, ss to ch7-sp) 11 times, ss to join
Round 18 5ss, (ch9, ss to ch8-sp) 11 times, ss to join
Round 19 rep round 9 (ch9-sp instead of ch7-sp, and 21 repeats instead of 10)
Round 20 rep round 10 (22 repeats)
Round 21 rep round 11 (21 repeats)
Round 22 rep round 12 (22 repeats)
Round 23 rep round 13 (22 repeats)
Round 24 rep round 14 (22 repeats)
Round 25-34 rep rounds 15-24
Round 35 rep round 15
Round 36 rep round 16
Round 37 rep round 17
Round 38 rep round 18

Now it’s time to work around the hoop. Each ch10 should loop over the hoop before slip stitching to next ch-sp.

Round 39 ss5, (ch10, ss to ch9-sp) to end, ss to join
Round 40 dc sets of 10 between each loop over the hoop all the way around the hoop. Ss to join.
Optional to create a loop to hang the legacy mandala: ch7, ss to next, tie off.

Chart

Please note, the chart shows only a segment of the full mandala and rounds 15, 17, 25, 27 and 29 slip stitch backwards on the chart. This is to keep the start and finish of the rounds in roughly the same place on the chart. You can ss forward, as normal.

Also note, the chart shows rounds 1-30, when the written pattern has a repeat of rounds 15-24. Please also repeat rounds 15-24 when working from the chart (unless making a smaller mandala).

The chart key has both UK and US terms (dc/sc)

*affiliate link

Koala Lovey – Free Crochet Pattern

It’s Pattern Day!

Are you ready, do you have your yarn?

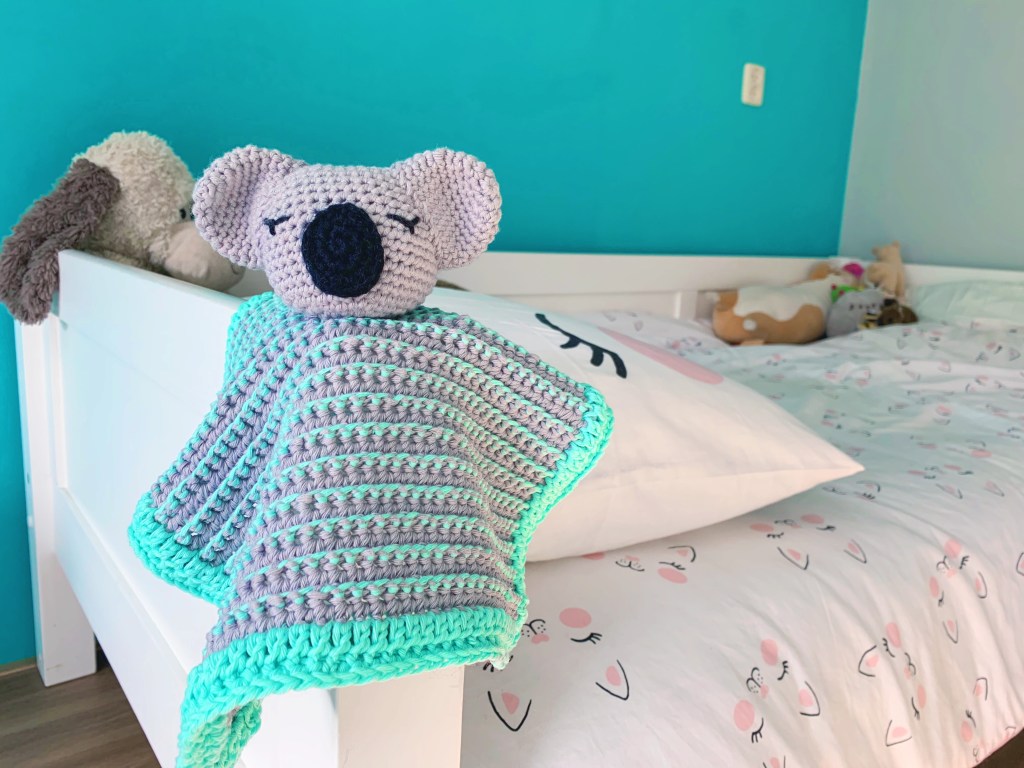
close up of koala lovey

GET THE YARN

Scheepjes Cahlista is an aran weight yarn, made with 100% cotton. I’m using two balls of colour 074 Mercury, and you will also need a single ball of the complementary colour. Have a look at the Scheepjes Website for colour inspiration and stockists, there are more than 100 colours to choose from!

You can order the yarn online from my local yarn store Caro’s Atelier*.

Internationally there’s Wool Warehouse* (global shipping) and if in the US check out Dot’s Yarn Den.

Note: this version of the pattern uses UK terms. If you would like to access US terms or printable PDFs in both UK and US terms, you can purchase the patterns from either Ravelry or Lovecrafts.com for a small fee.

Please share your projects using #KoalaLovey in the socials and tag me everywhere!

Let’s go!

Materials

MC: Scheepjes Cahlista in 074 Mercury – 2 balls (100% cotton, aran weight, 50g, 85m)
CC: Scheepjes Cahlista in your choice – 1 ball (100% cotton, aran weight, 50g, 85m)
Scrap black, preferably Scheepjes Cahlista – about 2 metres
I used 385 Chrystalline and 256 Cornelia Rose in my samples.
4mm hook (amigurumi parts)
6mm hook (mini-blanket)
5mm hook (border of mini-blanket)
Toy filling (or you can stuff the head with scrap yarn or anything you have at home that will be a bit squishy)

Tension

Mini-blanket: 16 rows and 17sts over 10 cm in YUdc

Head: not important, but stitches should be tight, so use at least a hook size down from what the yarn recommends.

Measurements

Mini-blanket – 30 x 30cm blocked

Abbreviations

(UK terms)
Ch chain
MR magic ring
Ss slip stitch
St(s) stitch(es)
Ch chain
Dc double crochet
DcInc double crochet increase (2 sts increased in 1 st)
Dec double crochet decrease (1 st worked decreased over 2 sts)
HtrInc half treble crochet increase (2 sts increased in 1 st)
Tr treble crochet
YUdc yarn under double crochet
MC main colour
CC contrast colour.
Rep repeat
Pm place marker
Rm remove marker
Flo front loop only
Blo back loop only

Pattern Notes

This pattern is worked both amigurumi style in continuous rounds (with no joining) and sewn together to make the koala’s head, and also back and forth in rows using the yarn under colourwork technique to make the mini-blanket.

Work instructions inside parentheses (…) the indicated number of times.

Special Abbreviation

YUdc (yarn under double crochet) is a colourwork technique using two strands of working yarn. To work the stitch insert hook with mc, yoh, pull up a loop, with cc yoh from front to back (keeping cc in front of mc), with mc yoh, pull through 3 loops.

Check out the short instruction vid here.

Instructions

Koala head

Working in rounds, with MC and 4mm hook

Round 1 6dc in MR (mark first st and move marker up each round to keep track of starting point) (6)
Round 2 6dcinc (12)
Round 3 (inc, dc) six times (18)
Round 4 (inc, 2dc) six times (24)
Round 5 (inc, 3dc) six times (30)
Round 6 (inc, 4dc) six times (36)
Round 7-17 36dc (36)
Round 18 dec twice, pm second dec, 14dc, dec twice, pm second dec, 13dc, dec, rm. (32)
Round 19 dec, pm, 12dc, dec twice, rm, pm second dec, 11dc, dec, ss. (28)

Cut yarn, leave tail long enough to sew top shut when assembling.

Ear

(make 2)
Working in rounds, with MC and 4mm hook

Round 1 6dc in MR (6)
Round 2 6dcinc (12)
Round 3 (inc, dc) six times (18)
Round 4 inc, pm in second st of inc, 8dc, inc, pm in second st of inc, 9dc (20) (starting point is moved by 1st )
Round 5 20dc
Round 6 inc, pm in second st of inc, 9dc, inc, pm in second st of inc, 10dc (22) (starting point is moved by 1 st)
Round 7-10 22dc. Ss (22)

Cut yarn and leave tail to sew to head when assembling.

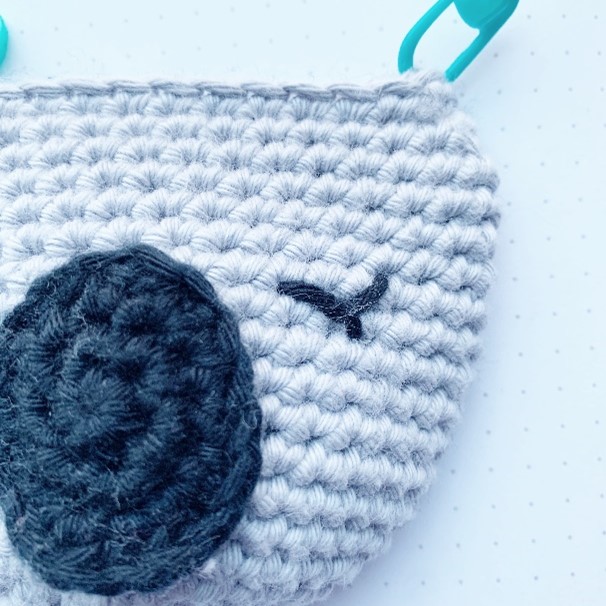
close up of koala lovey head ready for assembly

Nose

Working in rounds, with black and 4mm hook

Round 1 6dc in MR (6)
Round 2 6dcinc (12)
Round 3 (3htrinc, 3dc) twice, ss to join (18)

Cut yarn, leave long tail to sew to head and make eyes.

Mini Blanket

Working back and forth in rows using both MC and CC, 6mm hook

See short video tutorial here.

Row 1 MC, ch42
Row 2 YUdc in third loop and each ch across to end (40)
Row 3 ch1 (does not count as a st), YUDC to end (40)
Row 4-42 rep row 3 (40)

Cut MC and continue working the border in CC.

Border

Working in rounds 5 and 6mm hooks

Round 1 turn, with 6mm hook, work 40ss loosely across to corner, ch1, 40ss across the rows (note, there are two more rows than border sts, so you will need to “lose” two sts). Continue around to end and ch1 and ss to 1st st of the round.
Round 2 change to 5mm hook, ch2, working into the ss, [tr to corner ch (tr, ch1 tr) in flo of corner ch], rep around to end, ss to join. Cut yarn.
Round 3 flip your work so the back is facing you, ss to join at a corner, ch2, tr in the back of the ss from round 1, rep round 2.
Round 4 now we’ll join the two rounds. Ch1, dc in the flo of round 3 sts and the corresponding blo from round 2 sts to join the two rounds together. Rep to corner, 3dc in the corner ch, then rep all the way round to end. Ss to join, cut yarn, weave in ends and block.

Assembly

pieces of koala lovey head to be assembled

Position nose 7 rounds below opening at mid-point between markers, sew to head.  Make eyes 1 st to the side of the nose, 3 sts wide and slightly angled (1 round) upwards at the outer side. Fasten the eye loop on row below to fix it in place.

close up of koala lovey nose for assembly
close up of koala lovey eye and nose for assembly

Stuff the head with toy filling and sew shut. Attach ears to side of head on an angle, 3 sts in from the sides of the sewn shut head.

close up of koala lovey eye, ear and nose for assembly

Sew the head to the middle of the blanket, either using the leftover yarn tails, or a new length of yarn, using round 3 of the head as your guide.

close up of koala lovey head
Koala lovey crochet toy lying on a bed

*Affiliate link

Free Crochet Pattern – Jan’s Scarf

90C8345E-1557-4F85-A870-987CF2BA9BF3 (1).jpg

I know you’ve been following the progress on my skies project over the last few weeks and today we’re launching the pattern!

The pattern below uses UK crochet terms. A pdf version of this pattern in your choice of UK or US terms is available to purchase on Ravelry for €2.50, with a Dutch translation to follow soon.

To purchase the yarn, head to one of the following sites:

Scheepjes has all the stockist listed on their website, so you can find one local to you.

Wool Warehouse* and Deramores* ship all over the world, Knotty House* is in North America, Black Sheep Wools* in the UK, and of course my local store is Caro’s Atelier* here in Almere.

IMG_1235 (1).JPG

What You’ll Need

3 hanks of Scheepjes Skies Light*
Colour 1: Cirrocumulus 109
Colour 2: Cirrus 110
Colour 3: Cumulus 111
3.5mm (E/4) hook or hook to obtain tension
Tapestry needle
Blocking mats and pins

Measurements

215 cm long (point to point) x 30 cm wide

Tension

26 sts and 13 rows to measure 10 x 10 cm over shell st

Abbreviations

(UK terms)

Ch chain
Sts stitches
Yoh yarn over hook
Sp(s) space(s) between shell stitches
Tr treble crochet
2trInc two treble crochet in one stitch to increase
Tr2tog 2 treble crochet stitches decreasing into one stitch
Puff-st puff stitch (yoh, insert hook, pull up a loop, yoh, insert hook, pull up a loop, yoh, pull up a loop, yoh, pull through all loops. Do not ch1)
Shell 3 treble crochet stitches in 1 stitch
Ss slip stitch
Rep repeat

Notes

This pattern is worked back and forth in rows, increasing at one end and decreasing at the other.  The increases and decreases will always be worked at the same end each row, creating an oblong shape.

We also work puff stitches.  A great video tutorial can be found here: https://www.youtube.com/watch?v=5O8QtxZFYGo. It’s important to note that often when completing a puff stitch, a ch1 is worked.  For this pattern, we do not work the ch1.

At the beginning of each row work a ch2. This does not count as a stitch.  The first instructed stitch is always worked into the very first stitch of the row.

It can be that the stitch pattern and count doesn’t exactly match up to the instructions; this is because it can be easy to add or lose a stitch at the decrease end if not careful.  Don’t worry too much, just keep an eye on it and don’t decrease over a couple of rows to get your stitch count back up (or down) to the right number.  Blocking and adding the fringe at the ends will disguise any “wonkiness.”

Take care using Scheepjes Skies, It’s a gorgeous, naturally dyed yarn using indigo.  It’s not colour fast, and if left in the sun the colour will fade.  Treat your wrap and yarn with extra special care.

You can also substitute the pack of Skies Light minis to complete this pattern, although there is less yarn in a full set of minis compared to three full hanks.  Note: I have not tested this pattern using the minis, but from a maths perspective I recommend skipping rows 5 – 6, and 36 – 37. You may also need to skip a shell stitch row in the middle section (colour 2 below) to have 4 rows instead of 5. There may not be enough yarn leftover to make a long fringe, so bear this in mind.

img_1236.jpg

Instructions

Colour 1

Row 1 ch 301 (299 +2)

Row 2 ch2 (does not count as a st here or throughout), 2trinc in the 3rd ch from the hook, tr into each ch to and into the 3rd last, tr2tog in the last 2 ch, turn.

Row 3 ch2, tr2tog, (puff-st, tr) to and into the 2nd last st, 2trinc, turn.

Row 4 ch2, 2trinc, tr to and into the 3rd last st, r2tog, turn

Row 5 ch2, tr2tog, (ch1, miss 1, tr) to and into 2nd last st, 2trinc, turn

Row 6 rep row 4

Row 7 rep row 3

Row 8 rep row 4

Colour 2

Row 9 ch2, tr2tog, miss 1, (shell, miss 2), rep to and into 3rd last st, miss 1, 2trinc, turn

Row 10 ch2, 2trinc, shell in each sp to sp before the last shell of previous row, miss shell, tr last, turn

Row 11 ch2, tr, miss 1st shell, shell in next and all sps to last sp, 2trinc last tr, turn

Row 12 ch2,  2trinc, shell in each sp to the last shell, miss the last shell, tr last st, turn

Colour 1

Row 13 ch2, tr2tog, tr to and into 2nd last st, 2trinc, turn

Row 14 ch2, 2trinc, (puff-st, tr) rep t and into 3rd last st, tr2tog, turn

Row 15 rep row 13

Row 16 ch2, 2trinc, (h1, mist 1, tr) rep to and int 3rd last st, tr2tog, turn

Row 17 rep row 13

Colour 2

Row 18 ch2, 2trinc, miss 1, (shell, miss 2) rep to and into 4th last st, miss 1, tr2tog, turn

Row 19 ch2, tr, miss shell, shell in each sp to last sp, miss 1 st, 2trinc, turn

Row 20 ch2, 2trinc, shell in each sp to last shell, miss last shell, tr last st, turn

Row 21 rep row 19

Row 22 rep row 20

Row 23 rep row 19

Colour 3

Row 24 rep row 4

Row 25 rep row 5

Row 26 rep row 4

Row 27 rep row 3

Row 28 rep row 4

Colour 2

Rows 29-32 rep rows 9-12

Colour 3

Rows 33-37 rep rows 13-17

Row 38 rep row 14

Row 39 rep row 13

Tie off, use the left over yarn to cut 20cm lengths to fold in half and knot into each row to create a fringe.

Block and enjoy!

Please add your projects to Ravelry, and if you use the minis for this I will certainly love to hear how you go and I can adjust the tips based on your feedback!

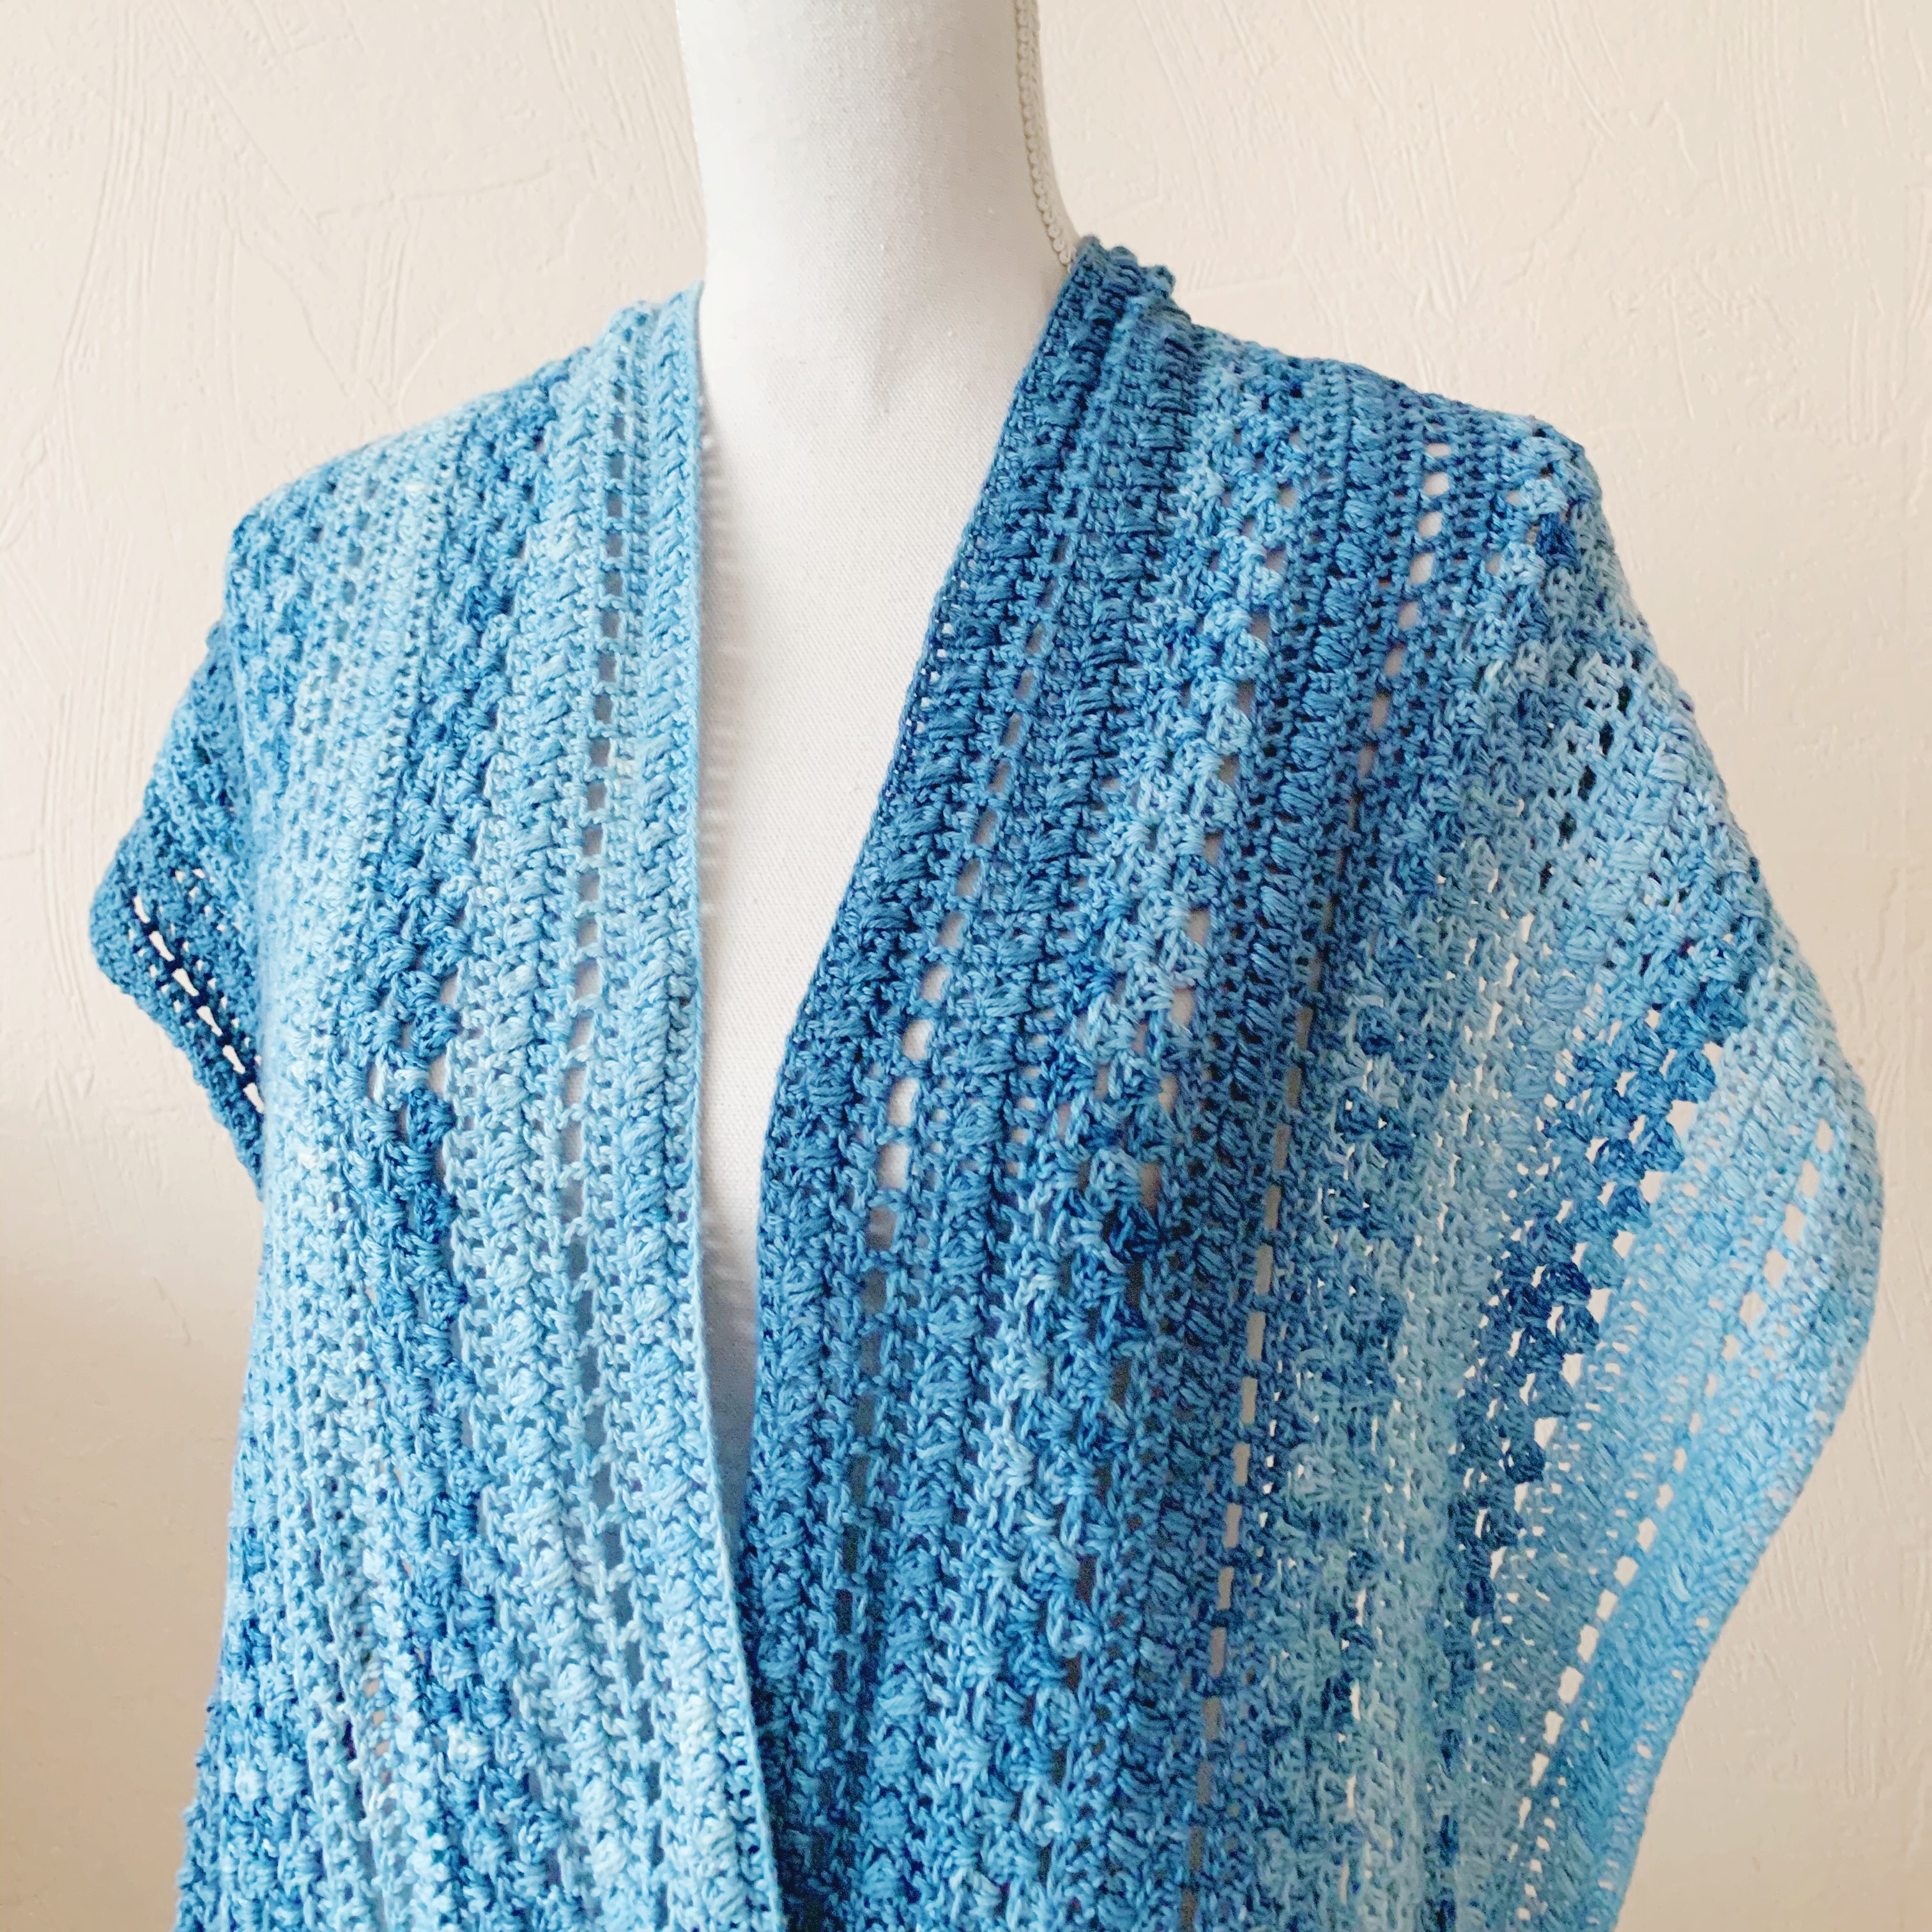
IMG_1232 (1).JPG

*affiliate link

Olaf (the warm shrug) Free Crochet Pattern

Just in time for Christmas, I’m sharing my latest free pattern with you!

While I was making this, I kept wondering what I should call it. I was hoping for a yoga related name, as I’m using Scheepjes Namaste, but as soon as I tried it on it felt like a warm hug. And then because I have a young kid, all I could hear in my head (over and over again, omg) was “I’m Olaf, and I like warm hugs,” so I couldn’t call this anything but Olaf (the warm shrug)!

What you’ll need for this pattern is 7 balls of Scheepjes Namaste in your favourite colour and a 10mm hook. I used Warrior (614). I also deliberately made this a one size fits all design and the size that fits me (XL) fits my husband and several friends I asked to try it on for me. If you’re a very small person, it may well be too large for you, but there are some tips on how to resize it if you would like to make it smaller.

The pattern below is written in UK crochet terms, but if you prefer US terms I have a separate PDF for both versions for a small fee to download from my Ravelry store. That version is print friendly, and there is also a printer/e-reader friendly version for the UK terms as well for a small fee.

Abbreviations

(UK Terms)
Ch chain stitch
Htr half treble crochet
Tr treble crochet
Trtcl treble crochet tiny cluster
Tr2tog treble crochet two together (decrease)
InV inverted v-stitch (see notes)
[…] (…) repeat instructions between brackets the required number of times.
Rep repeat
SS slip stitch

Notes

Olaf (the warm shrug) is designed to be one size fits most, but by adjusting the sleeve length, you’ll be able to make it smaller, or larger. There will be information on how to do that at the end of the instructions.

The shrug is created back and forth in rows, then the corners are folded in and stitched together to make the lapels and yoke, then we attach a collar and sleeves.

The InV stitch is an inverted V-stitch: YO, insert hook, pull up a loop, YO, pull through 2 loops, miss 1, YO, insert hook, pull up a loop, YO, pull through 2 loops, YO, pull through all loops.

Instructions

Body

  1. Ch 89 (84 +5), mark the 43rd stitch for later, and leave a 40cm tail for sewing the sides (you can roll this up and poke it in through some stitches to hold it out of the way).
  2. Trtcl in the 3rd ch from the hook, tr to last, trtcl. Ch 2, turn.
  3. Trtcl, tr [ch2, miss 2, tr next] to last, trtcl. Ch 2, turn.
  4. Trtcl, tr, ch 1 [miss 2 (tr, ch 1, tr in next tr)] to last 4, ch 1, miss 2, tr, trtcl. Ch 2, turn.
  5. Trtcl, tr, ch 2 [InV, ch 2] to last 2, tr, trtcl last. Ch 2, turn.
    Repeat rows 3-5 9 times
  6. Trtcl, tr, [2 tr in the ch sp, tr next] to last, trtcl. Tie off, leave 40cm tail.

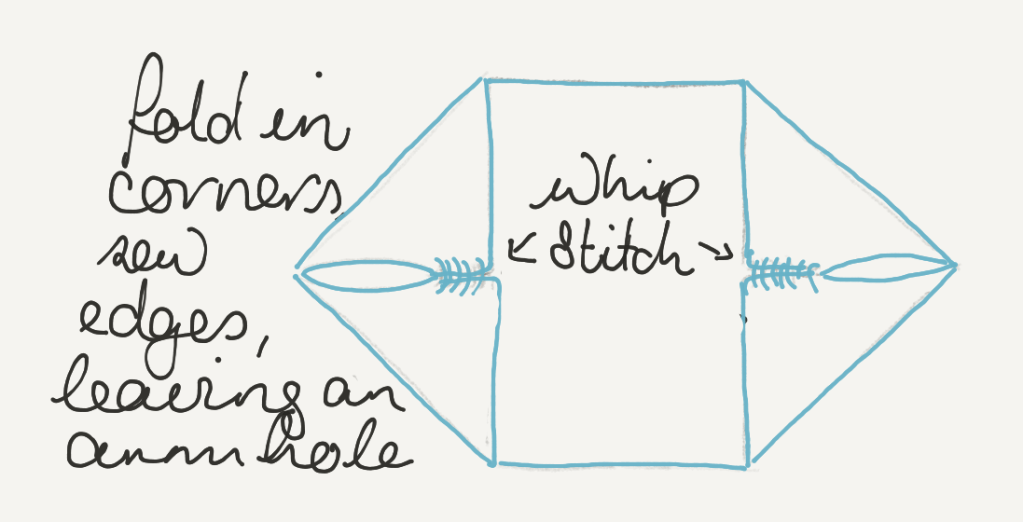
Fold top and bottom corners into meet in the middle, and using the long tails, whip stitch the from the outside corners toward the fold for 10 cm. Repeat for the other side. Take care that you will be able to work 18 trebles into the opening (the gaps between rows) when making the sleeves.

Sleeves

Make 2

Join at the seam with a standing tr, ch1 (or ss to join and ch 4), [tr in the next space between rows, ch1] repeat around, ss to join. You should have 18 trebles. If not, adjust your stitch placement accordingly.

  1. Ss into the ch space, ch 2, tr next ch sp, ch 1 [tr2tog in same sp and next sp, missing the treble in between, ch 1] repeat to last tr2tog in the last sp and 1st sp, ch 1, ss to join.
  2. Ss to ch sp, ch 1, tr same sp, [ch 1, tr next sp], repeat to last, ss to join. Note, there is no ch between the last and 1st trebles, this is a decrease.
  3. Ss to ch sp, ch 2, tr next ch sp, ch 1, [tr2tog in the same sp and next sp, missing the treble in between], repeat to last ch sp, ch 1, tr2tog in the last sp and 1st sp, skipping 2 trebles. Ch 1, ss to join.
  4. Repeat round 3
  5. Repeat round 4
  6. Ss to ch sp, ch 1, tr, ch 1, [tr next ch sp, ch 1] repeat to end, ss to join.
  7. Ss to ch sp, ch 2, tr next sp, ch 1 [tr2tog in the same and next sp, missing treble in between, ch 1], rep to last, tr2tog last sp and 1st sp, ch 1, ss to 1st tr.
  8. Repeat round 7
  9. Repeat round 8
  10. Ss to sp, ch 1, 2 htr in the same sp, [2 htr in the next sp] repeat to last, ss to join.
  11. Repeat round 11. Tie off.

Note: to make the shrug smaller, you can make the join seam longer. This will make the lapels and collar wider, and you will need to work fewer rounds on the sleeves (skip rows 9 and 10).

Your stitch count in round 1 will also be less, but the instructions for rest of the rounds will work if you have fewer trebles as well.

If you like, you can omit the sleeves altogether, and instead work rows 1, 11 and 12 to make a cuff.

Collar

Starting at the marker from the very first row, count and mark the 18th stitch in each direction. This is the bottom of the shrug. Note: Make sure you check to hold the work the right way out, so the sleeves won’t be inside out.

  1. Join at middle marker with a standing tr (or ch 3), ch 1, tr in the same st, [miss 2, (tr, ch 1, tr same)] to marker, remove marker, [miss 1, (tr, ch 1, tr same)] to marker, remove marker, [miss 2 (tr, ch 1, tr same)] to last, ss to join.
  2. Ss to ch sp, ch 1, [tr, ch 1, tr same] in the same space, [tr, ch 1, tr same] in the next ch space, and to the last, ss to join.
  3. Repeat round 2, mark the join, tie off.
  4. Count 16 V-stitches (tr, ch1, tr) and join with an ss to the next ch sp. Ch 2, [dc, ch 1, dc] next ch sp, [htr, ch 1, htr] next ch sp, [tr, ch 1, tr] next 46 spaces, [htr, ch 1, htr] next ch sp, [dc, ch 1, dc] next ch sp, ch 2, ss in the next ch sp, tie off.

Weave in ends, block gently if desired.

Feel free to add an oversized button where the sleeves are seamed if you want to close it like a jacket.

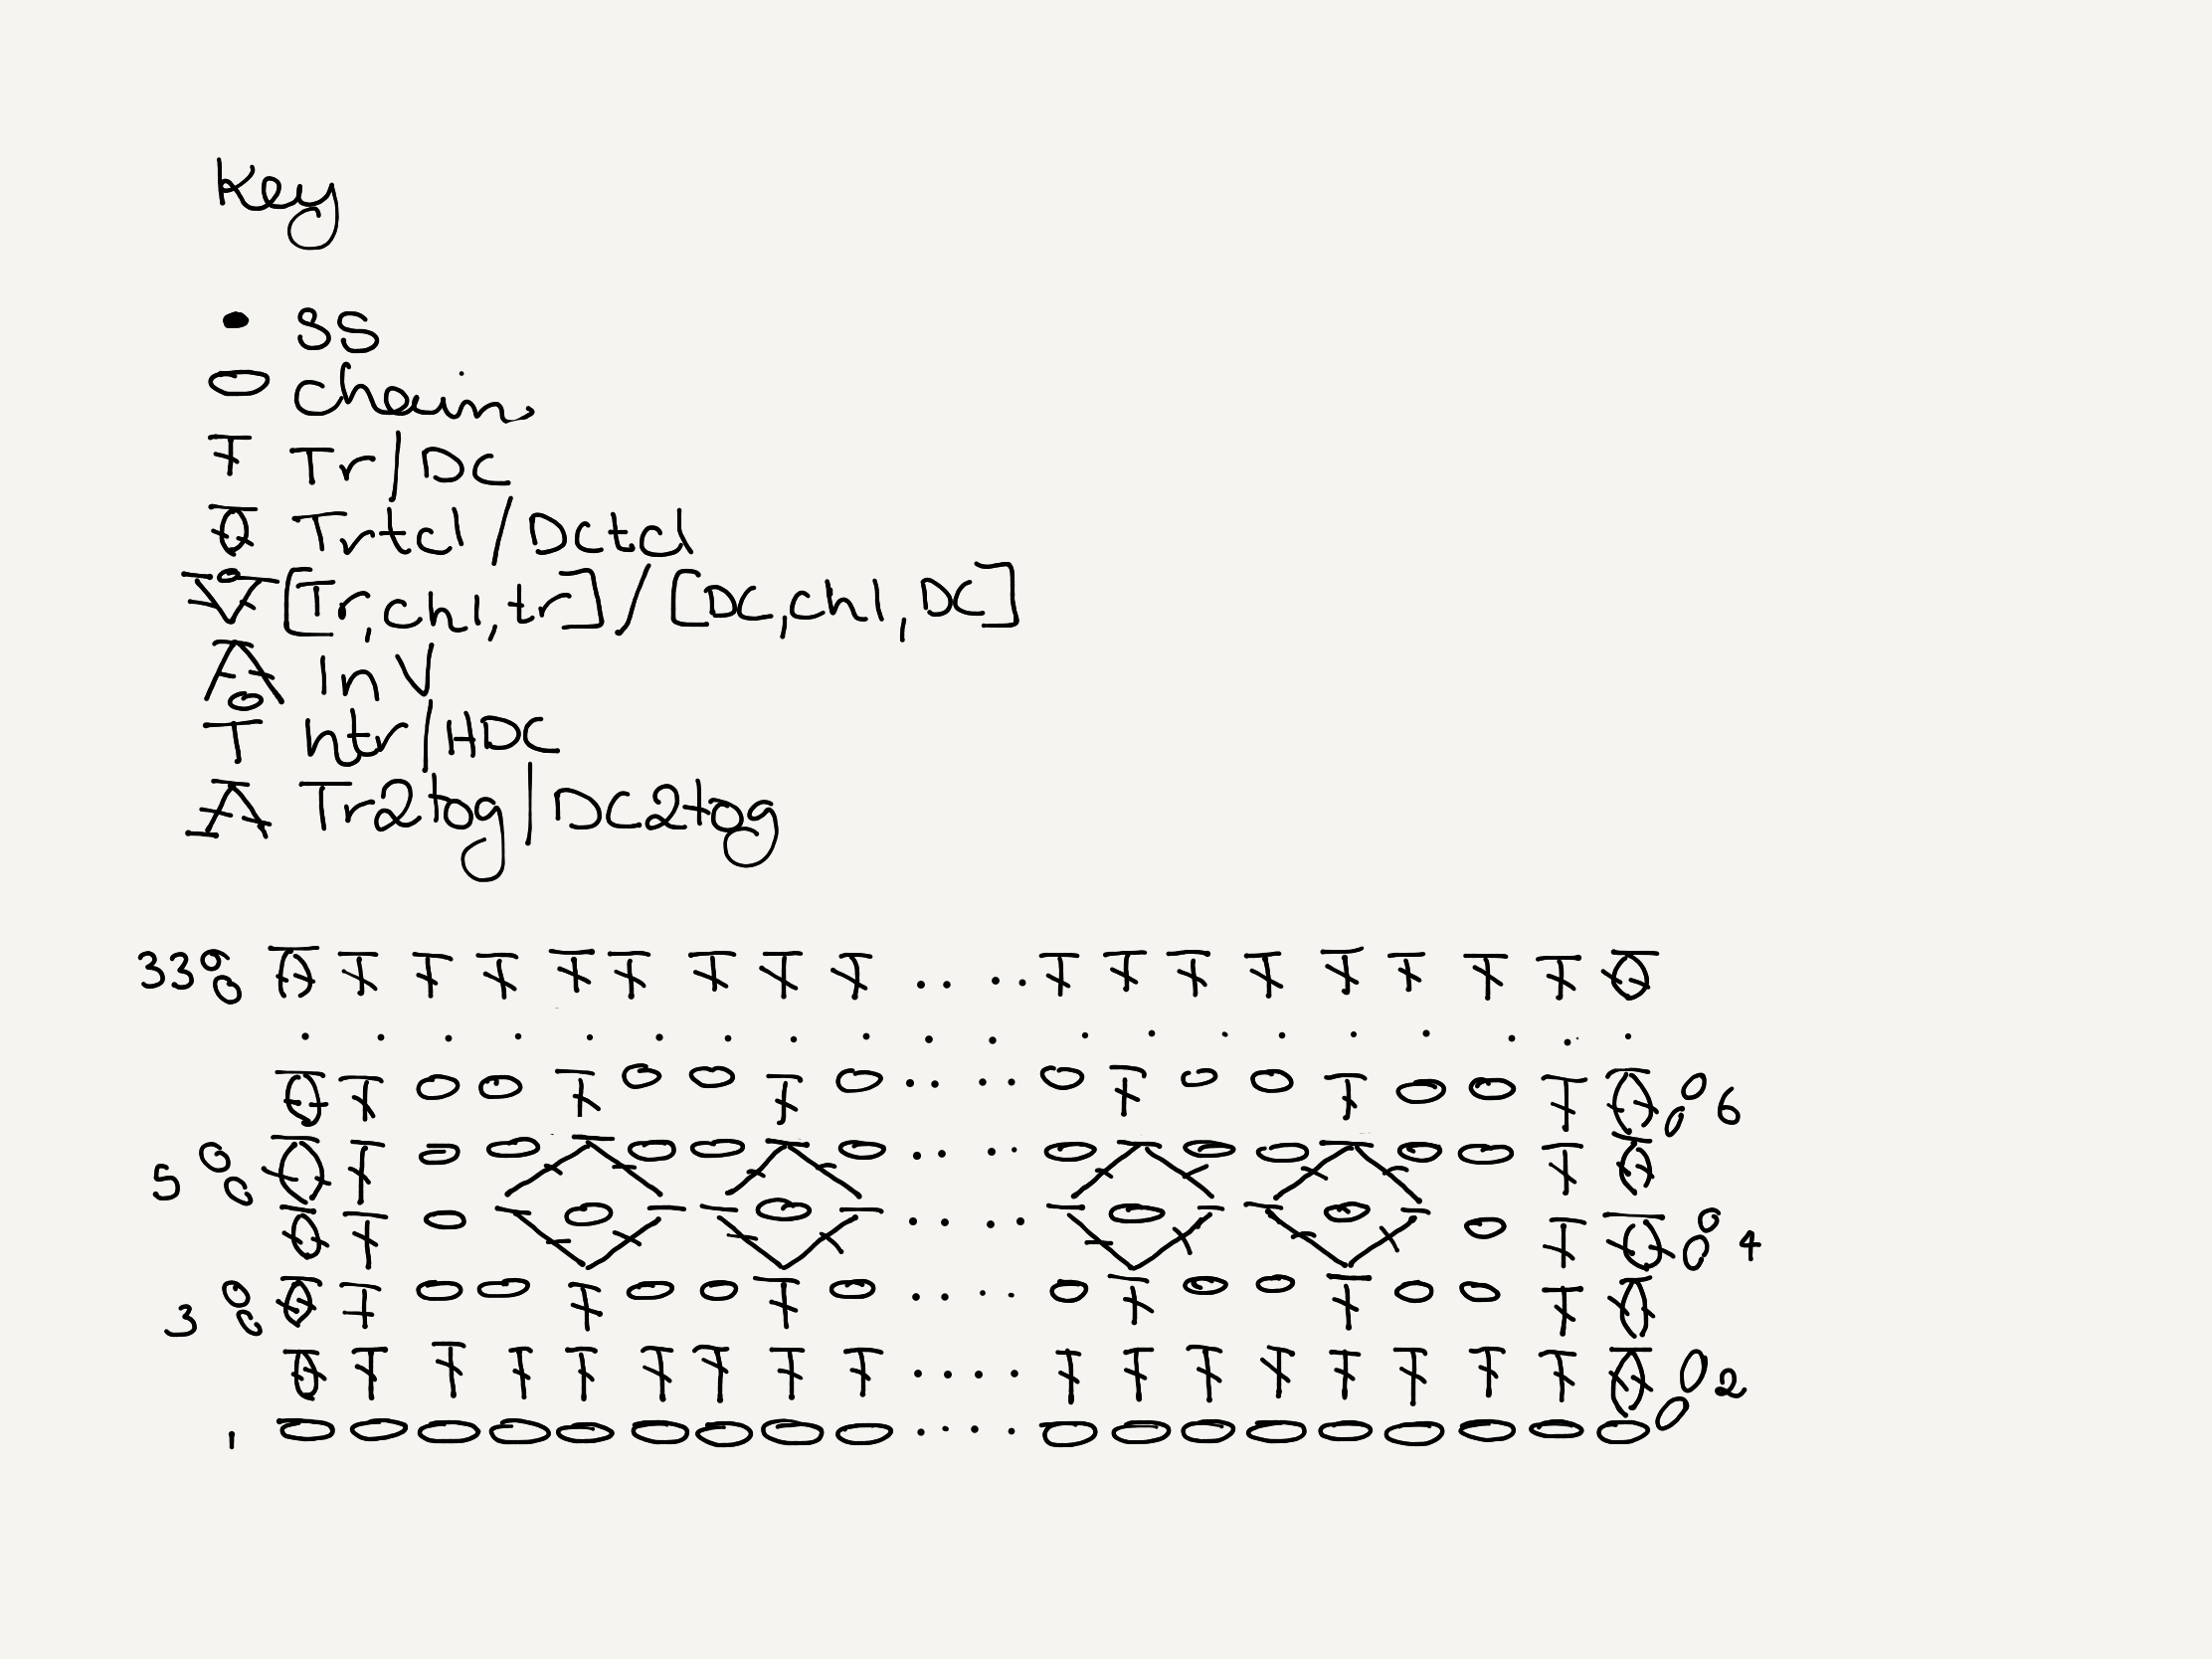
Chart

What do you think? Do you like warm hugs? I’d love you to make this, and you can purchase the yarn from a bunch of great retailers. Scheepjes lists all the shops on their website, and if you’re in the Netherlands I recommend my local yarn store, Caro’s Atelier*.

For those of you across the globe, you can order from Wool Warehouse*, and Deramores*, who both offer world wide shipping, Knotty House* is a great retailer in North America, and I’ve just discovered Belle Mae Yarns in Australia! Plus of course if you’re in South Africa Be Inspired has the entire Namaste collection.

While you’re here, have you seen my other Scheepjes Namaste pattern? It’s the Matchy Matchy Hat, which works up in under an hour!

Merry Christmas, and have a warm hug from me! XO

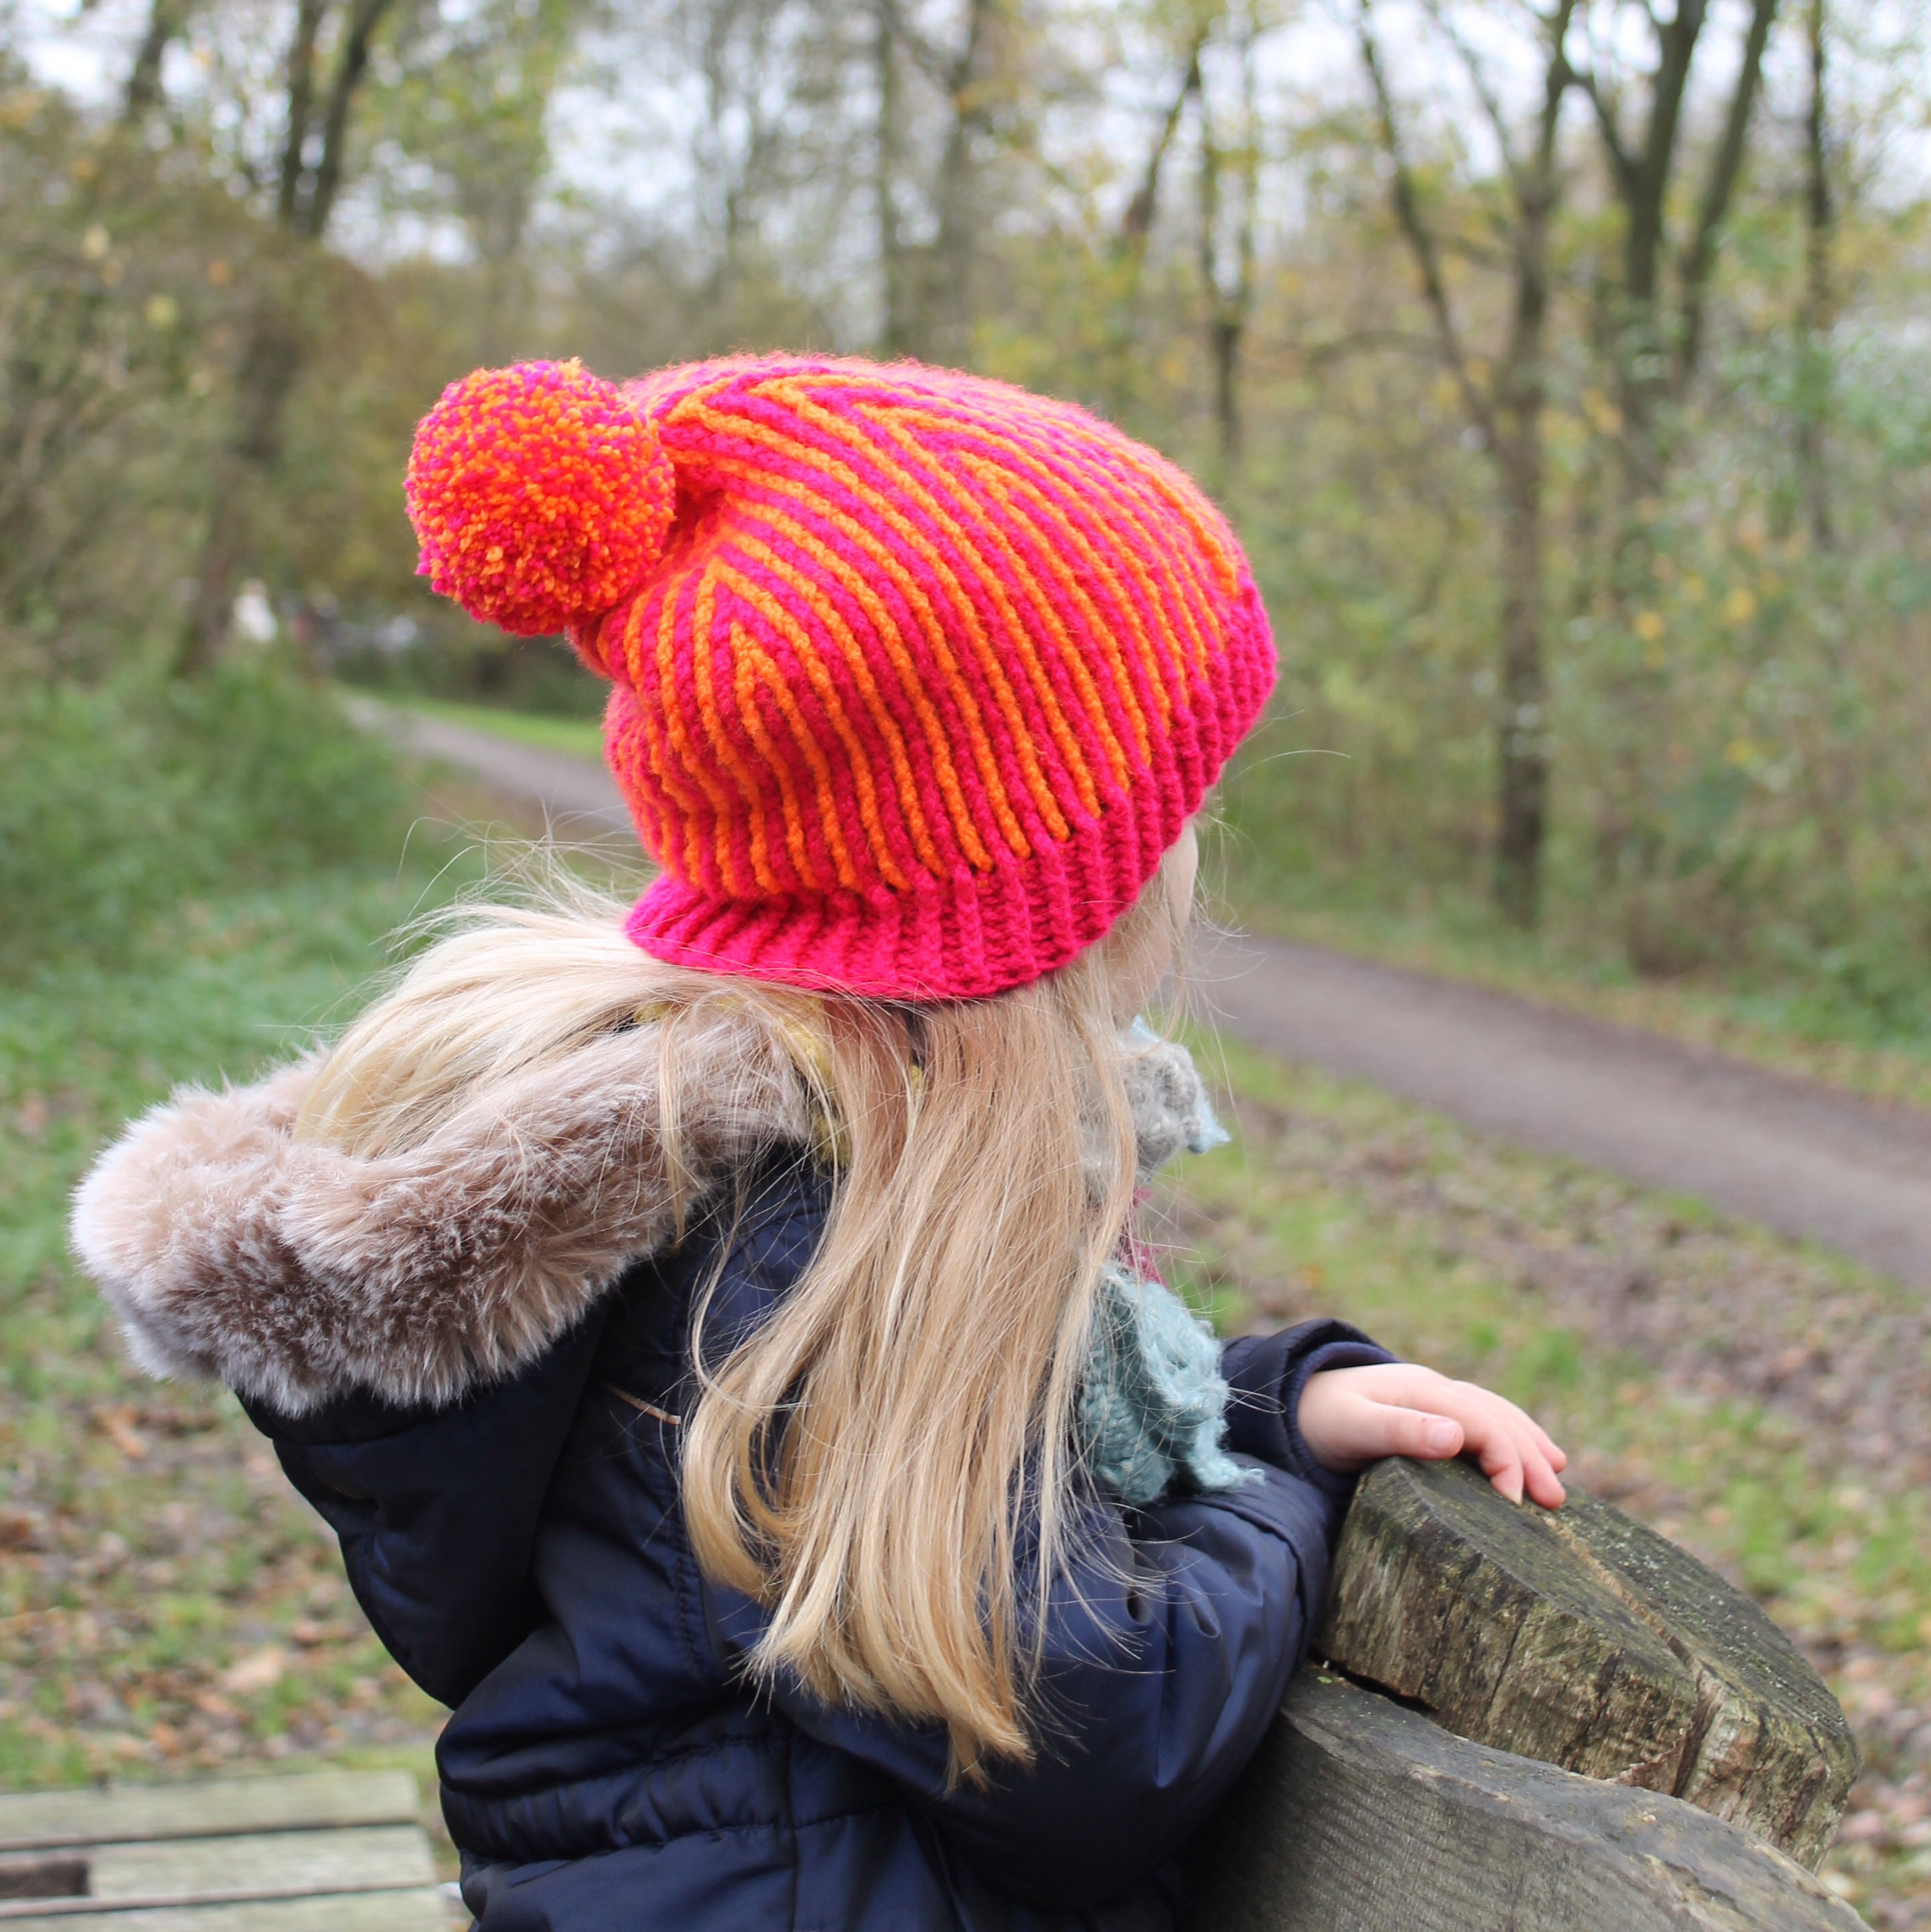
Crochet Brioche Beanie Free Pattern

I know, I know.

This has taken me ages to do.  I have a load of excuses; you all know – December is crazy!

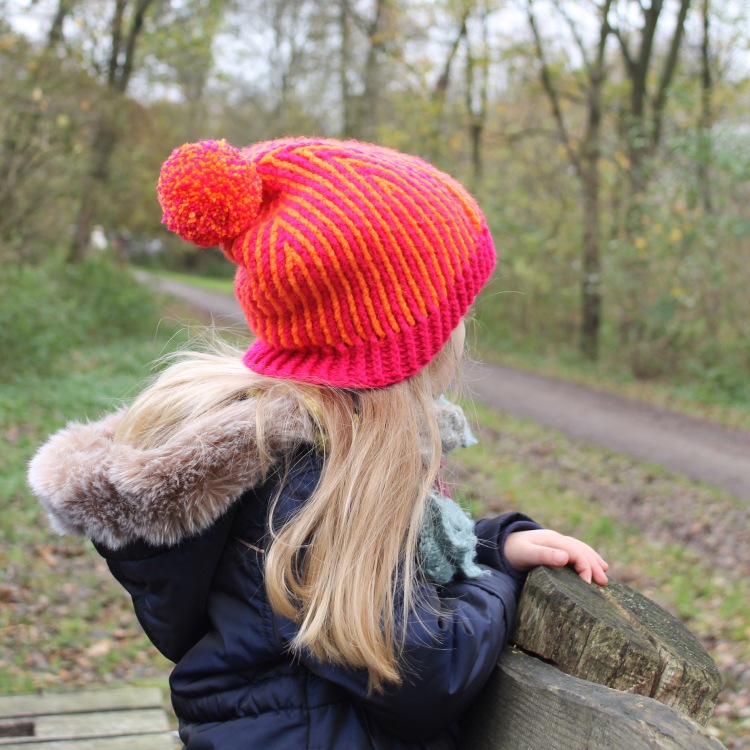
crochet brioche beanie in One Size Fits All, free tutorial on missneriss.com

But here it is!  The pattern for the Brioche Beanie!

I’m sorry Dutch ladies, this pattern is only in English right now.  I’d love to translate it for you, but well, you know, time.

I’ve created a handy pdf so you can work on the design offline, or open it in your e-reader.  It’s a bit photo heavy, so do think twice before printing.  Included are step by step photo tutorials on how to create the brioche stitch itself, and also how to decrease and shape the hat.

Click here to download the free pattern for the Brioche Beanie

crochet brioche beanie in One Size Fits All, free tutorial on missneriss.comcrochet brioche beanie in One Size Fits All, free tutorial on missneriss.com2015-11-28 13.07.50

This design is made using Scheepjes Colour Crafter. You can pick up the yarn at Scheepjes retailers all over the Benelux, or internationally from Deramores, Wool Warehouse, and at Paradise Fibers in North America!

I hope you enjoy making this hat, it’s really fun and easy to do once you get the hang of the stitch and the coolest part is that it’s totally reversible!  So if you prefer horizontal stripes, go for it!

Ps.  Coming soon is a cowl pattern too!  Stay tuned, and have a wonderful Christmas and New Year!

Peek-a-Boo Button Wrap Pattern Size S-XL

Here it is, what you’ve been waiting for – the pattern for the Peek-a-Boo Wrap!

Peek-a-Boo Wrap free crochet pattern size S-XL on missneriss.com #haken

I’ve made this for you in four different sizes, from Small through to XL.

Here you can find a written pattern for size Medium, and below you can find a chart which will give you the measurements and stitch counts for sizes Small, Large and XL.

For the Dutch speakers among us, I’ve also had the design translated.  You can find it here. Veel plezier!

You can pick up the yarn at Scheepjes retailers all over the Benelux including Caro’s Atelier*, or internationally from Wool Warehouse* and Deramores*.

And even better, Esther from It’s all in a Nutshell has created a video tutorial, which is enormously helpful!

Are you ready?

What You Need

Scheepjes Stone Washed XL in 850 (Garnet) – 12 balls for size M (I used 11, but get an extra to be safe)
S = 10 balls (each ball of Stone Washed XL has 75 metres)
M = 12 balls
L = 15 balls
XL = 17 balls
7cm bamboo button – you can pick these up at any good craft store, or online
Size 5mm hook (or hook to obtain gauge)
Measuring Tape
Scissors
Tapestry Needle
Eucalan wool wash

Gauge

8 stitches x 5 rows = 5cm x 5cm
gauge across gauge up

Stitches

Note: All stitches are in US terms
Chain (CH)
Half Double Crochet (HDC)
Half Double Crochet Back Loop Only (HDCBLO)
Half Double Crochet Front Loop Only (HDCFLO)

Size Medium

  1. Chain loosely 119 stitches.  If you’re a tight crocheter, consider going up a hook size to make sure that the chain isn’t too tight.
  2. HDC into the third chain from the hook, and all the way across (a total of 117 stitches across).  CH2, turn.
  3. HDCBLO in the first stitch, HDCFLO in the next.  Repeat this front and back (HDCBLO/FLO) format all the way across, CH2, turn.  Note:  It’s important to ensure that you have an odd number of stitches to make it easier to achieve the texture of the stitches.  If you finish the row in the back loop, when you start the next row, start in the front loop and vice versa.  You’ll find very quickly as you go that the look of the wrap will be different if you don’t maintain the BLO then FLO stitch pattern in alternating stitches.Stitch view vest
  4. Repeat this pattern building rows for 25cm.
  5. Now we are going to make the first sleeve.  Follow the HDCBLO/FLO pattern for 20 stitches, then CH 35, skip 35, then continue the HDCBLO/FLO pattern all the way to the end.  Make sure you double check that you stitch into the BLO or FLO correctly (if the stitch in the row below was FLO, you need to stitch into the BLO).
  6. HDCBLO/FLO to the chain from the previous row, then HDC 35 into the chain, then continue the HDCBLO/FLO to the end.  the short end becomes the collar of the wrap.
  7. Repeat step 3 for a further 37cm and then we will make the next sleeve.  Making sure you start from the top of the collar and work down (add a row if you need to), repeat steps 5 and 6.
  8. Continue building the final front panel, for 25cm, then we will make the button hole.button large
  9. Starting from the top of the collar, repeat the HDCBLO/FLO pattern for 37 stitches.  Chain 7, skip 7 stitches, then repeat the HDCBLO/FLO pattern all the way to the end.
  10. HDCBLO/FLO to the chain from the previous row, then HDC 7 into the chain, then continue the HDCBLO/FLO to the end.
  11. Build a further 7 rows, or complete your ball of yarn.  Tie off, weave in ends.
  12. Sew button on the opposite end of the garment to the button hole 9cm from the end, 25cm from the top.Peek-a-Boo Wrap free crochet pattern size S-XL on missneriss.com #haken
  13. Block, stretching a little (especially the length) and you’re done!

Peek-a-Boo Wrap free crochet pattern size S-XL on missneriss.com #hakenThe back of the body warmer

Size Chart

You can switch out the stitch counts and centimetres in the written pattern above for the numbers in the chart below, depending on your required size.

SMALL MEDIUM
CM Rows CM Rows
Length 70 Chain 117 + 2 70cm Chain 117 + 2
Back 32 32 37 37
Front (button) 20 20 25 25
Front (button hole) 27 27 32 32
CM Stitch Count CM Stitch Count
Start Sleeve 12.5 20 12.5 20
End Sleeve 20 32 22.5 35
Start Button Hole 23 37 23 37
Button Hole Size 7 7
LARGE X-LARGE
CM Rows CM Rows
Length 75cm Chain 123 + 2 75cm Chain 123 + 2
Back 42 42 47 47
Front (button) 30 30 35 35
Front (button hole) 37 37 42 42
CM Stitch Count CM Stitch Count
Start Sleeve 15 24 17.5 28
End Sleeve 25 39 27.5 43
Start Button Hole 25 40 25 40
Button Hole Size 7 7

*Affiliate Link