Tag Archives: hat

The Carolyn – A Crochet Hat Reveal

Close up image of woman wearing crochet hat

Introducing The Carolyn – a celebration of Autumn.

Close up image of woman wearing crochet hat

GET THE YARN

You’ll need two skeins of River Washed and one skein of River Washed XL (or Stone Washed, choose your favourite).

Scheepjes has a complete list of stockists on their website. Most of their retailers stock Stone Washed and River Washed, but if not, don’t be afraid to ask them to get it in!

Wool Warehouse* stocks both River Washed and River Washed XL and ship all over the world.

Black Sheep Wools* in the UK also stocks River Washed and River Washed XL

Here in the Netherlands, Caro’s Atelier* has River Washed and River Washed XL, plus they’re my LYS (and awesome).

In the US check out DotsYarnDen who also stocks River Washed, plus a bunch of other Scheepjes yarns.

In Australia Little Woollie also stocks Stone Washed and Stone Washed XL.


Close up image of woman wearing crochet hat

The Carolyn is a completely different design and construction to most usual hats.

We have a double brim for warmth, which is also shaped in a way so that the crown sits perfectly on your head and snuggles into the back of your neck and keeps your ears covered.

We make the brim first, and then work upwards, decreasing as we go. The puff stitches add a textural dimension and interest, without losing warmth.

The River Washed is warm enough to wear all through the winter, but still breathes so you can wear it on days when there is just a bit of a chill in the air.

Can you sense that I’m a bit obsessed with warmth? Seriously, before I moved to Northern Europe I didn’t even own a proper winter coat, let alone a scarf or hat! Now these three items make up half my wardrobe.

But why Carolyn?

Well. Carolyn is a good friend of mine. She’s a north American who LOVES Autumn and she was the inspiration for the shape of this hat. I like to choose the names of people who are dear to me to name my designs, and Carolyn was the obvious choice. We walk our dogs together and I love her excitement when October rolls around. She’s always extolling her love of this time of year while I’m too busy complaining about the cold 😀

The pattern has been tested, and I’m adding the finishing touches. I plan to launch it in the coming days, so do get your yarn order in. This will make a fantastic Christmas gift for that one person in your life who complains about the cold as much as I do!

Close up image of woman wearing crochet hat

A Perfectly Autumn Crochet Project

Autumn is all in the colour, right?

I never really appreciated the colours of Autumn growing up. In Australia we have mostly evergreen trees – Eucalyptus, Acacia, Melaleuca and the like. They tend to look (and smell) beautiful all year round.

It wasn’t until I moved to the northern hemisphere that I really learned to appreciate it. Driving through the Devon lanes and wandering the old forests and moors of de Veluwe in October, or dreaming of visiting Canada in the Autumn. It’s something that the average Australian just doesn’t really get to experience at home.

The biggest joy of them all, however, are the toadstools! Nothing quite triggers the “I’m living in a fairy tale” feeling quite like finding one of these beauties while out wandering.

The glorious shades of red and orange inspired me to choose Scheepjes River Washed (XL) in the colour Avon for my autumn/winter hat pattern, which I’ll be sharing with you over the next few weeks.

Isn’t that colourway perfectly Autumn?

And when you look at the balls in the sunshine, it’s like they’re on fire, the way the forest looks when hit by the late afternoon sunshine in October. I love it.


Get the Yarn

Scheepjes has a complete list of stockists on their website. Most of their retailers stock Stone Washed and River Washed, but if not, don’t be afraid to ask them to get it in!

Wool Warehouse* stocks both River Washed and River Washed XL and ship all over the world.

Black Sheep Wools* in the UK also stocks River Washed and River Washed XL

Here in the Netherlands, Caro’s Atelier* has River Washed and River Washed XL, plus they’re my LYS (and awesome).

In the US, Jimmy Beans stocks Stone Washed and Stone Washed XL, which you can easily substitute for River Washed.

In Australia Little Woollie also stocks Stone Washed and Stone Washed XL


For my hat project you’ll need two balls of River Washed and one ball of River Washed XL. You can easily substitute Stone Washed, as it’s essentially the same yarn with a different coloured core (white core in SW opposed to a coloured core in RW). The sizing will be for adults, but my daughter is already asking for her own, so let’s see how that goes later on!

Stay tuned for progress in the next week or so, but in the meantime I want to know your favourite Stone Washed or River Washed colourway. Who knows, I’m thinking of gifting some – ’tis the season afterall! Let me know on my Instagram.

Chunky Camel Stitch Hat – Reveal!

I have wanted to share photos of this hat for ages and ages, but I finally have it for you!

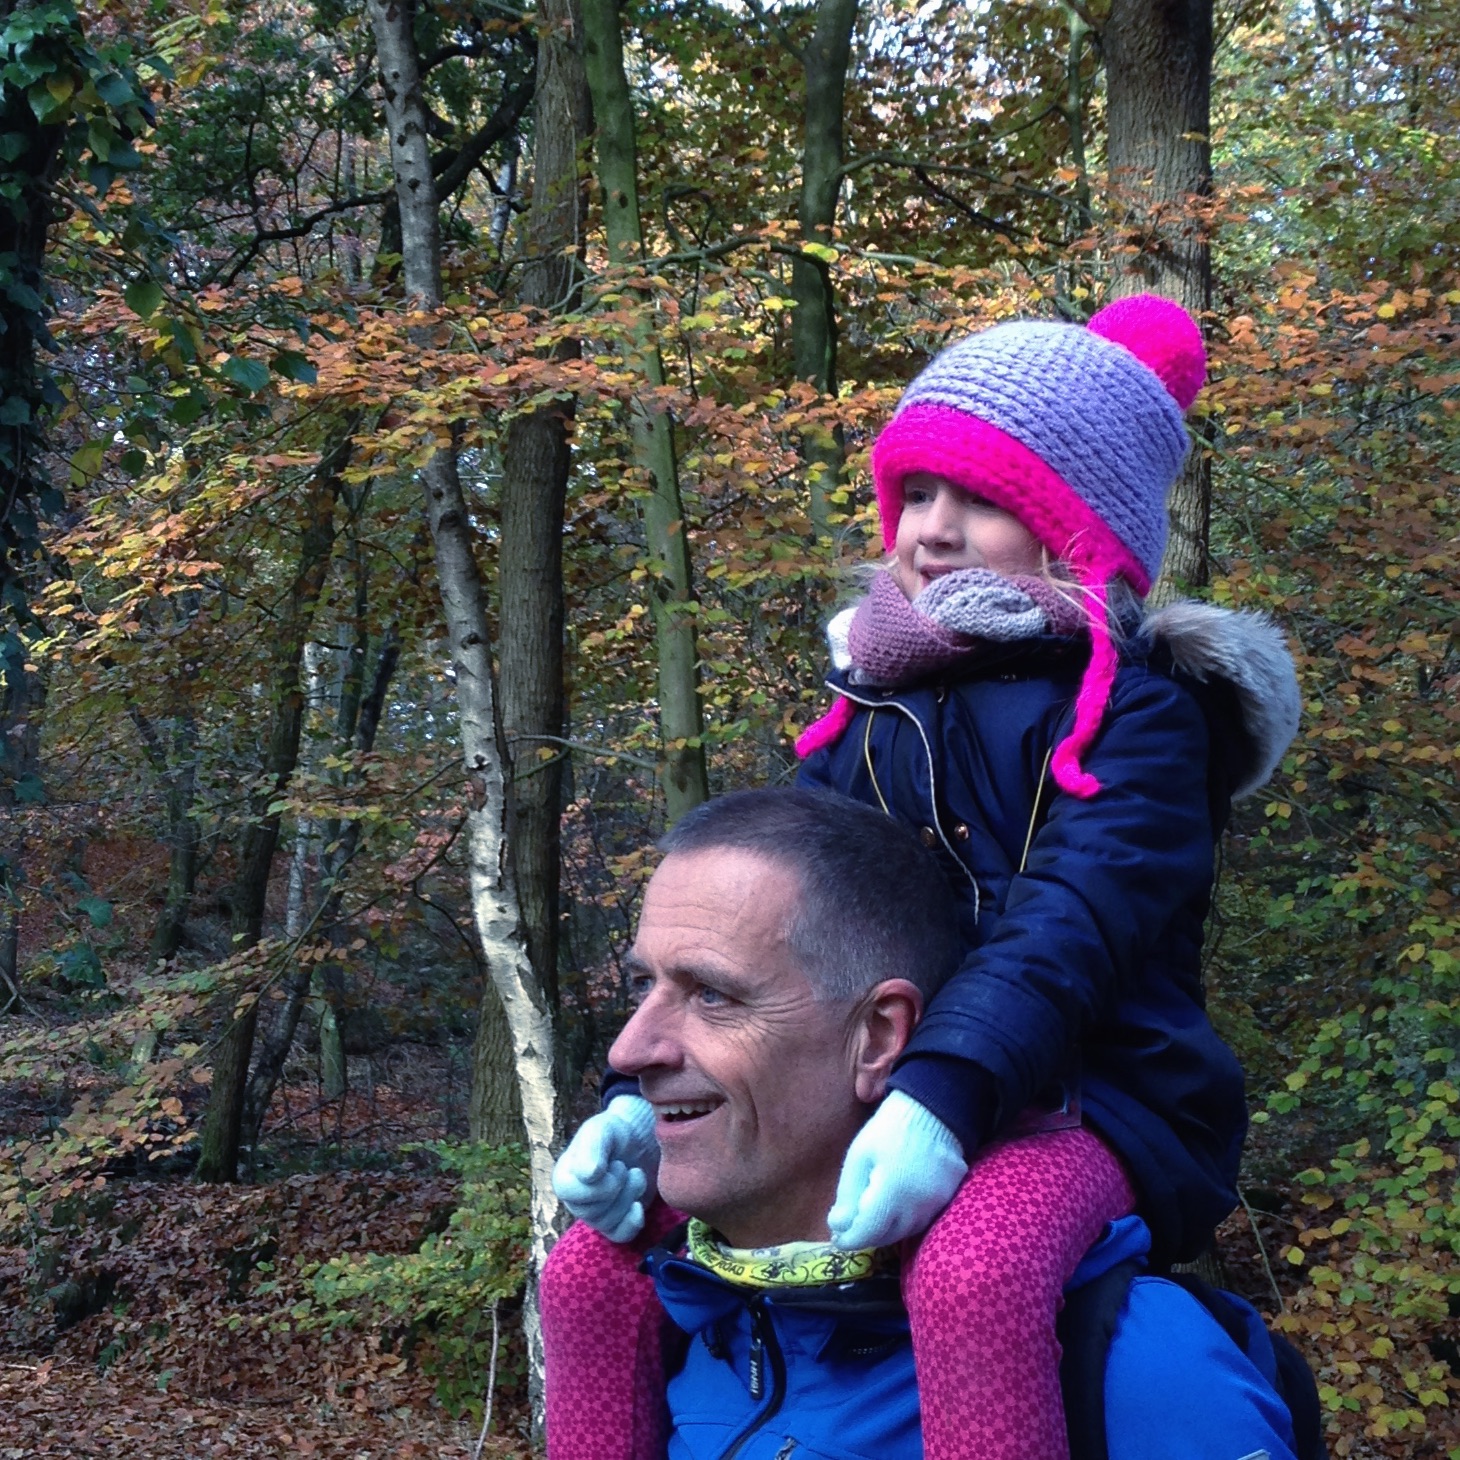
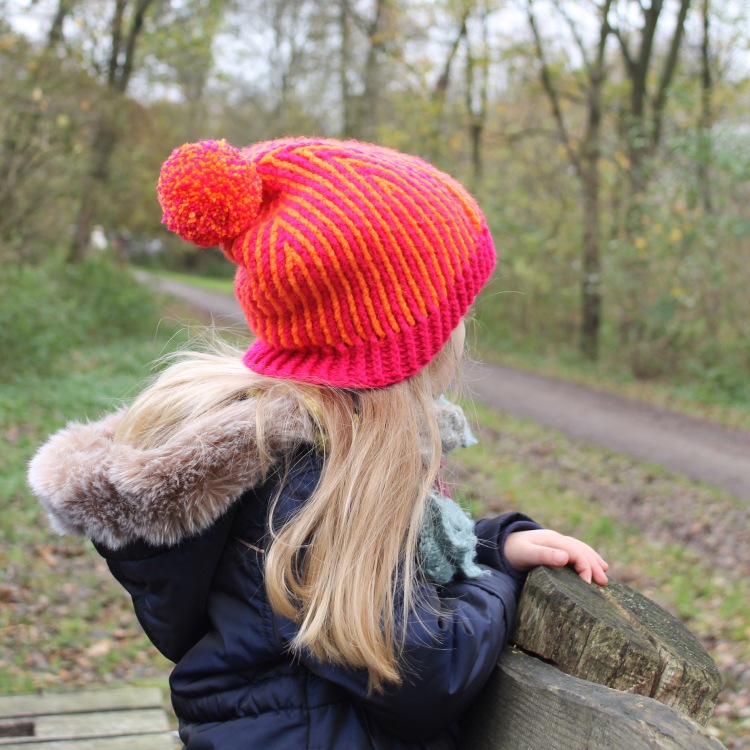
Chunky Camel Stitch Hat by MissNeriss

Chunky Camel Stitch Hat by MissNeriss

This is Raina with her Opa having the best time ever!  Seriously, don’t you miss being small enough to ride on shoulders?

I managed to bribe her to sit still long enough to take one photo on her own, but she was way too busy searching for chestnuts, acorns and toadstools to pay much attention to me.

pictapgo-image

In the end I decided: If you can’t beat them, join them and went foraging too.

pictapgo-image-2

Now, the pattern is ready for this, and I’m going to post it in a few days.  I’ll also have more pictures, this time in the adult size!

To get prepared and have the yarn ready, here’s where you can get hold of the yarn:

Globally: Wool Warehouse*
UK: Deramores*
US: Deramores*
Benelux retailers
South Africa: Be Inspired

You’ll need a ball of Hilversum and either Eelde or Zwolle (or both if you want to make two hats like I have).

*affiliate link

Crochet Hat Design – WIP

Last week I introduced you to the yarn for a new hat design that I’m working on in collaboration with Scheepjes and their lovely premium acrylic yarn, Colour Crafter.

Scheepjes Colour Crafter, available from http://bit.ly/colour-crafter

This week I thought I’d share my work in progress.

Scheepjes Colour Crafter, available from Wool Warehouse: http://bit.ly/woolwarehouse

You can see that I’m using the Navajo Plying method I showed you in my video last week for this project, making my hat lovely and chunky.

I’m using the neon pink for the edging and a gorgeous plump pom pom:

Clover large pom pom maker, available from Wool Warehouse: http://bit.ly/cloverpompom

The pink is SO bright, I can’t get enough of it.

I could never figure out how to use the pom pom makers in the past, but now I have a handle on it I’ll never go back to cardboard circles ever again.  This one was gifted to me by my Fibre Share partner, but you can find them at Wool Warehouse* or most local craft stores stock them too.

If you haven’t organised the yarn already, head to Wool Warehouse* or Deramores* (globally), or from any of the Benelux retailers.  You’ll need a ball of Hilversum and either Eelde or Zwolle (or both if you want to make two hats like I have).

Next week: The reveal!

*Affiliate link

A New Crochet Hat Design

This is a new project that came about basically by accident.  I was pulling out all the winter gear a few weeks ago and realised that all the winter hats I made my daughter last year are all too small!  So it means with the colder weather, she really needs a new hat (or two).

I decided to make it using the Scheepjes Colour Crafter, because being a premium acrylic it’s perfect for hats for kids.  Plus, the colours are fabulous!  I’ve chosen Eelde (left), Zwolle and Hilversum – all colours which are perfect matches for my daughter’s personality.

Scheepjes Colour Crafter, available from http://bit.ly/colour-crafter

Scheepjes Colour Crafter, available from http://bit.ly/colour-crafter

I’m using a technique which you’ll discover over the coming months is one of my favourite methods of turning a light weight yarn into something more bulky, and it’s seriously one you need in your crochet toolbox. I’ve even created a little video to illustrate it for you:

So for this hat project, you’ll need two balls of yarn.  Well, one and a half really.  I’ve used three of these balls to make two hats – one in a child’s size, and another for an adult.  This means I’m all sorted for winter too!

I’m going to release the pattern in a few weeks, so in the meantime you can get yourself organised in advance by picking up the yarn from either Wool Warehouse* or Deramores* (globally), or from any of the wonderful Benelux retailers.  Oh, and you’re also going to need a pompom maker*

*Affiliate links

Scheepjes Bucketful of Sunshine Hat – Tutorial (Toddler)

Here it is, the tutorial for my Bucketful of Sunshine Hat!  My daughter absolutely loves it, and so do I.  And it’s ready, just in time for the glorious weather in the Netherlands.

Enjoying the weather and the Bucketful of Sunshine hat on missneriss.com #scheepjes #scheepjeswol #cotton8 #crochet

Let’s get started, shall we?  This tutorial will show you how to make a hat to fit a toddler/preschooler.  My daughter has a small head for her age (it’s a family thing, so does my husband), so if your toddler’s a bit bigger, go up half a hook size, it won’t matter.

This hat is made using the V-Stitch and the Half V-Stitch.  The half V-stitch may well be a made up term, but it’s essentially the same stitch as a normal V-Stitch, but using the half double crochet instead of a double crochet.  You can V-Stitch using whatever height stitch you like really, but Google wouldn’t tell me the official name, so I’ve assigned one to it.

The V-Stitch

The V-Stitch is a very easy stitch to master, it is essentially a double crochet, chain 1 and double crochet in the same stitch.  Then you skip a stitch and repeat in the next.  When it comes to the next row, instead of doing the V-Stitch into the double crochet stitch, you do it into the chain 1 space.

A bit like this:

V-Stitch step 1, chain 3

V-Stitch step 1, chain 3

V-Stitch Step 2 - DC into same stitch

V-Stitch Step 2 – DC into same stitch

V-Stitch step 3 - skip 1 stitch, DC into the next stitch

V-Stitch step 3 – skip 1 stitch, DC into the next stitch

V-Stitch Step4 - Chain 1

V-Stitch Step4 – Chain 1

V-Stitch step 5 - DC into the same stitch

V-Stitch step 5 – DC into the same stitch

And there you have it!  The V-Stitch

And there you have it! The V-Stitch

The Half V-Stitch is the same process, using a half double crochet instead.

What you’ll need

Scheepjeswol Cotton 8 in three shades of the same colour.  I used yellow (508, 551, and 655). The best thing you can do is cake the yarn so you can pull from both ends, because for this project we’re using two strands together.

You’ll also need a 5mm crochet hook. scissors and a tapestry needle.

Abbreviations

(American terms)

MR – Magic Ring

DC – Double Crochet

VS – V-Stitch

HVS – Half V-Stitch

Inc – Increase

STS – Stitches (stitch count)

Notes

The beginning of each row begins with a CH3, which counts as the first DC and CH 1 to start your first V-Stitch of the row.  Below I will just use VS, but assume unless described otherwise that the first V-Stitch is a CH3, DC.  Always join into the chain space of the first V-Stitch.

When working the Half V-Stitch, still chain 3 at the beginning of the each row.

Oh, and did I mention that I’m a leftie?

Round 1

Start with a Magic Ring, chain 3 and work 9 DC into the ring, pulling it tight.  You’ll have 10 double crochets for your foundation.
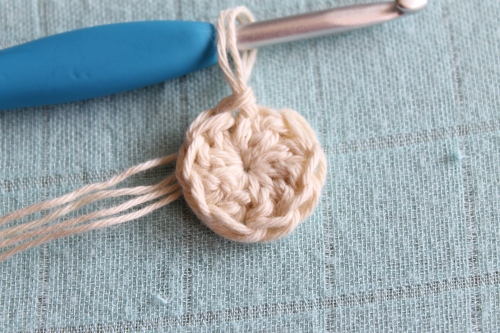
10 DC into a magic ring

Round 2

VS Inc x5.  SLS into the first VS to join = 15 STS

To crochet a V-Stitch Increase, follow the instructions for a normal V-Stitch, but instead add a third V.  So, DC, CH1, DC into the same stitch, CH1, DC into the same stitch again.  Skip 1 stitch and either repeat the increase (as is needed in Round 2) or work an ordinary V-Stitch.

V-Stitch Increase - CH3, DC, CH1 DC, skip 1 stitch, V-Stitch in the next

V-Stitch Increase round

Round 3

(VS Inc, VS) x 5.  SLS into the first VS to join = 25 STS

INC, VS x 5 round

 Round 4

(VS Inc, 2 x VS) x 5.  SLS into the first VS to join = 35 STS

INC, 2VS x 5 Round

Round 5

VS x 20.  SLS into the first VS to join = 40 STS

VS x 20 Round

Round 6

(VS Inc, 3 x VS) x 5.  SLS into the first VS to join = 45 STS

Round 7

VS x 25.  SLS into the first VS to join = 50 STS

Round 8-12

VS x 25.  SLS into the first VS to join = 50 STS

Change colour

Change Colour

Round 13-15

VS x 25.  SLS into the first VS to join = 50 STS

Change Colour
Round 16

VS x 25.  SLS into the first VS to join = 50

Round 17

In this row we start making the brim.  We will count the CH 1 space in the V-Stitch as a stitch.  We will also be adding a few increases to widen the brim.

CH2, (2DC in the next stitch, which is the 1st CH space, then DC in the next 14 Stitches.  Repeat this 4 times and slip stitch to the first CH2 of the round. = 80 STS

DC in each stitch around, adding increases every 14 stitches

Round 18

HVS x 40 = 80 STS

Half VS around

Round 19

HVS x 40 = 80 STS

Finish off and weave in the ends.

Sunburst

To make the sunburst, I experimented with lots of different flowers and picots and nothing really seemed to be right.  So, when I came across this scrubby pattern on Petals to Picots, I realised it would be perfect.  I just grew the sunburst with each colour instead of crocheting the entire base in one go.  Then I just tacked it onto the hat in the right spot.  You can pick up the pattern for free here.

Sunburst attached to Bucketful of Sunshine hat


Here’s the finished hat, modelled on my super-cute (just recovering from chicken pox) daughter:

Bucketful of Sunshine hat on missneriss.com - free pattern #scheepjes #scheepjeswol #cotton8 #crochet #freepattern Bucketful of Sunshine hat on missneriss.com, made with Scheepjeswol Cotton 8. #scheepjeswol #cotton8 #scheepjes

You’ve made it to the end, way to go!  I hope you enjoy making this adorable hat as much as I’ve enjoyed designing it.

Watch this space, coming soon are other sizes, including the 3-6 month old which is up next!

For updates and cute photos in the mean time, do follow me on both Facebook and Instagram, and I would be so excited if you would share your own projects with me!

https://www.facebook.com/madebyMissNerisshttp://instagram.com/miss__neriss


St Patrick’s Day Baby Leprechaun Hat Pattern now Available

It has taken months and months and MONTHS to get there, but I finally have my St Patrick’s Day Leprechaun hat pattern ready to go.

Well, I have it in the newborn size for now.  I’m still working on the toddler size and will post the adult size as soon as I can.

The pattern is available in all of my stores, Etsy, Craftsy, and of course, Ravelry!

Here’s how it looks:

Baby Leprechaun - St Patrick's Day, pattern now available!

To celebrate, I’m giving away two copies of the pattern for free!  All you have to do to win is comment on this original post (on missneriss.com), and I will draw a random winner on Wednesday 12 March!  I will announce the lucky winners here and they will also be contacted by email.

Good luck, and thanks so much for your ongoing support!

Updated 13 March 2014

And the winners are:

Suzy and Patricia!  Congratulations, the pattern is on its way to you!

Image

Cabbage Patch Kids are the new Black

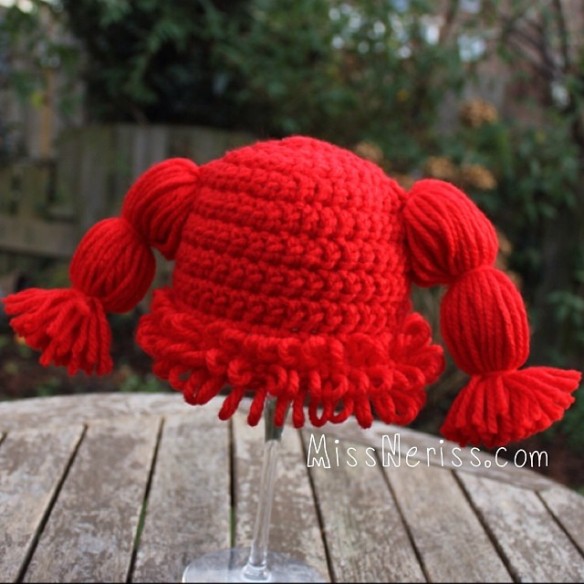
I’m calling it. Minions are over and Cabbage Patch Kids are back! Well, I don’t really believe that myself, but it seems everywhere I look I see cute babies wearing Cabbage Patch Kids hats.

Did you have one as a child? I think I was the only girl at school not to have one (I didn’t have any My Little Ponies either, poor me) and now all of a sudden I’m in an age group where it’s time to be nostalgic for all things 80s!

This last week I had two orders to make these Cabbage Patch Kids hats, and I found a great free pattern from the Dearest Debi site. The pattern is for a newborn, but it is extremely easy to up-size it to whatever you need.

Here are the results of my endeavours:

Cabbage Patch Kid hat on missneriss.com.  Based on a FREE pattern by Dearest Debi.

What do you think about this new craze to be rocking the crochet world? I’ve never been a fan of Cabbage Patch Kids. I prefer the Garbage Gang/pail Kids instead. But everything comes back into fashion, so best to just embrace it!

Ravelry Giveaway, just in time for Christmas!

I’m giving away 20 copies of my Merry Mini Christmas hat for free on Ravelry to help everyone get into the Christmas spirit! Just enter MERRYMINIXMAS when checking out!

Free pattern with coupon code MERRYMINIXMAS for the first 20 customers!http://www.ravelry.com/patterns/library/mini-santa-christmas-hat

Image

Instagram Action

I love taking photos, but my time is so limited that I never seem to get round to taking fabulously constructed shots with great lighting. Coupled with a daughter who will not sit still to take a sharp shot and a husband I never see during daylight hours, my model opportunities are often limited to desperate selfies! Honestly, most photos are taken on my couch at 11pm with my iPad before items get wrapped and shipped. Because of that, Instagram is my absolute best friend. I can share what I like there and it’s ok that my images aren’t professionally finished. Poor lighting isn’t the end of the world. I just try not to post blurred photos…

Here’s some of my latest creations that have only really made it as far as Instagram:

The pattern for this one is coming soon!

The pattern for this one is available to buy on Craftsy and Ravelry

Meanwhile, did you know that WordPress allows you to add Instagram images to posts by merely pasting the image link into the post/page? Looks fantastic and is interactive as well! Don’t forget to follow me on Instagram, it’s where I spend most of my time.

How do you tackle the time vs lighting vs model issues?