Ready to start working on your Legacy Mandala pattern? Here we go!
Below is the pattern using UK terminology. You will be able to get your hands on the US version via a pdf from my Ravelry store or LoveCrafts. I’ll work on an NL translation too, but this will take time.
GET THE YARN
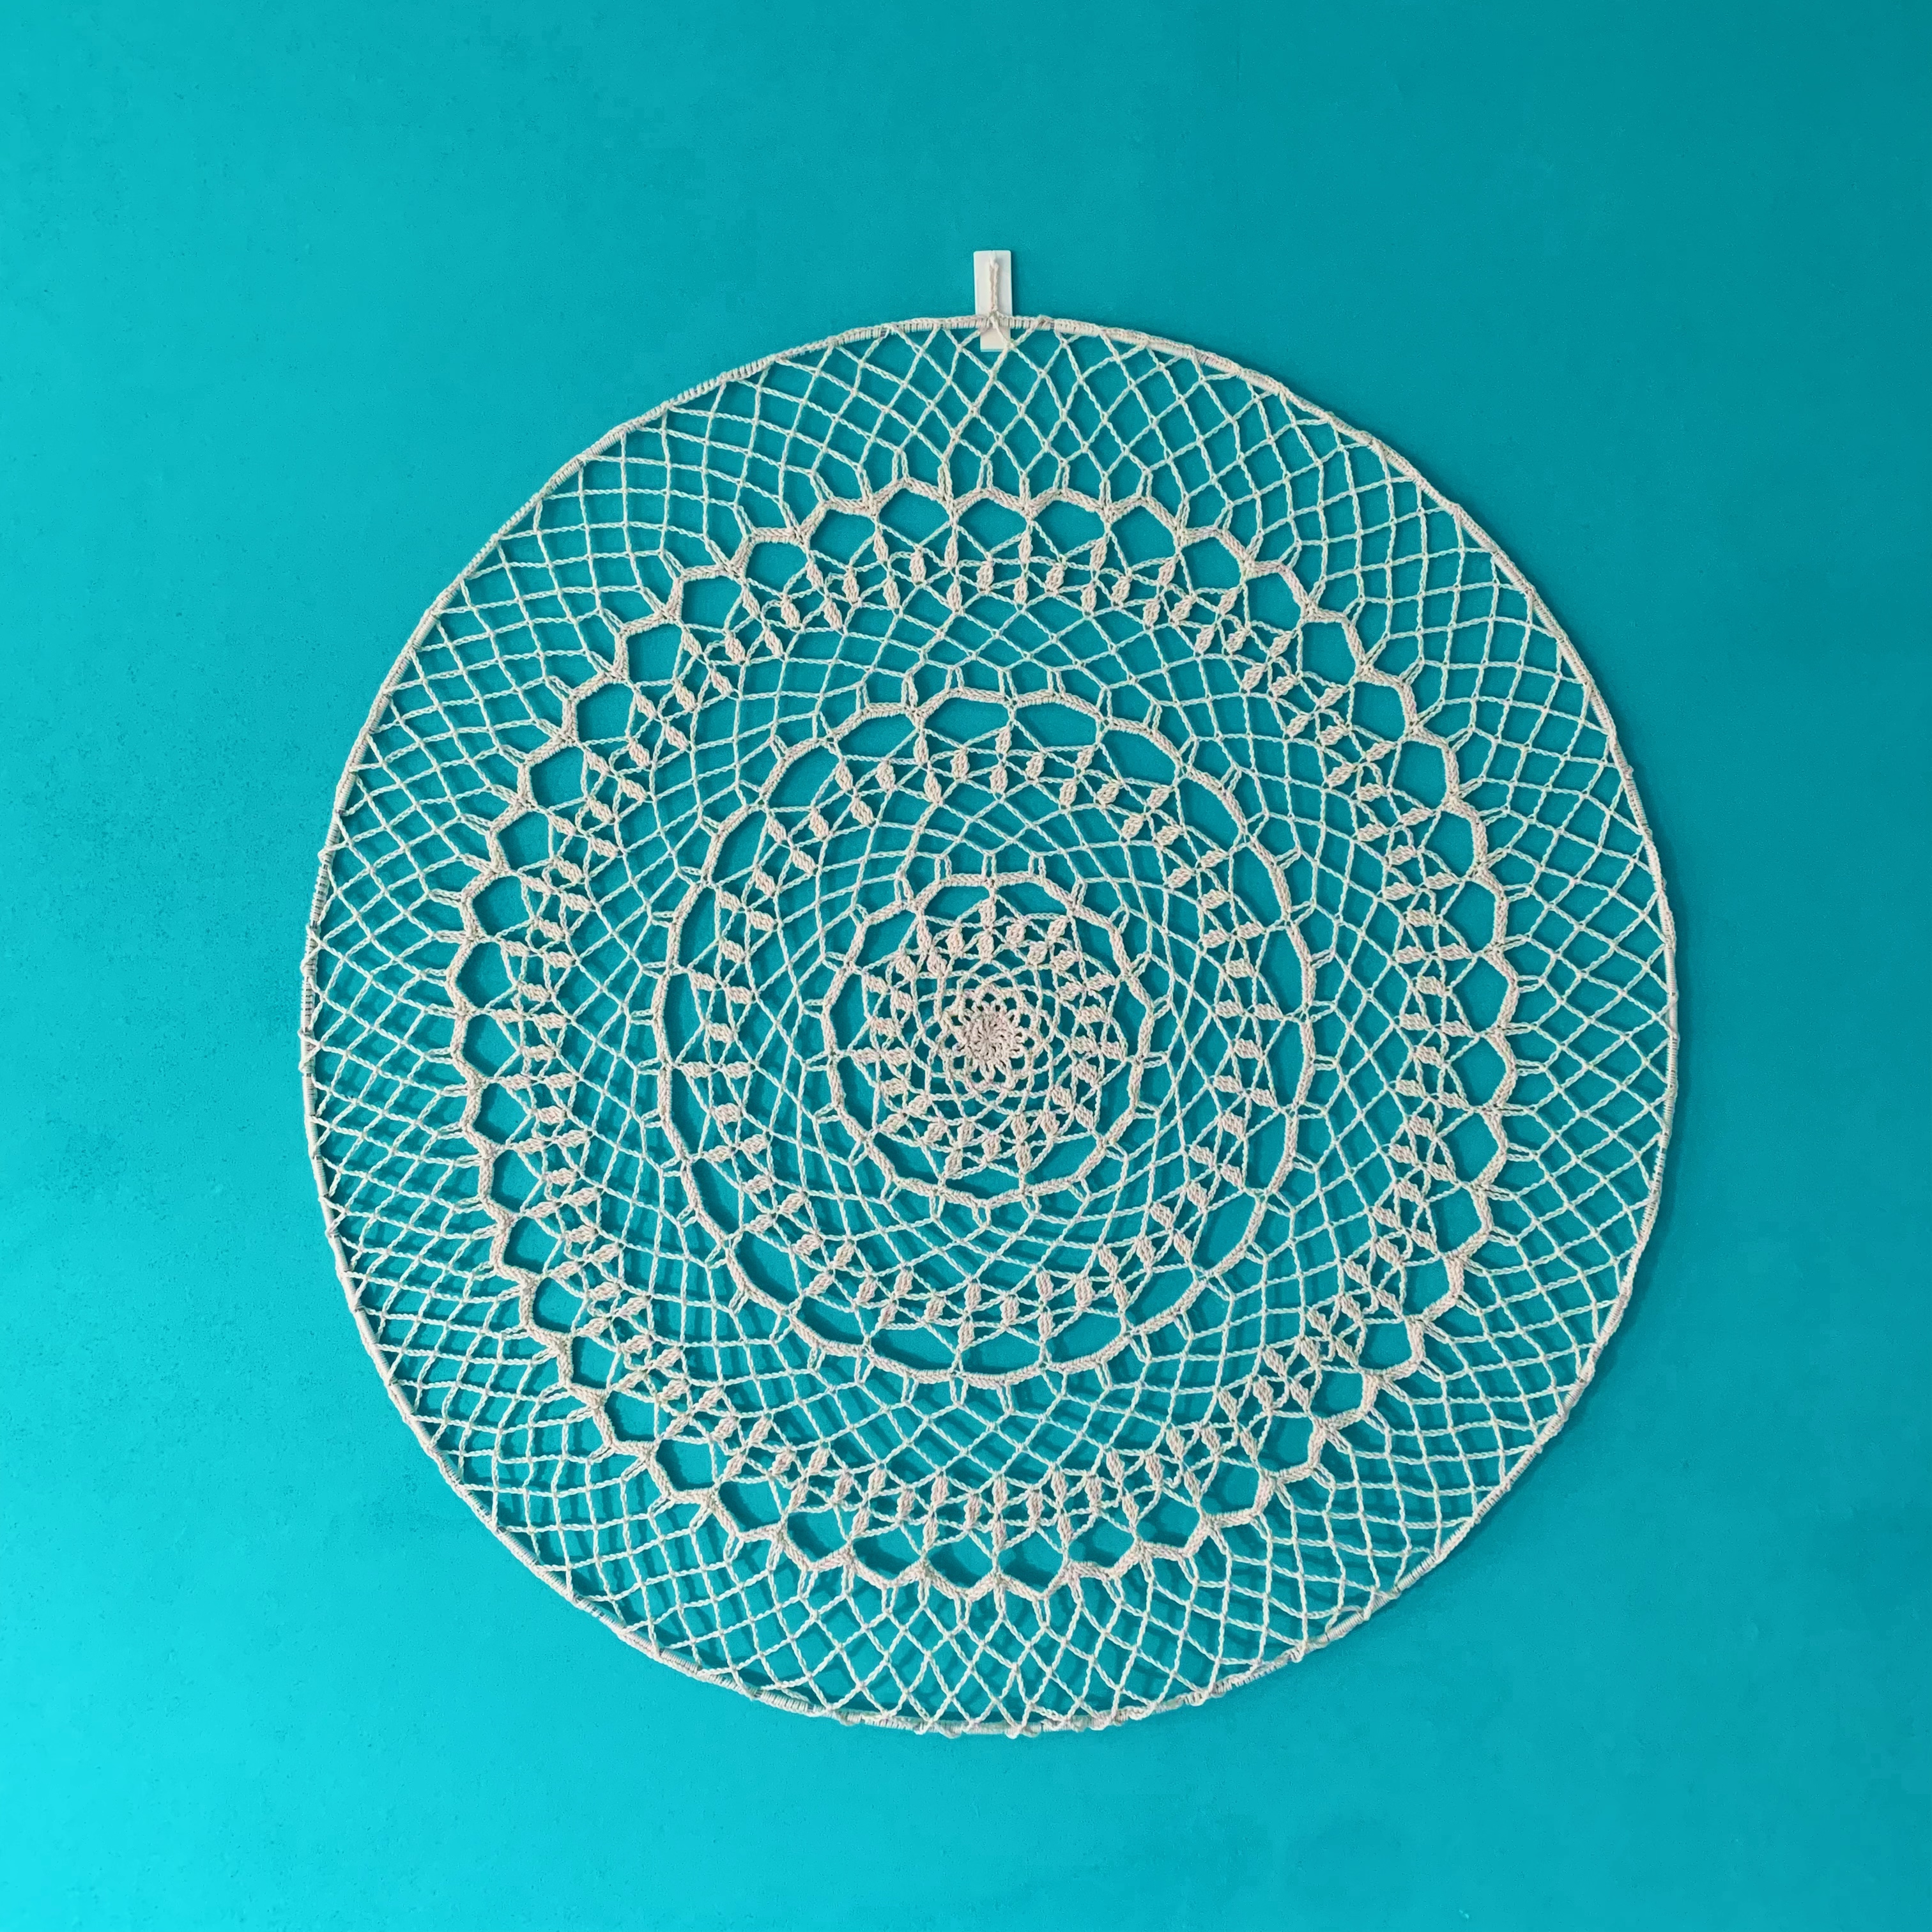
You’ll need two skeins of Scheepjes Legacy No. 6 in off-white (ecru) and a wire hoop. I found my 90cm hoop at Lampenkapmaterialen.com here in Almere, but there are places that you can find them everywhere; have a look to see what’s local.
For the yarn, Scheepjes has a full list of stockists on their website, you can search for one close to you.
In Europe head to Caro’s Atelier*
In the UK Black Sheep Wools*
Materials
Scheepjes Legacy Nr. 6 (100% mercerised cotton, 100g, 240m), colour 089 off-white x2 balls
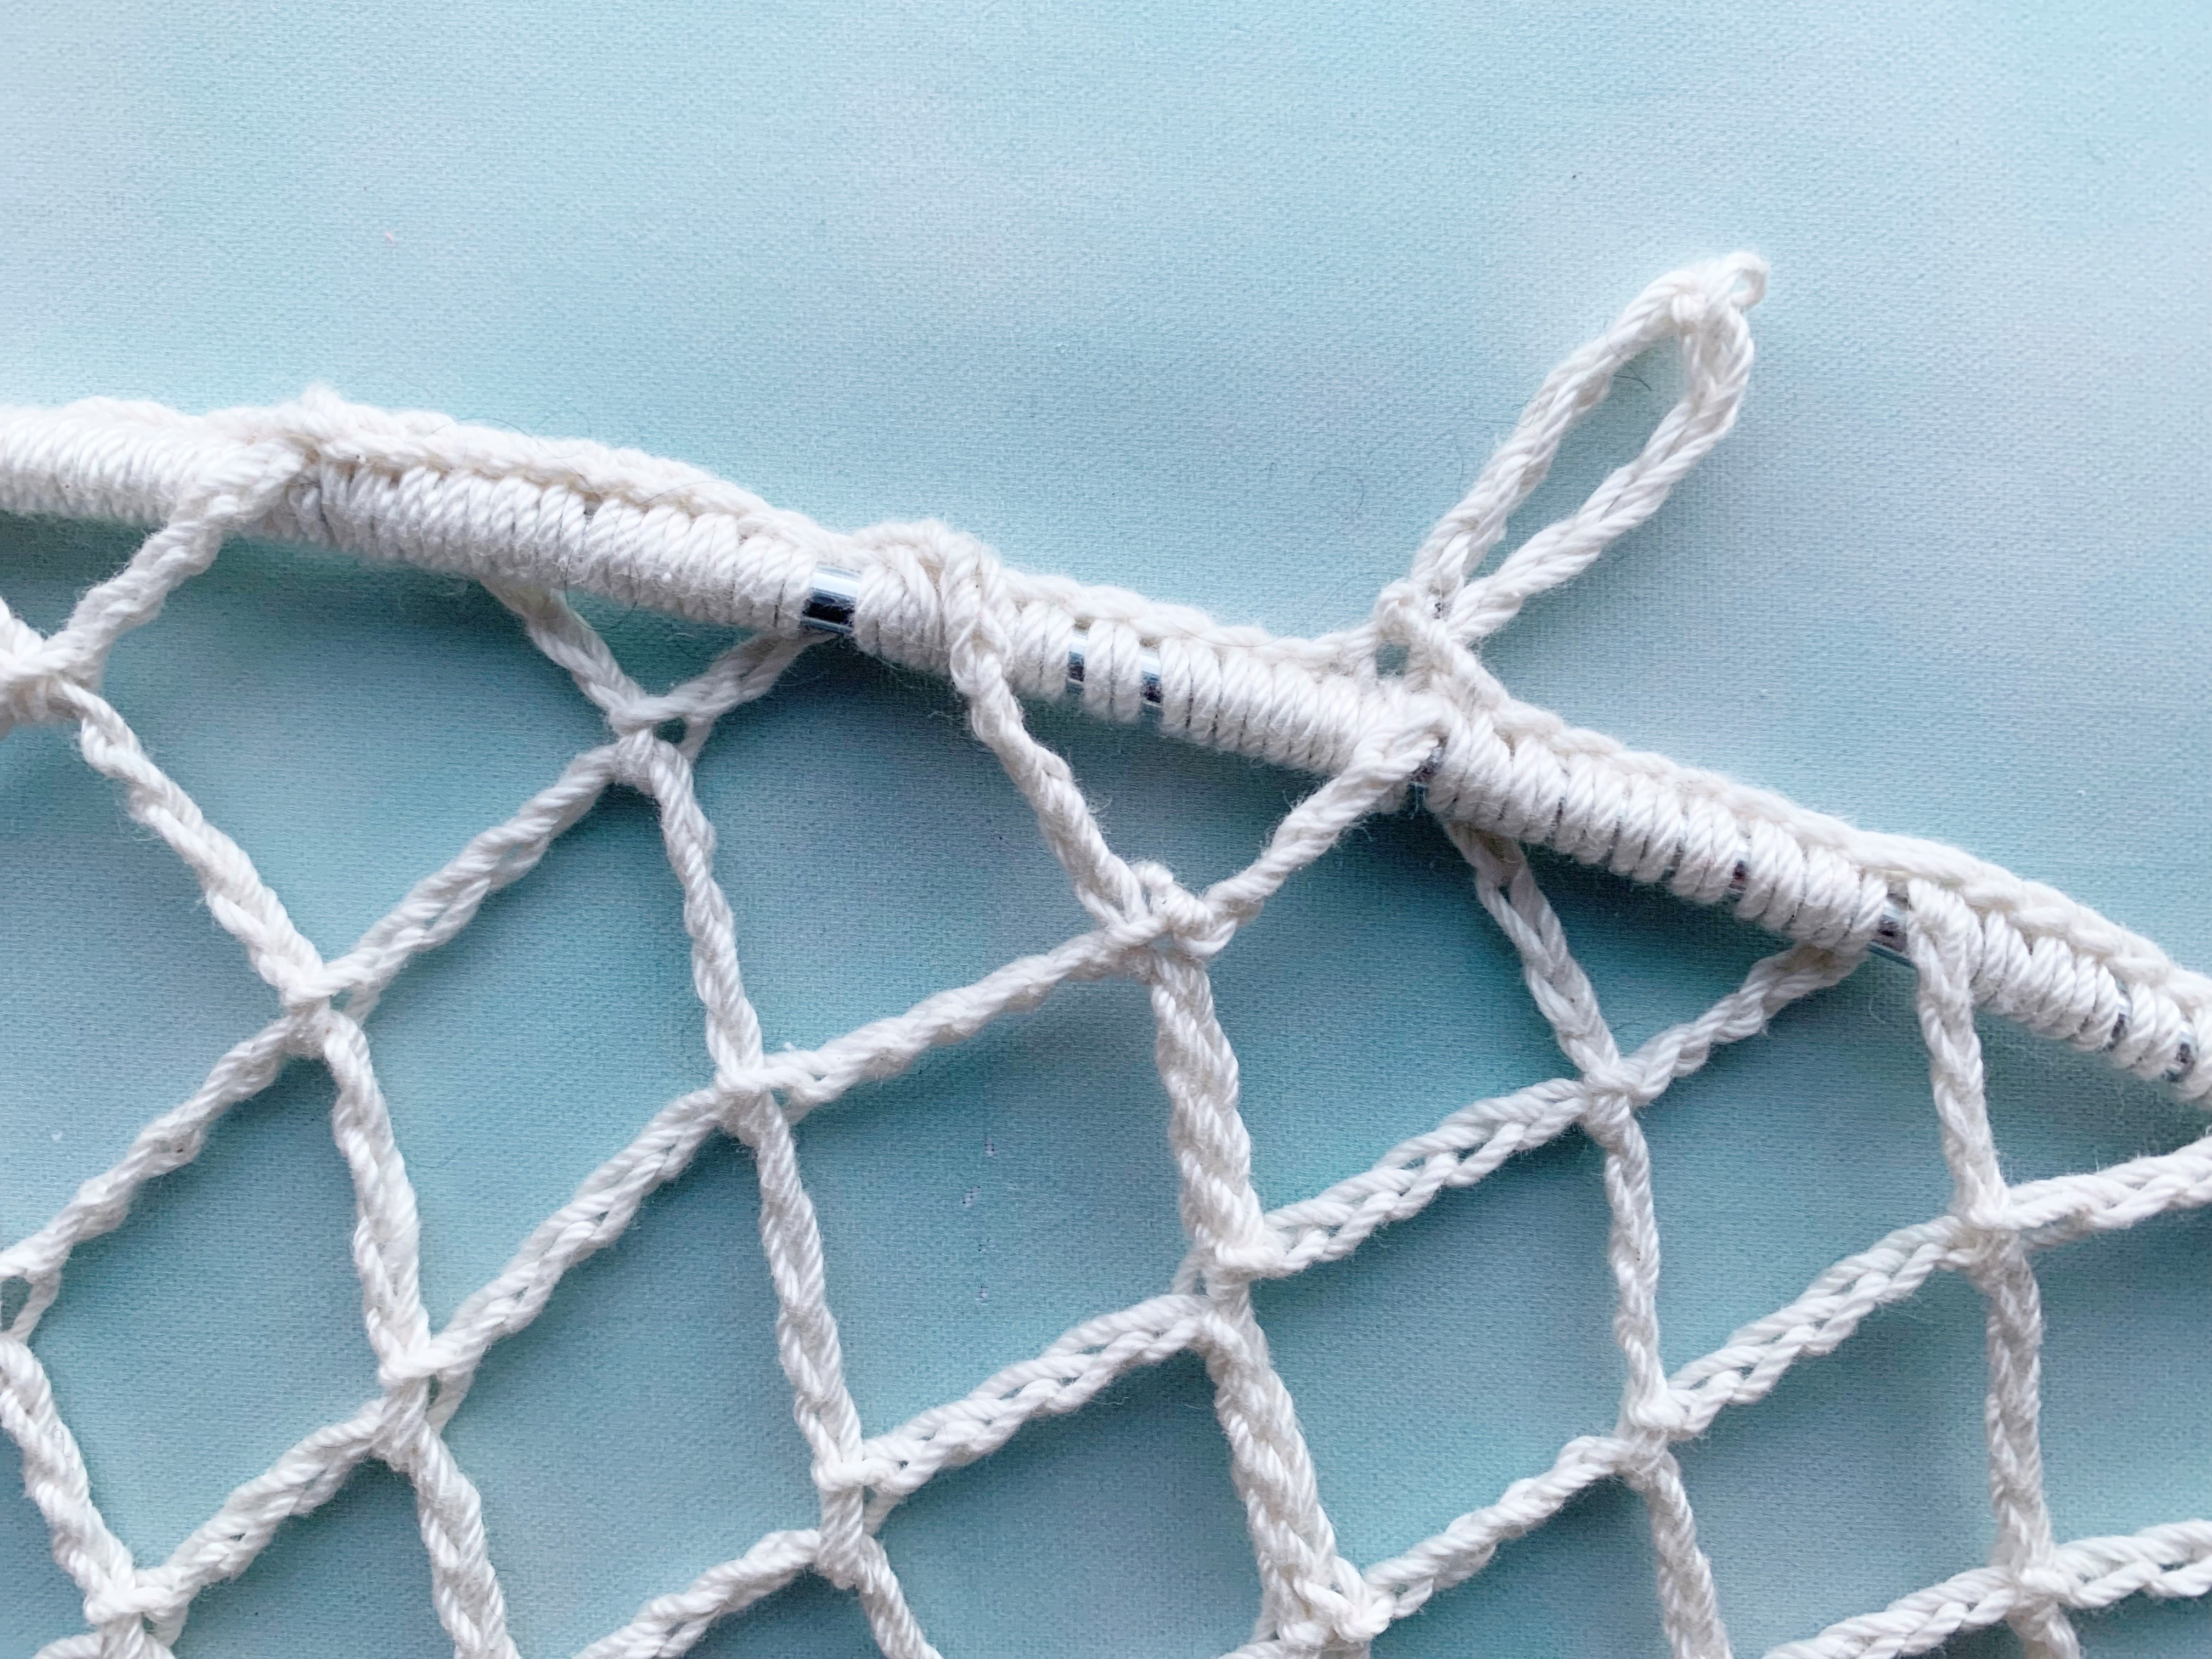
90cm wire hoop.
Measurements
90cm in diameter when stretched onto hoop
Abbreviations
UK terms
ch chain
ch(1)-sp chain space
dc double crochet
dcblo double crochet back loop only
tr treble crochet
dtrcl double treble crochet cluster
rep repeat
ss slip stitch(es)
ssblo slip stitch back loop only
st(s) stitch(es)
Repeat Format
[(….)] x times Work the instructions between parentheses and brackets the total number of times stated.
Pattern Notes
This pattern is worked in rounds, slip stitching to join. The last ch round is worked around the hoop. You can increase or decrease the diameter by adding or removing a set of repeats between rounds 15-24.
Instructions
Round 1 (tr, ch1) 11 times in a magic ring, ss to join
Round 2 ch1 (does not count as a st), 22dc (in each st and ch-sp), ss to join
Round 3 ch6, dc next, (dc, ch5, dc) 10 times, ss to join
Round 4 ss to top of ch, (ch5, ss to top of next ch) 11 times
Round 5 ch1, (5dc in ch5-sp, miss ss) 11 times, ss to join
Round 6 3ss, (ch6, miss 4, ss) 11 times
Round 7 3ss, (ch6, ss to next ch6-sp) 11 times (ss to first ss of the round to join)
Round 8 4ss (ch7, ss to next ch6-sp) 11 times (ss to first ss of the round to join)
Round 9 ch3, 2dtrcl in the first st, (ch4, ss to middle of ch7-sp, ch4, 3dtrcl in next ss) 10 times, ch4, ss in ch7-sp, ch4, ss to join
Round 10 (ch5, 3dtrcl in next ss, ch5, ss in dtrcl from prev round) 11 times
Round 11 ch3, 2dtrcl in the first st (ch6, ss to 3dtrcl from prev round, ch6, 3dtrcl to next ss), 10 times, ch6, ss in 3dtrcl, ch6, ss to join
Round 12 ch1 (does not count as a st), [dc, ch12, miss (ch6, ss, ch6)], rep 11 times, ss to join
Round 13 ch1, (miss dc, 12dc in ch12-sp) 11 times, ss to join
Round 14 (ch7, 6ssblo) 11 times
Round 15 4ss to top of ch, (ch6, ss to next ch) 11 times, ss to join
Round 16 4ss, (ch7, ss to ch6-sp) 11 times, ss to join
Round 17 4ss, (ch8, ss to ch7-sp) 11 times, ss to join
Round 18 5ss, (ch9, ss to ch8-sp) 11 times, ss to join
Round 19 rep round 9 (ch9-sp instead of ch7-sp, and 21 repeats instead of 10)
Round 20 rep round 10 (22 repeats)
Round 21 rep round 11 (21 repeats)
Round 22 rep round 12 (22 repeats)
Round 23 rep round 13 (22 repeats)
Round 24 rep round 14 (22 repeats)
Round 25-34 rep rounds 15-24
Round 35 rep round 15
Round 36 rep round 16
Round 37 rep round 17
Round 38 rep round 18
Now it’s time to work around the hoop. Each ch10 should loop over the hoop before slip stitching to next ch-sp.
Round 39 ss5, (ch10, ss to ch9-sp) to end, ss to join
Round 40 dc sets of 10 between each loop over the hoop all the way around the hoop. Ss to join.
Optional to create a loop to hang the legacy mandala: ch7, ss to next, tie off.
Chart
Please note, the chart shows only a segment of the full mandala and rounds 15, 17, 25, 27 and 29 slip stitch backwards on the chart. This is to keep the start and finish of the rounds in roughly the same place on the chart. You can ss forward, as normal.
Also note, the chart shows rounds 1-30, when the written pattern has a repeat of rounds 15-24. Please also repeat rounds 15-24 when working from the chart (unless making a smaller mandala).
The chart key has both UK and US terms (dc/sc)


*affiliate link