Well isn’t it obvious? This is the neon bag literally of my dreams 😀
I love the look of a crochet cross-body bag, but wasn’t entirely sure on the colours I wanted to use, UNTIL Scheepjes launched their neon catonas. I knew instantly that it was a done deal.
GET THE YARN
Scheepjes Catona is a 100% mercerised cotton, fingering weight yarn, with balls available in 50g, 25g and teeny tiny 10g sizes.
Scheepjes has a full list of stockists on their website.
Wool Warehouse ships all over the world from the UK Caro’s Atelier is my LYS and they also ship across Europe LoveCrafts.com also stock most colours
The pattern is in progress, should be ready soon. Lots of fun parts and only a single ball of each colour. I also bought the plastic chain online, but I’ll provide alternative instructions for you so it can be 100% crochet.
Recently I sat down with Matt from Scheepjes and shared all about my crafty journey, from my humble beginnings growing up on a farm in rural South Australia to world domination as a Scheepjes blogger! Well, not quite world domination, but you get my drift.
Check out the full interview here:
If you want to jump to some of the different topics we chat about, here is the list of chapters: 00:00 – Meeting Nerissa 07:42 – Becoming a Blogger and designer 11:08 – Favourite Scheepjes yarn? 12:58 – Designing own Colourway for Our Tribe 18:26 – Designs in YARN Bookazine 28:11 – The RainBOOM Make-A-Long 33:46 – My Agile Way of Working 38:20 – Size inclusive design, the Olaf Shrug 41:25 – What’s Next?
It was a joy to chat to Matt, and it was really fun to reflect on some of my favourite designs and my thought process when it comes to design.
I have a brand new crochet project on the go that I can’t wait to share with you!
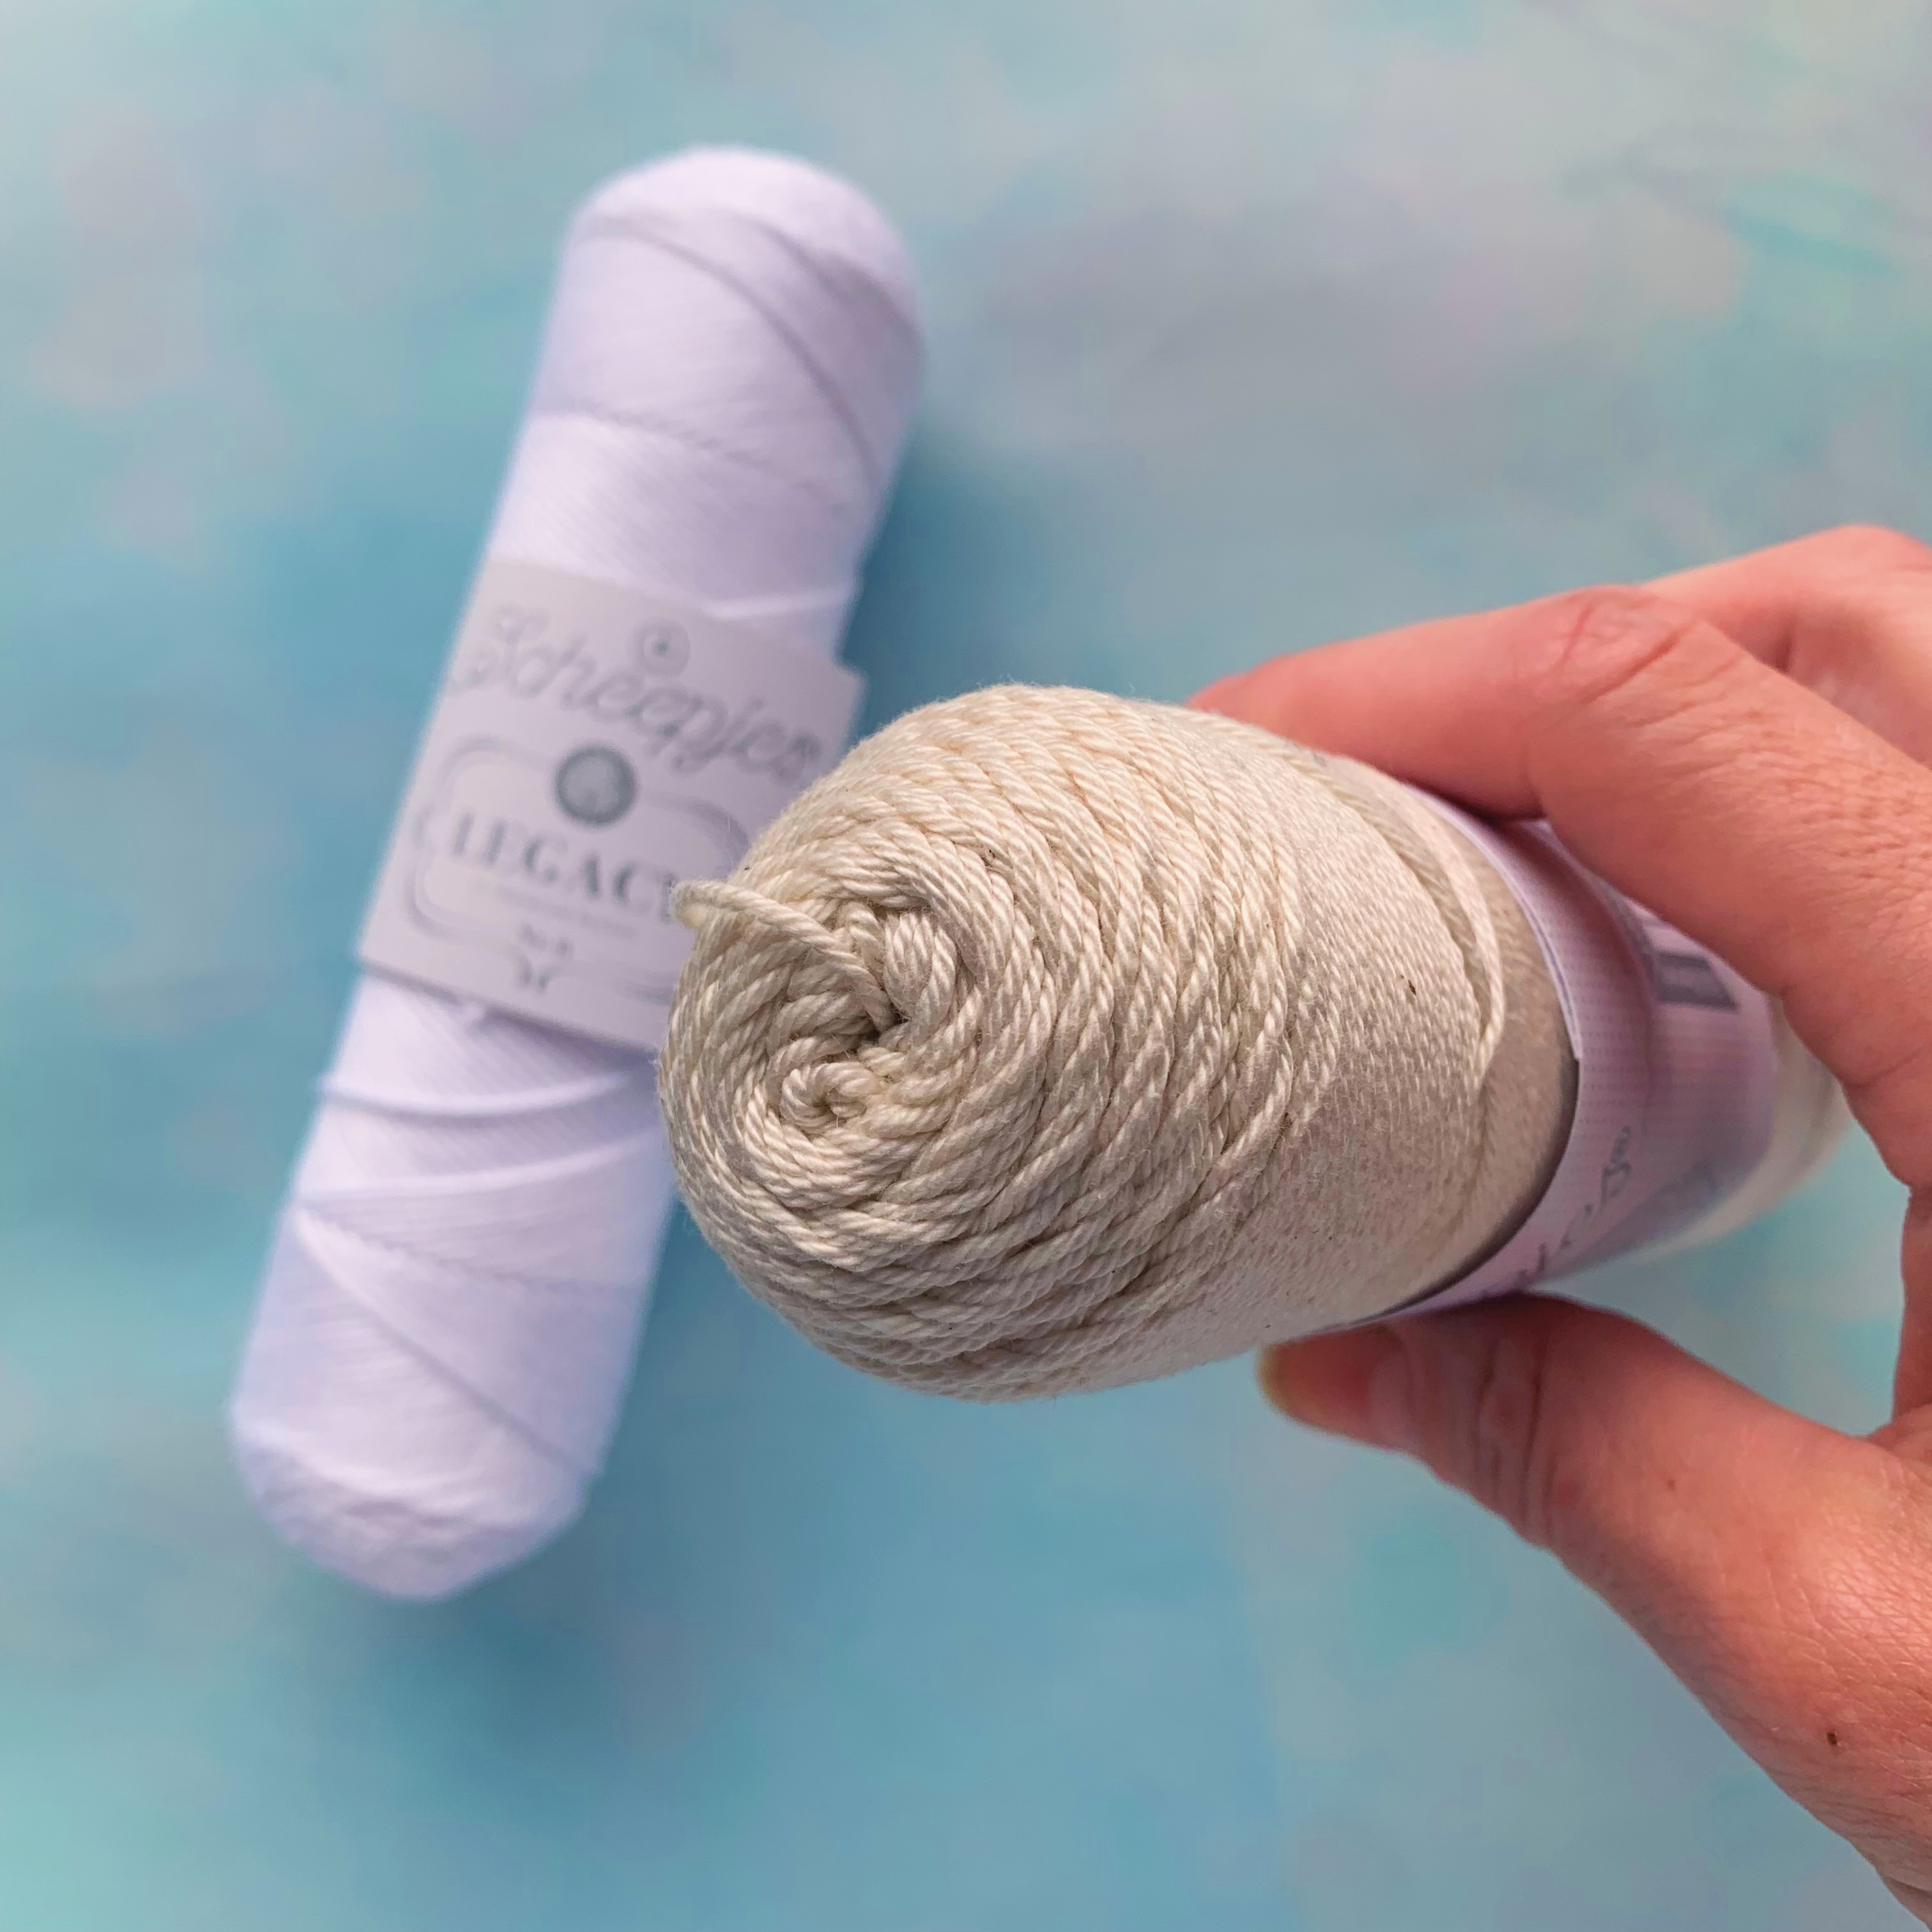
I’m using the lovely Legacy yarn from Scheepjes which is a nostalgic delight.
Doesn’t this yarn just trigger memories of years gone by, visiting an older relative, being fascinated by the cabinet filled with precious china and statuettes, all artfully arranged on delicate lace doilies?
Scheepjes has multiple weights of this yarn, mercerised and non-mercerised, in two colours, bright white and off white. I’m going to use the mercerised Nr. 6, with the following specs:
Hook size: 3.5mm Ball Weight: 100 grams Length: 240 metres Gauge: 23 stitches x 30 rows to 10 cm on 3.5mm hooks
Get the Yarn
Scheepjes has a full list of stockists on their website, you can search for one close to you.
I absolutely love these hanks. The way they’re wound, they way they feel in my hands, I’m transported to another time by this yarn, which I’m sure was the intention of the Scheepjes design team.
With that feeling of a by-gone era in mind, I’m going to use this yarn to make a vintage-inspired lace mandala. I’ve been busy building a chart to work from, it’s going to be quite a challenge to write it all out line by line I’m sure, so this will be a great project to brush off the chart making skills!
Keep an eye on my blog and Instagram for more photos and progress to come!
Ik heb de Nederlandstalige versie van mijn Rainbow Ridge Blanket toegevoegd! Het is hieronder, en ook op Ravelry/Lovecrafts te vinden als je liever een PDF printvriendelijke versie willen gebruiken.
100 x 70 cm na opspannen (kan iets kleiner uitvallen door spanning in het garen)
Stekenverhouding
18 stn en 19 rijen meten 10 cm in patroon. Houd de stekenverhouding goed in de gaten, want je hebt weinig speling met deze kleine bolletjes. Afkortingen
(NL termen) L losse Hv halve vaste S(tn) steek/steken l-open lossen opening St stokje(s) SOv sla-over vaste (zie speciale steken) HK hoofdkleur (2622 Latte) K(1) kleur (1) Herh herhalen VK Voorkant AK Achterkant
Notities
Je haakt het patroon in rijen heen en weer, met de SOv techniek (zie Speciale steken). Daarna haak je de dubbele rand in toeren.
Elk rij begint met een l1. Dit telt niet als een steek.
Herhalingen
[(…)] herhaal de instructies tussen haakjes het totaal aantal keer aangegeven.
Sorteer de kleuren in deze volgorde:
K1: 2514 Rose K2: 2513 Light Rose K3: 2620 Starfish K4: 2466 Peach K5: 2518 Canary K6: 2496 Banana K7: 2640 Mint K8: 2639 Green Tea K9: 2630 Arctic K10: 2646 Glacial Mist K11: 2658 Lavender K12: 2657 Orchid
Speciale steken
SOv (Sla-over vaste) is een techniek waarmee we een steek met twee draden tegelijk haken. Met de eerste kleur, steek naald in steek en sla de draad om de haaknaald. Haal de lus op. Met de tweede kleur, sla draad om van voor naar achter (houd de tweede kleur voor de eerste), met de eerste kleur, sla draad om en haal de eerste kleur door alle lussen.. Zie video instructies hier. Ook op Youtube.
Instructies
Rij 1 Met HK, 102l, 1v in derde l en alle l tot einde van rij, keer om. (100 stn) Rij 2 Met K1 als leidende kleur, samen met HK, l1, SOv in alle stn tot rij-eind, keer om. Rij 3-6 Herh Rij 2. Rij 7 Met HK als leidende kleur, herh Rij 2. Rij 8-10 Herh Rij 7. Rij 11-14 Herh Rij 2, knip draad K1 af. Rij 15 Wissel naar K2, met HK als leidende kleur, herh Rij 7. Rij 16-18 Herh Rij 7. Rij 19 Met K2 als leidende kleur, herh Rij 2. Rij 20-22 Herh Rij 2. Rij 23 Met HK als leidende kleur, herh Rij 7. Rij 24-26 Herh Rij 7. Rij 27 Met K2 als leidende kleur, herh Rij 2. Rij 28-30 Herh Rij 2, knip draad K2 af. Rij 31-46 Met K3, herh Rij 15-30. Rij 47-62 Met K4, herh Rij 15-30. Rij 63-78 Met K5, herh Rij 15-30. Rij 79-94 Met K6, herh Rij 15-30. Rij 95-111 Met K7, herh Rij 15-30. Rij 112-127 Met K8, herh Rij 15-30. Rij 128-143 Met K9, herh Rij 15-30. Rij 144-159 Met K10, herh Rij 15-30. Rij 160-175 Met K11, herh Rij 15-30. Rij 176-191 Met K12, herh Rij 15-30. Knip draad K12 af.
Rand
De rand haak je in toeren, eerst met een 6 mm en daarna een 4 mm haaknaald.
Toer 1Deze toer wordt de VK. Met HK en 6 mm haaknaald, keer om, 2l, 1hv in elke s tot einde van rij (dit is nu de hoek), 2l, roteer 90 graden, 1hv in elk rij-eind, zo dichtbij de zijkant als mogelijk, tot de volgende hoek, 1hv in de hoek, 2l, roteer 90 graden, 1hv in elke l tot de volgende hoek, roteer 90 graden, 1hv in elk rij-eind tot de laatste hoek, sluit met een hv in eerste s.
Toer 2 Met 4 mm haaknaald, 1l, 1v in de hoek-open [(1l, sla 1 s over, 1v in l-open) tot hoek-open, 2l, 1v in l-open], herh tot einde van toer, sluit toer niet in laatste l-open, maar haak hv in v.
Toer 3 1hv in elke s tot hoek-open, 1l, [(1l in l-open, 1l) tot hoek-open, (1v, 2l, 1v) in hoek-open], herh tot einde van toer, 1l, sluit af met hv in v.
Toer 4 Herh Toer 3, maar voeg 1 extra herh van (1l, v, 1l) toe voordat je de toer sluit met een hv.
Toer 5 Herh Toer 4, hecht af.
Omdraaien naar AK Hecht aan in in AK van dezelfde hoek als Toer 1 van de rand, en haak Toer 1 opnieuw, maar nu in de AK van de hv van Toer 1 (VK). Herh daarna Toer 2-5 (deze bevinden zich dus aan AK).
Omdraaien naar VK We sluiten nu de dubbele rand en verbergen alle draadjes daarin als volgt: 1l, 1v in l-open van zowel laatste AK als laatste VK toer, [(1l, 1v in l-open van beide toeren) tot de hoek-open, (1v, 1l, 1v in beide toeren) in hoek l-open], herh tot einde van toer, sluit af met een hv.
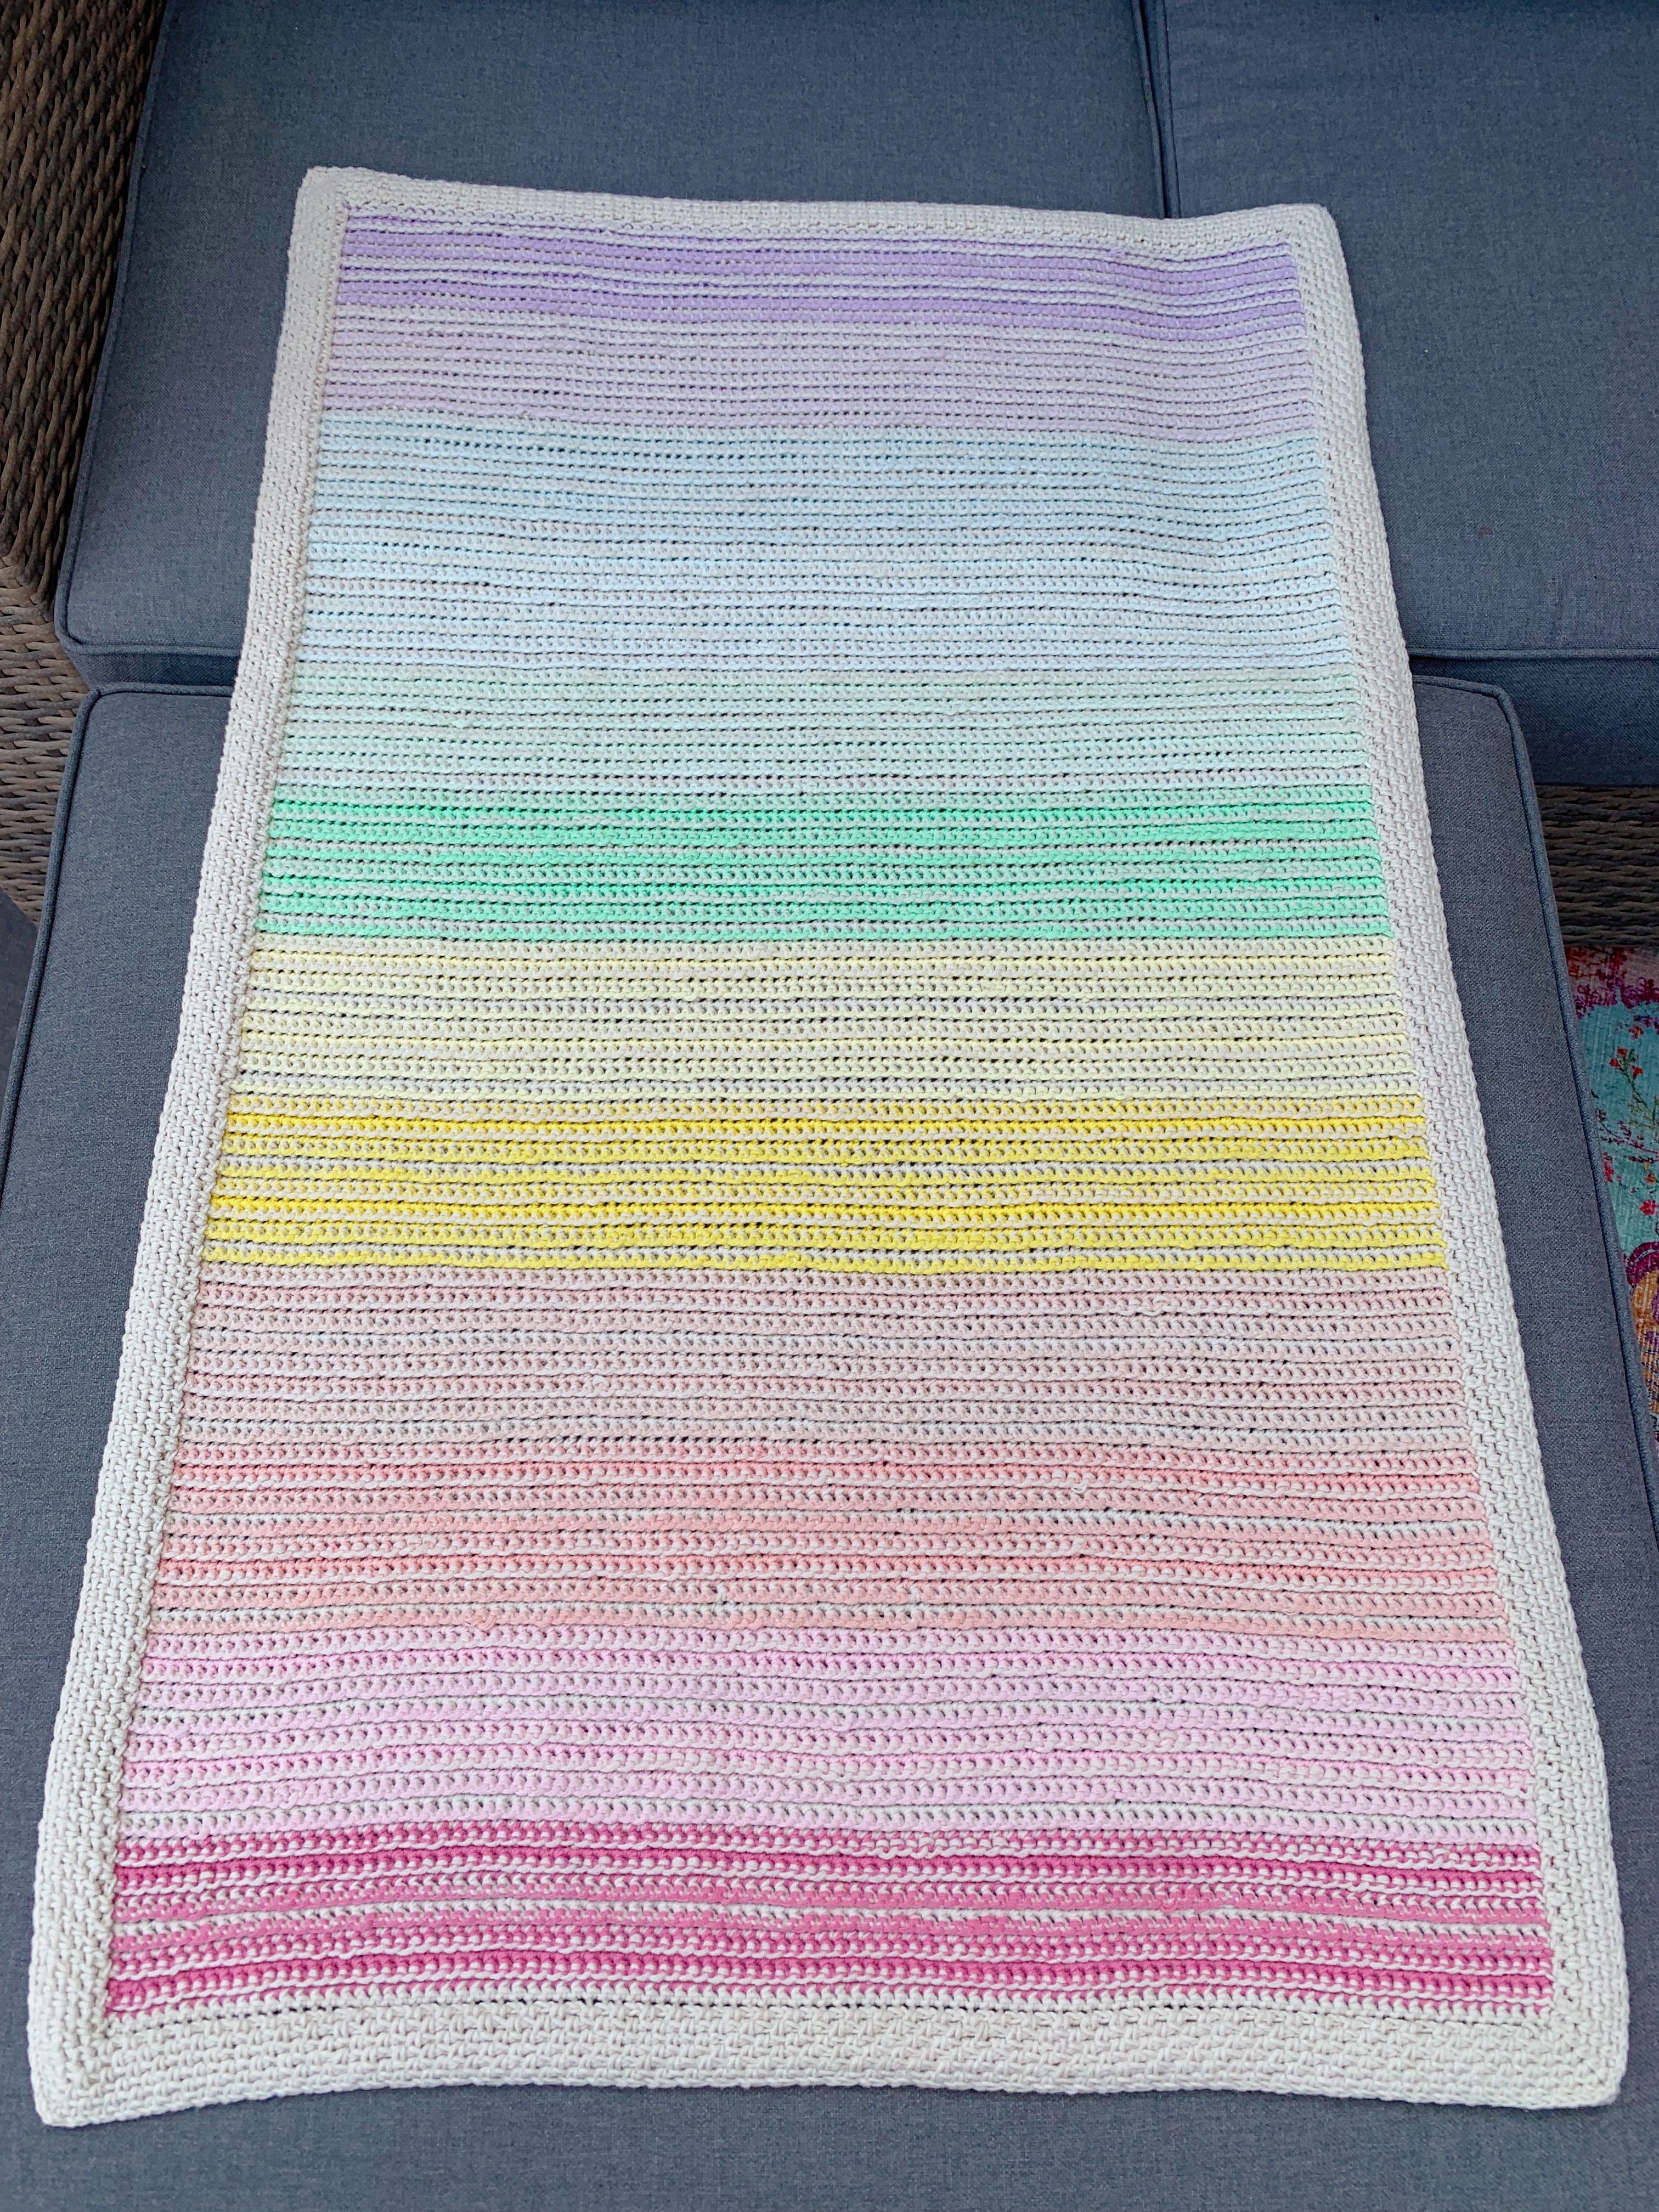
I LOVED making this blanket SO much! I mean, you know how few blankets I make, right? I simply struggle with making something so huge, it takes me months! This one however, is perfect for my instant gratification heart. I could smash it out relatively quickly as it’s sized for a baby, and the rhythm of the stitches means you just want to keep doing “one more row.”
The Scheepjes Softfun is a wonderful blanket yarn. It has loads of stretch to make it squishy and a bit of weight to add warmth, plus enough cotton to make sure you can still use it all summer long.
No baby? No problem! It also makes a great lap blanket 😉
There will be US terms available on Ravelry and Lovecrafts, and this free version below uses UK terminology.
There are five different Softfun colour packs to choose from including Pastel (which I have), Jewel, Rich, Rainbow and Cloud. There are a full list of stockists on the Scheepjes website, but you can also find the packs at your favourite LYS or online retailer including: Wool Warehouse* (global) Caro’s Atelier* (NL and Europe) Love Crafts* (US) Dot’s Yarn Den (US) Belle Mae Yarns (AU)
You’ll need one colour pack in the colours you like best, plus 6 balls of Softfun in a complementary colourway. I chose 2622 Latte.
18sts and 19 rows over 10 cm in pattern. Stick as close to the tension as possible as the mini balls are limited and you may run out if your tension is looser than indicated.
Measurements
100 x 70cm blocked (will contract a little due to the stretch in the yarn)
Abbreviations
(UK terms)
Ch chain Ss slip stitch St(s) stitch(es) Ch chain Ch(2)-sp chain (2) space Dc double crochet YUdc yarn under double crochet MC main colour (2622 Latte) CC(1) contrast colour. Number denotes which colour to be used Rep repeat RS right side WS Wrong side
Pattern Notes
This pattern is worked back and forth in rows using the yarn under colourwork technique to make the blanket. The double border is worked in rounds.
Each row begins with a ch1, this does not count as a stitch.
Work instructions inside brackets and parentheses [(…)] the indicated number of times.
Sort the colours into the following order:
CC1: 2514 Rose CC2: 2513 Light Rose CC3: 2620 Starfish CC4: 2466 Peach CC5: 2518 Canary CC6: 2496 Banana CC7: 2640 Mint CC8: 2639 Green Tea CC9: 2630 Arctic CC10: 2646 Glacial Mist CC11: 2658 Lavendar CC12: 2657 Orchid
Special Abbreviation
YUdc (yarn under double crochet) is a colourwork technique using two strands of working yarn. To work the stitch insert hook with mc, yoh, pull up a loop, with cc yoh from front to back (keeping cc in front of mc), with mc yoh, pull through 3 loops. See video instructions here on Instagram, or here for Youtube.
Row 1 With MC, ch102, dc in the third ch and in all ch sts to end (100sts), turn Row 2 With CC1 as the lead, carrying MC, ch1, YUDC in all sts to end, turn Row 3-6 Rep row 2 Row 7 With MC as the lead and rep row 2 Row 8-10 Rep row 7 Row 11-14 Rep row 2, cut CC1 Row 15 Switch to CC2, with MC as the lead, rep row 7 Row 16-18 Rep row 7 Row 19 With CC2 as the lead, rep row 2 Row 20-22 Rep row 2 Row 23 With MC as the lead, rep row 7 Row 24-26 Rep row 7 Row 27 With CC2 as the lead, rep row 2 Row 28-30 Rep row 2, cut CC2 Row 31-46 With CC3 rep rows 15-30 Row 47-62 With CC4 rep rows 15-30 Row 63-78 With CC5 rep rows 15-30 Row 79-94 With CC6 rep rows 15-30 Row 95-111 With CC7 rep rows 15-30 Row 112-127 With CC8 rep rows 15-30 Row 128-143 With CC9 rep rows 15-30 Row 144-159 With CC10 rep rows 15-30 Row 160-175 With CC11 rep rows 15-30 Row 176-191 With CC12 rep rows 15-30, cut yarn
Border
Working in rounds with 6 and 4mm hooks
Round 1 This now becomes the RS. With MC and a 6mm hook, turn, ch2, ss to end (now corner), ch2, rotate 90 degrees, ss in each row as close to the edge as possible to next corner, ss in corner, ch2, rotate 90 degrees, ss in each st across, ch2, rotate 90 degrees, ss in each row to next corner, ss to ch1 to join.
Round 2 With 4mm hook ch1, dc in ch-sp [(ch1, miss 1, dc in ch-sp) rep to corner ch2-sp, ch 2, dc in ch2-sp], rep on all four sides to end, don’t work last dc in final corner ch2-sp, ss to dc instead.
Round 3 Ss to ch2-sp, ch1 [(dc in ch2-sp, ch1) rep to corner, (dc, ch2, dc) in corner] rep to end, ch1, ss to dc to join.
Round 4 Rep round 3, but ad 1 (ch1, dc, ch1) at the end before ss to join.
Round 5 Rep round 4, tie off.
Flip to WS, Starting in the same corner as R1 from the RS instructions, and working in the back of the SS from round 1, rep rounds 1-5.
Flip to RS Close the double border. Ch1, dc into ch-sp of both layers, [(ch1,dc in ch-sp of both layers) to corner, (dc, ch1, dc in both layers) in corner ch2-sp], rep to end, ss to join, hiding all the ends inside the border. Cut yarn, weave in the end, block to size.
I’ve been bursting to share this with you for weeks and weeks (in case my instagram posts didn’t give it away), this one is absolutely beautiful!
The colours, the texture, all of it. I love it.
Get the Yarn
There are five different Softfun colour packs to choose from including Pastel (which I have), Jewel, Rich, Rainbow and Cloud. There are a full list of stockists on the Scheepjes website, but you can also find the packs at your favourite LYS or online retailer including: Wool Warehouse* (global) Caro’s Atelier* (NL and Europe) Black Sheep Wools* (UK) Dot’s Yarn Den (US) Belle Mae Yarns (AU)
You’ll need one colour pack in the colours you like best, plus 6 balls of Softfun in a complementary colourway. I chose 2622 Latte.
I’ve used the same yarn under technique to make the Rainbow Ridge blanket that I used in Reti the Koala Lovey from a few months ago, with a moss (linen) stitch double border.
The softfun colour pack coupled with a few 50g balls of softfun make the perfect baby/cot sized blanket. The cotton blend makes it great for warmer months, and the weight of the blanket thanks to the ridge texture means that it’s also snuggly. The durability of the acrylic means that you can wash and wash and wash this one and it will keep looking beautiful.
Of course the dog couldn’t be left out, she inserted herself into most of the photos!
I’m getting ready to convert the pattern from UK to US terms so I can upload it within the next week. Stay tuned!
Scheepjes Cahlista is an aran weight yarn, made with 100% cotton. I’m using two balls of colour 074 Mercury, and you will also need a single ball of the complementary colour. Have a look at the Scheepjes Website for colour inspiration and stockists, there are more than 100 colours to choose from!
You can order the yarn online from my local yarn store Caro’s Atelier*.
Note: this version of the pattern uses UK terms. If you would like to access US terms or printable PDFs in both UK and US terms, you can purchase the patterns from either Ravelry or Lovecrafts.com for a small fee.
Please share your projects using #KoalaLovey in the socials and tag me everywhere!
Let’s go!
Materials
MC: Scheepjes Cahlista in 074 Mercury – 2 balls (100% cotton, aran weight, 50g, 85m) CC: Scheepjes Cahlista in your choice – 1 ball (100% cotton, aran weight, 50g, 85m) Scrap black, preferably Scheepjes Cahlista – about 2 metres I used 385 Chrystalline and 256 Cornelia Rose in my samples. 4mm hook (amigurumi parts) 6mm hook (mini-blanket) 5mm hook (border of mini-blanket) Toy filling (or you can stuff the head with scrap yarn or anything you have at home that will be a bit squishy)
Tension
Mini-blanket: 16 rows and 17sts over 10 cm in YUdc
Head: not important, but stitches should be tight, so use at least a hook size down from what the yarn recommends.
Measurements
Mini-blanket – 30 x 30cm blocked
Abbreviations
(UK terms) Ch chain MR magic ring Ss slip stitch St(s) stitch(es) Ch chain Dc double crochet DcInc double crochet increase (2 sts increased in 1 st) Dec double crochet decrease (1 st worked decreased over 2 sts) HtrInc half treble crochet increase (2 sts increased in 1 st) Tr treble crochet YUdc yarn under double crochet MC main colour CC contrast colour. Rep repeat Pm place marker Rm remove marker Flo front loop only Blo back loop only
Pattern Notes
This pattern is worked both amigurumi style in continuous rounds (with no joining) and sewn together to make the koala’s head, and also back and forth in rows using the yarn under colourwork technique to make the mini-blanket.
Work instructions inside parentheses (…) the indicated number of times.
Special Abbreviation
YUdc (yarn under double crochet) is a colourwork technique using two strands of working yarn. To work the stitch insert hook with mc, yoh, pull up a loop, with cc yoh from front to back (keeping cc in front of mc), with mc yoh, pull through 3 loops.
Round 1 6dc in MR (mark first st and move marker up each round to keep track of starting point) (6) Round 2 6dcinc (12) Round 3 (inc, dc) six times (18) Round 4 (inc, 2dc) six times (24) Round 5 (inc, 3dc) six times (30) Round 6 (inc, 4dc) six times (36) Round 7-17 36dc (36) Round 18 dec twice, pm second dec, 14dc, dec twice, pm second dec, 13dc, dec, rm. (32) Round 19 dec, pm, 12dc, dec twice, rm, pm second dec, 11dc, dec, ss. (28)
Cut yarn, leave tail long enough to sew top shut when assembling.
Ear
(make 2) Working in rounds, with MC and 4mm hook
Round 1 6dc in MR (6) Round 2 6dcinc (12) Round 3 (inc, dc) six times (18) Round 4 inc, pm in second st of inc, 8dc, inc, pm in second st of inc, 9dc (20) (starting point is moved by 1st ) Round 5 20dc Round 6 inc, pm in second st of inc, 9dc, inc, pm in second st of inc, 10dc (22) (starting point is moved by 1 st) Round 7-10 22dc. Ss (22)
Cut yarn and leave tail to sew to head when assembling.
Nose
Working in rounds, with black and 4mm hook
Round 1 6dc in MR (6) Round 2 6dcinc (12) Round 3 (3htrinc, 3dc) twice, ss to join (18)
Cut yarn, leave long tail to sew to head and make eyes.
Mini Blanket
Working back and forth in rows using both MC and CC, 6mm hook
Row 1 MC, ch42 Row 2 YUdc in third loop and each ch across to end (40) Row 3 ch1 (does not count as a st), YUDC to end (40) Row 4-42 rep row 3 (40)
Cut MC and continue working the border in CC.
Border
Working in rounds 5 and 6mm hooks
Round 1 turn, with 6mm hook, work 40ss loosely across to corner, ch1, 40ss across the rows (note, there are two more rows than border sts, so you will need to “lose” two sts). Continue around to end and ch1 and ss to 1st st of the round. Round 2 change to 5mm hook, ch2, working into the ss, [tr to corner ch (tr, ch1 tr) in flo of corner ch], rep around to end, ss to join. Cut yarn. Round 3 flip your work so the back is facing you, ss to join at a corner, ch2, tr in the back of the ss from round 1, rep round 2. Round 4 now we’ll join the two rounds. Ch1, dc in the flo of round 3 sts and the corresponding blo from round 2 sts to join the two rounds together. Rep to corner, 3dc in the corner ch, then rep all the way round to end. Ss to join, cut yarn, weave in ends and block.
Assembly
Position nose 7 rounds below opening at mid-point between markers, sew to head. Make eyes 1 st to the side of the nose, 3 sts wide and slightly angled (1 round) upwards at the outer side. Fasten the eye loop on row below to fix it in place.
Stuff the head with toy filling and sew shut. Attach ears to side of head on an angle, 3 sts in from the sides of the sewn shut head.
Sew the head to the middle of the blanket, either using the leftover yarn tails, or a new length of yarn, using round 3 of the head as your guide.
Scheepjes Cahlista is an aran weight yarn, made with 100% cotton. I’m using two balls of colour 074 Mercury, and you will also need a single ball of the complementary colour. Have a look at the Scheepjes Website for colour inspiration and stockists, there are more than 100 colours to choose from!
You can order the yarn online from my local yarn store Caro’s Atelier*.
As I mentioned in my previous posts, I’ve used Scheepjes Cahlista for this design, and it’s really the perfect yarn for baby things. The brushed cotton is soft and because it’s an aran weight it works up fast!
I’ve loved creating this smooshy little lovey. I mean, a sleepy koala, who’d have thought? They only sleep about 20 hours per day!
I came across the technique to create the two colour blanket on Instagram, and it’s called “yarn under.” In my pattern (which will go live soon) I’ve abbreviated the stich to YUDC, or yarn under (UK terms) double crochet.
The pattern is almost ready, the colours look amazing. I can’t wait to share it with you!
Last week I told you about the baby project that I’m working on and I’m making great progress!
My little Koala Lovey is really starting to take shape!
There are almost as many stitch markers as pieces!
Right now it’s a bit like a jigsaw puzzle, everything is there, it all just needs to find the perfect placement so it all fits together, just so.
If you don’t know what a lovey is, I think it’s a very technical term for a stuffed animal head attached to a little square of fabric that babi’s absolutely love to snuggle with and munch on. I remember how much my daughter enjoyed hers, it was adorable! I made a bunch in the past, it was like a mini production line there for a while as babies seemed to be popping out all over the place!
GET THE YARN
Scheepjes Cahlista is an aran weight yarn, made with 100% cotton. I’m using two balls of colour 074 Mercury, and you will also need a single ball of the complementary colour. Have a look at the Scheepjes Website for colour inspiration and stockists, there are more than 100 colours to choose from!
You can order the yarn online from my local yarn store Caro’s Atelier*.
Introducing The Carolyn – a celebration of Autumn.
GET THE YARN
You’ll need two skeins of River Washed and one skein of River Washed XL (or Stone Washed, choose your favourite).
Scheepjes has a complete list of stockists on their website. Most of their retailers stock Stone Washed and River Washed, but if not, don’t be afraid to ask them to get it in!
Here in the Netherlands, Caro’s Atelier* has River Washed and River Washed XL, plus they’re my LYS (and awesome).
In the US check out DotsYarnDen who also stocks River Washed, plus a bunch of other Scheepjes yarns.
In Australia Little Woollie also stocks Stone Washed and Stone Washed XL.
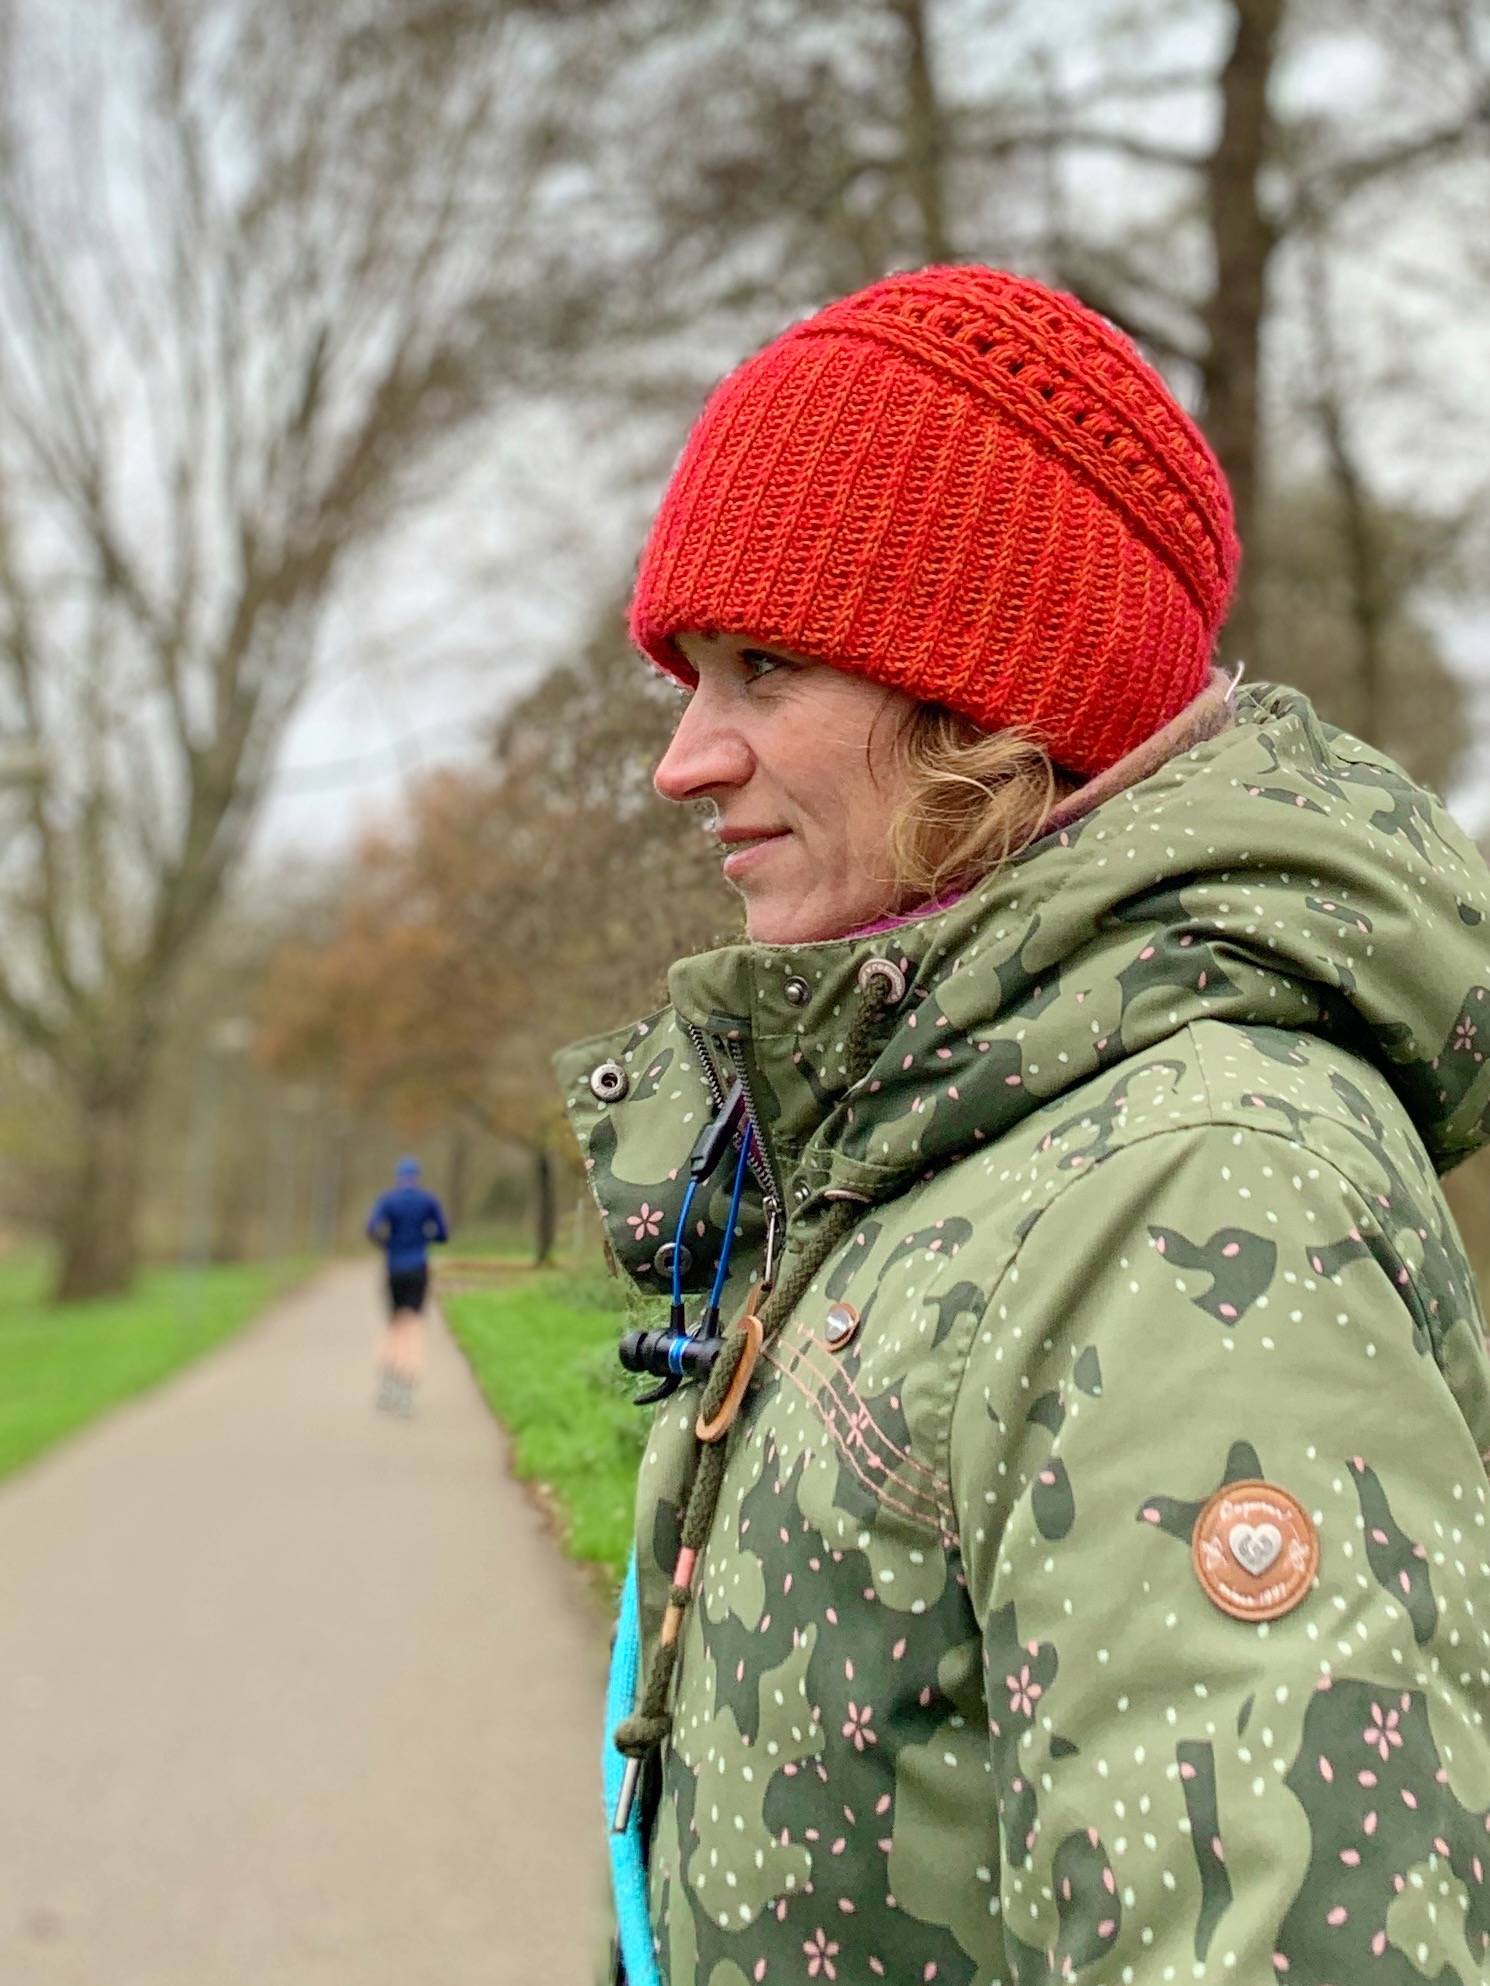
The Carolyn is a completely different design and construction to most usual hats.
We have a double brim for warmth, which is also shaped in a way so that the crown sits perfectly on your head and snuggles into the back of your neck and keeps your ears covered.
We make the brim first, and then work upwards, decreasing as we go. The puff stitches add a textural dimension and interest, without losing warmth.
The River Washed is warm enough to wear all through the winter, but still breathes so you can wear it on days when there is just a bit of a chill in the air.
Can you sense that I’m a bit obsessed with warmth? Seriously, before I moved to Northern Europe I didn’t even own a proper winter coat, let alone a scarf or hat! Now these three items make up half my wardrobe.
But why Carolyn?
Well. Carolyn is a good friend of mine. She’s a north American who LOVES Autumn and she was the inspiration for the shape of this hat. I like to choose the names of people who are dear to me to name my designs, and Carolyn was the obvious choice. We walk our dogs together and I love her excitement when October rolls around. She’s always extolling her love of this time of year while I’m too busy complaining about the cold 😀
The pattern has been tested, and I’m adding the finishing touches. I plan to launch it in the coming days, so do get your yarn order in. This will make a fantastic Christmas gift for that one person in your life who complains about the cold as much as I do!