I’ve been bursting to share this with you for weeks and weeks (in case my instagram posts didn’t give it away), this one is absolutely beautiful!
The colours, the texture, all of it. I love it.
Get the Yarn
There are five different Softfun colour packs to choose from including Pastel (which I have), Jewel, Rich, Rainbow and Cloud. There are a full list of stockists on the Scheepjes website, but you can also find the packs at your favourite LYS or online retailer including: Wool Warehouse* (global) Caro’s Atelier* (NL and Europe) Black Sheep Wools* (UK) Dot’s Yarn Den (US) Belle Mae Yarns (AU)
You’ll need one colour pack in the colours you like best, plus 6 balls of Softfun in a complementary colourway. I chose 2622 Latte.
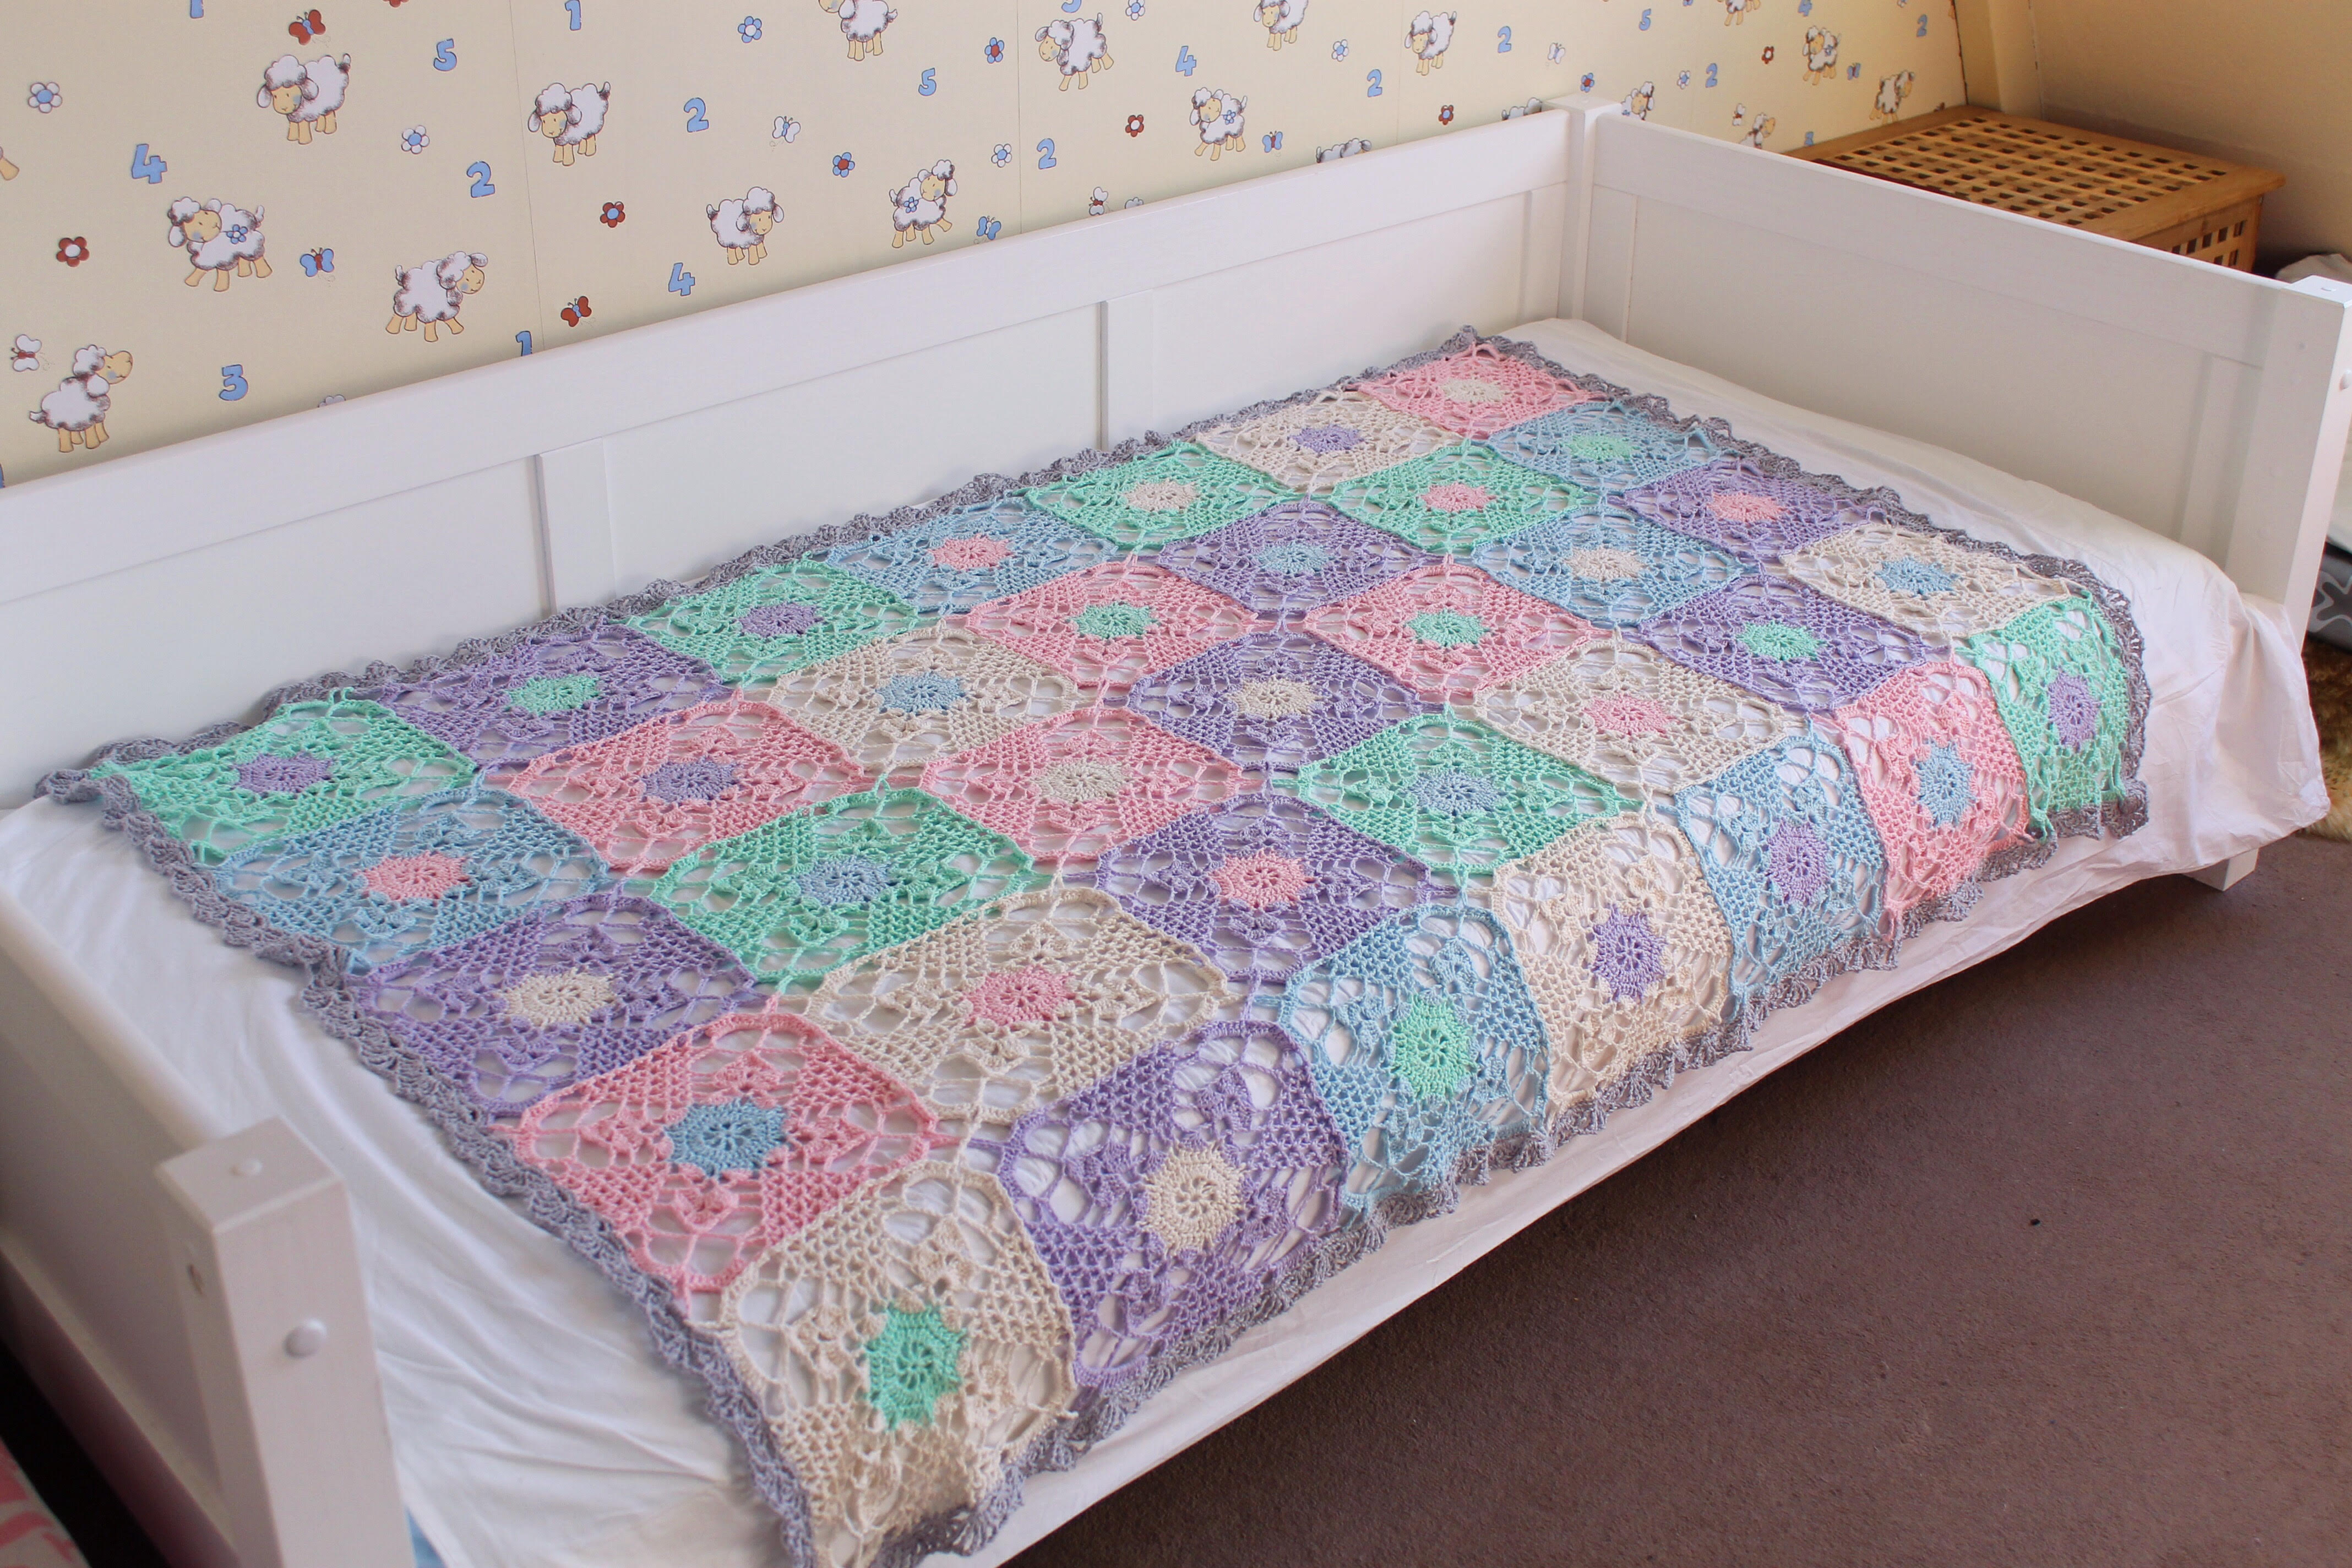
I’ve used the same yarn under technique to make the Rainbow Ridge blanket that I used in Reti the Koala Lovey from a few months ago, with a moss (linen) stitch double border.
The softfun colour pack coupled with a few 50g balls of softfun make the perfect baby/cot sized blanket. The cotton blend makes it great for warmer months, and the weight of the blanket thanks to the ridge texture means that it’s also snuggly. The durability of the acrylic means that you can wash and wash and wash this one and it will keep looking beautiful.
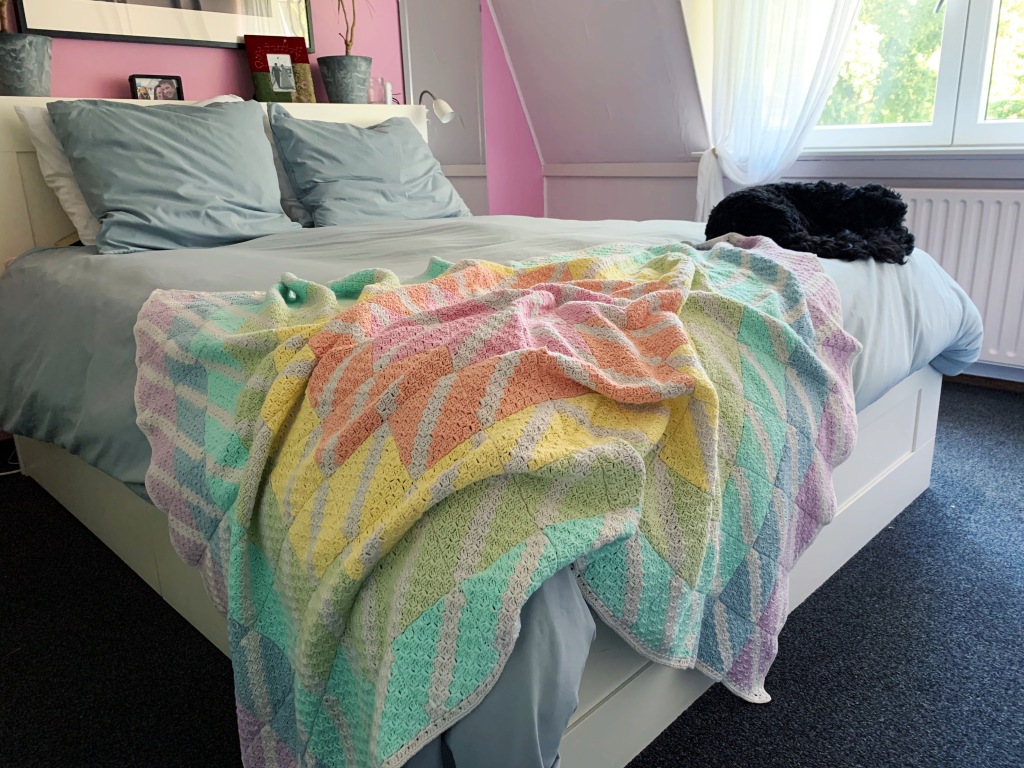
Of course the dog couldn’t be left out, she inserted herself into most of the photos!
I’m getting ready to convert the pattern from UK to US terms so I can upload it within the next week. Stay tuned!
I already shared my love for the Scheepjes Softfun colour packs, and if you follow me on Instagram (please do if you don’t, I share a bit more often there), you’ll have seen my progress pics already.
There are five different Softfun colour packs to choose from including Pastel (which I have), Jewel, Rich, Rainbow and Cloud. There are a full list of stockists on the Scheepjes website, but you can also find the packs at your favourite LYS or online retailer including: Wool Warehouse* (global) Caro’s Atelier* (NL and Europe) Black Sheep Wools* (UK) Dot’s Yarn Den (US) Belle Mae Yarns (AU)
You’ll need one colour pack in the colours you like best, plus 6 balls of Softfun in a complementary colourway. I chose 2622 Latte.
I’m working the YUDC stitch that I used in my Reti Koala pattern, so these two projects together might almost be called a collection!
Scheepjes Cahlista is an aran weight yarn, made with 100% cotton. I’m using two balls of colour 074 Mercury, and you will also need a single ball of the complementary colour. Have a look at the Scheepjes Website for colour inspiration and stockists, there are more than 100 colours to choose from!
You can order the yarn online from my local yarn store Caro’s Atelier*.
Note: this version of the pattern uses UK terms. If you would like to access US terms or printable PDFs in both UK and US terms, you can purchase the patterns from either Ravelry or Lovecrafts.com for a small fee.
Please share your projects using #KoalaLovey in the socials and tag me everywhere!
Let’s go!
Materials
MC: Scheepjes Cahlista in 074 Mercury – 2 balls (100% cotton, aran weight, 50g, 85m) CC: Scheepjes Cahlista in your choice – 1 ball (100% cotton, aran weight, 50g, 85m) Scrap black, preferably Scheepjes Cahlista – about 2 metres I used 385 Chrystalline and 256 Cornelia Rose in my samples. 4mm hook (amigurumi parts) 6mm hook (mini-blanket) 5mm hook (border of mini-blanket) Toy filling (or you can stuff the head with scrap yarn or anything you have at home that will be a bit squishy)
Tension
Mini-blanket: 16 rows and 17sts over 10 cm in YUdc
Head: not important, but stitches should be tight, so use at least a hook size down from what the yarn recommends.
Measurements
Mini-blanket – 30 x 30cm blocked
Abbreviations
(UK terms) Ch chain MR magic ring Ss slip stitch St(s) stitch(es) Ch chain Dc double crochet DcInc double crochet increase (2 sts increased in 1 st) Dec double crochet decrease (1 st worked decreased over 2 sts) HtrInc half treble crochet increase (2 sts increased in 1 st) Tr treble crochet YUdc yarn under double crochet MC main colour CC contrast colour. Rep repeat Pm place marker Rm remove marker Flo front loop only Blo back loop only
Pattern Notes
This pattern is worked both amigurumi style in continuous rounds (with no joining) and sewn together to make the koala’s head, and also back and forth in rows using the yarn under colourwork technique to make the mini-blanket.
Work instructions inside parentheses (…) the indicated number of times.
Special Abbreviation
YUdc (yarn under double crochet) is a colourwork technique using two strands of working yarn. To work the stitch insert hook with mc, yoh, pull up a loop, with cc yoh from front to back (keeping cc in front of mc), with mc yoh, pull through 3 loops.
Round 1 6dc in MR (mark first st and move marker up each round to keep track of starting point) (6) Round 2 6dcinc (12) Round 3 (inc, dc) six times (18) Round 4 (inc, 2dc) six times (24) Round 5 (inc, 3dc) six times (30) Round 6 (inc, 4dc) six times (36) Round 7-17 36dc (36) Round 18 dec twice, pm second dec, 14dc, dec twice, pm second dec, 13dc, dec, rm. (32) Round 19 dec, pm, 12dc, dec twice, rm, pm second dec, 11dc, dec, ss. (28)
Cut yarn, leave tail long enough to sew top shut when assembling.
Ear
(make 2) Working in rounds, with MC and 4mm hook
Round 1 6dc in MR (6) Round 2 6dcinc (12) Round 3 (inc, dc) six times (18) Round 4 inc, pm in second st of inc, 8dc, inc, pm in second st of inc, 9dc (20) (starting point is moved by 1st ) Round 5 20dc Round 6 inc, pm in second st of inc, 9dc, inc, pm in second st of inc, 10dc (22) (starting point is moved by 1 st) Round 7-10 22dc. Ss (22)
Cut yarn and leave tail to sew to head when assembling.
Nose
Working in rounds, with black and 4mm hook
Round 1 6dc in MR (6) Round 2 6dcinc (12) Round 3 (3htrinc, 3dc) twice, ss to join (18)
Cut yarn, leave long tail to sew to head and make eyes.
Mini Blanket
Working back and forth in rows using both MC and CC, 6mm hook
Row 1 MC, ch42 Row 2 YUdc in third loop and each ch across to end (40) Row 3 ch1 (does not count as a st), YUDC to end (40) Row 4-42 rep row 3 (40)
Cut MC and continue working the border in CC.
Border
Working in rounds 5 and 6mm hooks
Round 1 turn, with 6mm hook, work 40ss loosely across to corner, ch1, 40ss across the rows (note, there are two more rows than border sts, so you will need to “lose” two sts). Continue around to end and ch1 and ss to 1st st of the round. Round 2 change to 5mm hook, ch2, working into the ss, [tr to corner ch (tr, ch1 tr) in flo of corner ch], rep around to end, ss to join. Cut yarn. Round 3 flip your work so the back is facing you, ss to join at a corner, ch2, tr in the back of the ss from round 1, rep round 2. Round 4 now we’ll join the two rounds. Ch1, dc in the flo of round 3 sts and the corresponding blo from round 2 sts to join the two rounds together. Rep to corner, 3dc in the corner ch, then rep all the way round to end. Ss to join, cut yarn, weave in ends and block.
Assembly
Position nose 7 rounds below opening at mid-point between markers, sew to head. Make eyes 1 st to the side of the nose, 3 sts wide and slightly angled (1 round) upwards at the outer side. Fasten the eye loop on row below to fix it in place.
Stuff the head with toy filling and sew shut. Attach ears to side of head on an angle, 3 sts in from the sides of the sewn shut head.
Sew the head to the middle of the blanket, either using the leftover yarn tails, or a new length of yarn, using round 3 of the head as your guide.
Last week I told you about the baby project that I’m working on and I’m making great progress!
My little Koala Lovey is really starting to take shape!
There are almost as many stitch markers as pieces!
Right now it’s a bit like a jigsaw puzzle, everything is there, it all just needs to find the perfect placement so it all fits together, just so.
If you don’t know what a lovey is, I think it’s a very technical term for a stuffed animal head attached to a little square of fabric that babi’s absolutely love to snuggle with and munch on. I remember how much my daughter enjoyed hers, it was adorable! I made a bunch in the past, it was like a mini production line there for a while as babies seemed to be popping out all over the place!
GET THE YARN
Scheepjes Cahlista is an aran weight yarn, made with 100% cotton. I’m using two balls of colour 074 Mercury, and you will also need a single ball of the complementary colour. Have a look at the Scheepjes Website for colour inspiration and stockists, there are more than 100 colours to choose from!
You can order the yarn online from my local yarn store Caro’s Atelier*.
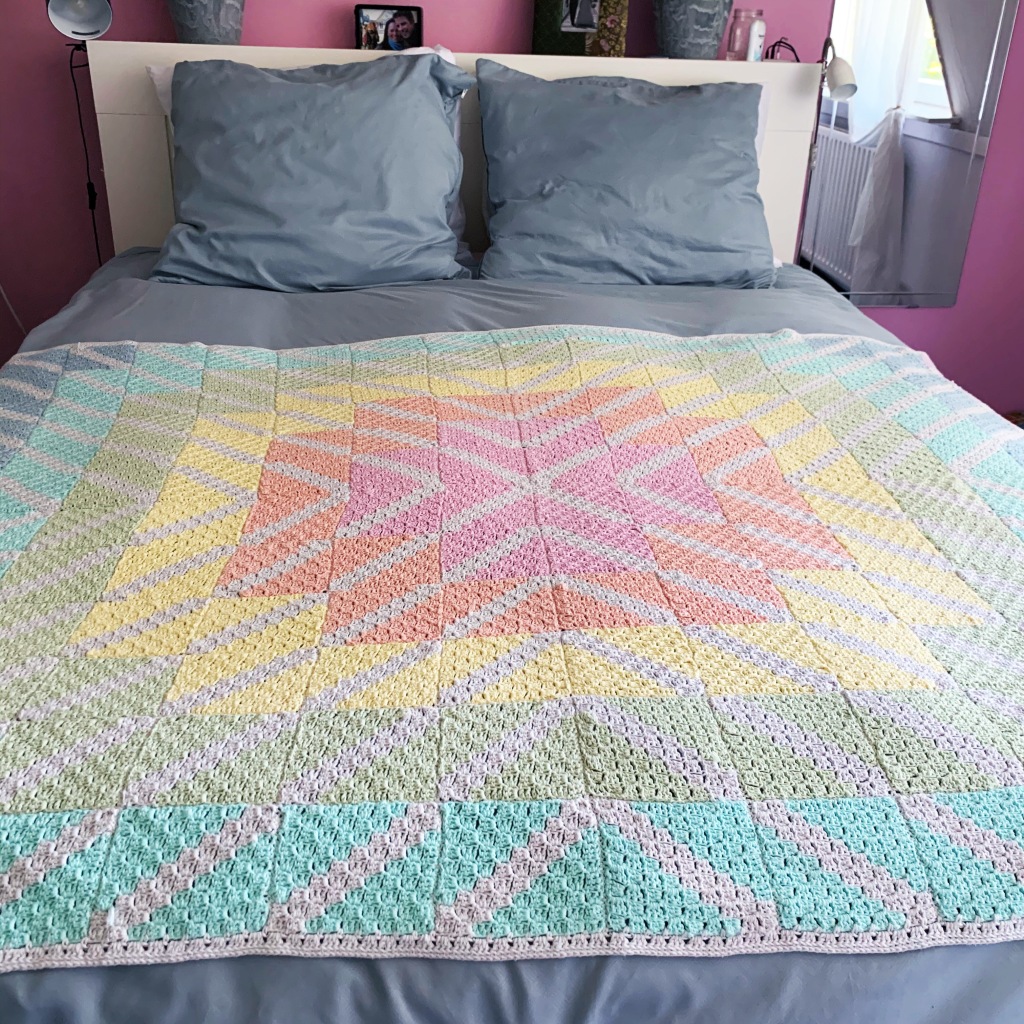
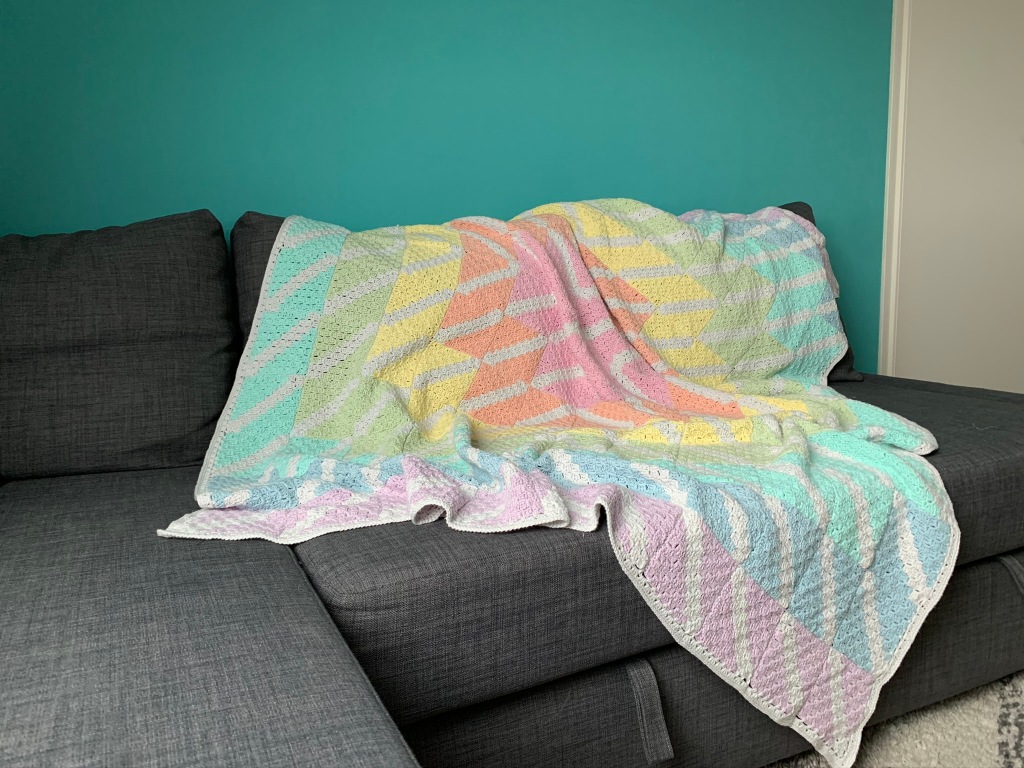
I’m so excited to be able to share this new design with you!
It’s been a massive undertaking; probably the largest crochet project I’ve ever made, and all with a teeny tiny 3mm hook!
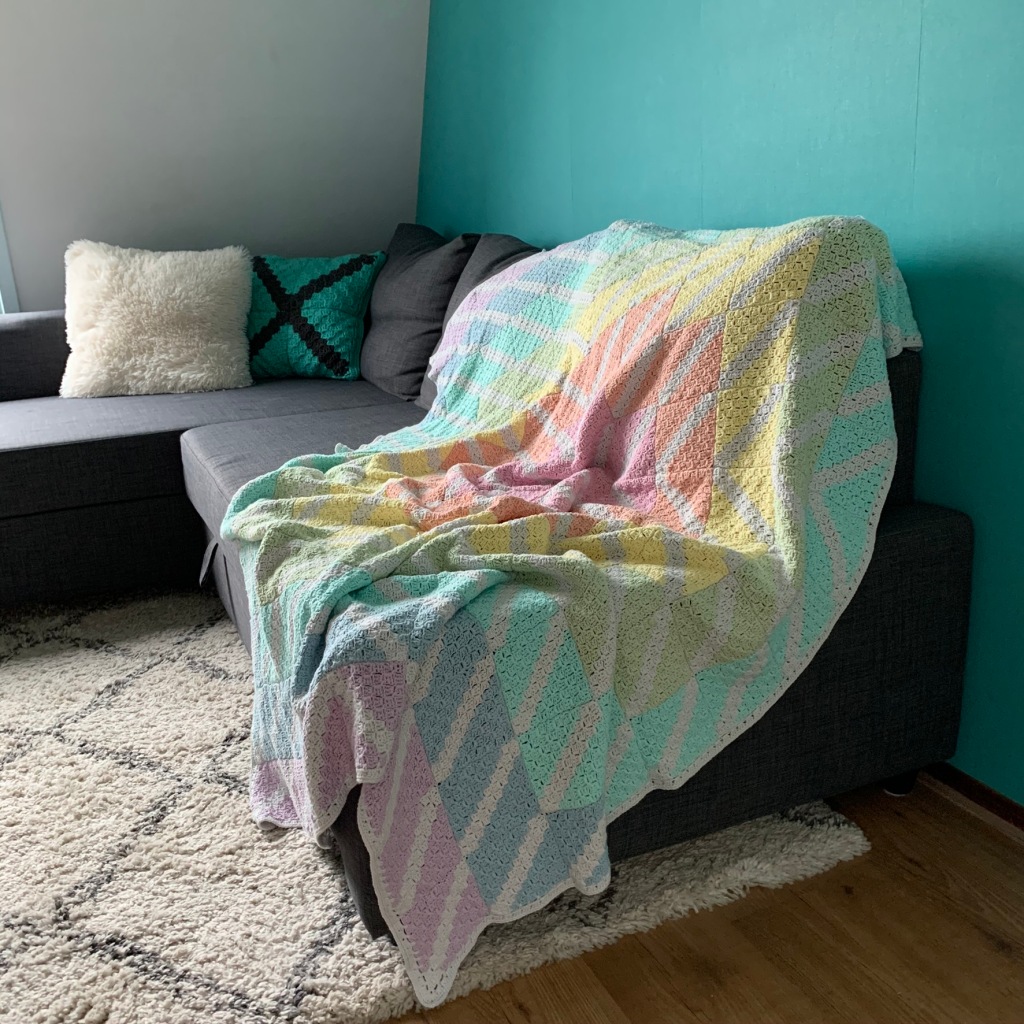
I love the pastel rainbow, all brought together with the soft white stripes radiating out from the centre.
The Centerpoint blanket is made with Scheepjes Organicon, their first certified organic (and vegan) cotton yarn, and using a 3mm hook. I’ve shared more information about this lovely yarn here.
Get The Yarn
Scheepjes has the complete list of stockists available on their website, at scheepjes.com. If your favourite retailer doesn’t have Organicon, you can always ask them to get it in – don’t be shy!
Wool Warehouse* ships globally (with some small delays due to C-19), so you can pick it up there.
I say it all the time: Caro’s Atelier* is my local yarn store, so I would also love you to support them. They ship all over Europe.
Black Sheep Wools* is one of the best bricks and mortar stores in the UK, and they’ll also ship to you.
(If you own a yarn store and stock Organicon, please feel free to add direct links to your product page in the comments of this post.)
The pattern will be ready shortly, the charting is all done, and if you look closely in the photos, I’ll have a modified version so you can make the blocks and turn them into whatever you fancy!
It’s been a busy few weeks! I’ve been working on my Scheepjes Organicon squares in the background, but I also shared about the launch of the latest issue of Yarn – The Colour Issue; did you see it yet? If not, all the info is here. The designs are incredible, it’s a must have.
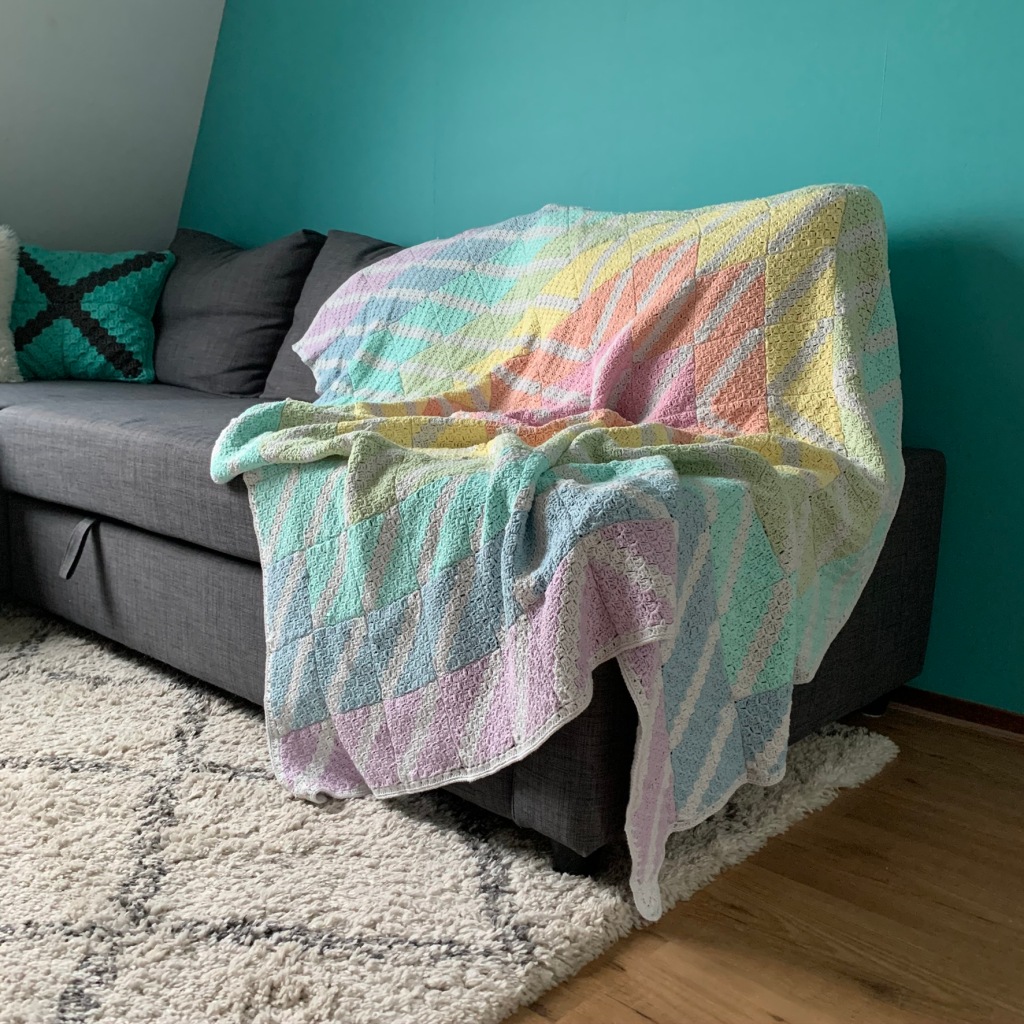
Because it’s so huge and the hook is so small, this blanket is taking me longer than usual to complete. Having said that, the effort is so worth the results already. The colours are just the best, I’m excited about all of this!
Get The Yarn
Scheepjes has the complete list of stockists available on their website, at scheepjes.com. If your favourite retailer doesn’t have Organicon, you can always ask them to get it in – don’t be shy!
Wool Warehouse* is shipping globally again (with some small delays due to C-19), so you can pick it up there.
As I’ve said many times, Caro’s Atelier* is my local yarn store, so I would also love you to support them. They ship all over Europe.
Black Sheep Wools* is one of the best bricks and mortar stores in the UK, and they’ll also ship to you.
(If you own a yarn store and stock Organicon, please feel free to add direct links to your product page in the comments of this post.)
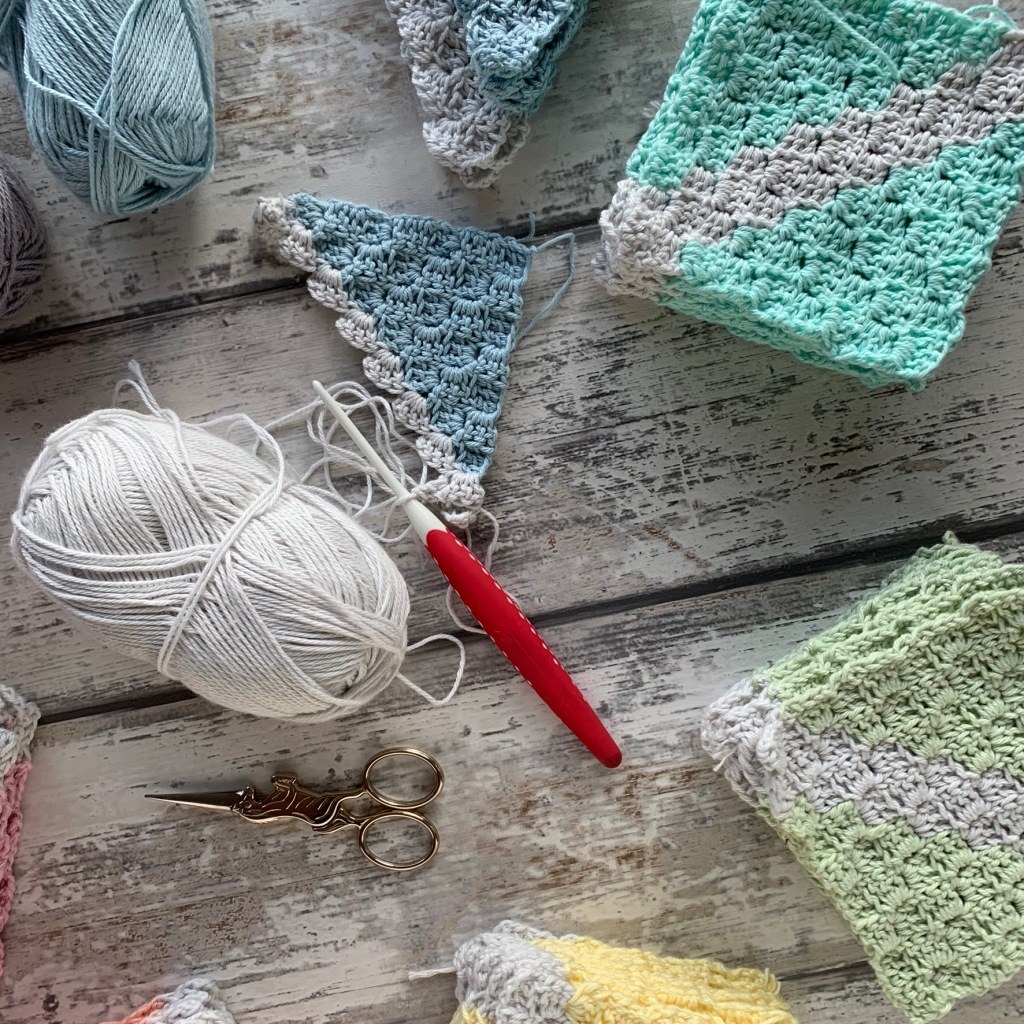
Isn’t this colour mash beautiful? This photo was at about 60-ish blocks in, with a LOT to go. I’ll need at least double this amount to achieve my blanket goal.
One thing that I am doing, although it doesn’t really look like it here is, I’m working my ends away as I go and will only need to snip them when I’m done. Each block has 6 ends, so if I multiply that by 150-odd blocks, my brain explodes, so I have to weave them in as I go otherwise I’ll throw it all in a corner and never look at it again!
Are you a person who weaves ends in as you go, or do you wait until the end? How do you feel about ends? Personally I find them to be the necessary evil in creating things of beauty, so I tolerate them and do everything I can to minimise the effort.
Stay tuned, I’ll be joining soon. I plan to use that really fast slip stitch invisible zipper join so it will all come together very quickly, I think you’re going to love it.
Keep an eye on the socials for more photos, the reveal will be here before you know it!
I have a seriously cool design coming up, using all of these colours, I can’t wait to share it with you over the coming weeks.
Get The Yarn
Scheepjes has the complete list of stockists available on their website, at scheepjes.com. If your favourite retailer doesn’t have Organicon, you can always ask them to get it in – don’t be shy!
Wool Warehouse* is shipping globally again (with some small delays due to C-19), so you can pick it up there.
As you know, Caro’s Atelier* is my local yarn store, so I would also love you to support them. They ship all over Europe.
Black Sheep Wools* is one of the best bricks and mortar stores in the UK, and they’ll also ship to you.
(If you own a yarn store and stock Organicon, please feel free to add direct links to your product page in the comments of this post.)
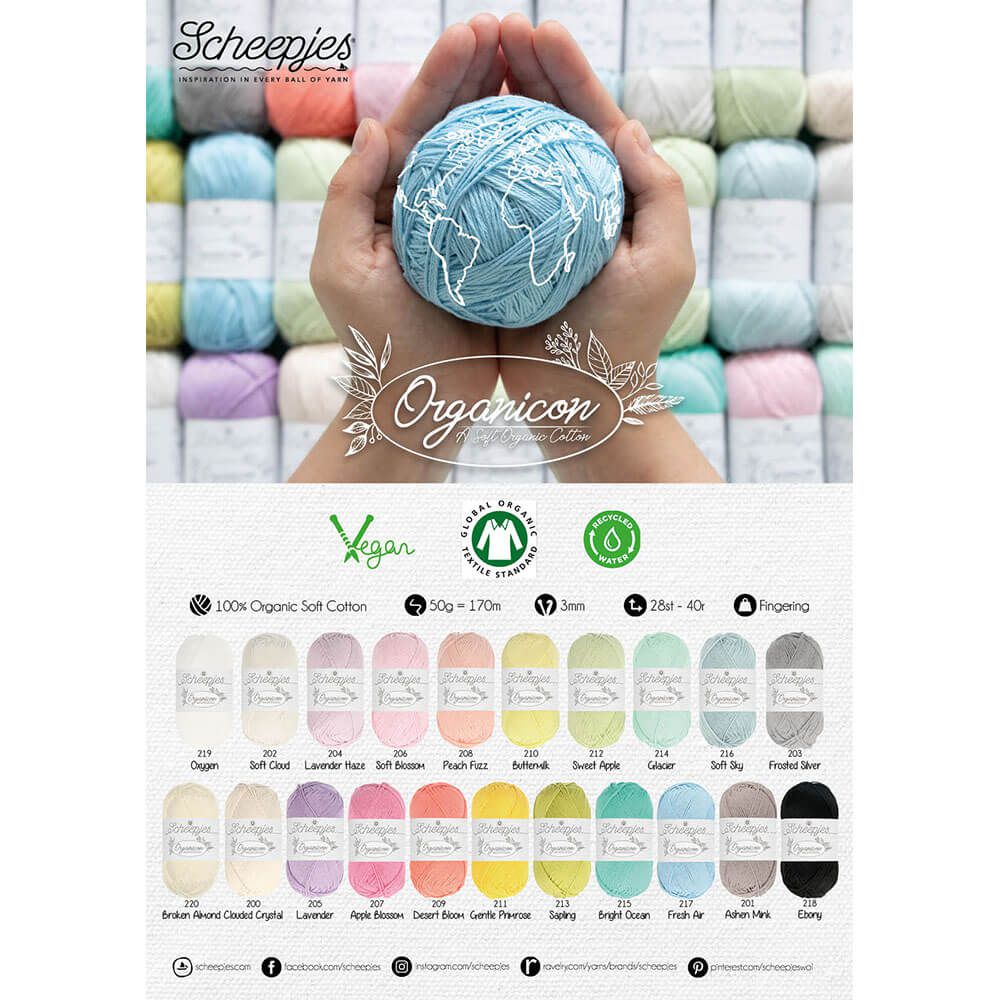
About Organicon
Scheepjes Organicon is a 100% GOTS certified organic cotton, which is part of a strong push toward sustainability and the need to improve production methods and conscious consumption.
A benefit of this is that Organicon is a deliciously soft yarn which is soft on skin and has a beautiful drape for garments and projects for baby.
Not only is Organicon produced in a sustainable way and unbelievably soft, it’s also vegan friendly, containing no animal products from the production of the cotton through to the dyes used to colour the yarn.
Yarn Stats
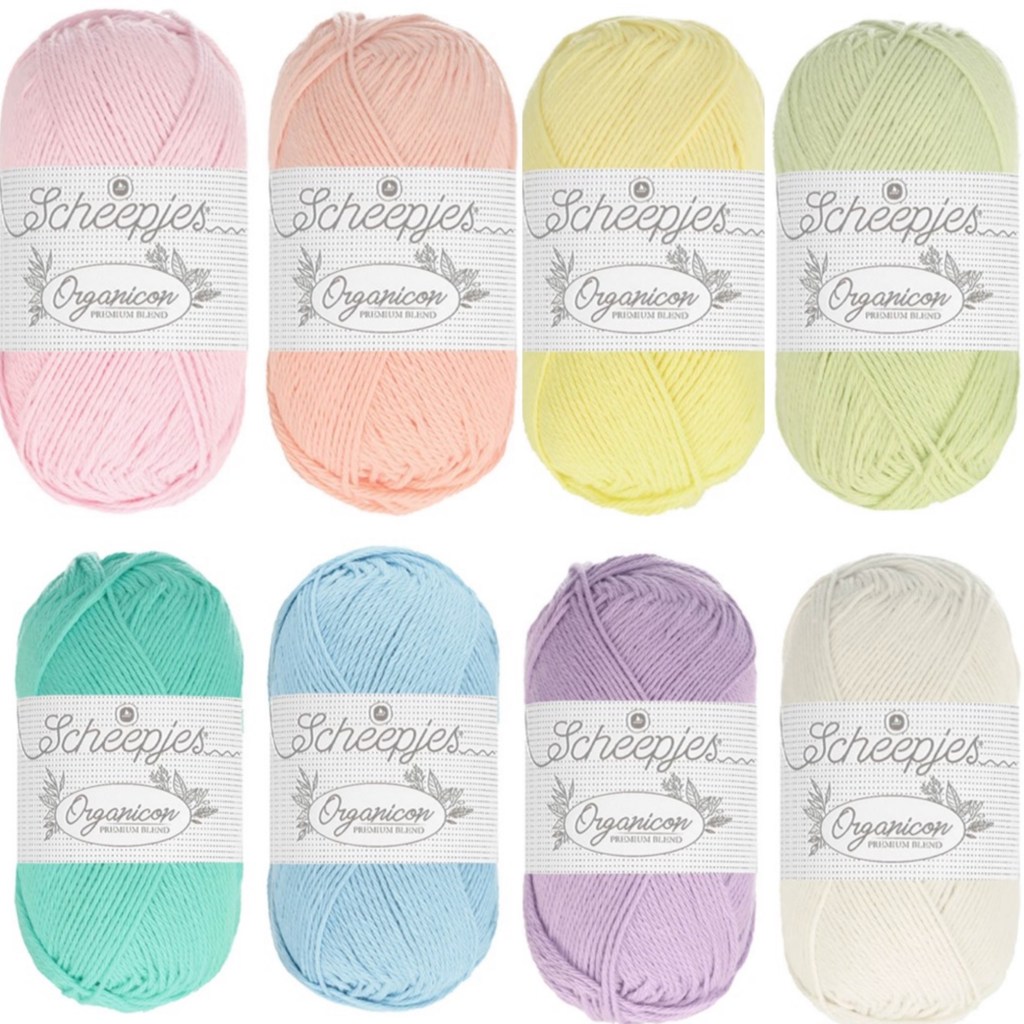
The yarn comes as 50g balls, with 170 metres. It’s a 4ply (fingering) weight yarn, and a 3mm hook/needles are recommended. There are 21 colours to choose from, and what I love is that there are light and bright versions of the same colour, so they all work together and can be interchangeable.
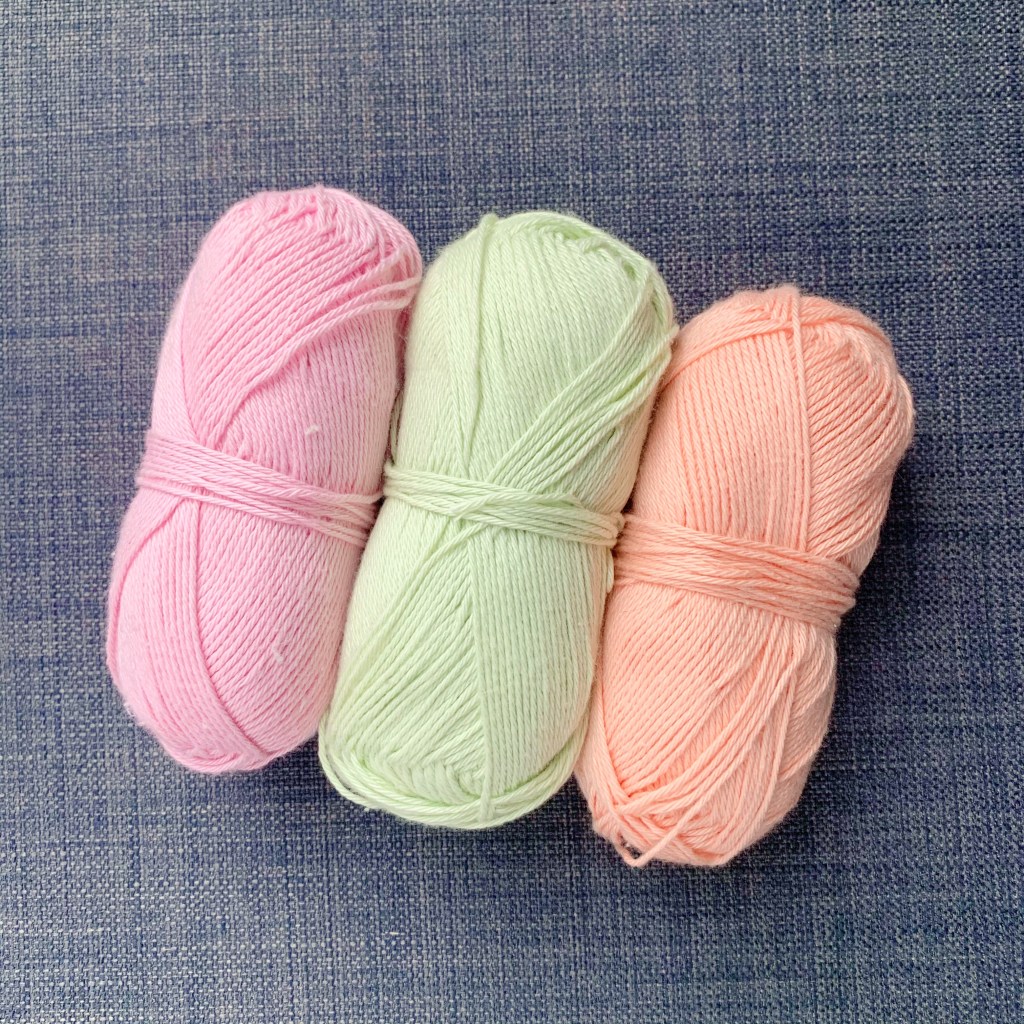
Here’s a sneak peek at some of the colours I’m using. You’ll have to wait and follow my Instagram feed to keep up with the progress over the next few weeks.
Just a small hint: my project is huge, and is many, many more balls than the three I’ve just shown you. It’s going to be completely worth the effort, and I’m going to have a great pattern to share with you at the end of it.
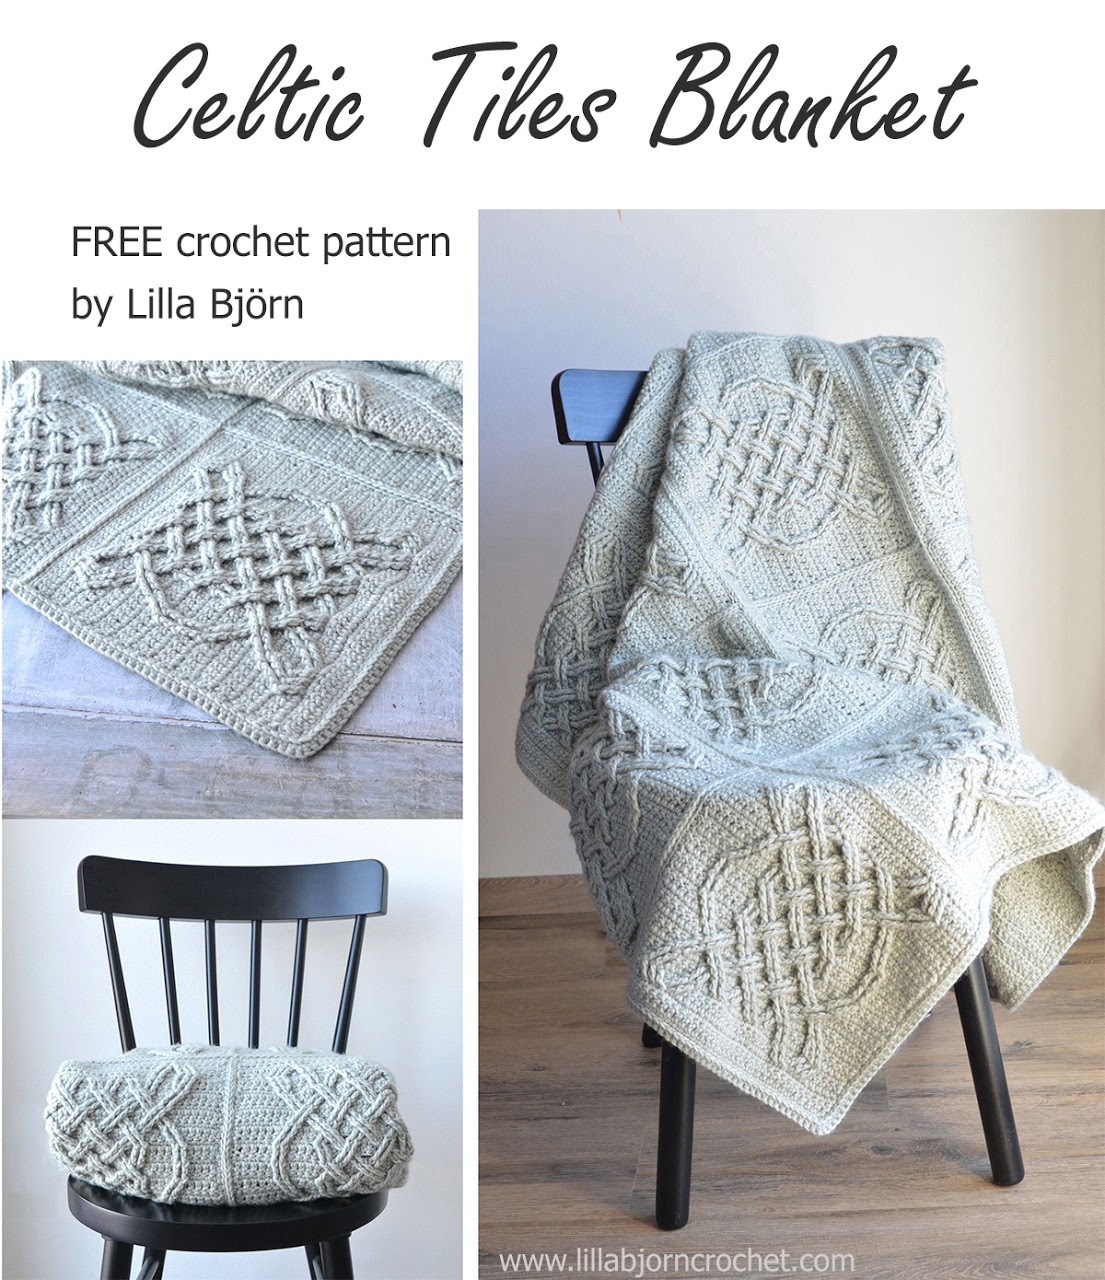
I wanted to share this fabulous design by Tatsiana of Lilla Bjorn’s Crochet World:
There is no doubt that Tatsiana is The Queen of overlay. You only need to see her other designs here for proof.
This design takes me back to Cornwall and to Land’s End. I even signed my marriage certificate in a pen with this crosshatch celtic pattern and it’s my favourite, very precious pen!
The free pattern is available on Tatsiana’s blog here, or you can purchase a print friendly version on Ravelry here.
And even more exciting, Wool Warehouse has packs in Stonewashed XL for this design available, so you must grab yours here*!
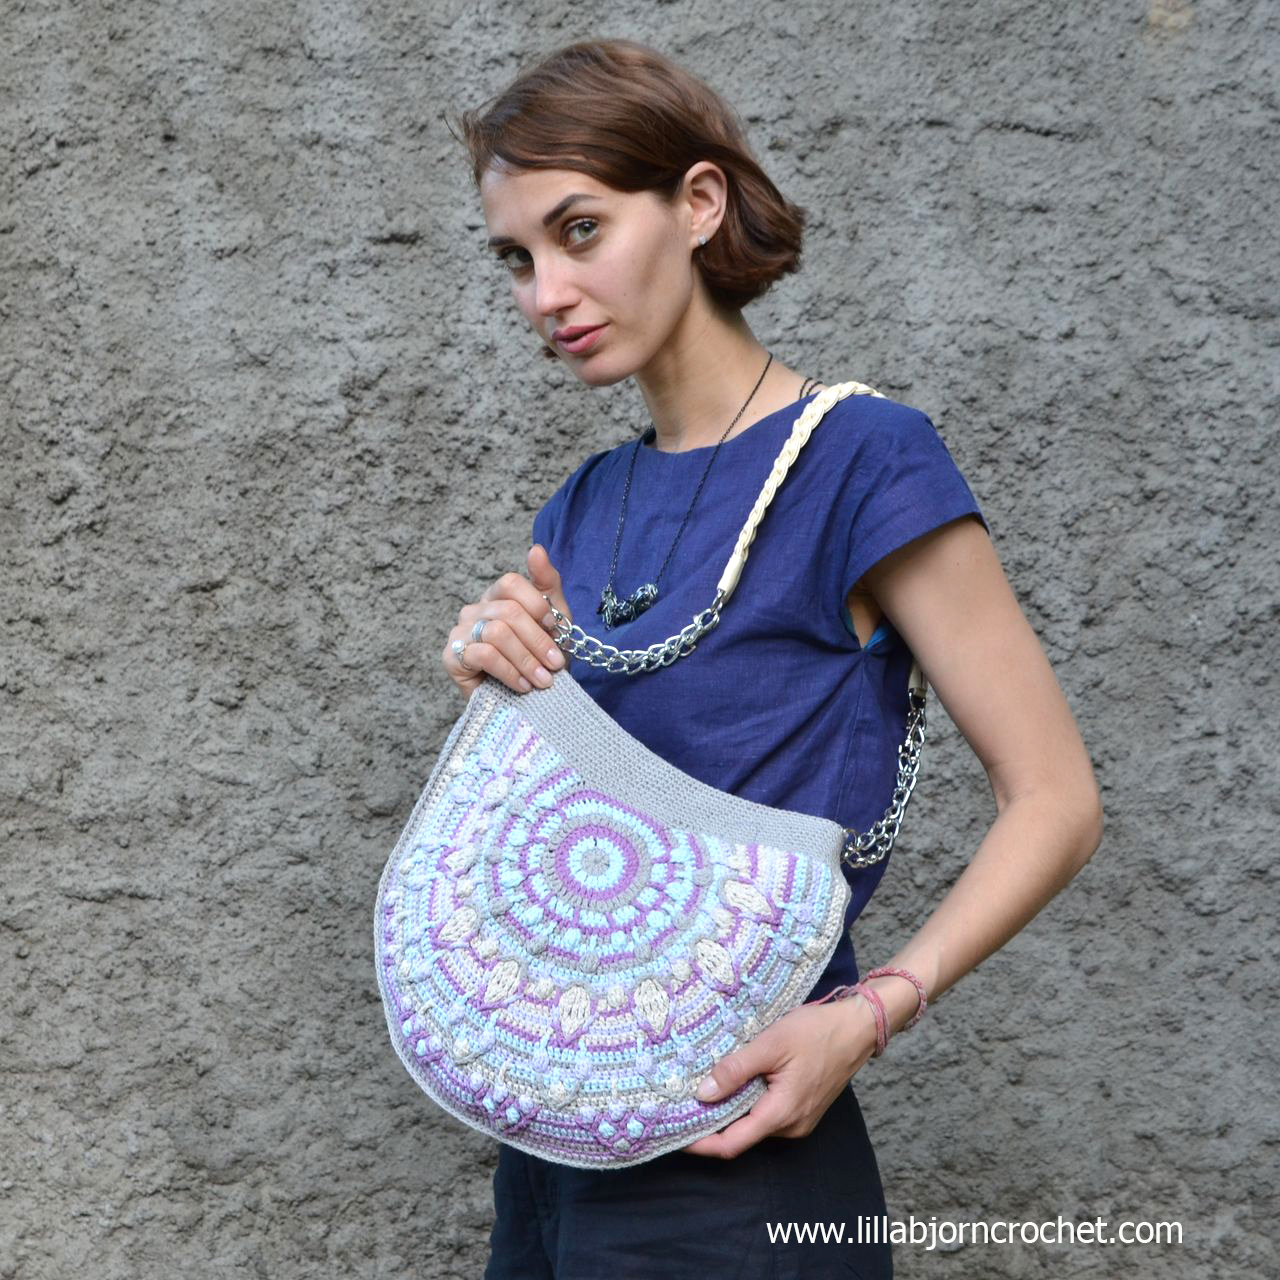
And for a little refresher, here are some of the spectacular overlay projects that Tatsiana has designed. My favourite is the Peacock Tail Bag:
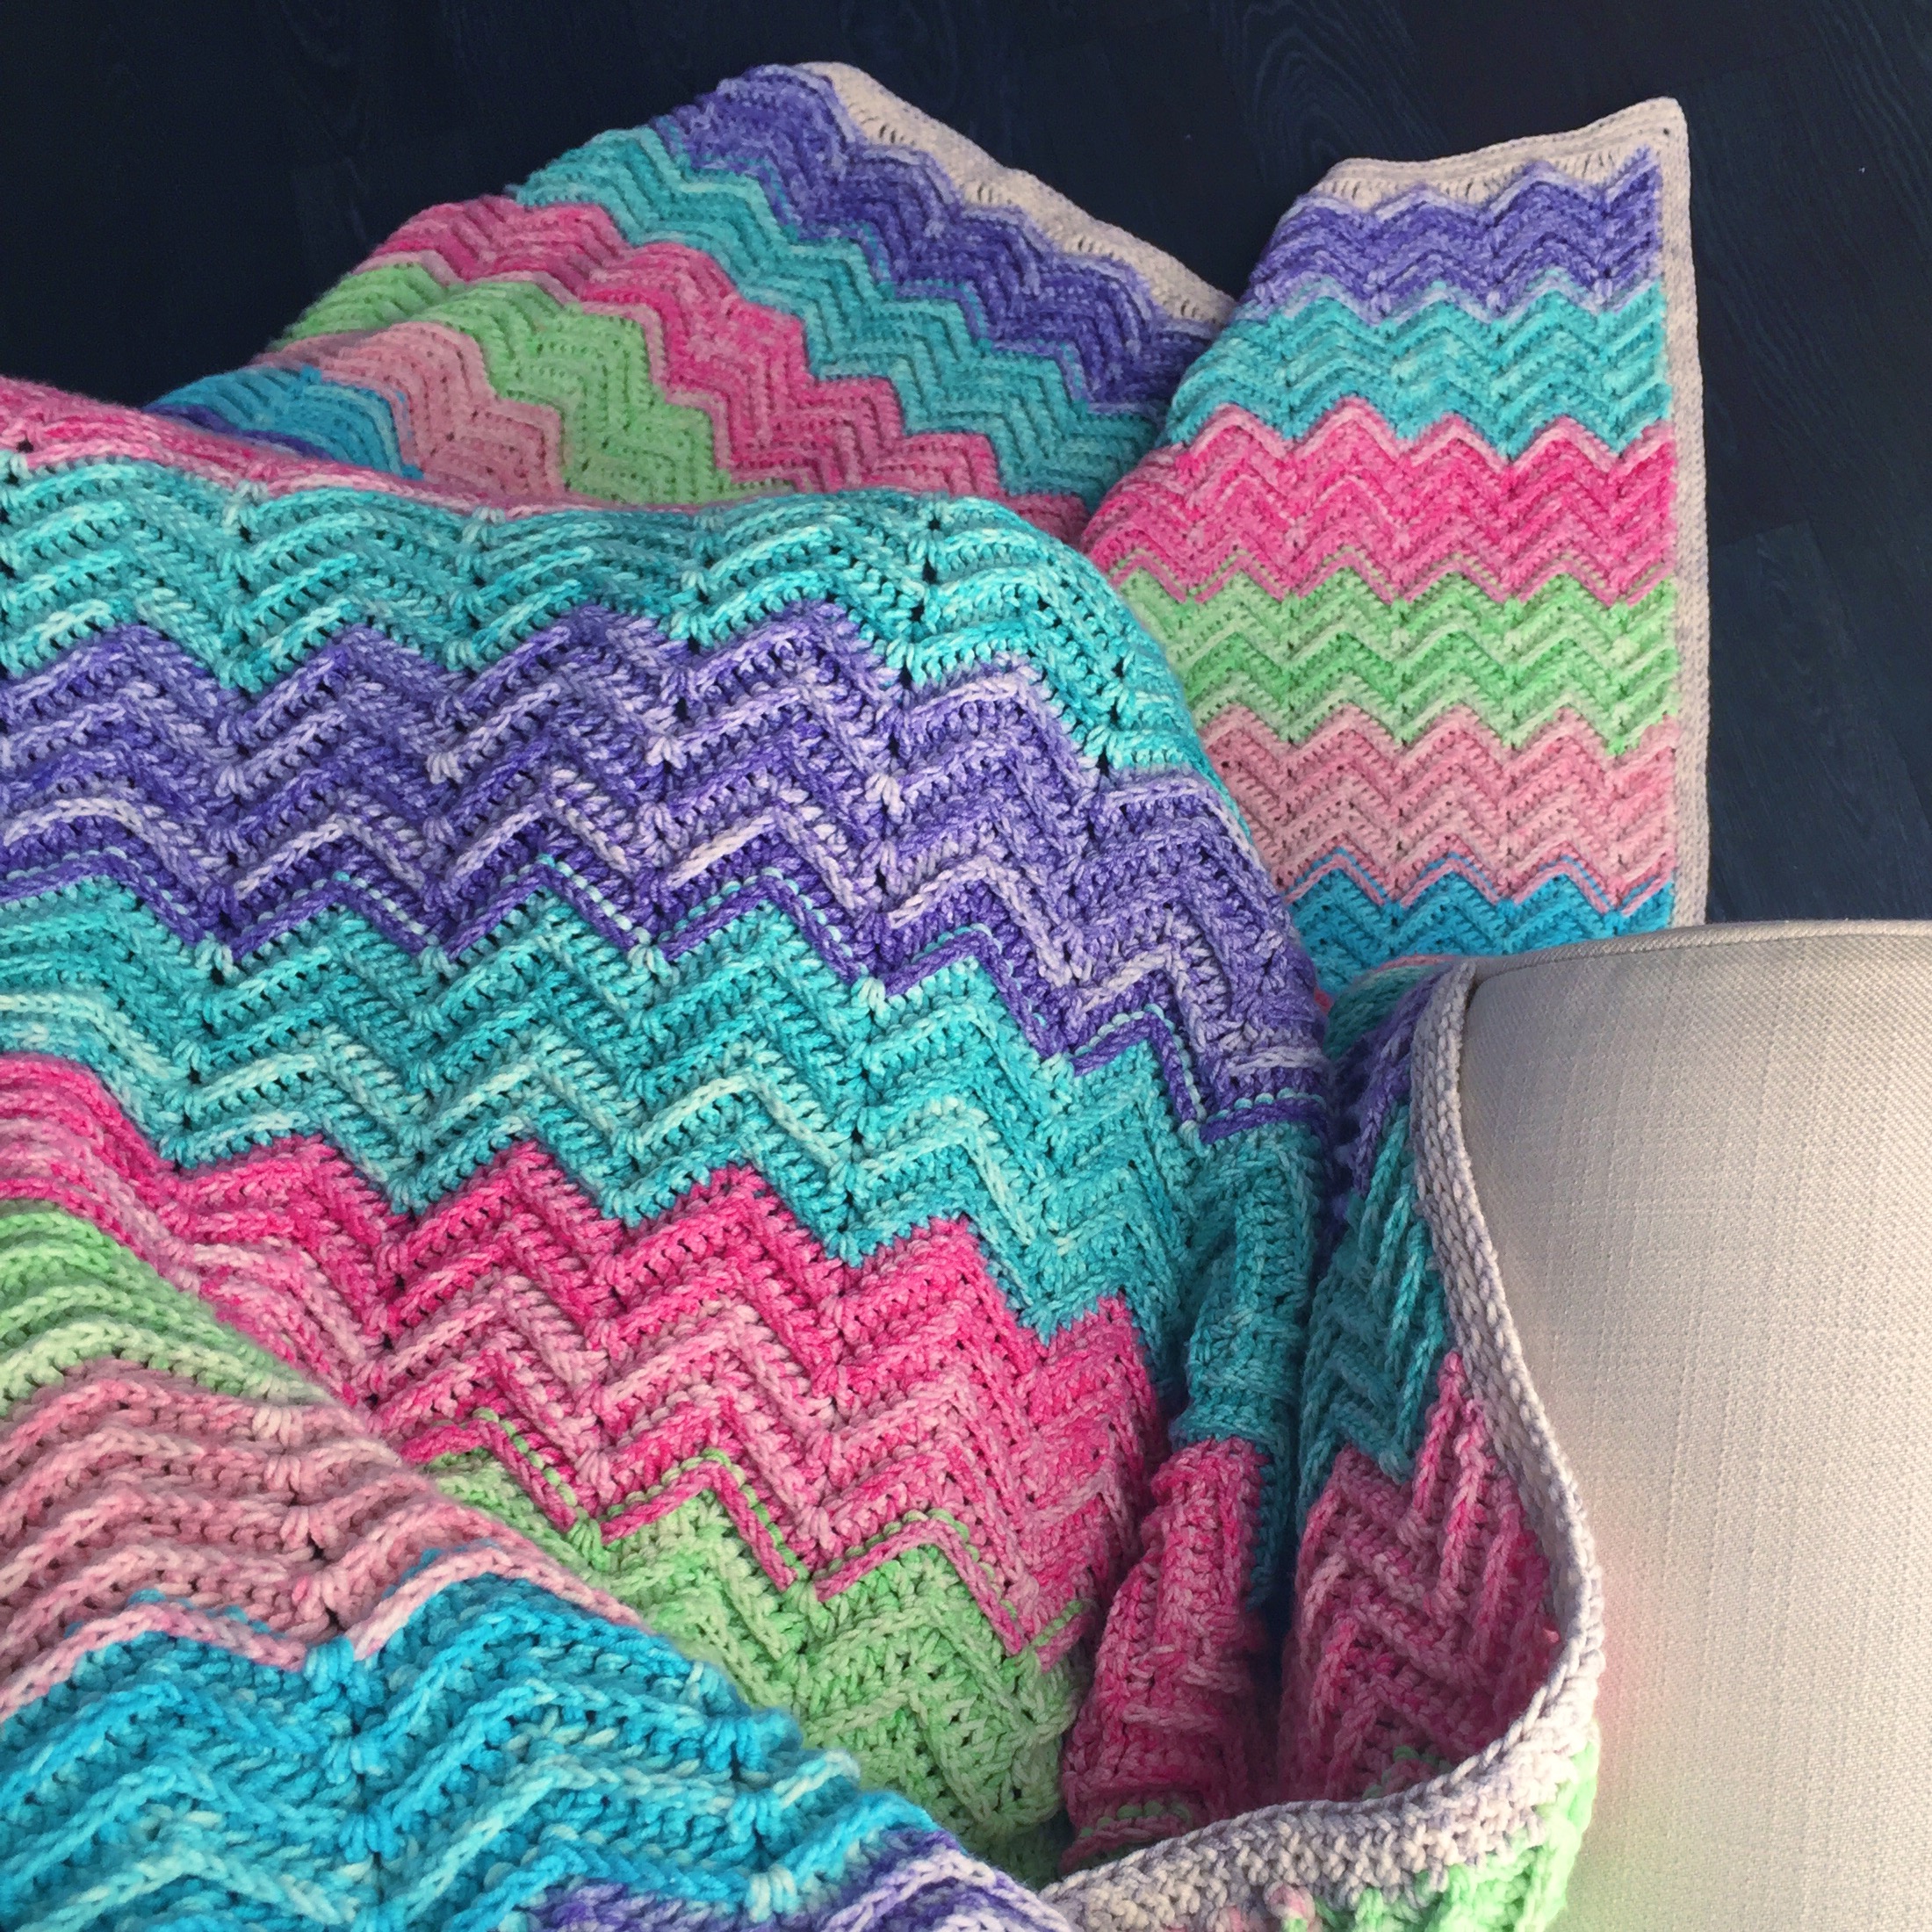
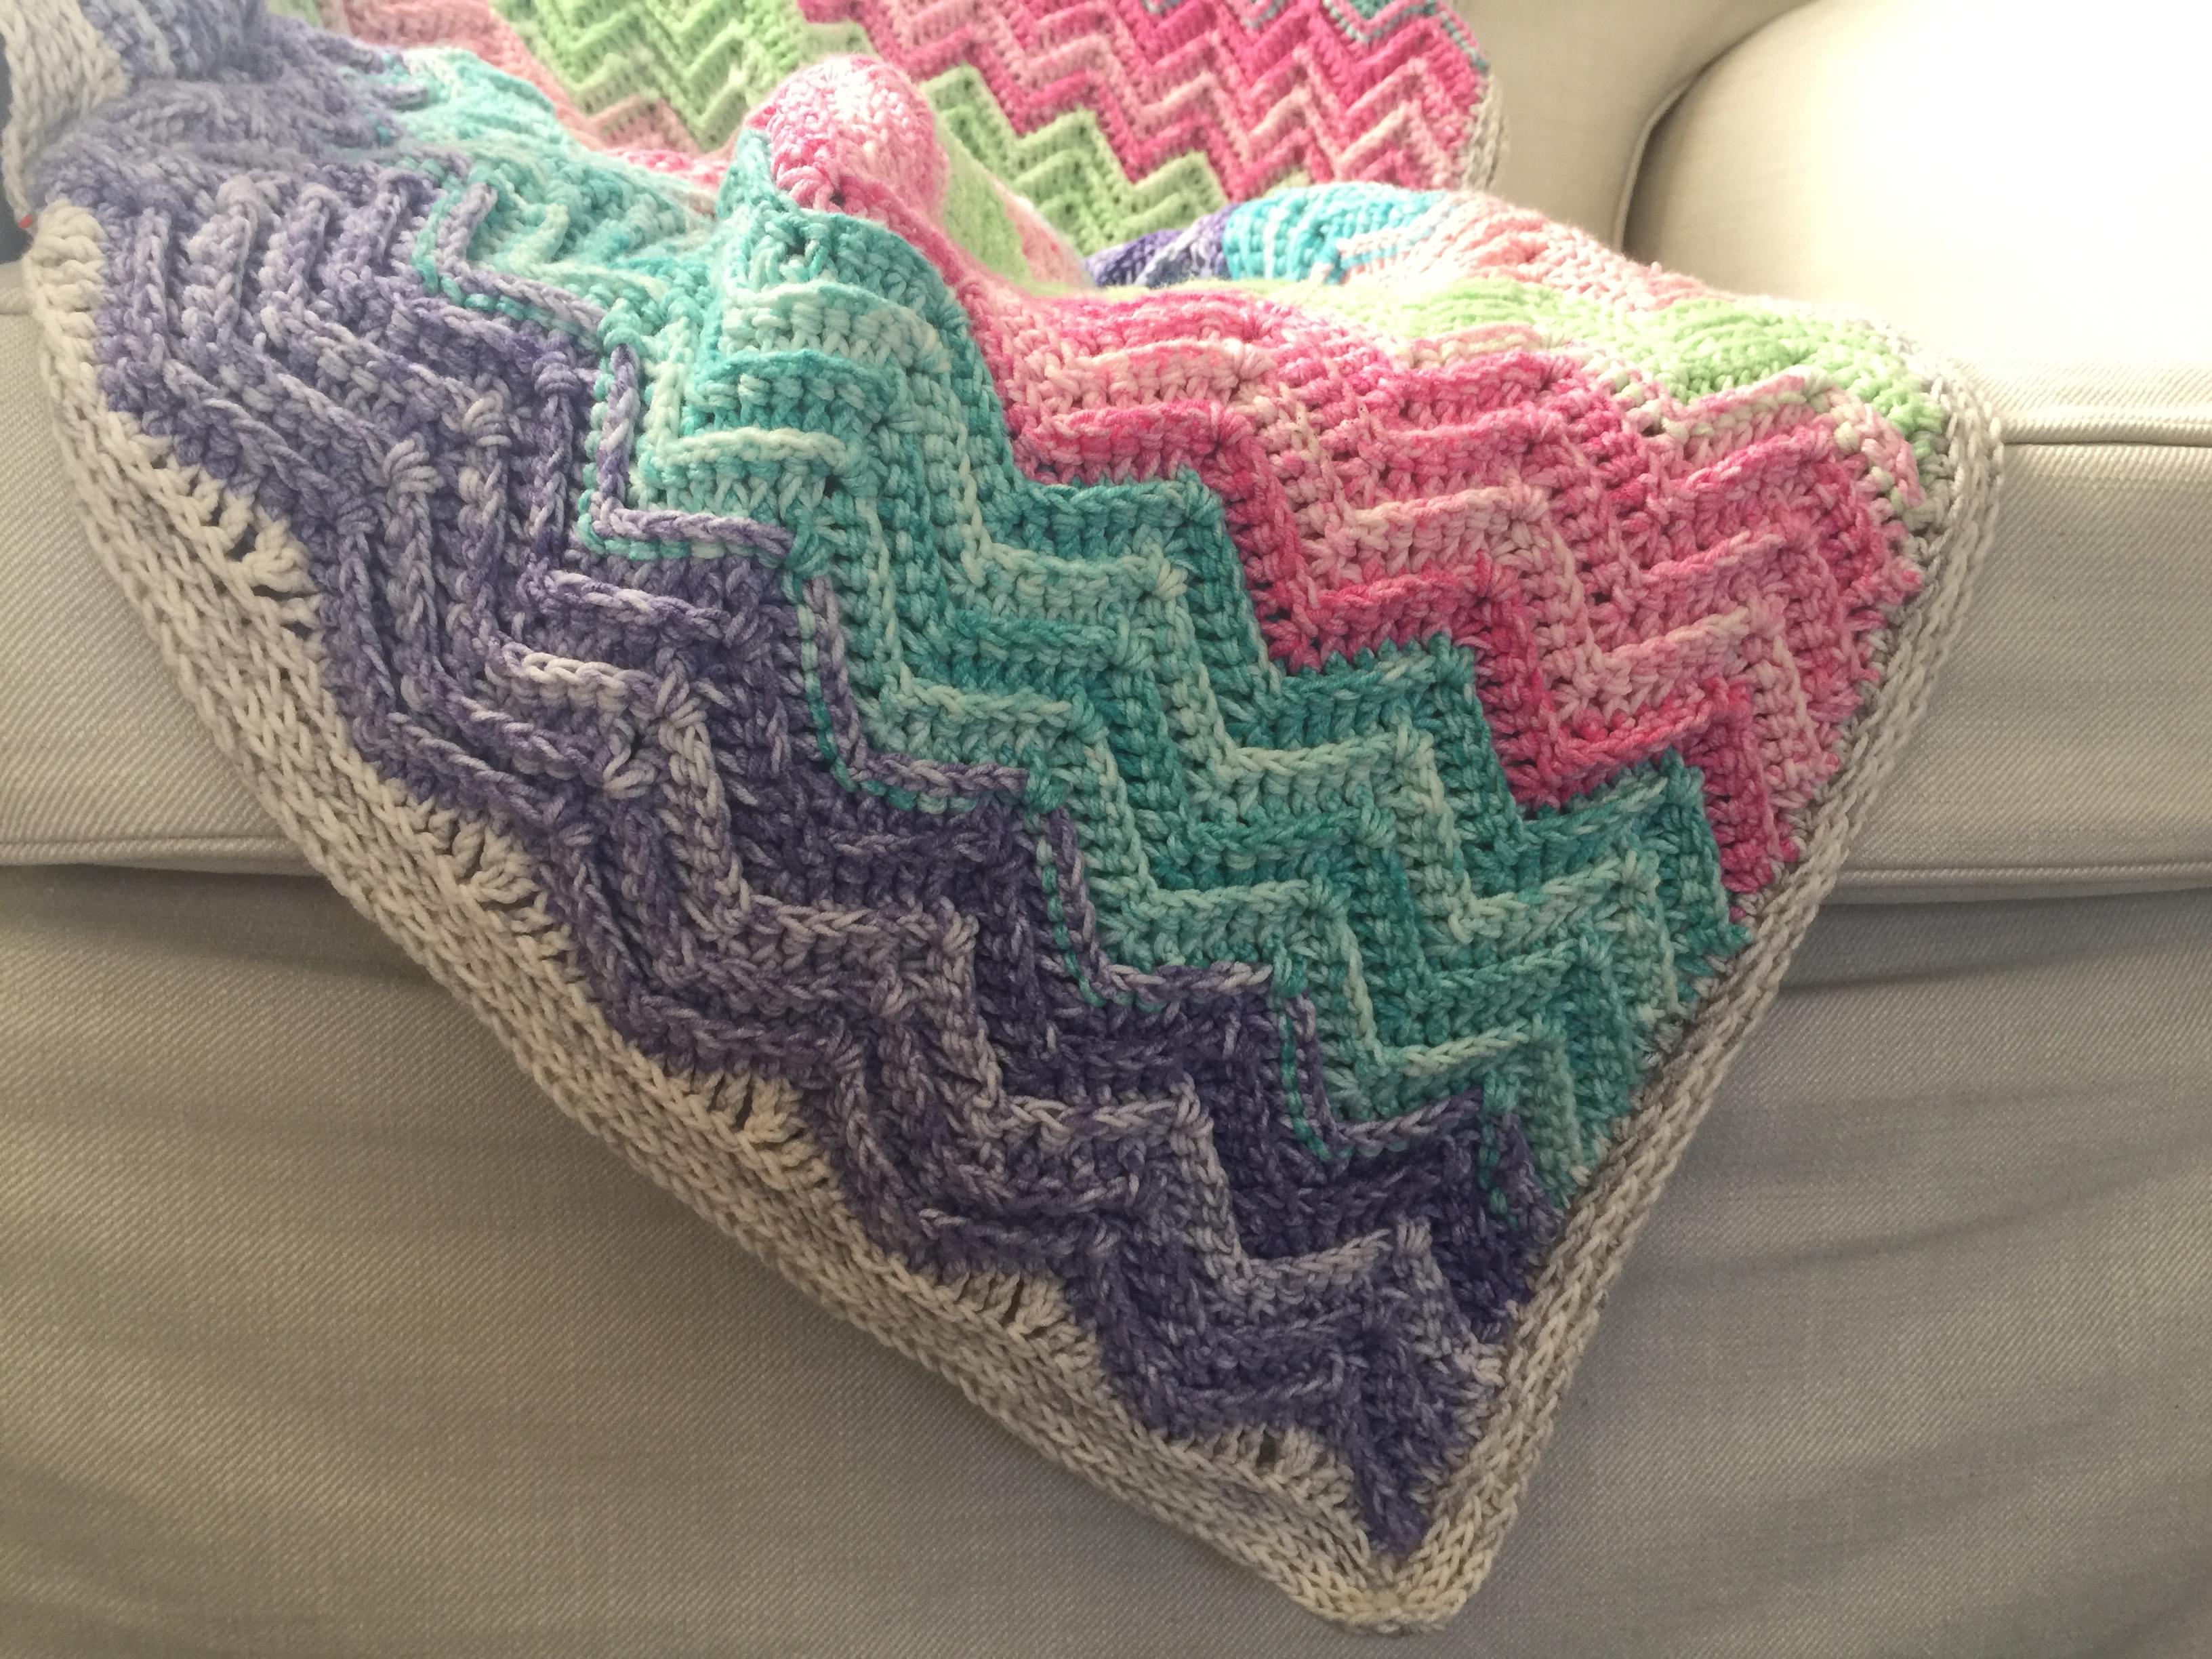
After months and months and months, I’ve finally finished my Textured Chevron Blanket!
And not only have I finished it, but I have the pattern ready as well. But first, look!
For this project I’ve been using Scheepjes Softfun Aquarel, which is one of my faves. It’s a cotton acrylic blend which is soft, squishy, warm and has outstanding stitch definition. Oh, and it’s durable too!
Note: All stitches are in US terms. There are a lot of them, so make sure you pay close attention to what needs to be used where. CH – Chain Stitch SS – Slip Stitch SC – Single Crochet DC – Double Crochet HDC – Half Double Crochet Tr – Treble Crochet 2HDCTog – Decrease 2 Half Double Crochet into 1 2DCTog – Decrease 2 Double Crochet into 1 3DCTog – Decrease 3 Double Crochet into 1 FPHDC – Front Post Half double Crochet FPDC – Front Post Double Crochet FPTr – Front Post Treble Crochet 2TrTog – Decrease 2 Treble Crochet into 1 3TrTog – Decrease 3 Treble Crochet into 1 FP2DCTog – Decrease 2 Front Post Double Crochet into 1 FP3DCTog – Decrease 3 Front Post Double Crochet into 1 FP2TrTog – Decrease 2 Front Post Treble Crochet into 1 FP3TrTog – Decrease 3 Front Post Treble Crochet into 1 FPextDC – Front Post Extended Double Crochet HDC3L – Half Double Crochet in the 3rd loop (camel stitch)
Tension
4 zigzag sets by 10 rows = 10cm
Notes
Each colour block uses about 1.5 balls of yarn, so you will need to join. Do take care to make your joins strong and tight and keep ends to weave in. If your join isn’t strong enough and it comes unraveled, it will be a disaster to fix!
Although the stitches and abbreviations all sound complicated, once you start working on the blanket it’s all very straight forward and easy.
Instructions
Using colour 809, CH 296 298. If you have too many chains on your hook, don’t start over, you can pull them out once you’re done.
2DCTog into the 3rd chain from the hook and the next 5 CH. DC, CH, DC into the next, DC into the next 5 CH, 3DCTog in the next. *DC in next 5 CH, DC, CH, DC, DC in the next, DC into the next 5 CH, 3DCTog in the next.* Repeat 19 times, but the very last stitch of the row will be 2DCTog instead of 3DCTog. CH2, turn.
CH2 (does not count as a stitch here or throughout), 2FPDCTog in the first 2, FPDC around the next 5 stitches, DC, CH1, DC into the CH space, FPDC into the next 5 stitches, 3FPDCTog in the next 3 (the stitch before the decrease, the decrease and the stitch after the decrease), *FPDC in the next 5 stitches, DC, CH1, DC in the CH space, FPDC in the next 5 stitches, 3FPDCTog in the next 3.* Repeat 19 times, except in the very last decrease, which will be 2FPDCTog instead of 3FPDCTog. CH2, turn.
Repeat Row 3 7 times.
Change to colour 810, repeat row 3 9 times.
Change to colour 803, repeat row 3 9 times
Change to colour 808, repeat row 3 9 times
Change to colour 807, repeat row 3 9 times
Change to colour 801, repeat row 3 9 times
Change to colour 809, repeat row 3 9 times
Change to colour 801, repeat row 3 9 times
Change to colour 807, repeat row 3 9 times
Change to colour 808, repeat row 3 9 times
Change to colour 803, repeat row 3 9 times
Change to colour 810, repeat row 3 9 times.
Change to colour 809, repeat row 3 9 times.
Change to colour 810, repeat row 3 9 times.
Change to colour 803, repeat row 3 9 times
Change to colour 808, repeat row 3 9 times
Change to colour 807, repeat row 3 9 times
Change to colour 801, repeat row 3 9 times
Change to colour 809, repeat row 3 9 times
Change to colour 801, repeat row 3 9 times
tie off and weave in ends.
Border
Join colour 804 to the top corner to work across and square off each end.
CH3, 2FPTrTog, FPtr, FPextdc, FPdc, FPhdc, sc in the next 3, FPhdc, FPdc, FPextdc, FPtr, 3FPTrtog, *tr, extFPdc, FPdc, FPhdc, sc in the next 3, FPhdc, FPdc, FPextdc, FPtr, FP3TrTog* repeat across. In the last set, FP2TrTog instead of 3. Cut and tie off. Rotate to join to the bottom corner to work across and square off.
Join with a sc, sc, *FPhdc, FPdc, FPextdc, FPtr, FP3TrTog (the 3 dc in one from the foundation row counts as 1 stitch), FPTr, FPextdc, FPdc, FPhdc, sc in the next 3*. Repeat across and instead of 3 sc, work 2. Turn 90 degrees to work down the side.
Working down each side is not an exact science; try to work 3 HDC per two rows. This will make sure that the border is not too tight, nor so loose that it will be wavy. It won’t matter if your count is a couple of stitches out, you won’t notice. Once at the next corner (working 1 stitch into the post of the 1st top border stitch), work a hdc, ch1, hdc into the 1st stitch to form the corner, then work a HDC3L in each stitch across the top. At the next corner,hdc, ch1, hdc into the last stitch, then turn the work, 90 degrees to work along the third edge. Repeat all the way around, for a total of three camel stitch rows. Don’t join and ch 2 at the end of each row, just keep going until you’re back to the top corner which is the start/finish point. The ends should have 4 rows of camel stitch at each end, and 3 down the sides.
Tie off, weave in ends and wet block aggressively.
There will be a lot of stretch in the blanket, making it perfect to tuck around your feet and body while bingeing on Outlander on Netflix.
Get the Yarn
There are loads of great stockists where you can get hold of Scheepjes Aquarel. In the Benelux go to Caro’s Atelier*, in South Africa head to Be Inspired.love and for everyone else can go to Wool Warehouse* as they offer global shipping and have great rates.
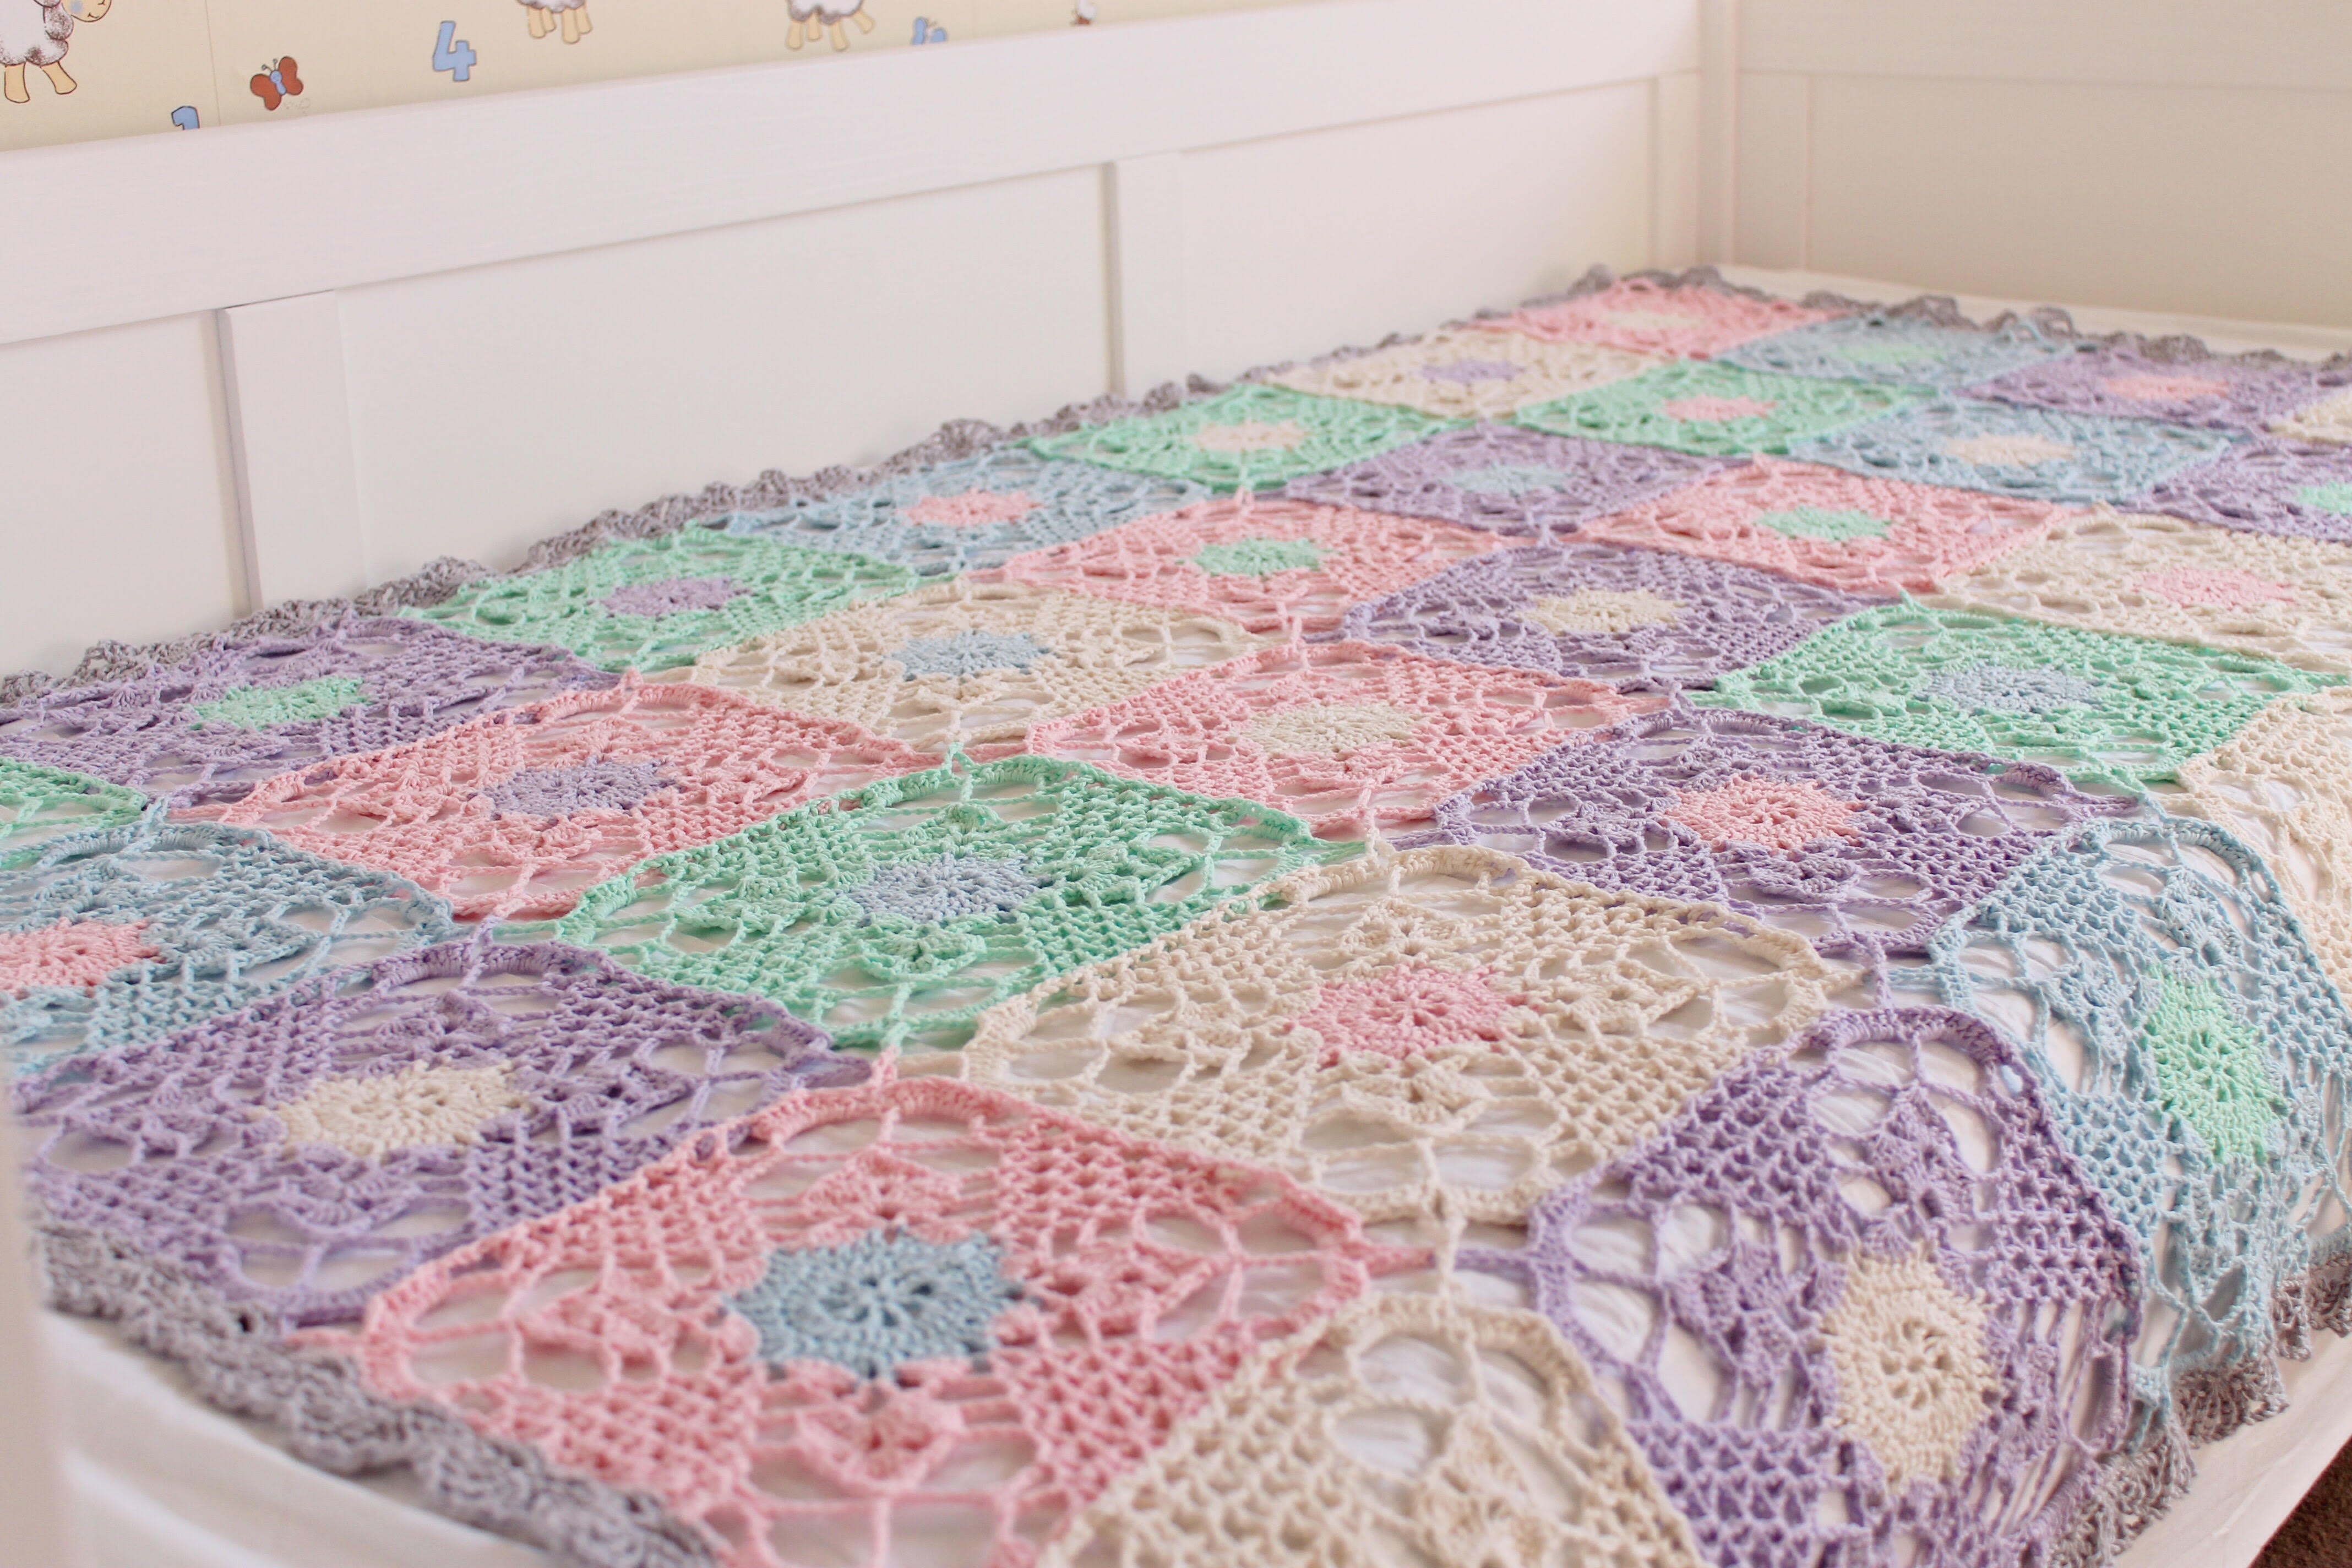
It has taken me months and months, but finally, it’s finished!
It’s absolutely beautiful. Spectacular even. I really struggled to capture the beauty in photographs, to be honest.
I used the joining method that Marianne from MaRRose-CCC came up with, which is essentially genius. The blanket just grew beautifully and the joins are virtually invisible which I just love. Especially as I hate joining motifs.
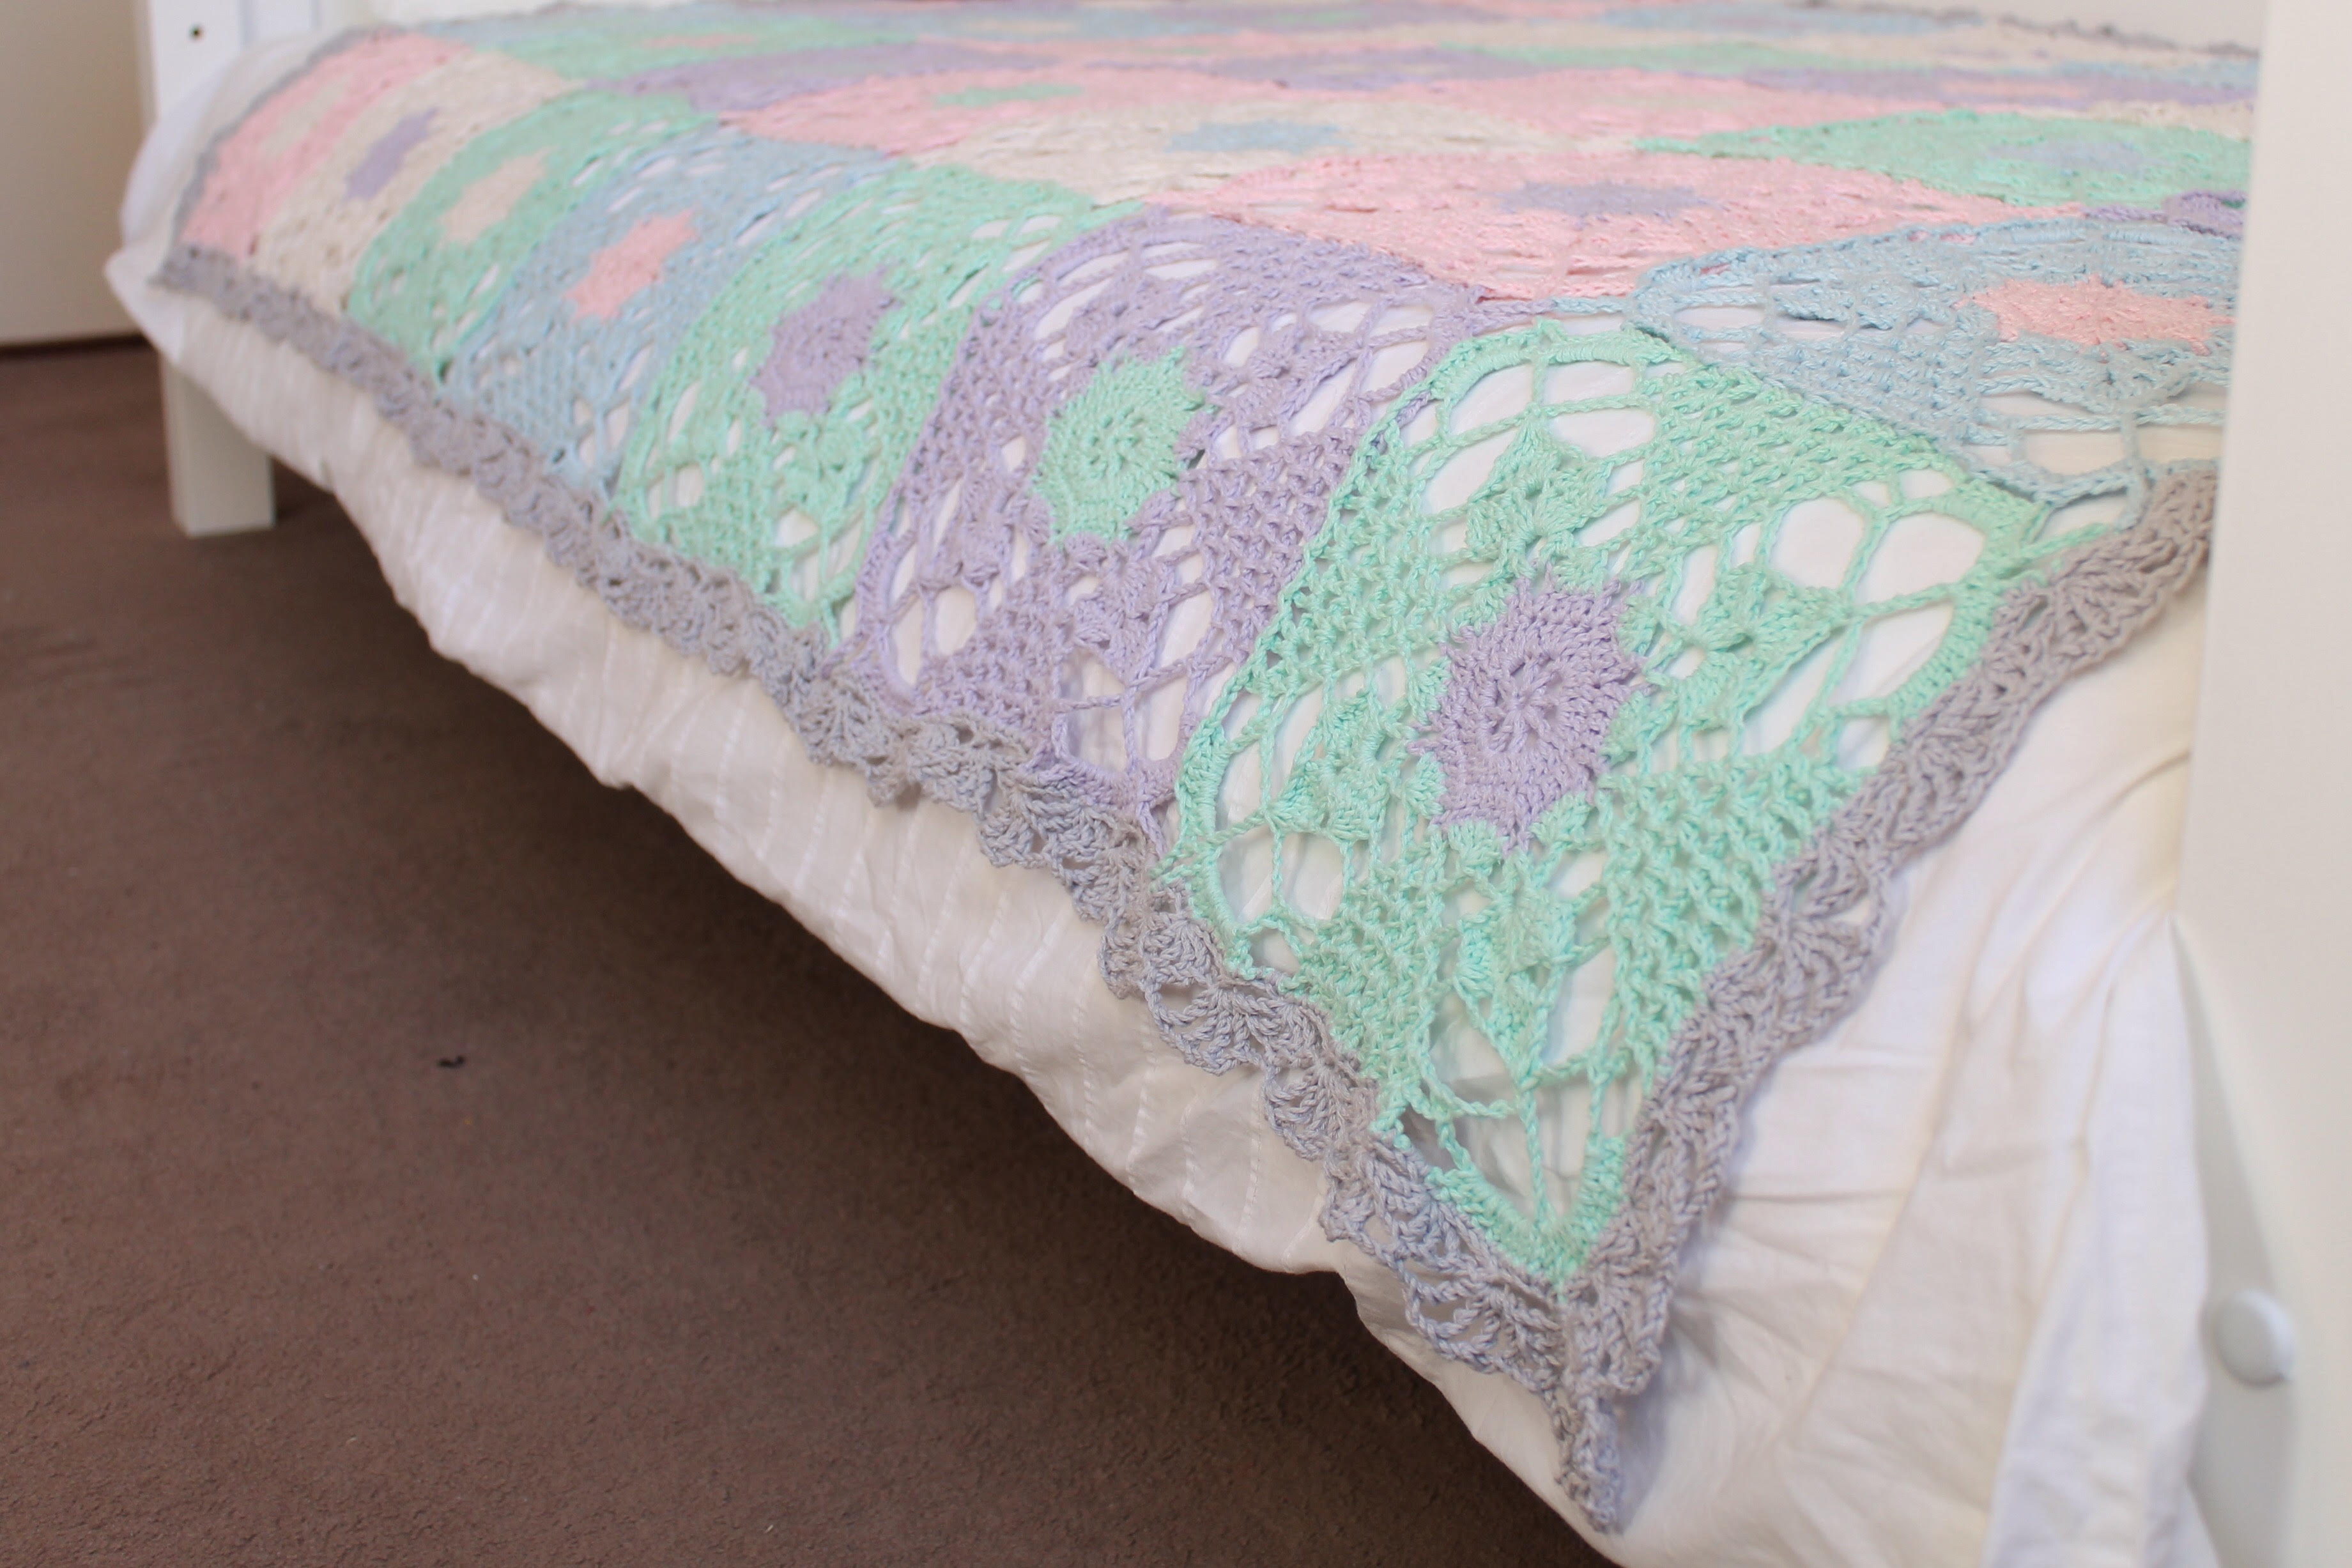
Once the blanket was done I had to come up with an border. I searched the internet high and low for inspiration, but to be honest, there aren’t a lot of examples out there. Cornel Strydom used a simple scalloped edging, which I loved, but wasn’t quite right for me.
In the end I went digging through my crochet stitch bibles, and found an edging that I liked, but wasn’t quite right either, so I decided to modify it slightly.
Here’s a close-up:
So how did I do it? It’s really very simple.
The pattern works on a 10 stitch repeat, so first of all, what you need to do is do a lap around the blanket in single crochet stitches, to get the edging into multiples of 10. Each finished square has loose loops at the corners, I joined those with one SC around both loops. I had to fudge it a little bit, because the squares themselves don’t have quite the right stitch count. I crocheted into each stitch, and in the chain sections I crocheted one stitch less than the chain. So when the last round of the square has a chain 3, I single crocheted 2 stitches into that space. Make sense? Otherwise the edging will become too ruffly.
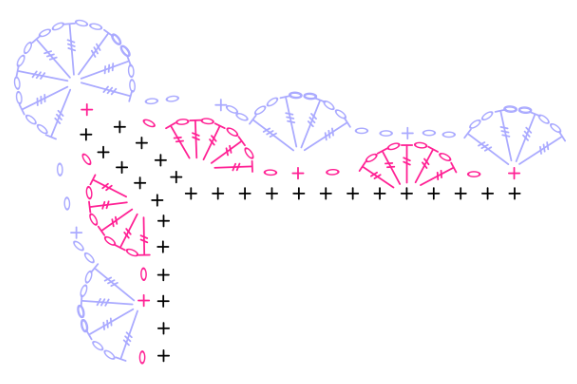
On the second round, start at a corner, skip the next 4 stitches, Treble Crochet into the fifth. Chain 1, and TC, Ch1, 4 more times. Skip 4 stitches, SC into the next, skip 4 stitches, TC, CH1 5 times into the next. Repeat that fan pattern all the way around. there should be a SC at each corner, so there is a fan on each side of the corner.
The third and final round, start at a corner and Double Treble, CH2 8 times into the SC in the corner of the previous round. SC into the middle TC from the previous round, CH2, DTC (Double Treble Crochet), CH2 4 times into the SC stitch between fans from the previous round. SC into the middle TC from the previous round. Repeat this all the way round, making sure that you have the 8 DTC stitches in each corner. If you take a look at the pic above, you’ll see what I mean.
I cobbled together a chart. It’s not fabulous because I’m still getting my head around the Stitchworks software, but it will help you get the idea.
I’m so happy with the results, I just love the blanket. I just want to wrap myself in it, with a cup of tea and enjoy the sunshine. You know what? I’m going to do just that. #enjoyeverymoment
For this project I used Scheepjes Linen Soft. I used almost 5 balls of each colour, and just over two for the border. I have enough yarn leftover to make at least one matching cushion, when I get the chance.
ETA: If you haven’t seen or made the square for yourself already, here’s the chart: