Category Archives: Stone Washed

Crochet Pattern Launch – Memory Throw

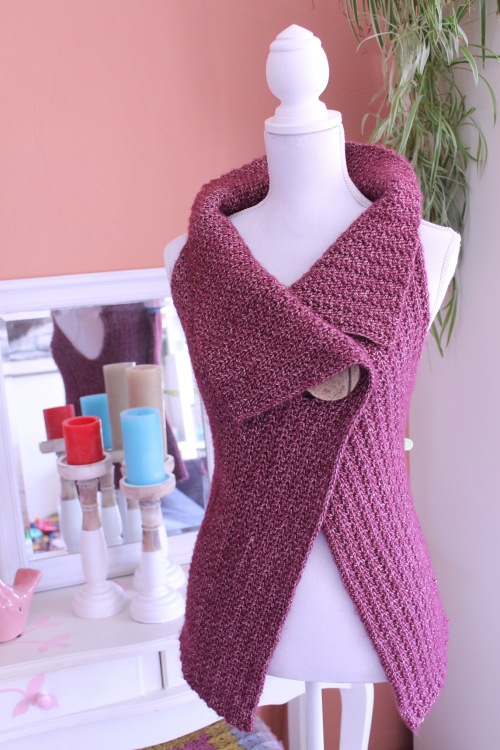
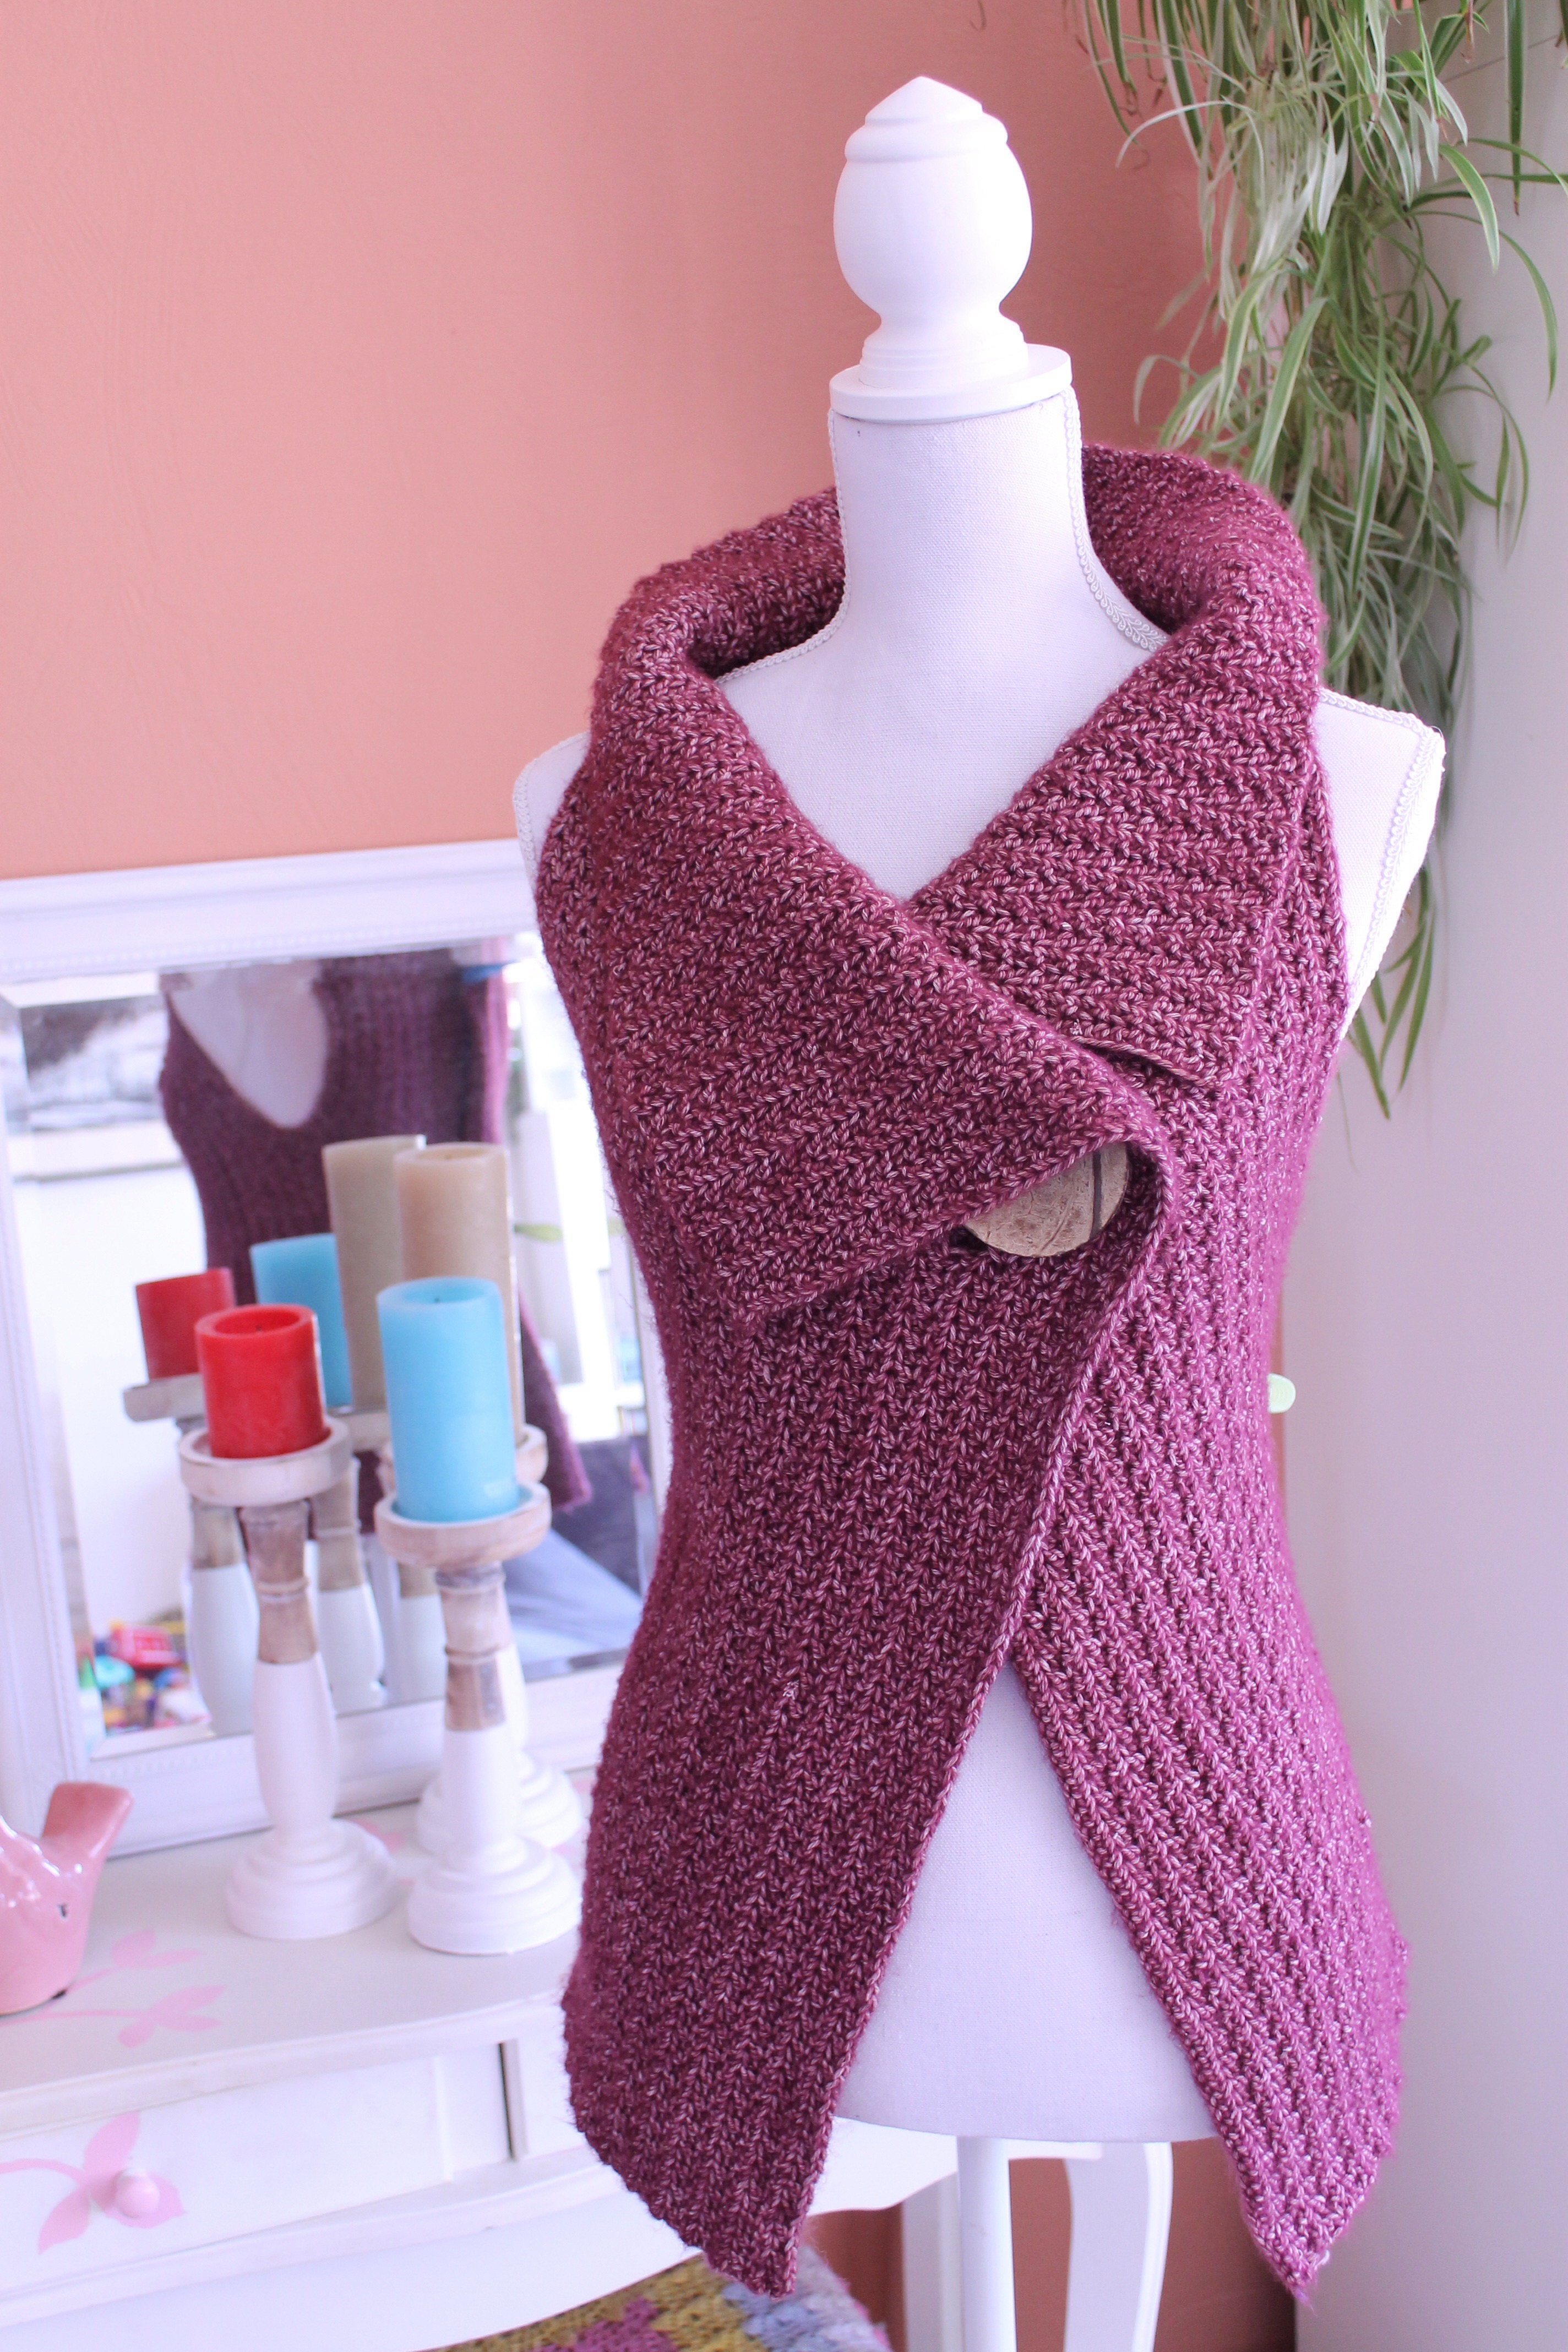
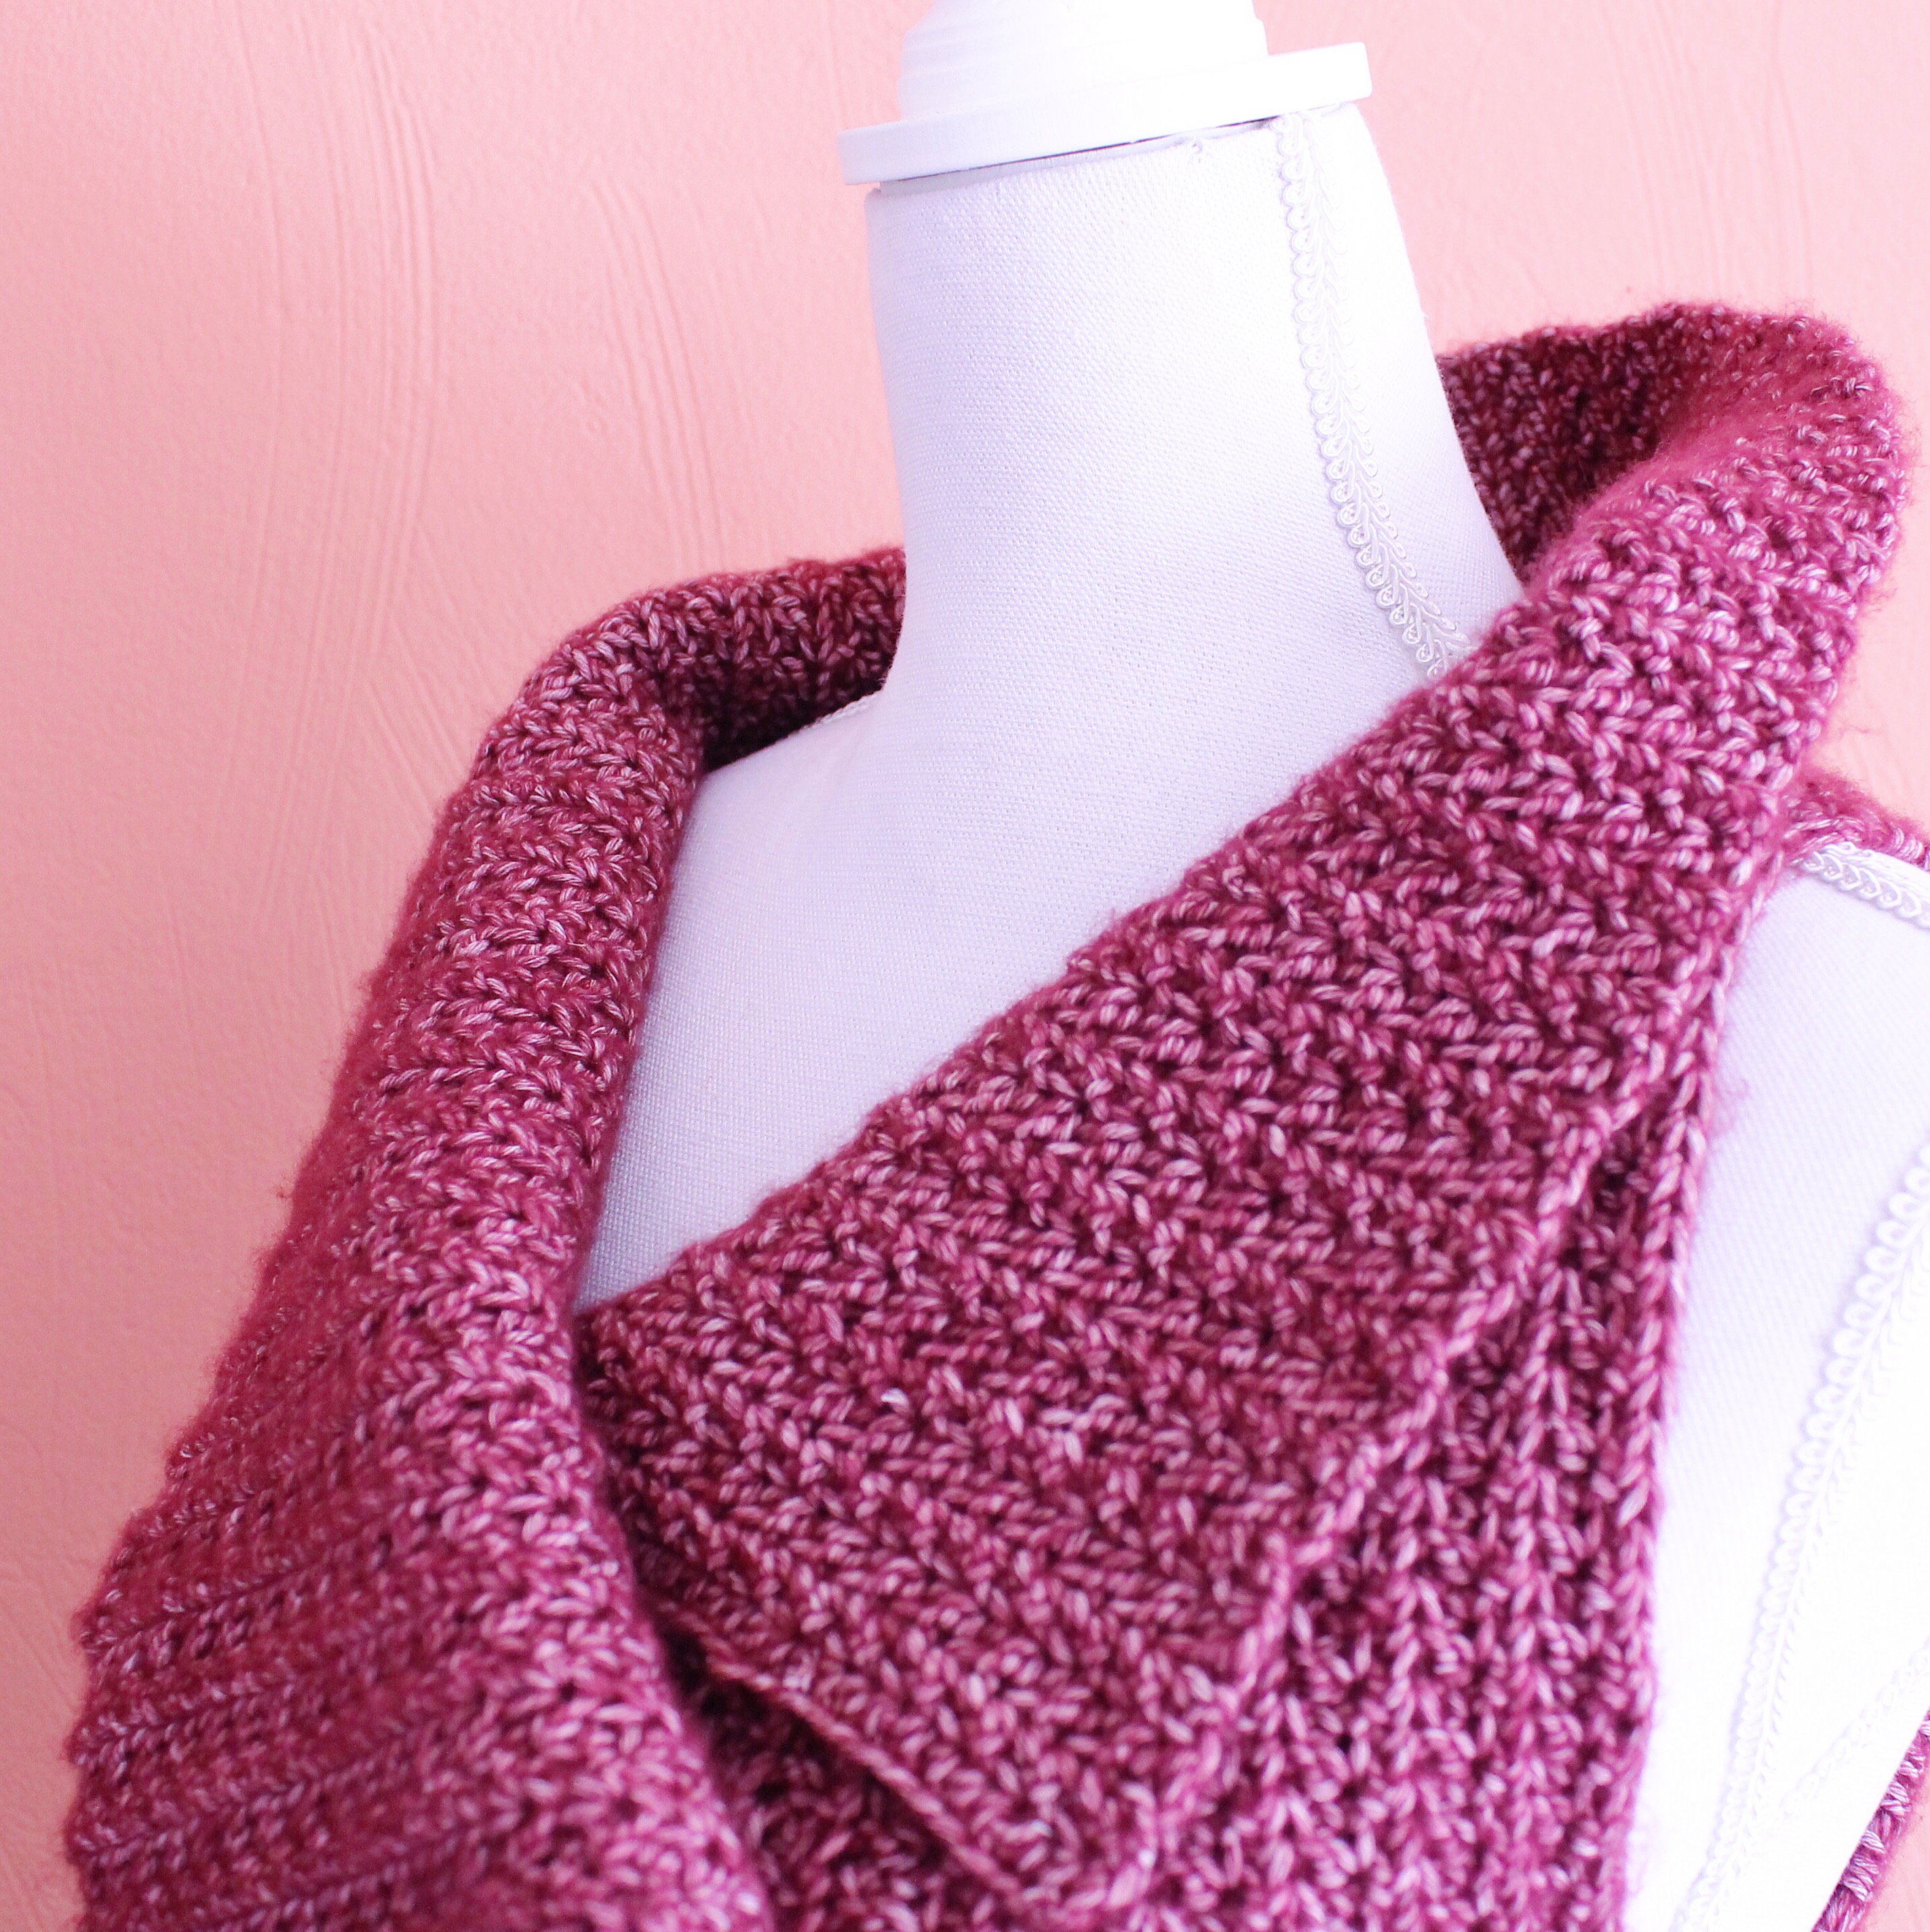
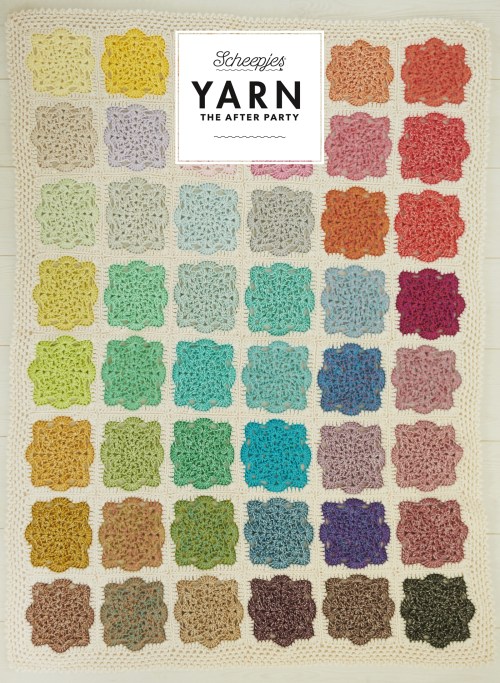
It’s been a big week for me! Yesterday I launched the Berry Smash Cowl, and Scheepjes also released their latest YARN, the After Party issue, which is the pattern for my Memory Throw.

Memory Throw


Where to buy?

After Party patterns retail for a euro/pound, and Scheepjes has a list of all their fantastic stockists here. They also have loads of info about the pattern on their website.

Wool Warehouse stocks the English version*
My local yarn store Caro’s Atelier stocks the Dutch version*
Caro’s also stocks yarn packs to make the blanket*! If you buy from Caro’s and want the pattern in a different language, email me @ missnerisscrochet@gmail.com and I’ll gift it to you via Ravelry.

You can get your hands on the digital version in both Dutch and English, plus French, German, Spanish and Swedish on Ravelry here.


This pattern is one of the most special that I’ve made in my crocheting career.  You see, I made this quite a while ago actually.  While I was home in Australia last helping my mum sort all her stuff as she was dying, I found a vintage crochet blanket in a box in the shed.  I remember it being draped over our couch as a kid, but hadn’t seen it for years.

Original throw from 1988

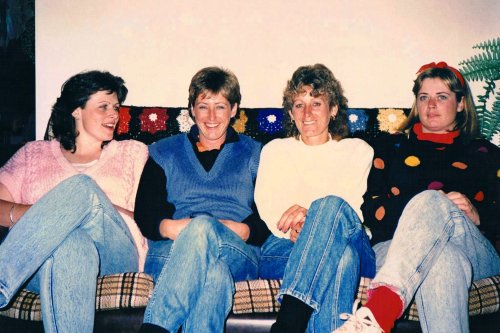
The OG inspiration, circa 1988. That’s my mum there, second from the right.

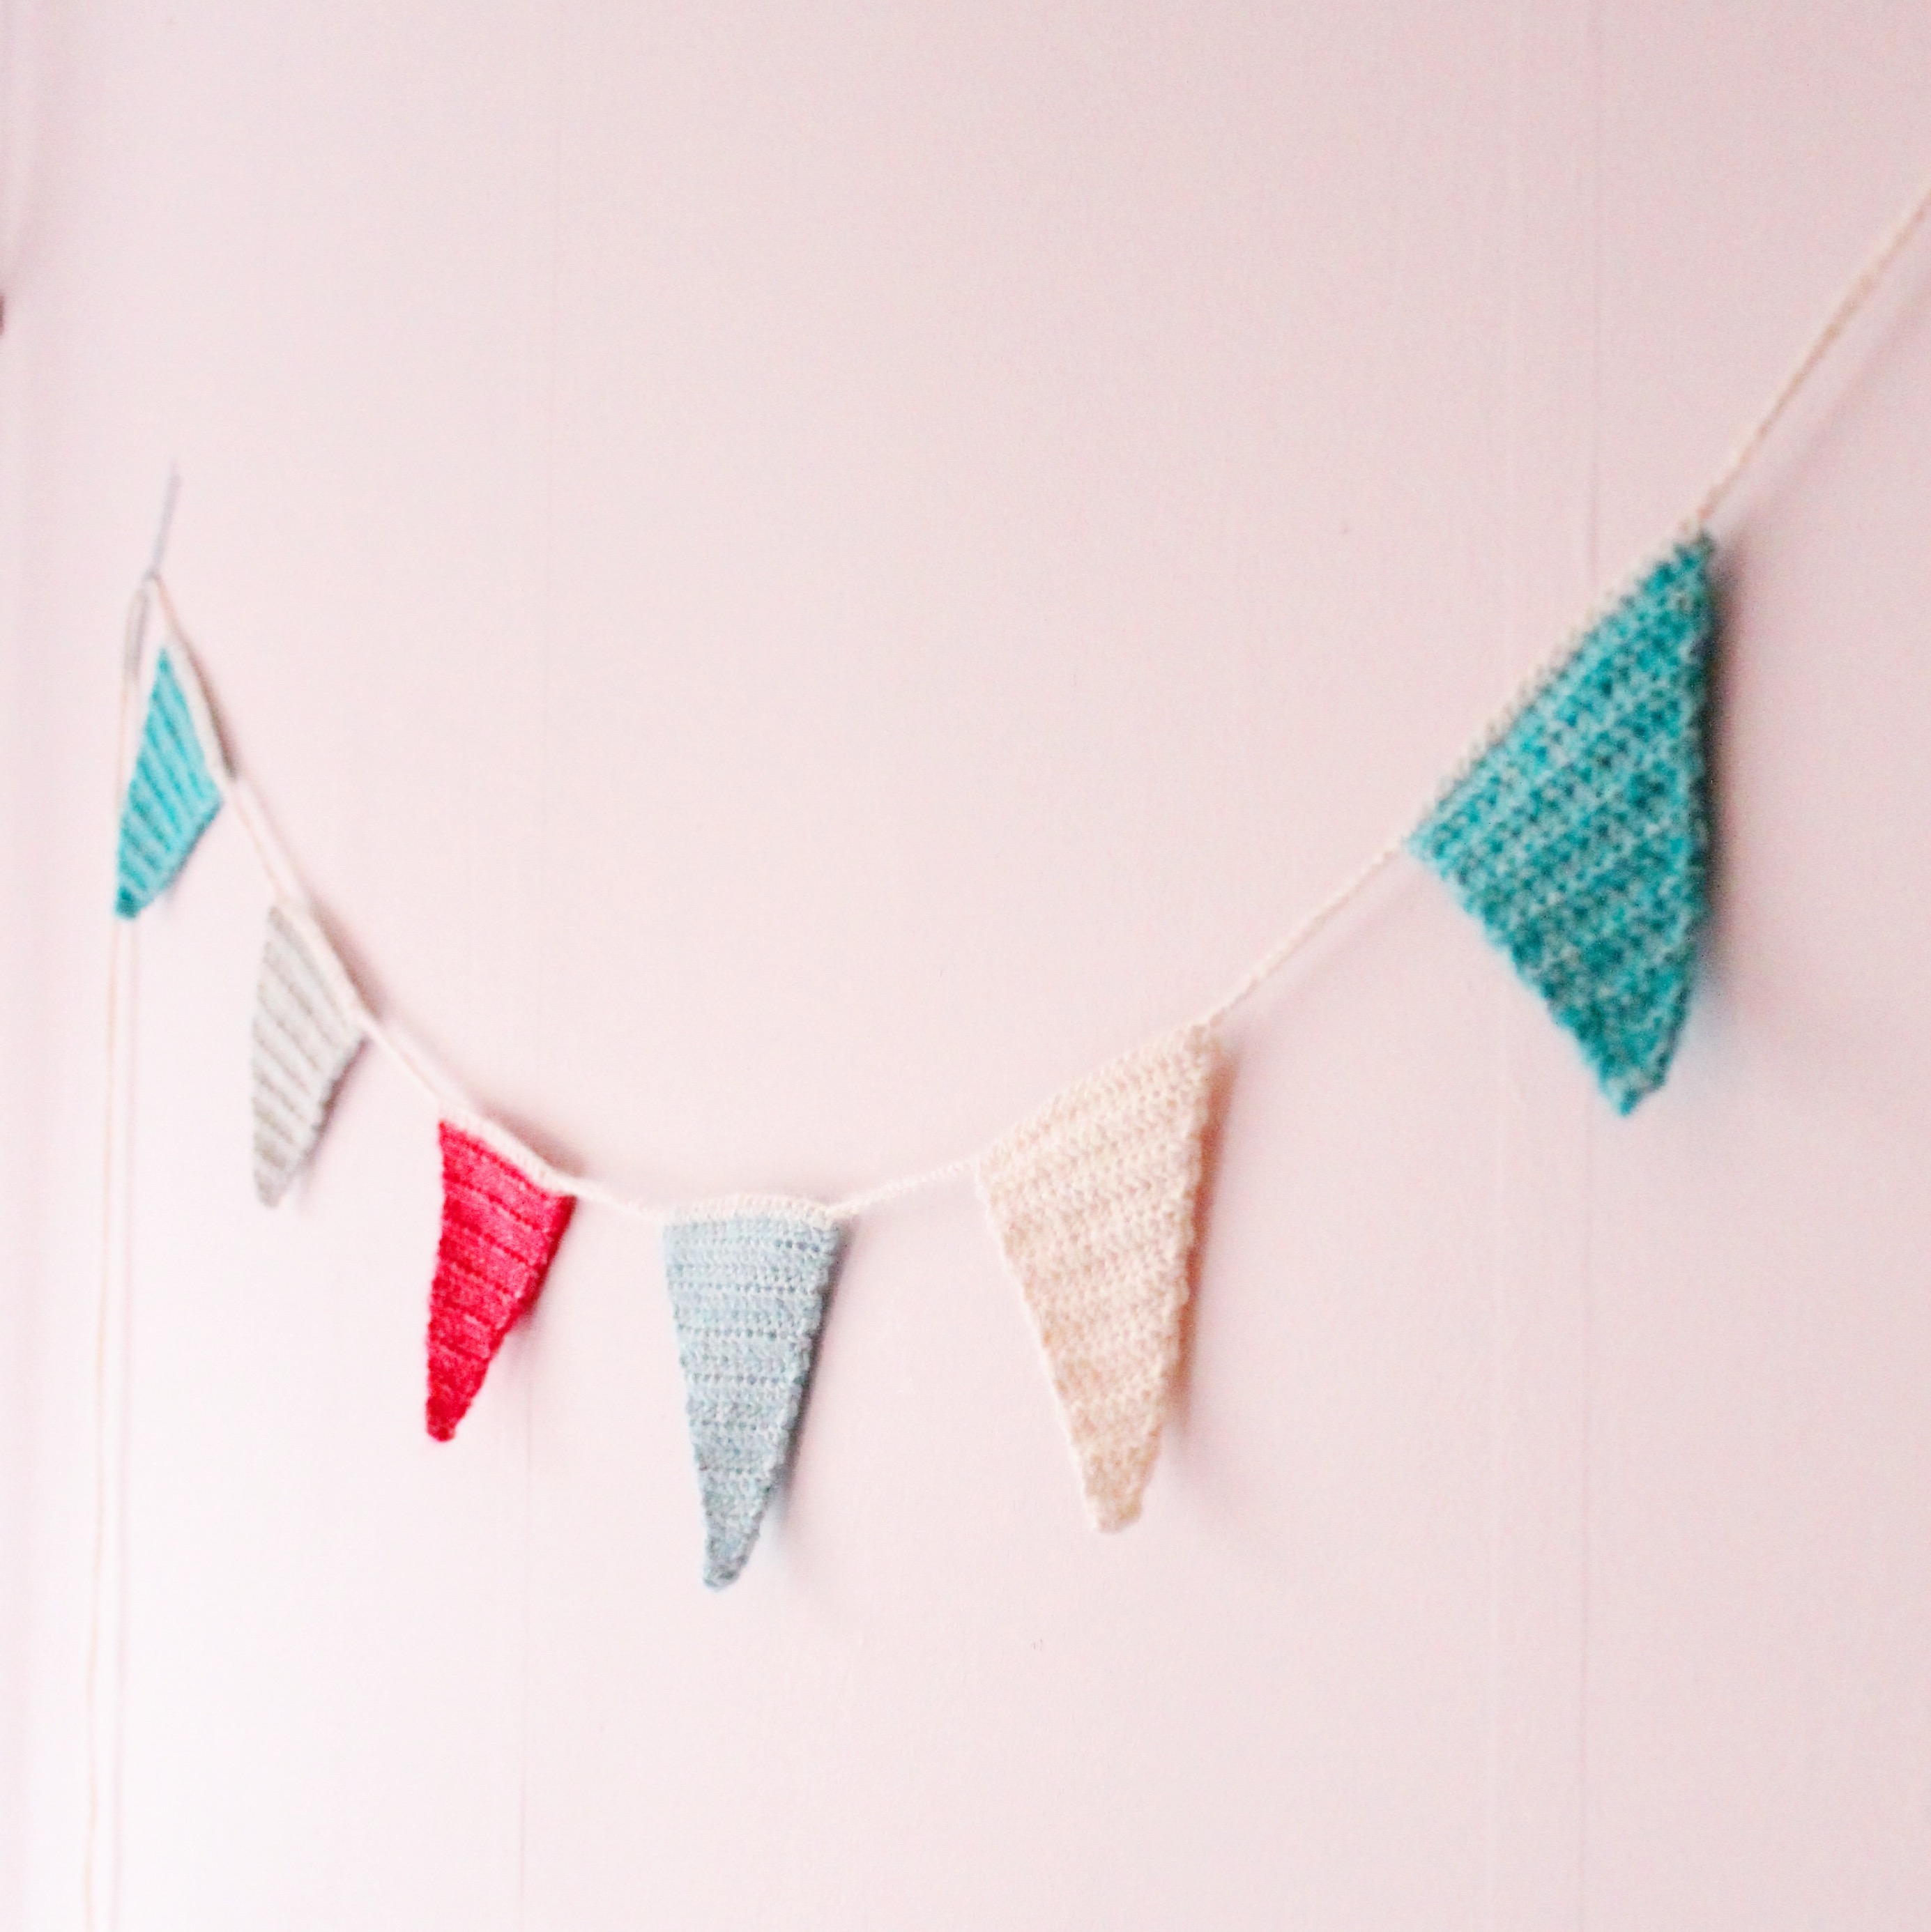
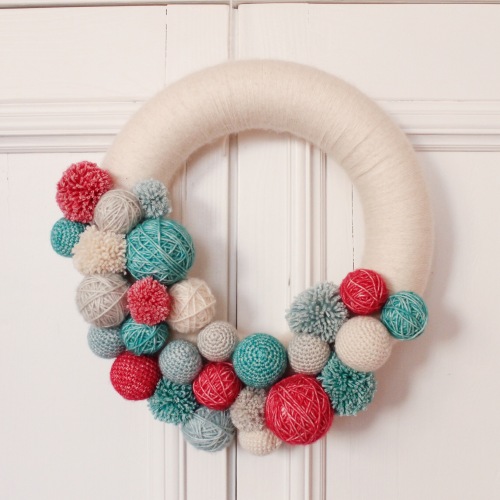
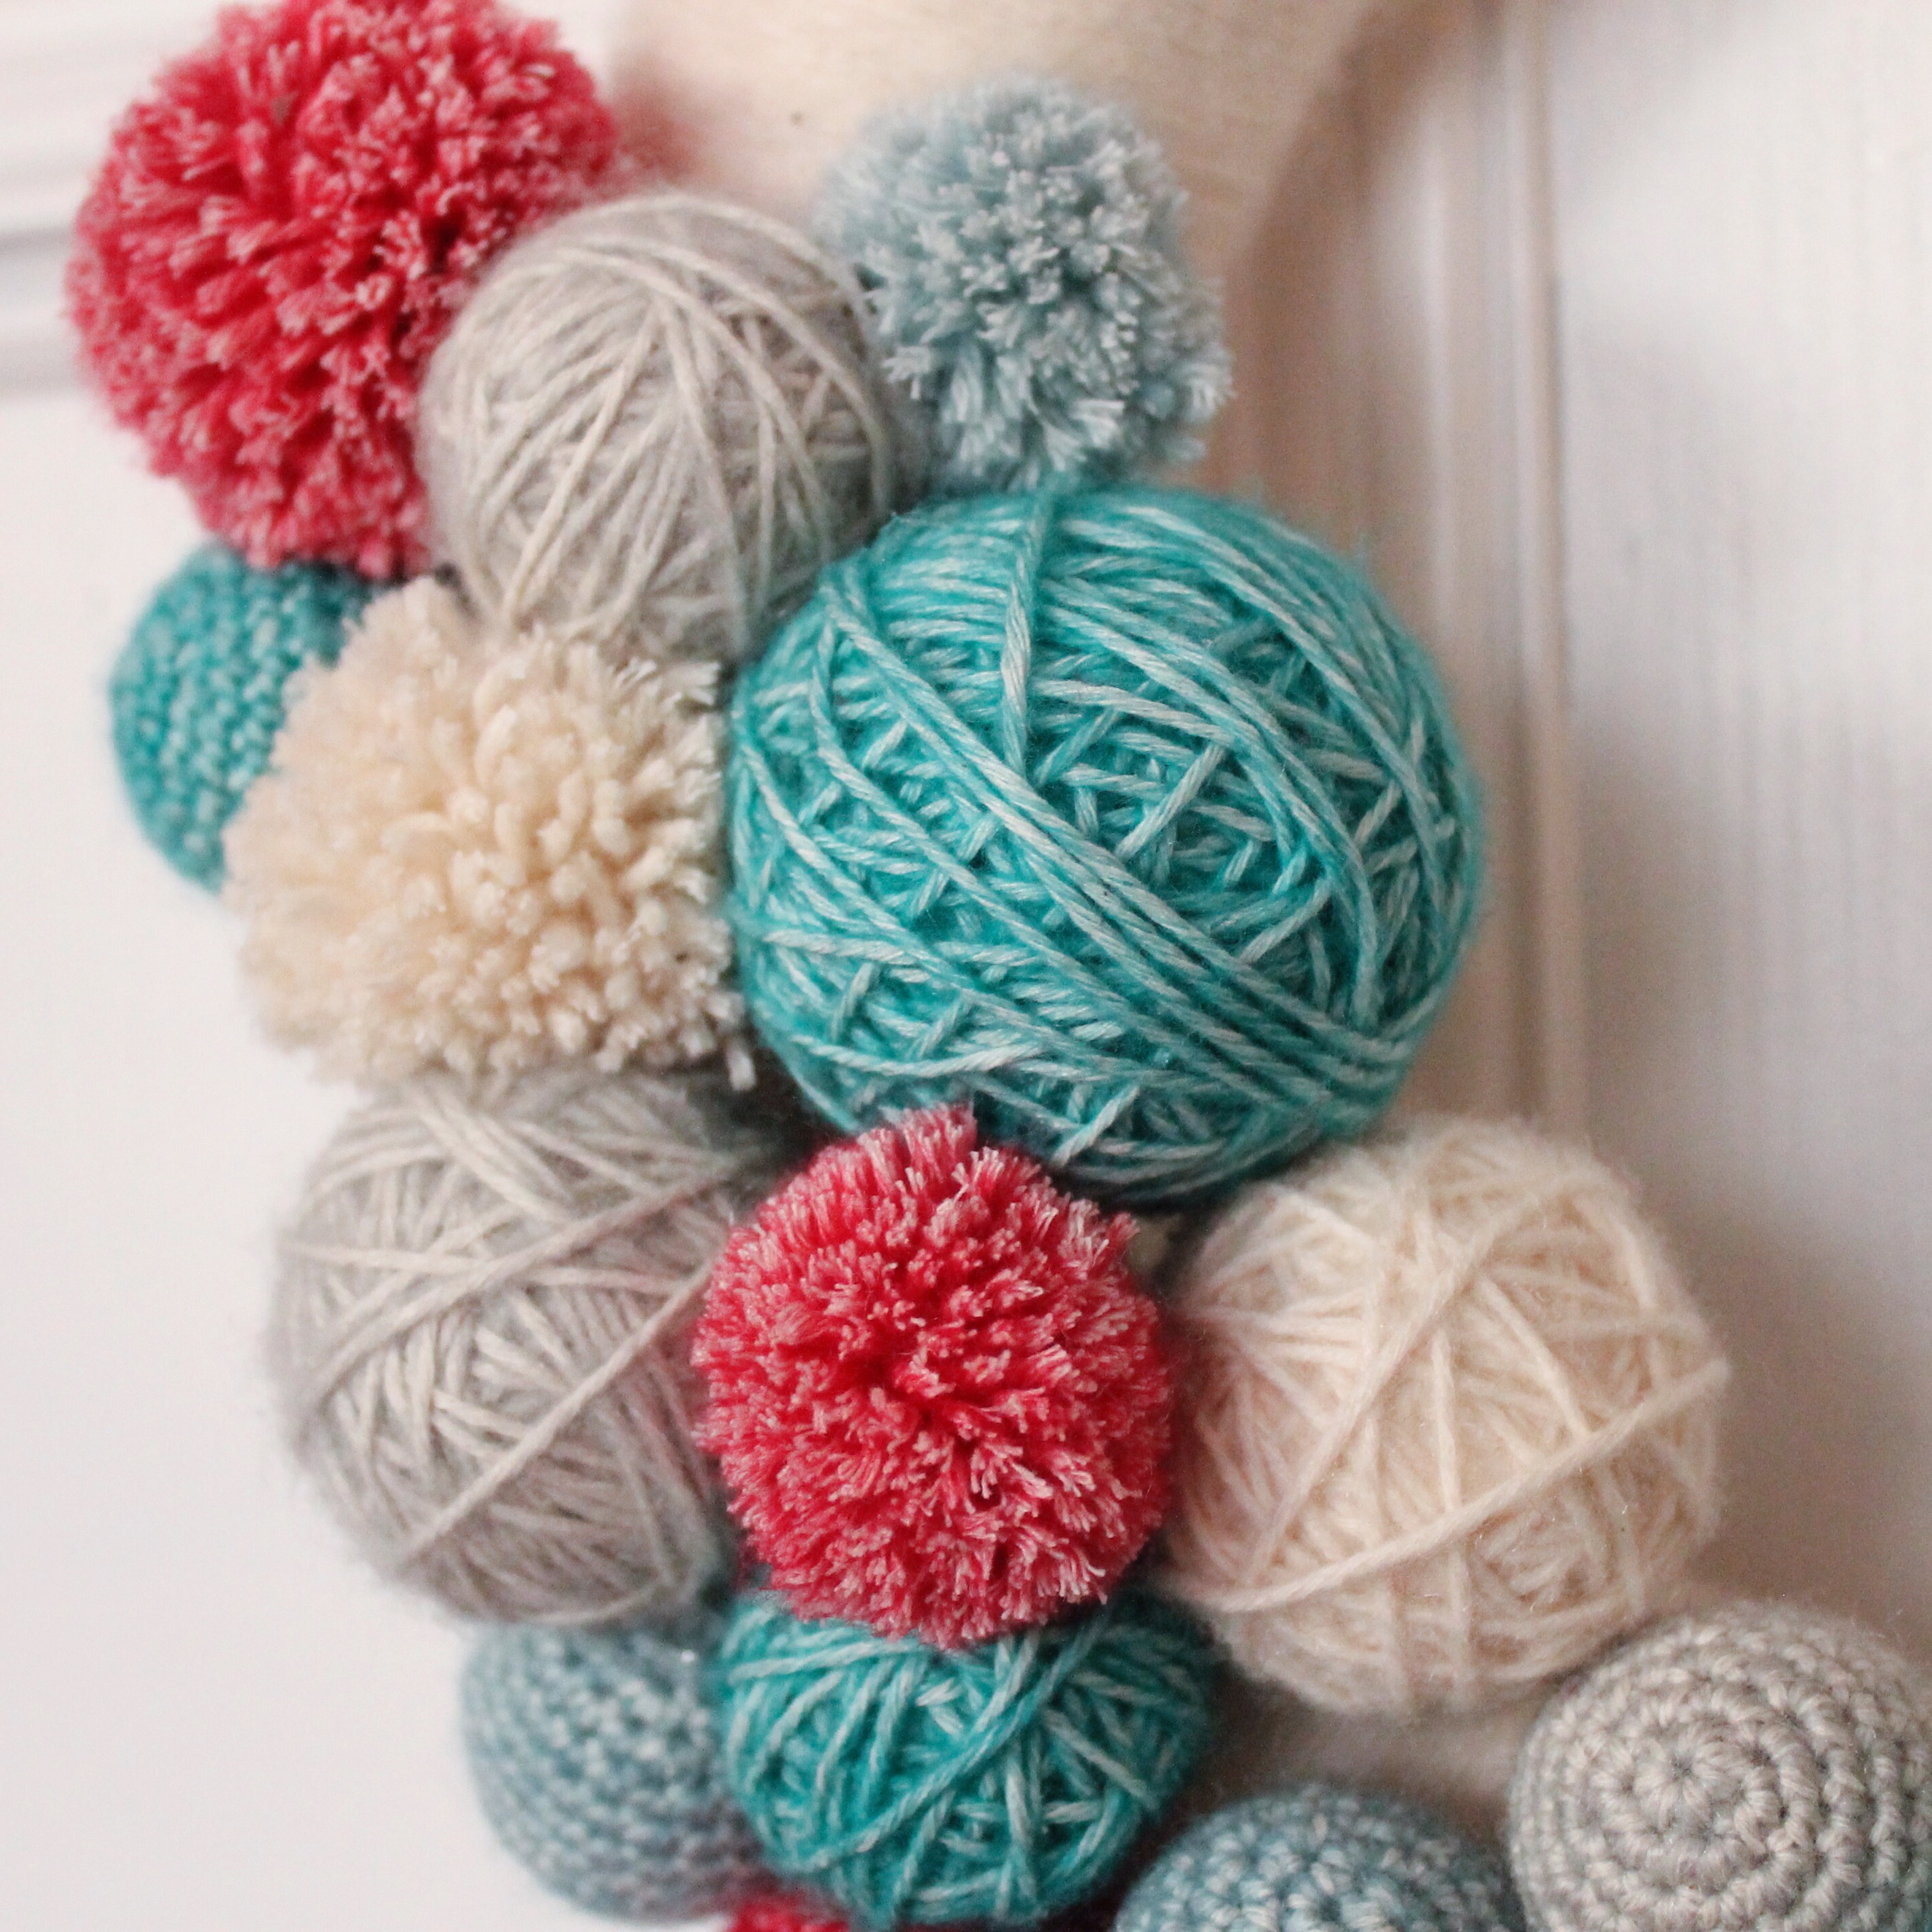
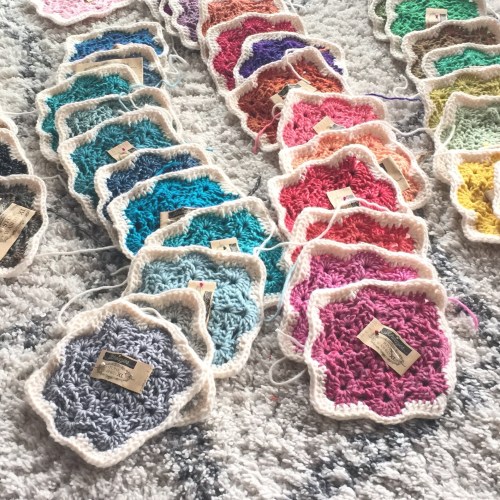
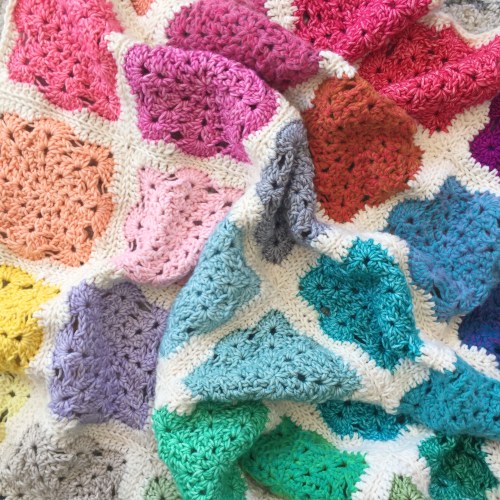
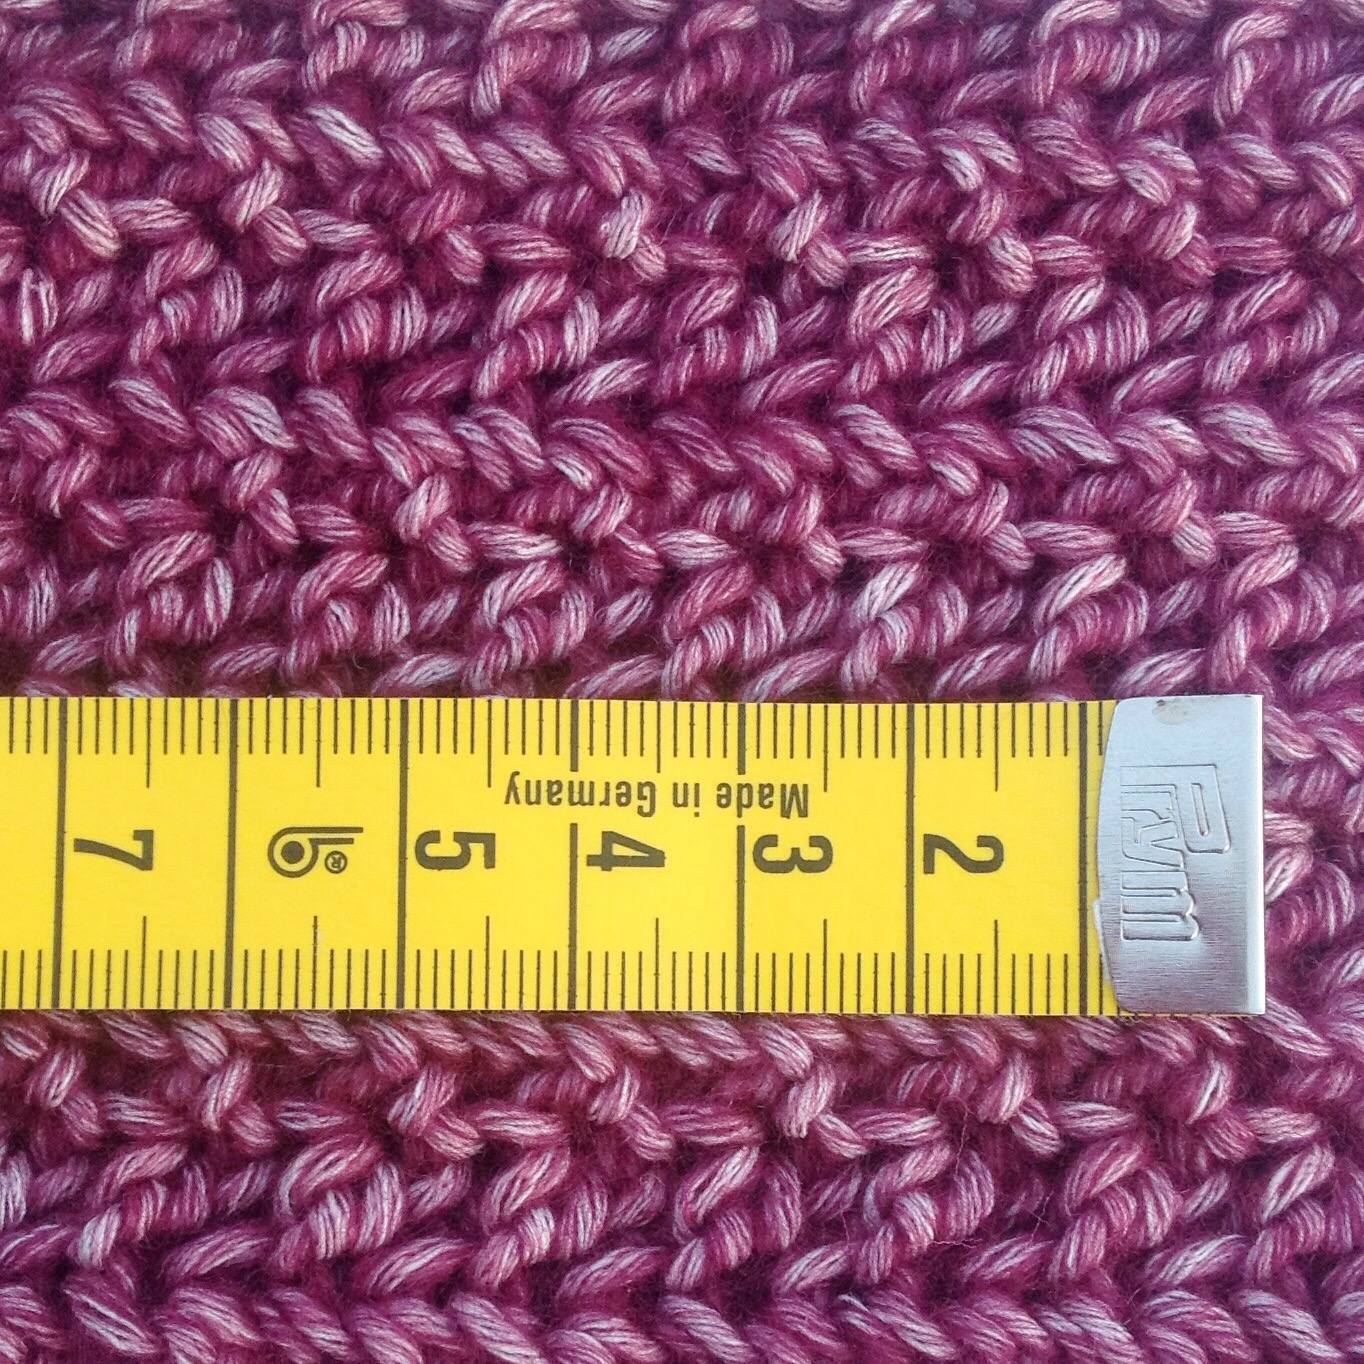
The brightly coloured motifs and immediately inspired me to use my Scheepjes Stone Washed XL colour pack!

I started working on the blanket in the short two weeks between returning to the Netherlands and when my mum died.  I can still see myself sitting on the couch, working away, waiting to speak to her one more time, praying it wouldn’t be the last, then suddenly she was gone.

The next weeks were spent going through the motions, putting on a face for the outside world so as to not make others feel uncomfortable while I was drowning in my grief, and in that time those motifs were my safe place. I could pick up a ball and disappear for a few minutes, and just be in the moment. I was cast adrift, and working on this throw anchored me again.

Memory throw motifs

When it was finished, packing it up and shipping it off to its new home at Scheepjes HQ was cathartic.  So much of my heart and soul was poured into that blanket and it helped me to move through the stages of grief.

Memory throw super close up

Now, the beautiful styling and photographers from the wonderful team at Scheepjes really hits me in the feels.  I’m transported to that time, but instead of feeling the same sorrow, I feel what can almost be described as joy.  To be cliched, out of darkness comes light.

Memory Throw close up

The throw embodies my mum.  She was colour personified. I like to think she would have happily draped this over the back of her couch and snuggled under it on chilly nights.

Memory Throw full blanket

Thank you to the creative team at Scheepjes for publishing this pattern and for their ongoing support in my creative journey. I feel nurtured and love that I’m given the space to grow as a designer, especially as I spent the first 30 years of my life believing I wasn’t a creative person.  Now I know better!

*This post contains affiliate links, which support my designs, at no extra cost to you, my valued audience.


Advertisement

Crocheting a Rainbow with Scheepjes Stone Washed and River Washed Cutie Pies

If you follow me on Instagram, you would have seen a rainbow growing over the last month or so.

A while ago Scheepjes sent me a couple of Stone Washed and River Washed cutie pie colour packs to play with, and I immediately started planning how I could make something which would use every single colour and this rainbow wrap was born.

Let me tell you a little about the cutie pies.  They come in two packs, one in regular stone/river washed, and the other in XL.Scheepjes Stone Washed (and XL Cutie Pies)

The regular Stone Washed come in 10g balls, with 26m of yarn. I was able to get 300 UK trebles (US double) from a ball with a 5mm hook.  The XL come in 15g balls with 22.5m of yarn.  I haven’t tested how many stitches this works out to be, because I’m saving the yarn – I have a special idea brewing, so we’ll have to wait for more info there…

But, back to the rainbow.

I decided to make something of a giant zigzag and although it took me a while to make it work, the end result is beautiful.

Rainbow Wrap made with Scheepjes Stone/River washed cutie pies: http://shrsl.com/ubkw

Now here’s the link to the pattern; RainBOOM!

You’ll need an entire Stone Washed/River Washed cutie pie colour pack, which you can pick up from most Scheepjes retailers, including:

Wool Warehouse* (for UK and global shipping)
Caro’s Atelier* (in the Benelux and Europe)
Black Sheep Wools* (in the UK)
Knotty House* (US and Canada)
Snufflebean Yarn (in the UK)

Lastly, you should check out Matt from A Boy and Bunting’s fun and fabulous Youtube review of the yarn, he dives right in and talks about everything you need to know.

*affiliate link

Celtic Tiles Blanket by Lilla Bjorn

I wanted to share this fabulous design by Tatsiana of Lilla Bjorn’s Crochet World:Celtic Tiles Blanket by Lilla Bjorn: http://www.lillabjorncrochet.com/2017/02/celtic-tiles-blanket-free-overlay.html

There is no doubt that Tatsiana is The Queen of overlay.  You only need to see her other designs here for proof.

This design takes me back to Cornwall and to Land’s End.  I even signed my marriage certificate in a pen with this crosshatch celtic pattern and it’s my favourite, very precious pen!

Celtic pen

The free pattern is available on Tatsiana’s blog here, or you can purchase a print friendly version on Ravelry here.

And even more exciting, Wool Warehouse has packs in Stonewashed XL for this design available, so you must grab yours here*!

Celtic Tiles Blanket pattern from Lilla Bjorn at Ravelry

Celtic Tiles Blanket pattern from Lilla Bjorn at Ravelry

And for a little refresher, here are some of the spectacular overlay projects that Tatsiana has designed.  My favourite is the Peacock Tail Bag:

Peacock bag CAL http://www.lillabjorncrochet.com/2016/08/peacock-tail-bag-cal-general-information.html

Macaron pin cushion http://www.lillabjorncrochet.com/2015/05/macaron-pin-cushion-free-pattern.html

Floral Ear Muffs by Lilla Bjorn http://www.lillabjorncrochet.com/2016/01/floral-ear-muffs-free-crochet-pattern.html

All photos are courtesy of Tatsiana and Lilla Bjorn’s Crochet World.

*Affiliate link


Peek-a-Boo Button Wrap for Kids – Pattern

Here we are, finally.  The kid’s version of my seriously popular Peek-a-Boo Button Wrap is ready.

Peek-a-boo button wrap for kids. Using Scheepjes Stone Washed XL, designed by MissNeriss.

Making this wrap reminded me just how much I love the Stone Washed yarn.  It is such a beautiful yarn to work with.  No splitting, froggable, soft, warm – oh so warm, and beautiful colours.  The soft Rose Quartz pink I used for this was the perfect choice for my daughter.  She’s a pink girl, through and through.

Right, let’s get on with it.

Peek-a-boo button wrap for kids. Using Scheepjes Stone Washed XL, designed by MissNeriss.

What You’ll Need

Scheepjes Stone Washed XL in 860 (Rose Quartz) – 5 balls (more if your gauge is different)
4 cm bamboo button – you can pick these up at any good craft store, or online
Size 5mm hook (or hook to obtain gauge).  My favourite is the Clover Amour.
Measuring Tape
Scissors
Tapestry Needle
Eucalan wool wash

Gauge

8 stitches x 5 rows = 5cm x 5cm
gauge across gauge up

Stitches

Note: All stitches are in US terms
Chain (CH)
Half Double Crochet (HDC)
Half Double Crochet Back Loop Only (HDCBLO)
Half Double Crochet Front Loop Only (HDCFLO)

Notes

In this tutorial I’m going to give the instructions on how to make a Peek-a-Boo Button wrap in a size to fit a 4-6 year old.  I will also give you a schematic so you can easily see what measurements you will need to make a wrap for older kids or younger kids.

My friend Esther from It’s all in a Nutshell has made a fantastic instructional video on how to create the stitch and her brilliant method of tracking her progress.  You can see it here:

Instructions

  1. Loosely, chain 74 for the base chain, plus 2 to start the 1st row.
  2. HDC into the 3rd loop from the hook, and all the way across.  The stitch count should be 74.  CH2 and turn.  Note, the CH2 does not count as a stitch.
  3. HDC into the back loop (HDCBLO) of the first stitch, then into the front loop (HDCFLO) into the next.  Repeat this alternating back loop/front loop pattern all the way across.  CH2 and turn.
  4. You should have ended the previous with your last stitch into the front loop of the stitch.  On this row you need to make sure that if the stitch from the previous row was in the front loop, this row needs to be in the back loop.  This creates the lovely texture and drape that makes this wrap so beautiful.  If you ensure your stitch count is even, it is easy to manage – you will always start the row in the BLO and finish in the FLO. So, HDCBLO in the first stitch, HDCFLO in the next.  Repeat across, CH2, turn.
  5. Repeat for a total count of 16 rows (or 16 cm – 1 row should be about 1cm high). Now we will make the first arm hole.  The first stitches of the row will form the collar height, so in the HDCBLO/FLO pattern, crochet 14 stitches.  Then CH15 and skip 15 stitches, HDCBLO into the next.  Then continue the FLO/BLO pattern all the way across.  CH3, turn.
  6. To close the sleeve, HDCBLO/FLO all the way across to the beginning of the chain from the previous row, then HDC 15 times around the chain, HDCBLO into the next stitch, and repeat the HDCFLO/BLO pattern to the top.
  7. Now you’ve closed the sleeve, you’re working across the back of the wrap.  Repeat the HDCBLO/FLO rows for another 25 rows, then repeat steps 5 and 6 for the second armhole.
  8. Crochet another 18 rows and then we will make the button hole.  This is a place where you can make a few personal adjustments – if the child is handy, you can do a fitting at this point, so see if it’s the right place to place the button hole.  A smaller child may need the button hole a few rows earlier, and larger children perhaps a few rows later.
  9. We’ll work from the bottom up to make the button hole for this size (if you add or subtract rows, you may need to work from the top, but the principle is the same). HDCBLO/FLO for 40 stitches, CH4, skip 4, HDCBLO in the next.  HDCFLO/BLO to the end, CH2, turn.
  10. HDCBLO/FLO to the chain, work 4 HDC around the CH4 from the previous row, then HDCFLO in the next.  HDCBLO/FLO across.
  11. Work another 4 rows (or until you run out of yarn), tie off and weave in the ends.

Wetblock using Eucalan, or another wool wash, pin out on blocking boards, stretching as needed, and wait impatiently for it to dry.

Below you can see the schematics  of the measurements of the entire wrap in the size that I have described above.  Using these measurement points, you can very easily customise the wrap to your own size.

To get the total height, take a tape measure and measure from the base of the skull to mid hip.  The button should sit over the breast/chest and the closure should be slightly off centre.

Schematic for the peekaboo button wrap by missneriss

Schematic for the peekaboo button wrap by missnerissThis design has been created with the specific use of Scheepjes Stone Washed XL in mind.

You can pick the yarn up at any great Scheepjes retailer in the Benelux, Wool Warehouse or Deramores internationally, and Paradise Fibers in the US.


Peek-a-Boo Button Wrap – For Kids!

I’m really not a fan of Dutch winters.  I’ve had this wrap ready to show you for ages, but haven’t had any decent light-filled days to photograph it. Finally at the weekend there was glorious sunshine, so Raina and I spent the morning outside taking pics.

Peek-a-boo button wrap for kids. Using Scheepjes Stone Washed XL, designed by MissNeriss.

Raina really loves her wrap.  It looks cute on her, don’t you think?

Peek-a-boo button wrap for kids. Using Scheepjes Stone Washed XL, designed by MissNeriss.

Peek-a-boo button wrap for kids. Using Scheepjes Stone Washed XL, designed by MissNeriss.

Peek-a-boo button wrap for kids. Using Scheepjes Stone Washed XL, designed by MissNeriss.

The Scheepjes Stone Washed XL is also a seriously snuggly yarn.  Even though it’s a cotton/acrylic blend, it’s warm enough that Raina had no complaints about the cold when it was only 5 degrees outside!

I’m in the process of writing the instructions for kids sizes.  I need to get hold of a few different sized kids and a tape measure!

Stay tuned, the instructions and measurements are coming soon.

You can pick up the yarn at Scheepjes retailers all over the Benelux, or internationally from Wool Warehouse*.

*Affiliate Link

Peek-a-Boo Button Wrap Pattern Size S-XL

Here it is, what you’ve been waiting for – the pattern for the Peek-a-Boo Wrap!

Peek-a-Boo Wrap free crochet pattern size S-XL on missneriss.com #haken

I’ve made this for you in four different sizes, from Small through to XL.

Here you can find a written pattern for size Medium, and below you can find a chart which will give you the measurements and stitch counts for sizes Small, Large and XL.

For the Dutch speakers among us, I’ve also had the design translated.  You can find it here. Veel plezier!

You can pick up the yarn at Scheepjes retailers all over the Benelux including Caro’s Atelier*, or internationally from Wool Warehouse* and Deramores*.

And even better, Esther from It’s all in a Nutshell has created a video tutorial, which is enormously helpful!

Are you ready?

What You Need

Scheepjes Stone Washed XL in 850 (Garnet) – 12 balls for size M (I used 11, but get an extra to be safe)
S = 10 balls (each ball of Stone Washed XL has 75 metres)
M = 12 balls
L = 15 balls
XL = 17 balls
7cm bamboo button – you can pick these up at any good craft store, or online
Size 5mm hook (or hook to obtain gauge)
Measuring Tape
Scissors
Tapestry Needle
Eucalan wool wash

Gauge

8 stitches x 5 rows = 5cm x 5cm
gauge across gauge up

Stitches

Note: All stitches are in US terms
Chain (CH)
Half Double Crochet (HDC)
Half Double Crochet Back Loop Only (HDCBLO)
Half Double Crochet Front Loop Only (HDCFLO)

Size Medium

  1. Chain loosely 119 stitches.  If you’re a tight crocheter, consider going up a hook size to make sure that the chain isn’t too tight.
  2. HDC into the third chain from the hook, and all the way across (a total of 117 stitches across).  CH2, turn.
  3. HDCBLO in the first stitch, HDCFLO in the next.  Repeat this front and back (HDCBLO/FLO) format all the way across, CH2, turn.  Note:  It’s important to ensure that you have an odd number of stitches to make it easier to achieve the texture of the stitches.  If you finish the row in the back loop, when you start the next row, start in the front loop and vice versa.  You’ll find very quickly as you go that the look of the wrap will be different if you don’t maintain the BLO then FLO stitch pattern in alternating stitches.Stitch view vest
  4. Repeat this pattern building rows for 25cm.
  5. Now we are going to make the first sleeve.  Follow the HDCBLO/FLO pattern for 20 stitches, then CH 35, skip 35, then continue the HDCBLO/FLO pattern all the way to the end.  Make sure you double check that you stitch into the BLO or FLO correctly (if the stitch in the row below was FLO, you need to stitch into the BLO).
  6. HDCBLO/FLO to the chain from the previous row, then HDC 35 into the chain, then continue the HDCBLO/FLO to the end.  the short end becomes the collar of the wrap.
  7. Repeat step 3 for a further 37cm and then we will make the next sleeve.  Making sure you start from the top of the collar and work down (add a row if you need to), repeat steps 5 and 6.
  8. Continue building the final front panel, for 25cm, then we will make the button hole.button large
  9. Starting from the top of the collar, repeat the HDCBLO/FLO pattern for 37 stitches.  Chain 7, skip 7 stitches, then repeat the HDCBLO/FLO pattern all the way to the end.
  10. HDCBLO/FLO to the chain from the previous row, then HDC 7 into the chain, then continue the HDCBLO/FLO to the end.
  11. Build a further 7 rows, or complete your ball of yarn.  Tie off, weave in ends.
  12. Sew button on the opposite end of the garment to the button hole 9cm from the end, 25cm from the top.Peek-a-Boo Wrap free crochet pattern size S-XL on missneriss.com #haken
  13. Block, stretching a little (especially the length) and you’re done!

Peek-a-Boo Wrap free crochet pattern size S-XL on missneriss.com #hakenThe back of the body warmer

Size Chart

You can switch out the stitch counts and centimetres in the written pattern above for the numbers in the chart below, depending on your required size.

SMALL MEDIUM
CM Rows CM Rows
Length 70 Chain 117 + 2 70cm Chain 117 + 2
Back 32 32 37 37
Front (button) 20 20 25 25
Front (button hole) 27 27 32 32
CM Stitch Count CM Stitch Count
Start Sleeve 12.5 20 12.5 20
End Sleeve 20 32 22.5 35
Start Button Hole 23 37 23 37
Button Hole Size 7 7
LARGE X-LARGE
CM Rows CM Rows
Length 75cm Chain 123 + 2 75cm Chain 123 + 2
Back 42 42 47 47
Front (button) 30 30 35 35
Front (button hole) 37 37 42 42
CM Stitch Count CM Stitch Count
Start Sleeve 15 24 17.5 28
End Sleeve 25 39 27.5 43
Start Button Hole 25 40 25 40
Button Hole Size 7 7

*Affiliate Link

Say Hello to the Peek-a-Boo Button Wrap

Crochet body warmer

Finally!  But, it was worth the wait, right?

Peek-a-boo Button Body Warmer

I picked up a mannequin from Xenos just to be able to show this off to you properly, and the form is just perfect.

peek-a-boo Button crochet body warmer

And so is the peek-a-boo button.  Better than I ever could have imagined.  I’ll be honest, when I first ordered the yarn and the button, I hadn’t really calculated the size of the button correctly, but now I couldn’t imagine having chosen anything else.

Standing collar on the crochet body warmer

I love how there is just enough strength in the stitch to hold the collar up at the back.  It’s always surprising just how soft and supple the Scheepjes Stone Washed is after blocking – I wasn’t sure if the collar would keep standing!

The back of the body warmer

Most of all, I adore the texture of the stitch I used.  It’s a very ordinary Half double Crochet, but in alternating front and back loops, giving the design just that little bit extra texture.  Plus the stitch allows just enough stretch for the top to really mold to the shape of the figure.

Can you tell how happy I am with the result?

Coming very soon, the pattern!  I’m drafting it in multiple sizes.  So we’ll have sizes from S through to XL next week!

The pattern is now live!  You can pick it up here: Peek-a-Boo Button Wrap.  Coming soon: pattern in Dutch! OMG that’s going to be tough 😀

Home from Holidays and it’s Yarn Day!

I’m back!  I can’t say if I’m happy to be back home from my “Other” home or not, but one thing’s for sure, I’m very happy to find this huge pile of yarn waiting for me!

Scheepjes Stonewashed, do you think I have enough?

I have a really cool project in mind for all of this.  A while back my Mother in Law asked me if I could make her a vest for days and nights when it’s too warm for a coat and too cold without, so I’m working on something that I think will be great.

Big pile of Scheepjes Stone Washed.


The colour and texture of the Scheepjes Stone Washed XL is just perfect for this project, the colour variation adds interest, and the fluffiness adds serious warmth!  What do you think of the start?  I just couldn’t wait to crack on, so have been measuring and counting and doing what I can to beat the jetlag.

Stone Washed Body Warmer from Scheepjes yarn

I also chose these enormous coconut shell buttons, which will be both a feature and functional.

Huge coconut buttons

More progress photos to come, stay tuned!

PS.  If you’re looking for this yarn but don’t know where to find it, you can pick it up at loads of great retailers (in person or online) in the Netherlands here, or internationally from deramores.com.  Happy hunting!

Christmas Bunting

Today is the very last day of the Scheepjeswol Christmas Blog Hop and I’m so sad that it’s over, yet very happy to be able to send it off, hopefully in style!

A fabulous Christmas-themed blog hop hosted by @Scheepjeswol. Check out all ten fantastic creations, all with free patterns!

How incredibly beautiful is Heike from Made with Loops bag?  Fair Isle, I promise you, will be absolutely THE biggest yarn trend of 2015, so get onto it!

Here’s today’s project from me, some lovely and very simple Christmas Bunting.

Christmas Bunting, part of the Scheepjes Christmas Blog Hop, see and make all ten of the beautiful Christmas projects!I had some left over yarn once I had finished my Christmas Wreath and I wanted to use it up for something fun to decorate the house with this Christmas, and I just love bunting, so bunting it was!

I came up with a very simple half double crochet pattern that works up in a jiffy.  Each flag can be made in under ten minutes!  It’s a great scrap project too, so you don’t have to worry too much about how much yarn you have lying around.

What you’ll need:

Scheepjeswol Stone Washed in five colours.  I used the same as in my wreath: 801, 807, 815, 813 and 814.
4mm hook
Scissors
Tapestry needle
Measuring tape

IMG_2229

How To:

Choose one of your colours, then start with a slip stitch, and chain 2.  Half double crochet into the second chain from the hook and there you will have the foundation of the triangle to start building your bunting.
From here on, you will need to increase at the end of each row with 2 half double crochets into the last stitch.
Row 2: Chain 2, 2 HDC (half double crochet) into the next stitch (3 stitches in total), turn.
Row 3: Chain 2, HDC into the next stitch, 2 HDC into the last stitch (4 stitches), turn.
Row 4: Chain 2, HDC into the next 2 stitches, 2 HDC into the last stitch (5 stitches), turn.
Continue this pattern until you have a stitch count of 17 (16 rows in total), then tie off and weave in the ends, making sure you keep the nice point at the bottom of the triangle.

Make 3 of each colour (or more if you’d like to make it longer)

Here’s a chart to help make it a bit easier:

Use this chart to create a Half Double Crochet Bunting triangle for your Christmas Bunting

To join the bunting, take your lightest colour (801) and start chaining, working the end in as you go.  Chain for 60cm to create a long enough tie, then attach to the first bunting triangle by single crocheting into the first and then all 17 stitches along.  Continue to chain, leaving about 8cm in between triangles.  Repeat this pattern until you have attached all your triangles to the chain, then to finish off, chain a further 60cm before cutting the yarn and weaving in the end.  The finished bunting will measure about 4m in length.

And you’re all done!  Now all that’s left to do is find the perfect spot to hang it!

Christmas Bunting, part of the Scheepjes Christmas Blog Hop, see and make all ten of the beautiful Christmas projects!On a wall…

Christmas Bunting, part of the Scheepjes Christmas Blog Hop, see and make all ten of the beautiful Christmas projects!Or in a window…?

And that’s it.  The Christmas Blog Hop is over for this year *sob*.  I hope you found some wonderful inspiration – I certainly did.  But before I go, here’s a recap of what we’ve seen in the last ten days:

 The beautiful Knitted Star motif from Crafts from theCwtch

 The seriously cute Reindeer Mug Cozy (including fluffy butt – haha!) by Haak Maar Raak

 Jellina-Creation’s lovely Christmas Tree Garland

Atty’s cool Bauble Coasters

Christmas Wreath for the Scheepjes Christmas Blog Hop - see all ten amazing designs and their free patterns, including how to make this wreath for yourself!My Christmas Wreath

 The most beautiful Christmas Baubles you’ve ever seen, by 50 Shades of 4 Ply

 The deliciously warm Fair Isle mittens by Canadutch

Vicarnos adorable little snowman

and finally,

This spectacular Fair Isle Christmas gift bag from Made with Loops.

What a collection of designs, I’m so happy to have been involved – surrounded by such talent!

Merry Christmas.

A Christmas Wreath

If you follow me on Facebook at all (you should, btw), you would have seen me posting about the Scheepjes Christmas Blog Hop all week, and today it’s my turn!

A fabulous Christmas-themed blog hop hosted by @Scheepjeswol.  Check out all ten fantastic creations, all with free patterns!

Thanks so much to Atty’s for yesterday’s post, wasn’t it just fabulous?  I’m definitely going to make some of those coasters, but I don’t know if I’ll actually use them as coasters, or get some Christmas washi tape and decorate my walls!

So let’s get to my contribution for this fabulous event, a yarn wreath.

Christmas Wreath for the Scheepjes Christmas Blog Hop - see all ten amazing designs and their free patterns, including how to make this wreath for yourself!

For this I used a couple of different techniques instead of just crochet.  I made pom poms in varying sizes, and also made yarn-wrapped balls to decorate this gorgeous wreath.

Christmas Wreath for the Scheepjes Christmas Blog Hop - see all ten amazing designs and their free patterns, including how to make this wreath for yourself!

What do you think of my palette?  I wanted something different, yet a little bit Christmas-sy and so I took Kirsten’s advice and spent countless hours (days?) trawling through Design Seeds for just the right colours and I thought that this one was just perfect.

Christmas Palette, design seeds

So let’s get to the instructions, shall we?

What you’ll need:

3 mm crochet hook
Scheepjeswol Stone Washed yarn in five shades (801, 807, 815, 813, 814)
A 25cm Styrofoam ring that has a flat side
About 20 Styrofoam balls in three sizes (4, 5 and 6 cm)
Fabric glue
Cardboard to make pom poms (or a pom pom maker if you prefer)
Scissors

How to:

First start working on the ring.  Using the glue, fasten the end of the lightest shade of yarn (801) to the Styrofoam ring.  Once it’s a little dry, start working the yarn around and around, adding dobs of glue as you go to ensure it all stays in place.  Once you come back to the beginning, snip the yarn, and fasten it all in place.  Set aside to dry thoroughly.

To make the Yarn Wrapped balls, take the colour of choice (make multiple in each size and colour), fasten the end of the yarn to the ball with the glue and start winding the yarn around the ball, like you’re just winding any old ball of wool.  Make sure that you add dobs of glue every now and then to keep the yarn in place.  Once it’s completely covered, snip the yarn and glue the end in place.

Christmas Wreath for the Scheepjes Christmas Blog Hop - see all ten amazing designs and their free patterns, including how to make this wreath for yourself!

To make the pom poms, first cut two pieces of cardboard into corresponding sizes to your balls and make them into doughnuts.  I like to cut an opening to help wind the yarn around, but you should use your favourite pom pom method.  Using the various colours, wind the yarn around the cardboard until it’s very full, then cut and fasten it all together, trimming it to be a nice, round ball.

Christmas Wreath for the Scheepjes Christmas Blog Hop - see all ten amazing designs and their free patterns, including how to make this wreath for yourself!

To make the crochet balls, you’ll need the different size styrofoam balls and a matching stitch count.

4cm ball:
Start with a magic ring, and stitch 6 single crochets (UK double crochet) into the ring, tightening it once you’re done.
For the second round, increase into each stitch around with single crochet so that you have 12 stitches around.
Round 3: Increase, then single crochet into the next stitch, repeating around until you have 18 stitches.
Round 4: Increase, then single crochet into the next 2 stitches, repeating around until you have 24 stitches.
For the next 5 rounds, single crochet around, before beginning your decrease at round 10. Insert the ball here too.
Round 10: Decrease (2 single crochet together), then single crochet into the next 2 stitches, repeating around until you have 18 stitches.
Round 11: Decrease, then single crochet into the next stitch, repeating around until you have 12 stitches.
Round 12: Decrease around until you have 6 stitches, cut the yarn, tie off and using a tapestry needle close up the ball.

Christmas Wreath for the Scheepjes Christmas Blog Hop - see all ten amazing designs and their free patterns, including how to make this wreath for yourself!

5 cm ball:
Follow the above instructions until you’ve completed round 4.
Round 5: Increase, single crochet into the next 3 stitches, repeating around until you have 30 stitches.
Round 6-13: Single crochet around and after round 13 insert the ball.
Round 14: Decrease, single crochet into the next 3 stitches, repeating around until you have 24 stitches.
Continue with the instructions from round 10 of the 4 cm ball.

6 cm ball:
Follow the instructions for the 5 cm ball until you’ve completed round 5.
Round 6: Increase, single crochet into the next 4 stitches, repeating around until you have 36 stitches.
Round 7-19: single crochet around, and after round 19 insert the ball
Round 20: Decrease, single crochet into the next 4 stitches, repeating around until you have 30 stitches.
Complete the ball as per the instructions from round 14 of the 5 cm ball.

Assembly

Now is the time to put it all together.  I like to vary the colours, sizes and textures, trying to make sure that no two balls of the same size and texture are next to one another.  Start building your wreath using the fabric glue to attach each ball to the wreath and its neighbour.  This will take some time as the glue needs to dry a little before you can proceed.  Make sure you hold the wreath up to see how it’s coming together often so you can get a feel for the result.

Once you’re happy, leave it to dry properly over night, and then you’re ready to hang it!

Christmas Wreath for the Scheepjes Christmas Blog Hop - see all ten amazing designs and their free patterns, including how to make this wreath for yourself!

What do you think? Will you try to make one?  I’ve really enjoyed the process and I absolutely love the result.  I’ve started buying all my Christmas decorations in matching colours and if you check back here in a few days, you’ll see that I have something to go with this that I think you’ll love.  I’m also using the leftover balls as baubles for the tree – fun!

In the mean time, be sure to visit 50 Shades of 4ply tomorrow for the next installment of the Scheepjes Christmas Blog Hop!

Love,
Nerissa