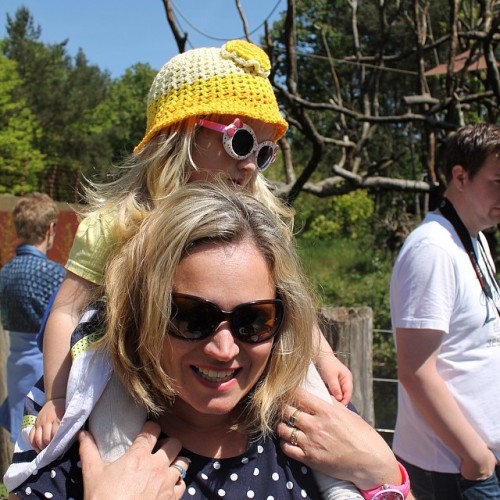
Here it is, the tutorial for my Bucketful of Sunshine Hat! My daughter absolutely loves it, and so do I. And it’s ready, just in time for the glorious weather in the Netherlands.
Let’s get started, shall we? This tutorial will show you how to make a hat to fit a toddler/preschooler. My daughter has a small head for her age (it’s a family thing, so does my husband), so if your toddler’s a bit bigger, go up half a hook size, it won’t matter.
This hat is made using the V-Stitch and the Half V-Stitch. The half V-stitch may well be a made up term, but it’s essentially the same stitch as a normal V-Stitch, but using the half double crochet instead of a double crochet. You can V-Stitch using whatever height stitch you like really, but Google wouldn’t tell me the official name, so I’ve assigned one to it.
The V-Stitch
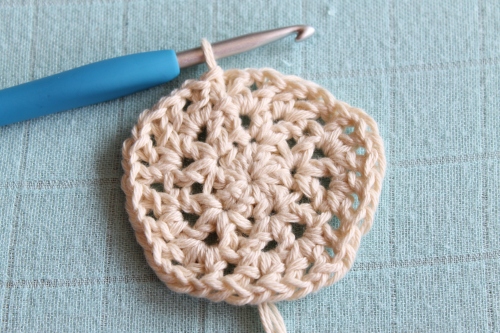
The V-Stitch is a very easy stitch to master, it is essentially a double crochet, chain 1 and double crochet in the same stitch. Then you skip a stitch and repeat in the next. When it comes to the next row, instead of doing the V-Stitch into the double crochet stitch, you do it into the chain 1 space.
A bit like this:
The Half V-Stitch is the same process, using a half double crochet instead.
What you’ll need
Scheepjeswol Cotton 8 in three shades of the same colour. I used yellow (508, 551, and 655). The best thing you can do is cake the yarn so you can pull from both ends, because for this project we’re using two strands together.
You’ll also need a 5mm crochet hook. scissors and a tapestry needle.
Abbreviations
(American terms)
MR – Magic Ring
DC – Double Crochet
VS – V-Stitch
HVS – Half V-Stitch
Inc – Increase
STS – Stitches (stitch count)
Notes
The beginning of each row begins with a CH3, which counts as the first DC and CH 1 to start your first V-Stitch of the row. Below I will just use VS, but assume unless described otherwise that the first V-Stitch is a CH3, DC. Always join into the chain space of the first V-Stitch.
When working the Half V-Stitch, still chain 3 at the beginning of the each row.
Oh, and did I mention that I’m a leftie?
Round 1
Start with a Magic Ring, chain 3 and work 9 DC into the ring, pulling it tight. You’ll have 10 double crochets for your foundation.
Round 2
VS Inc x5. SLS into the first VS to join = 15 STS
To crochet a V-Stitch Increase, follow the instructions for a normal V-Stitch, but instead add a third V. So, DC, CH1, DC into the same stitch, CH1, DC into the same stitch again. Skip 1 stitch and either repeat the increase (as is needed in Round 2) or work an ordinary V-Stitch.
Round 3
(VS Inc, VS) x 5. SLS into the first VS to join = 25 STS
Round 4
(VS Inc, 2 x VS) x 5. SLS into the first VS to join = 35 STS
Round 5
VS x 20. SLS into the first VS to join = 40 STS
Round 6
(VS Inc, 3 x VS) x 5. SLS into the first VS to join = 45 STS
Round 7
VS x 25. SLS into the first VS to join = 50 STS
Round 8-12
VS x 25. SLS into the first VS to join = 50 STS
Change colour
Round 13-15
VS x 25. SLS into the first VS to join = 50 STS
Change Colour
Round 16
VS x 25. SLS into the first VS to join = 50
Round 17
In this row we start making the brim. We will count the CH 1 space in the V-Stitch as a stitch. We will also be adding a few increases to widen the brim.
CH2, (2DC in the next stitch, which is the 1st CH space, then DC in the next 14 Stitches. Repeat this 4 times and slip stitch to the first CH2 of the round. = 80 STS
Round 18
HVS x 40 = 80 STS
Round 19
HVS x 40 = 80 STS
Finish off and weave in the ends.
Sunburst
To make the sunburst, I experimented with lots of different flowers and picots and nothing really seemed to be right. So, when I came across this scrubby pattern on Petals to Picots, I realised it would be perfect. I just grew the sunburst with each colour instead of crocheting the entire base in one go. Then I just tacked it onto the hat in the right spot. You can pick up the pattern for free here.
Here’s the finished hat, modelled on my super-cute (just recovering from chicken pox) daughter:
You’ve made it to the end, way to go! I hope you enjoy making this adorable hat as much as I’ve enjoyed designing it.
Watch this space, coming soon are other sizes, including the 3-6 month old which is up next!
For updates and cute photos in the mean time, do follow me on both Facebook and Instagram, and I would be so excited if you would share your own projects with me!








Pingback: 30 Free Crochet Bucket Hat Patterns - DIY & Crochet
Pingback: 8 Crochet Bucket Hat Patterns For Summer - Crafting Happiness
Pingback: 15 Easy Crochet Bucket Hat Patterns For Summer - The Yarn Crew
Pingback: Ombre Addict – Camera Strap | MissNeriss
Love it.
Pingback: Project Pile: Scalloped Neckline Lace Dress | MissNeriss