If you follow me on Facebook at all (you should, btw), you would have seen me posting about the Scheepjes Christmas Blog Hop all week, and today it’s my turn!
Thanks so much to Atty’s for yesterday’s post, wasn’t it just fabulous? I’m definitely going to make some of those coasters, but I don’t know if I’ll actually use them as coasters, or get some Christmas washi tape and decorate my walls!
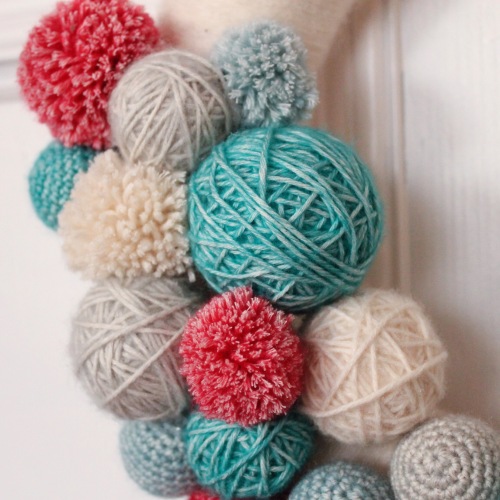
So let’s get to my contribution for this fabulous event, a yarn wreath.

For this I used a couple of different techniques instead of just crochet. I made pom poms in varying sizes, and also made yarn-wrapped balls to decorate this gorgeous wreath.
What do you think of my palette? I wanted something different, yet a little bit Christmas-sy and so I took Kirsten’s advice and spent countless hours (days?) trawling through Design Seeds for just the right colours and I thought that this one was just perfect.
So let’s get to the instructions, shall we?
What you’ll need:
3 mm crochet hook
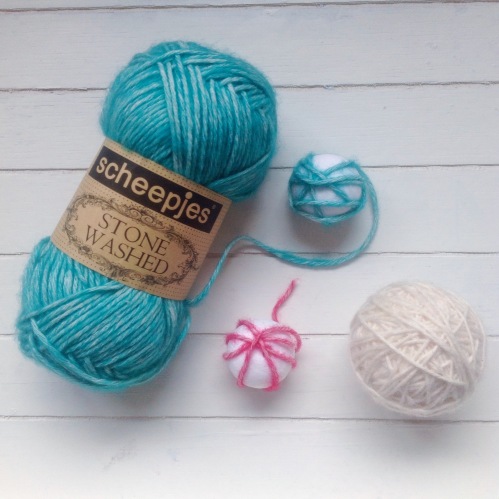
Scheepjeswol Stone Washed yarn in five shades (801, 807, 815, 813, 814)
A 25cm Styrofoam ring that has a flat side
About 20 Styrofoam balls in three sizes (4, 5 and 6 cm)
Fabric glue
Cardboard to make pom poms (or a pom pom maker if you prefer)
Scissors
How to:
First start working on the ring. Using the glue, fasten the end of the lightest shade of yarn (801) to the Styrofoam ring. Once it’s a little dry, start working the yarn around and around, adding dobs of glue as you go to ensure it all stays in place. Once you come back to the beginning, snip the yarn, and fasten it all in place. Set aside to dry thoroughly.
To make the Yarn Wrapped balls, take the colour of choice (make multiple in each size and colour), fasten the end of the yarn to the ball with the glue and start winding the yarn around the ball, like you’re just winding any old ball of wool. Make sure that you add dobs of glue every now and then to keep the yarn in place. Once it’s completely covered, snip the yarn and glue the end in place.
To make the pom poms, first cut two pieces of cardboard into corresponding sizes to your balls and make them into doughnuts. I like to cut an opening to help wind the yarn around, but you should use your favourite pom pom method. Using the various colours, wind the yarn around the cardboard until it’s very full, then cut and fasten it all together, trimming it to be a nice, round ball.
To make the crochet balls, you’ll need the different size styrofoam balls and a matching stitch count.
4cm ball:
Start with a magic ring, and stitch 6 single crochets (UK double crochet) into the ring, tightening it once you’re done.
For the second round, increase into each stitch around with single crochet so that you have 12 stitches around.
Round 3: Increase, then single crochet into the next stitch, repeating around until you have 18 stitches.
Round 4: Increase, then single crochet into the next 2 stitches, repeating around until you have 24 stitches.
For the next 5 rounds, single crochet around, before beginning your decrease at round 10. Insert the ball here too.
Round 10: Decrease (2 single crochet together), then single crochet into the next 2 stitches, repeating around until you have 18 stitches.
Round 11: Decrease, then single crochet into the next stitch, repeating around until you have 12 stitches.
Round 12: Decrease around until you have 6 stitches, cut the yarn, tie off and using a tapestry needle close up the ball.
5 cm ball:
Follow the above instructions until you’ve completed round 4.
Round 5: Increase, single crochet into the next 3 stitches, repeating around until you have 30 stitches.
Round 6-13: Single crochet around and after round 13 insert the ball.
Round 14: Decrease, single crochet into the next 3 stitches, repeating around until you have 24 stitches.
Continue with the instructions from round 10 of the 4 cm ball.
6 cm ball:
Follow the instructions for the 5 cm ball until you’ve completed round 5.
Round 6: Increase, single crochet into the next 4 stitches, repeating around until you have 36 stitches.
Round 7-19: single crochet around, and after round 19 insert the ball
Round 20: Decrease, single crochet into the next 4 stitches, repeating around until you have 30 stitches.
Complete the ball as per the instructions from round 14 of the 5 cm ball.
Assembly
Now is the time to put it all together. I like to vary the colours, sizes and textures, trying to make sure that no two balls of the same size and texture are next to one another. Start building your wreath using the fabric glue to attach each ball to the wreath and its neighbour. This will take some time as the glue needs to dry a little before you can proceed. Make sure you hold the wreath up to see how it’s coming together often so you can get a feel for the result.
Once you’re happy, leave it to dry properly over night, and then you’re ready to hang it!
What do you think? Will you try to make one? I’ve really enjoyed the process and I absolutely love the result. I’ve started buying all my Christmas decorations in matching colours and if you check back here in a few days, you’ll see that I have something to go with this that I think you’ll love. I’m also using the leftover balls as baubles for the tree – fun!
In the mean time, be sure to visit 50 Shades of 4ply tomorrow for the next installment of the Scheepjes Christmas Blog Hop!
Love,
Nerissa


Pingback: Christmas Bunting | MissNeriss