Tag Archives: how to

Textured Chevron Cushion Crochet Tutorial

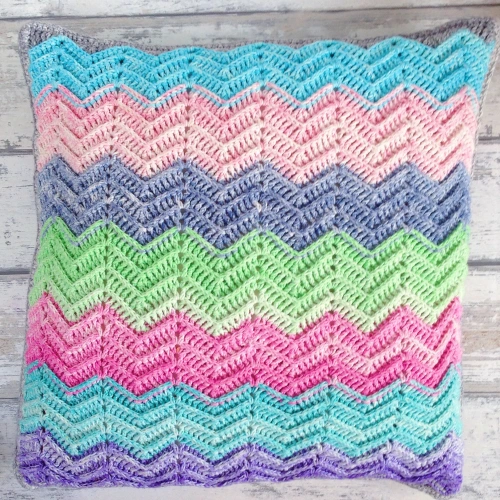
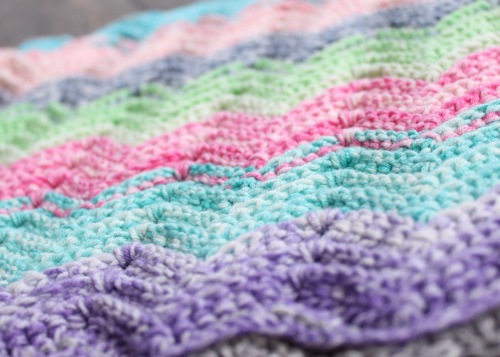
Here it is, finally!  It’s the tutorial for the Textured Chevron Cushion.  I’ve had the bones of the pattern written for a long time, but it needed some detail.

Unfortunately I won’t be providing my free patterns in a pdf format any more; I have had my Peek-a-Boo Button Wrap stolen and being emailed to people rather than referring them to my blog.  It’s a bit of a shitty thing to do, especially for indie businesses.  We’re all in this together, or so I thought!

Anyway, enough moaning and on with the show!

Chevron Cushion in Scheepjes Aquarel, design by MissNeriss

What You’ll Need

8 balls of Scheepjes Aquarel, one of each colour*.
4mm hook
50x50cm cushion insert

Stitches

Note: All stitches are in US terms.  There are a lot of them, so make sure you pay close attention to what needs to be used where.
CH – Chain Stitch
SS – Slip Stitch
SC – Single Crochet
DC – Double Crochet
2HDCTog – Decrease 2 Half Double Crochet into 1
2DCTog – Decrease 2 Double Crochet into 1
3DCTog – Decrease 3 Double Crochet into 1
3HDCTog – Decrease 3 Half Double Crochet into 1
HDC – Half Double Crochet
FPDC – Front Post Double Crochet
FP2DCTog – Decrease 2 Front Post Double Crochet into 1
FP3DCTog – Decrease 3 Front Post Double Crochet into 1
Tr – Treble Crochet
DTr – Double Treble Crochet
TrTr – Triple Treble Crochet
3TrTrTog – Decrease 3 Triple Treble Crochet into 1
extDC – Extended Double Crochet

Gauge

1 repeat = 7cm, two rows = 4cm

Notes

You can pick this gorgeous yarn up from Wool Warehouse* in the UK and internationally.  In the Benelux you can find the yarn at any Scheepjes retailer.

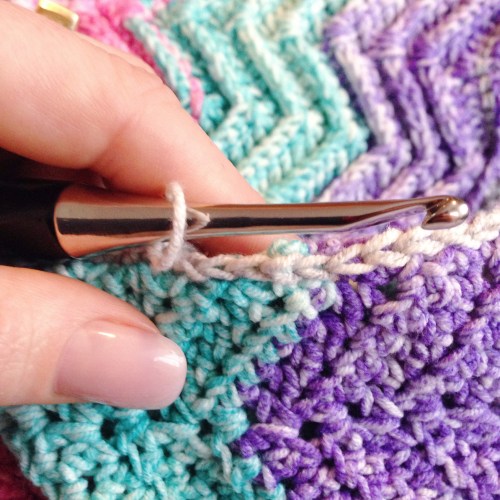
The front of the cushion is a 3D textured pattern; the stitches are made around the post of the previous row. The pattern is worked in a 14 stitch repeat, with 7 repeats, 7 rows of each colour and 7 colours changes.

The reverse side is flat, working normal half double crochet stitches.  To match the front, the back is not the same repeat, but instead it is 7 repeats of 12 stitches.

Colours throughout will be named colours 1-8.

When you see a text section between *…*, please repeat that stitch pattern the instructed amount of times.

Chevron Cushion

Front

  1. Using colour 1, CH 100.
  2. DC into the 3rd chain from the hook and the next 6 CH. DC, CH, DC into the next, DC into the next 5 CH, 3DCTog in the next. *DC in next 5 CH, DC, CH, DC, DC in the next, DC into the next 5 CH, 3DCTog in the next.* Repeat 5 times, but the very last stitch of the row will be 2DCTog instead of 3DCTog.  CH2, turn.
  3. CH2, FPDC around the next 6 stitches, FPDC, CH1, FPDC into the next, FPDC into the next 5 stitches, 3FPDCTog in the next, *FPDC in the next 5 stitches, FPDC, CH1, FPDC in the next, FPDC in the next 5 stitches, 3FPDCTog in the next.* Repeat 5 times, except in the very last decrease, which will be 2FPDCTog instead of 3FPDCTog. CH2, turn.
  4. Repeat Row 3 5 times.
  5. Change to colour 2, repeat row 3 7 times.
  6. Repeat steps 3-5 for all 7 colours, tie off and weave in ends.

Textured Chevron crochet pattern in Scheepjes Aquarel

Back

  1. Using colour 1, CH 86.
  2. HDC in the next 4 CH, HDC, CH1, HDC in the next, HDC in the next 4, 3HDCTog in the next. *HDC in the next 4 CH, HDC, CH1, HDC in the next, HDC into the next 4, 3HDCTog in the next.* Repeat 5 times, but in the very last decrease, 2HDCTog instead of 3HDCTog. CH2, turn.
  3. *HDC into the next 4, HDC, CH1, HDC into the next, HDC into the next 4, 3HDCTog into the next.* Repeat 6 times, but in the very last decrease, 2HDCTog instead of 3HDCTog. CH2 turn.
  4. Repeat row 3 5 times.
  5. Change to colour 2 and repeat row 3.
  6. Repeat steps 3-5 for 7 all colours, tie off and weave in ends.

Edging and Join

 Front

  1. Starting at the top and crocheting around the post of the stitches, corner, using colour 8 CH5, TrTr in the next, DTr, Tr, extDC, DC, HDC, then SC into the CH space.  Repeat in reverse: HDC, DC, extDC, Tr, DTr, TrTr decrease in the next three (3TrTrTog). *DTr, Tr, extDC, DC, HDC, SC in the CH space, HDC, DC, extDC, Tr, DTr, 3TrTrTog.*  Repeat 5 times, but the last 3TrTrTog will only be a 2TrTrTog.  Tie off and weave in ends.
  2. Now the top: At the corner, we repeat the above, but we start at the top of the point of the first stitch of the top row.

Back

  1. This time crochet as normal into the top of the stitches. Join at the corner of the bottom row, CH1, *HDC in the next, DC, extDC, Tr, DTr, TrTr, Dtr, Tr, extDC, DC, HDC, SC.* Repeat 6 times.
  2. Repeat the above instructions for the other end, but instead start with CH5, DTr, Tr, extDC, HDC, SC. Continue as above.


Join

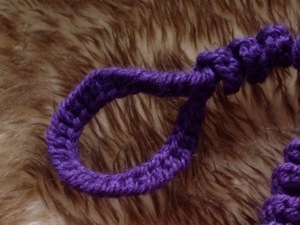
Slip stitch loosely down each side of both pieces to create a straight edge to join the pieces.  If you need it, a Felted Button has created a wonderful tutorial.

Starting at any corner, hold the wrong sides of both pieces together and HDC crochet through all four loops of each stitch, all the way round, with 3 HDC stitches in each corner. Crochet through all four loops of the slip stitches down the sides.

IMG_0233

When on the final side, stuff the cushion filler in and then close it up and you’re done!

Chevron Cushion in Scheepjes Aquarel, design by MissNeriss

*Affiliate links

Advertisement

How to Use IFTTT to Share an Instagram Photo to Your Facebook Page

We all have our little tricks to make our social media life easier, and this one is my absolute favourite.  If you haven’t heard of IFTTT (if this then that) then you need to get onto it straight away.  You can connect pretty much any channel thanks to the wonderful world of APIs.

One of the most common themes that came up over the weekend I’ve just had with an amazing group of bloggers (more about that later), is “How do I share my crochet photos from my Instagram to my Facebook page, rather than my own private Facebook?” Instagram only allows you to choose either your timeline OR your Page, and if you’re like me you don’t always want to choose.  I don’t want to bombard my friends with crochet photos – they see enough!  Just like my crochet family isn’t that excited about toddler pics.

So, what you need is an IFTTT recipe.  And lucky for you, I have set one up that works perfectly.

Hashtagged Instagram to Facebook Page album Notes: Change the hashtag and specify the album.


https://ifttt.com/recipes/299465-if-instagram-crochet-then-facebook-page

Basically what you need to do is click that image above (thanks for providing it ifttt.com), create an account within a few quick steps, and activate your Instagram and Facebook pages there as channels.  I won’t tell you how to do this because IFTTT is so intuitive you don’t need my help.

All you have to do is check that recipe, double check the hashtag you want to use, and activate it.  I have set #crochet as my hashtag, so whenever I post an Instagram and tag it on the image itself or in the comments, it will automatically upload to my MissNeriss Facebook page.

Here’s an example:

I posted the below photo on Instagram while on holiday, and because I thought those people who follow me on Facebook but are not on Instagram might like it, I tagged it #crochet.

Using IFTTT to upload your instagram to your Facebook page

And here you see it, also on Facebook, with the same caption and a link to the original Instagram.Using IFTTT to upload your instagram to your Facebook pageNow, I know that it’s possible to choose your Facebook page as your connected Facebook account rather than your timeline, but this tool allows you to have both your timeline and your page linked and you don’t have to do anything.  You don’t have to click the little Facebook button on the image editor in Instagram, you don’t have to rely on a good enough wifi connection for the image to upload to both locations (like I was on holiday).  IFTTT is a background rules engine, and will take care of everything for you.

Consider this little how-to an introduction to the engine, because once you dive in, you’ll be hooked.  Trust me. Want to save your Instagrams to your Dropbox?  Want to congratulate yourself when you meet your Fitbit goal? Want a message if it’s going to rain tomorrow?  IFTTT does it all.

Irresistible Owly Cat Toy – Tutorial

Ive been dreaming about this really cool project for a few weeks. As you already know, I’m a huge fan of A Morning Cup of Jo Creations and I’ve been making dozens of her mini owls (want one? Leave a comment or message me via my Facebook and I’ll be in touch ASAP). But aside from looking cute, what can these owls be used for?

A bouncy cat toy, of course!

20130402-174701.jpg

Let me explain how I made it. That’s right, it’s my first ever how-to!

First things first. Go to Craftsy and download Josephine’s Baby Owl Ornaments pattern. It’s free!

You can see from her pattern that the owls are indeed very mini, but it’s very easy to upsize the owls by using a heavier yarn. For my toy I used Katia Nevada #27 (purple) and a 6mm hook (US 9-10).

Once you’ve finished your owl, added eyes (I used 8mm safety eyes) stuffed him and sewn him up, don’t tie off. Instead, chain 8, single crochet into the other end of the top seam. Then slip stitch through 4 stitches of the chain that you just made so that you are now in the middle of the chain.

20130402-203400.jpg

Now chain 35, or as long as you’d like to make your bouncy chord.

20130402-203740.jpg

To make the handle you will need to use a foundation single crochet. If you don’t know how to do this stitch, Tamara from Moogly Blog has a great simple video tutorial to show you how. FSC the right length to be able to wrap around your handle. I created 35 stitches, then joined with a slip stitch at the top of my chain.

20130402-203842.jpg

Continue back down your chain, with 4 single crochet per chain, creating a bouncy spiral. Once you reach the beginning of the chain, slip stitch down the last 4 stitches to the body of the owl. Finish off and hide the loose ends in the body of the owl.

To make the Owly Bouncy Cat Toy extra irresistible, add a bag if catnip and a small bell and you’re ready to play!
20130402-203952.jpg

If you have any questions, please don’t hesitate to ask.  And if you spot mistakes, please let me know!

Apologies that the photos aren’t the best.  I plan to make this again very soon, so will add better photos.