Tag Archives: scheepjes

Last Dance on the Beach CAL – Week 7

We’ve cracked the halfway point of the squares for the Scheepjes CAL 2016.  I could see from all the wonderful Instagram posts from last week how much you all enjoyed Carmen’s C2C.  I had never done it before and I LOVED it!

This week we meet Maria, the creative and wonderfully cheeky soul behind 50 Shades of 4ply.  Maria has an incredible eye for colour, I love her palette choices every single time she makes something.  Maria is a featured designer in the brand new Scheepjes bookazine, Yarn, which is just another reason for you to get a copy*.

sidebarphoto-01_zpsf96b4821

Maria has designed the square that if I am perfectly honest, I’ve been the most excited about.  It’s the heart square!Week_07_square_Maria

Click here to download the pattern from the Scheepjes website.  As usual, Estherhas created a fantastic series of videos in English, Dutch and for us lefties.To help you with your gauge and tension, visit the Tips and Tricks document at the CAL home page, plus a great video, again by Esther here.

Do make sure you share your squares on social media so we can all see and comment on them.  Use hashtag #scheepjesCAL2016or#lastdanceonthebeach all over the internet and I’ll be sure to find them on Insta or Twitter or Facebook.

*Affiliate link

Last Dance on the Beach CAL – Week 6

6y week is over already, I can’t believe it zoomed by so quickly.  It was a wonderful week, with so many beautiful squares and such a positive response.  It has made me so proud and happy, thank you to all of you.

This week we meet Carmen.

Carmen is the wonderful designer behind Crafty Queens and probably one of the loveliest people I’ve met. She makes the cutest amigurumis, they’re so squishy and cuddly.  They usually have to be pried out of my hands, no kidding!  Be sure to check them out, I think you’ll love them too.

Carmen from Crafty Queens

This week Carmen has designed a corner to corner square, which is a stitch that I’ve never tried before, so I’m excited to learn!

Last Dance on the Beach CAL from Scheepjes, week 6, but Carmen from Crafty Queens

Click here to download the pattern from the Scheepjes website.  As usual, Esther has created a fantastic series of videos in English, Dutch and for us lefties.

To help you with your gauge and tension, visit the Tips and Tricks document at the CAL home page, plus a great video, again by Esther here.

Do make sure you share your squares on social media so we can all see and comment on them.  Use hashtag #scheepjesCAL2016 or#lastdanceonthebeach all over the internet and I’ll be sure to find them on Insta or Twitter or Facebook.

Textured Chevron Cushion Crochet Tutorial

Here it is, finally!  It’s the tutorial for the Textured Chevron Cushion.  I’ve had the bones of the pattern written for a long time, but it needed some detail.

Unfortunately I won’t be providing my free patterns in a pdf format any more; I have had my Peek-a-Boo Button Wrap stolen and being emailed to people rather than referring them to my blog.  It’s a bit of a shitty thing to do, especially for indie businesses.  We’re all in this together, or so I thought!

Anyway, enough moaning and on with the show!

Chevron Cushion in Scheepjes Aquarel, design by MissNeriss

What You’ll Need

8 balls of Scheepjes Aquarel, one of each colour*.
4mm hook
50x50cm cushion insert

Stitches

Note: All stitches are in US terms.  There are a lot of them, so make sure you pay close attention to what needs to be used where.
CH – Chain Stitch
SS – Slip Stitch
SC – Single Crochet
DC – Double Crochet
2HDCTog – Decrease 2 Half Double Crochet into 1
2DCTog – Decrease 2 Double Crochet into 1
3DCTog – Decrease 3 Double Crochet into 1
3HDCTog – Decrease 3 Half Double Crochet into 1
HDC – Half Double Crochet
FPDC – Front Post Double Crochet
FP2DCTog – Decrease 2 Front Post Double Crochet into 1
FP3DCTog – Decrease 3 Front Post Double Crochet into 1
Tr – Treble Crochet
DTr – Double Treble Crochet
TrTr – Triple Treble Crochet
3TrTrTog – Decrease 3 Triple Treble Crochet into 1
extDC – Extended Double Crochet

Gauge

1 repeat = 7cm, two rows = 4cm

Notes

You can pick this gorgeous yarn up from Wool Warehouse* in the UK and internationally.  In the Benelux you can find the yarn at any Scheepjes retailer.

The front of the cushion is a 3D textured pattern; the stitches are made around the post of the previous row. The pattern is worked in a 14 stitch repeat, with 7 repeats, 7 rows of each colour and 7 colours changes.

The reverse side is flat, working normal half double crochet stitches.  To match the front, the back is not the same repeat, but instead it is 7 repeats of 12 stitches.

Colours throughout will be named colours 1-8.

When you see a text section between *…*, please repeat that stitch pattern the instructed amount of times.

Chevron Cushion

Front

  1. Using colour 1, CH 100.
  2. DC into the 3rd chain from the hook and the next 6 CH. DC, CH, DC into the next, DC into the next 5 CH, 3DCTog in the next. *DC in next 5 CH, DC, CH, DC, DC in the next, DC into the next 5 CH, 3DCTog in the next.* Repeat 5 times, but the very last stitch of the row will be 2DCTog instead of 3DCTog.  CH2, turn.
  3. CH2, FPDC around the next 6 stitches, FPDC, CH1, FPDC into the next, FPDC into the next 5 stitches, 3FPDCTog in the next, *FPDC in the next 5 stitches, FPDC, CH1, FPDC in the next, FPDC in the next 5 stitches, 3FPDCTog in the next.* Repeat 5 times, except in the very last decrease, which will be 2FPDCTog instead of 3FPDCTog. CH2, turn.
  4. Repeat Row 3 5 times.
  5. Change to colour 2, repeat row 3 7 times.
  6. Repeat steps 3-5 for all 7 colours, tie off and weave in ends.

Textured Chevron crochet pattern in Scheepjes Aquarel

Back

  1. Using colour 1, CH 86.
  2. HDC in the next 4 CH, HDC, CH1, HDC in the next, HDC in the next 4, 3HDCTog in the next. *HDC in the next 4 CH, HDC, CH1, HDC in the next, HDC into the next 4, 3HDCTog in the next.* Repeat 5 times, but in the very last decrease, 2HDCTog instead of 3HDCTog. CH2, turn.
  3. *HDC into the next 4, HDC, CH1, HDC into the next, HDC into the next 4, 3HDCTog into the next.* Repeat 6 times, but in the very last decrease, 2HDCTog instead of 3HDCTog. CH2 turn.
  4. Repeat row 3 5 times.
  5. Change to colour 2 and repeat row 3.
  6. Repeat steps 3-5 for 7 all colours, tie off and weave in ends.

Edging and Join

 Front

  1. Starting at the top and crocheting around the post of the stitches, corner, using colour 8 CH5, TrTr in the next, DTr, Tr, extDC, DC, HDC, then SC into the CH space.  Repeat in reverse: HDC, DC, extDC, Tr, DTr, TrTr decrease in the next three (3TrTrTog). *DTr, Tr, extDC, DC, HDC, SC in the CH space, HDC, DC, extDC, Tr, DTr, 3TrTrTog.*  Repeat 5 times, but the last 3TrTrTog will only be a 2TrTrTog.  Tie off and weave in ends.
  2. Now the top: At the corner, we repeat the above, but we start at the top of the point of the first stitch of the top row.

Back

  1. This time crochet as normal into the top of the stitches. Join at the corner of the bottom row, CH1, *HDC in the next, DC, extDC, Tr, DTr, TrTr, Dtr, Tr, extDC, DC, HDC, SC.* Repeat 6 times.
  2. Repeat the above instructions for the other end, but instead start with CH5, DTr, Tr, extDC, HDC, SC. Continue as above.


Join

Slip stitch loosely down each side of both pieces to create a straight edge to join the pieces.  If you need it, a Felted Button has created a wonderful tutorial.

Starting at any corner, hold the wrong sides of both pieces together and HDC crochet through all four loops of each stitch, all the way round, with 3 HDC stitches in each corner. Crochet through all four loops of the slip stitches down the sides.

IMG_0233

When on the final side, stuff the cushion filler in and then close it up and you’re done!

Chevron Cushion in Scheepjes Aquarel, design by MissNeriss

*Affiliate links

Crochet Chevron Cushion – Reveal

I was supposed to share this with you last week, but I had family visiting from Australia so I didn’t have the time (or inclination to be honest) to be writing blog posts.  When you only see family every 18 months or so, you make the most of it, right?

Here’s my chevron cushion, finished!

Chevron Cushion in Scheepjes Aquarel, design by MissNeriss

Chevron Cushion in Scheepjes Aquarel, design by MissNeriss

For the design I used Scheepjes Aquarel.  The design uses almost one ball of each colour (8 balls including the border) and the front is textured, while the back is flat.

In the next week or so I’ll release the pattern for you, and in the meantime if you’d like to get the yarn to be ready to go, head to Wool Warehouse* internationally or Caro’s Atelier in the Netherlands and grab yourself a ball each of your favourite colour combo.

*Affiliate Link

Last Dance on the Beach CAL – Week 4

Surely it’s not week four already?  Didn’t week three just start yesterday?!

This week it’s Atty’s turn, with her waves square.

Last Dance on the Beach CAL - week 4 by Atty

Atty’s designs are fabulous.  I love watching her create, it’s like her hands have minds of their own – the motifs grow and change and suddenly they’re there, and beautiful.

Atty of Atty's

Click here to download the pattern from the Scheepjes website.  As usual, Esther has created a fantastic series of videos in English, Dutch and for us lefties.

To help you with your gauge and tension, visit the Tips and Tricks document at the CAL home page, plus a great video, again by Esther here.

Do make sure you share your squares on social media so we can all see and comment on them.  Use hashtag #scheepjesCAL2016 or #lastdanceonthebeach all over the internet and I’ll be sure to find them on Insta or Twitter or Facebook.

Happy Hooking!

WIP -Textured Chevron Crochet

Textured Chevron crochet pattern in Scheepjes Aquarel

Last week I showed you the yarn that I’m using for my next project series, and this week I’m showing you the progress.

I love the texture of this stitch.  It’s a 3D crochet stitch that I’ve adapted and looks absolutely wonderful.  The Scheepjes Aquarel is perfect for the stitch pattern, the colours really come to life.

Textured Chevron crochet pattern in Scheepjes Aquarel

This project will become a cushion, and I love how it’s coming together.

The front of the cushion will have the 3D textured stitch, and the back will be flat.

Textured Chevron crochet pattern in Scheepjes Aquarel

You can pick this gorgeous yarn up from Wool Warehouse in the UK and internationally.  In the Benelux you can find the yarn at any Scheepjes retailer.

Next week: the reveal!

Last Dance on the Beach – Kick Off!

Here we are!  Finally, after what feels like years of waiting, we get to start the Scheepjes CAL 2016, Last Dance on the Beach!

ldotb

Week one kicks off with the square by Esther from Happy in Red.


Esther from Happy in Red

Photo credit: Dedri Uys.


Isn’t this a beautiful square?!  If you click on Esther’s pic above you can visit her blog and read about her inspiration for this design.

Last Dance on the Beach Scheepjes CAL 2016 week one - square by Esther from Happy in Red

You can download the instructions here.

Esther from It’s All in a Nutshell has also made comprehensive left and right handed videos for each week, and you can see this week’s here:

The Dutch and left handed versions can be found by visiting Esther’s channel here: It’s All in a Nutshell . Esther will be your best friend for the next 14 weeks, believe me!

If you haven’t done so already, you absolutely must make a gauge swatch for this CAL.  As each square is created by a different designer, the gauge is different every week.  You may find in week one you need a 4mm hook, but in week two you need a 5mm (or vice versa).  The hook size may vary anywhere between a 3mm and a 6mm hook, depending on your own tension.  So by making the gauge swatch first, you’ll be able to compare your squares each week to that, to see how you are progressing and if you need to go up or down a hook size.

To help you with this, there is a Tips and Tricks document at the CAL home page, plus a great video, again by Esther here.

Do make sure you share your squares on social media so we can all see and comment on them.  Use hashtag #scheepjesCAL2016 or #lastdanceonthebeach all over the internet and I’ll be sure to find them on Insta or Twitter or Facebook.

All right.  I’d best be off, I have squares to crochet and post on Instagram!


Project Planning – New Yarn

I’m absolutely crazy about crochet lately.  I have been working like crazy, there are ideas swirling around and around and I’m desperately trying to pin them all down so they don’t fly off into someone else’s conscience.

Right now I want to share with you the next project on the list, it’s using the lovely new Scheepjes Aquarel.  Well, Scheepjes have launched so many new yarns in the last year, it’s hard to remember what’s new and what’s new!

You might have seen me post a pic on Instagram a while ago showing off the gorgeous colours? Here’s what they all look like together, aren’t they amazing?

IMG_0194

The Scheepjes Softfun Aquarel is a cotton acrylic blend (40/60%) and is the same composition as the regular Softfun and the hugely popular Softfun Denim. Plus, the colours across all three ranges are designed to work together, so you can easily combine any of the colours to work together.

The yarn calls for a 4mm hook and for your 50g you get 140 metres.

It’s a lovely stretchy yarn to work with, I really enjoy it.  The stitch definition is great, and the watercolour effect is beautiful when worked up.

Scheepjes Softfun Aquarel

Oh, and let’s not forget that now famous Easy Start tab.  Isn’t it just the best?

Scheepjes Softfun Aquarel - with Easy Start tab

Next week I’ll show you some examples of what I have in store for you!  This theme is going to span a few months, as this won’t be the only project I share with you, so stay tuned!

You can buy this beautiful yarn at any Scheepjes retailer in the Benelux, or you can pick it up at Wool Warehouse or Deramores in the UK (and internationally).

Reuniting The Blogger Tribe

I’m deep in the Come Down from the weekend. Properly miserable.

I have just experienced the most inspirational and energy-filled weekend with the most wonderful group of bloggers; my Blogger Tribe. And now it’s over, I’m devastated.

I exaggerate, obviously.  But, there is a very definite come down effect.  I went to dinner with friends last night, and while they were all chatting and laughing, I wasn’t really feeling myself.  I just wanted to be transported back to the weekend and to hang out with my blogger girls.

Scheepjes Blogger Tribe

Each year Scheepjes hosts a Blogger Weekend and I’m lucky enough for this to be my third year.  We started with a small handful of ladies; and now look at us!

This year we descended upon the beautiful city of Groningen in the north east of the Netherlands.  If you haven’t been, you must. It hosts one of the best Saturday markets in the country, along with some of the most lovely architecture and it has the coolest vibe.  Plus the shopping is amazing!

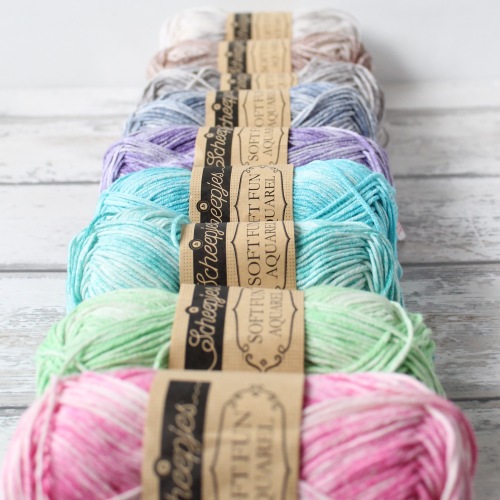
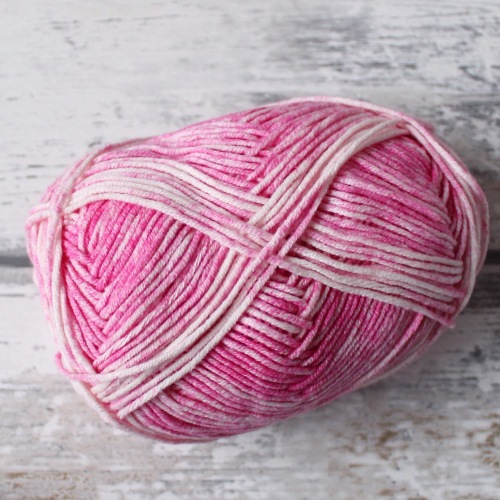
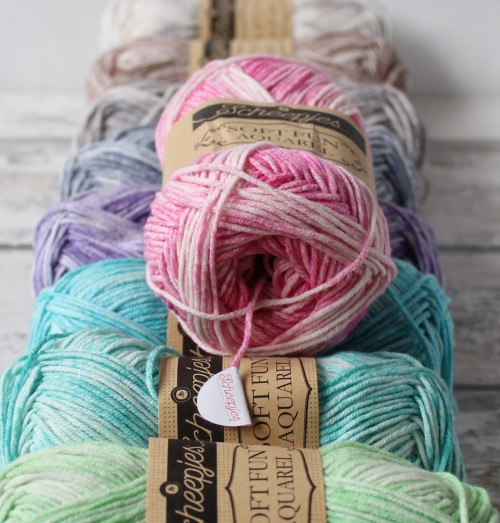
We spent the first day being let loose in the warehouse to feel all the buttons, squish the yarn, and gasp over the gorgeous fabrics.  The girls were all laughing at me because I needed two people to help me carry everything!  So be warned, there are a LOT of projects coming from me in the coming months!

We had a great session in the afternoon with tech editor Cara Medus, learning some of the fundamentals of garment design.  I’m pleased that although I’m not a fan of maths, I can understand formulas, so what I learned is going to be VERY useful and I can’t wait to put it into practice!

We were also extremely lucky to learn some of the inside gossip, and see some of what’s coming up in the next 6-12 months from Scheepjes, and let me tell you, it’s revolutionary!  For a small family business, they’re visionaries and are only going to grow and become industry leaders – mark my words!  I’m so excited to be along for the ride.

I wonder what this could be all about…..?

YARN - what's this all about?

I could tell you, but then I’d have to kill you…

Suddenly we were all at dinner, and then all the young’uns retired while the Usual Suspects headed for the bar until stupid o’clock with a few bottles of wine and a lot of laughter and a few tears.

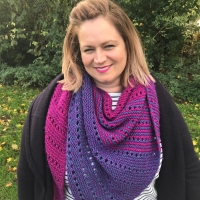
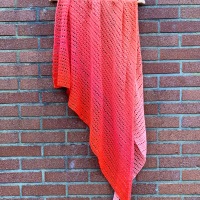
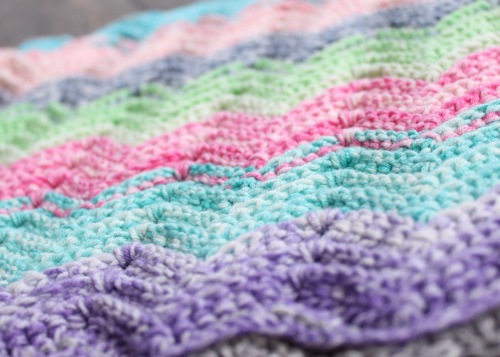
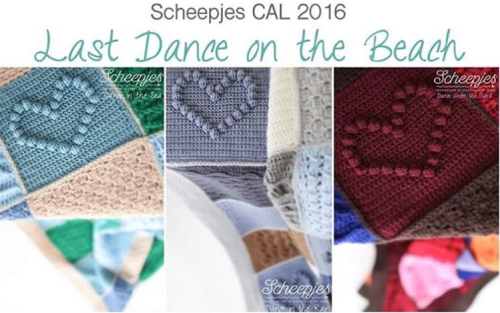
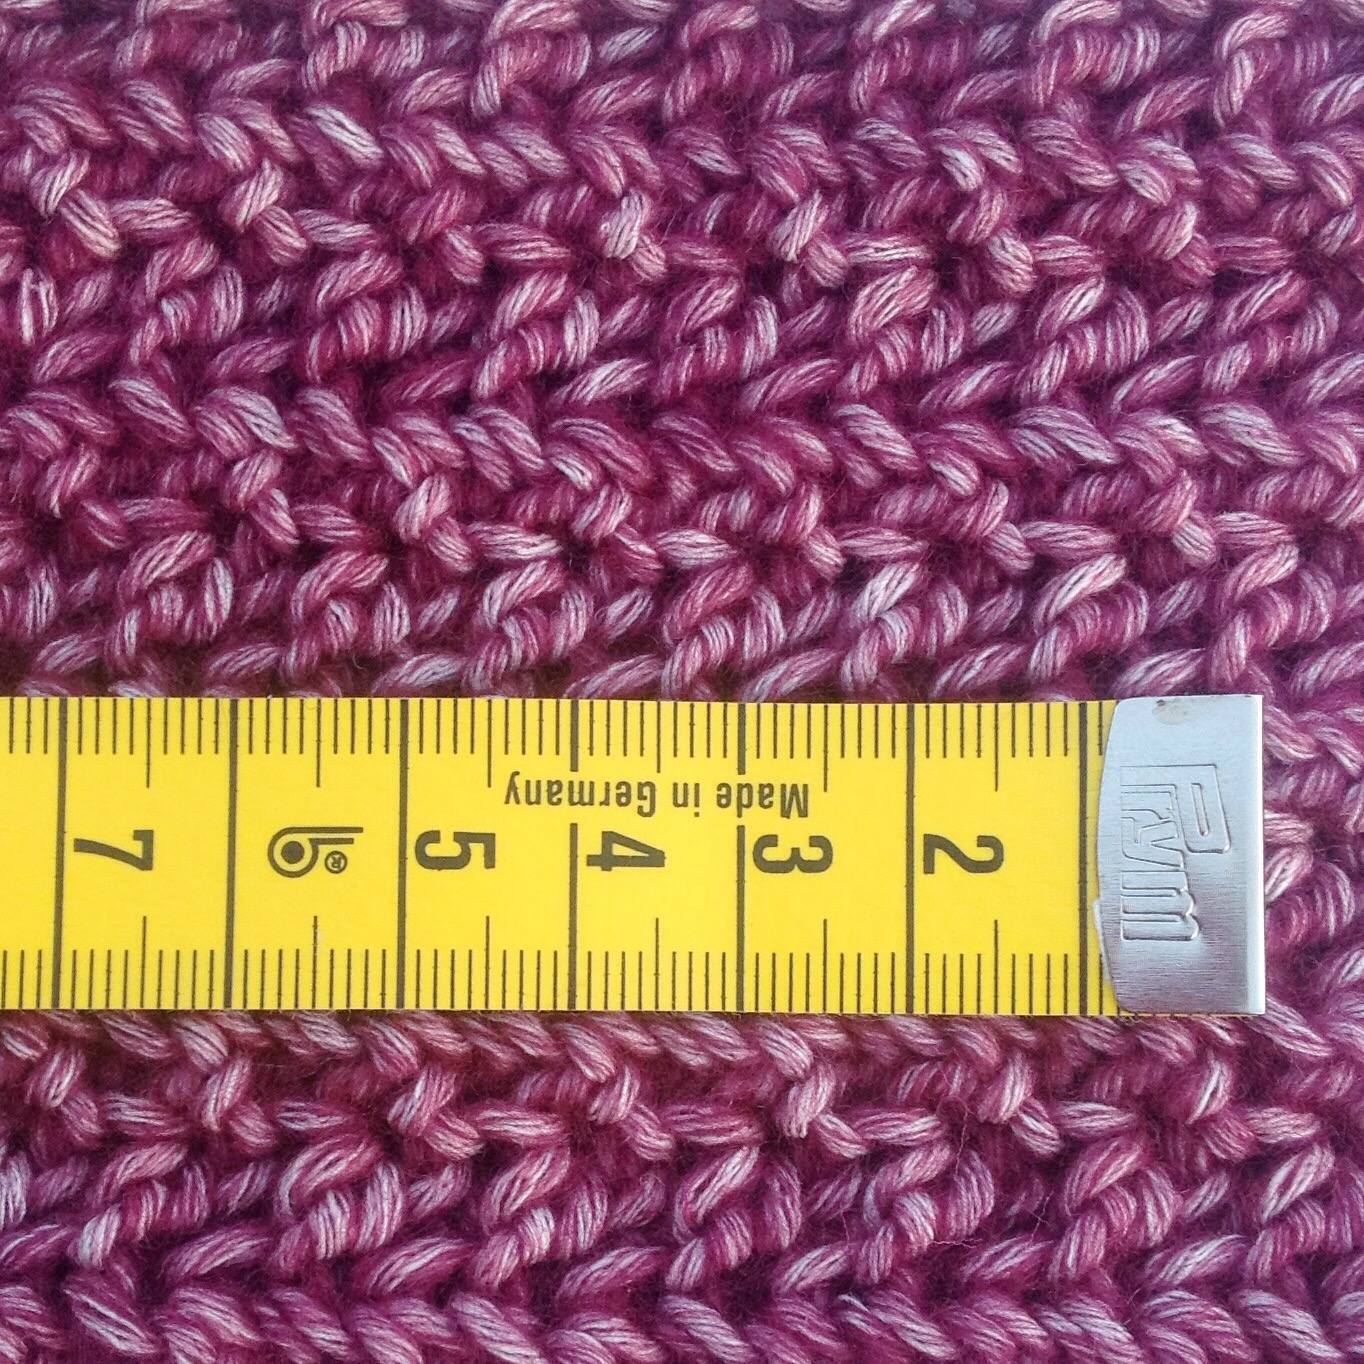
Feeling a little rough after a short nap overnight, it was time for round two! One of the biggest highlights was finally being able to see the finished Last Dance on the Beach CAL blankets that we all designed together in memory of our Beloved Wink.  Seriously, these blankets are beautiful.  Spectacular.  Absolute heirloom pieces. I had no idea, and I mean, absolutely none, that the blankets would be as beautiful as they are.  It’s difficult to tell the difference between the Merino Soft and Colour Crafter.  The biggest tell is the weight – the Merino Soft is quite a bit heavier than the Colour Crafter, and a bit silkier to touch.  Never in a million years would I have thought I’d be impressed by an acrylic yarn blanket!

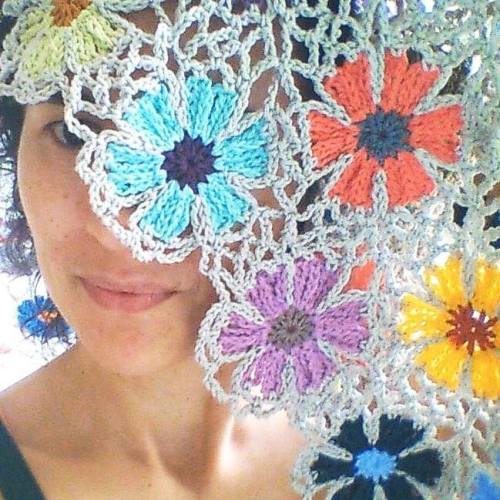
Here’s the Stars (lovely picture by Dedri)

12974513_545807725597474_2118534033637313014_n

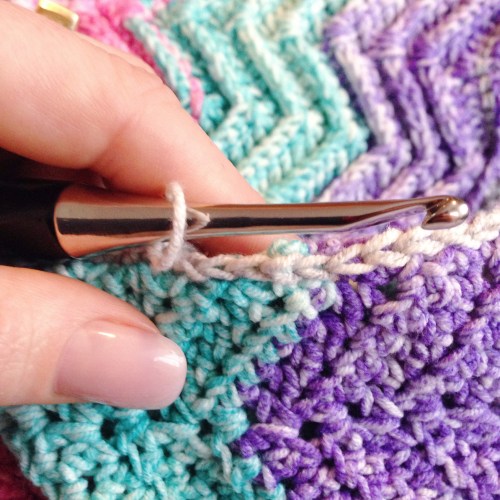
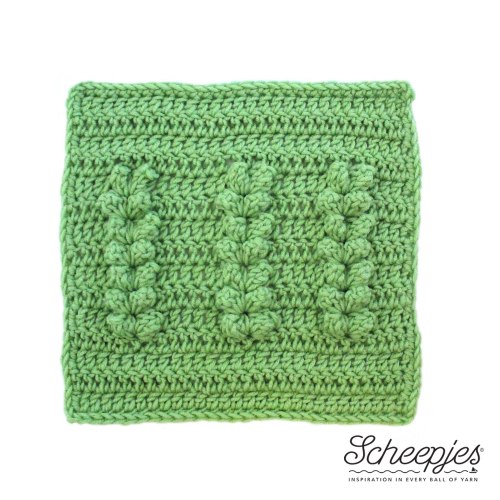
I also spent a bit of time with Esther filming a quick left handed segment for her instructional video for my square.  You’ll be able to see my shaking hands in person when it’s my week!

Nerissa and Esther filming a left handed tutorial for the Last Dance on the Beach CAL

I even took the plunge and have started learning to knit socks!  Tammy has been at me for ages to do it, but I just thought it would be too hard.  Then I saw her busy with two at a time using the Magic Loop method and they look so easy!  So, Sarah gave me a quick course on how to do Judy’s Magic Cast-on and how to increase using her finger and thumb method and I was away!  Well, kind of.  My knitting skills are not very advanced, so there was a random yarnover creating a hole, then somehow I managed to mess up my stitch count, so I had to rip it all out and start over. by second attempt is much, much better and I just wanna knit all the socks!

I didn’t take any decent photos as usual, but you can see some great shots taken by the other girls on their blogs and Instagram.

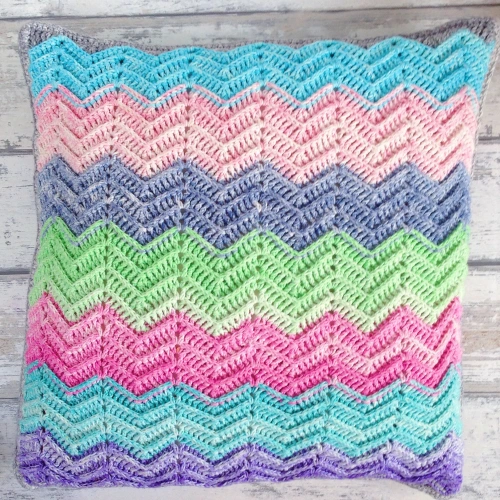
Here we are all together with the amazing Dance Under the Stars blanket

Scheepjes Blogger Tribe with the Dancing Under the Stars blanket for the Last Dance on the Beach CAL by Wink and friends from Scheepjes

From left to right we have Kirsten from Haak maar Raak, Jellina from Jellina Creations, Esther from It’s all in a Nutshell, Dedri (at the back) from Look at What I Made, Carmen (front) from Crafty Queens, Esther (back) from Happy in Red, Christa (front) from the Curio Crafts Room, Mr Scheepjes (Job), Atty (in front of Mr Scheepjes) from Atty’s, Tatiana from Lilla Bjorn Crochet, Bernadette (back) from Berniolie, Sarah from Crafts from the Cwtch, Me, Tammy from Canadutch, and Maria from 50 Shades of 4ply.  Missing was Annelies from Vicarno, and Susan from Felted Button (we missed you girls!!!!!).

All too soon it was over.  It was time to get in the car, leave these lovely women, and make the sad journey home.  Now I have a with a head absolutely chock full of inspiration and a heart wishing I could go back in time and hit pause so I could stay there forever.  There’s still more I have to tell you about the goodies we received, but that’s for another day!

Thank you so much to Job and our Tribe Builder and the rest of the team at Scheepjes.  It’s such an honour to be part of this cool group of women, these girls have changed my world.

Now excuse me, I have socks to knit.

Peek-a-Boo Button Wrap for Kids – Pattern

Here we are, finally.  The kid’s version of my seriously popular Peek-a-Boo Button Wrap is ready.

Peek-a-boo button wrap for kids. Using Scheepjes Stone Washed XL, designed by MissNeriss.

Making this wrap reminded me just how much I love the Stone Washed yarn.  It is such a beautiful yarn to work with.  No splitting, froggable, soft, warm – oh so warm, and beautiful colours.  The soft Rose Quartz pink I used for this was the perfect choice for my daughter.  She’s a pink girl, through and through.

Right, let’s get on with it.

Peek-a-boo button wrap for kids. Using Scheepjes Stone Washed XL, designed by MissNeriss.

What You’ll Need

Scheepjes Stone Washed XL in 860 (Rose Quartz) – 5 balls (more if your gauge is different)
4 cm bamboo button – you can pick these up at any good craft store, or online
Size 5mm hook (or hook to obtain gauge).  My favourite is the Clover Amour.
Measuring Tape
Scissors
Tapestry Needle
Eucalan wool wash

Gauge

8 stitches x 5 rows = 5cm x 5cm
gauge across gauge up

Stitches

Note: All stitches are in US terms
Chain (CH)
Half Double Crochet (HDC)
Half Double Crochet Back Loop Only (HDCBLO)
Half Double Crochet Front Loop Only (HDCFLO)

Notes

In this tutorial I’m going to give the instructions on how to make a Peek-a-Boo Button wrap in a size to fit a 4-6 year old.  I will also give you a schematic so you can easily see what measurements you will need to make a wrap for older kids or younger kids.

My friend Esther from It’s all in a Nutshell has made a fantastic instructional video on how to create the stitch and her brilliant method of tracking her progress.  You can see it here:

Instructions

  1. Loosely, chain 74 for the base chain, plus 2 to start the 1st row.
  2. HDC into the 3rd loop from the hook, and all the way across.  The stitch count should be 74.  CH2 and turn.  Note, the CH2 does not count as a stitch.
  3. HDC into the back loop (HDCBLO) of the first stitch, then into the front loop (HDCFLO) into the next.  Repeat this alternating back loop/front loop pattern all the way across.  CH2 and turn.
  4. You should have ended the previous with your last stitch into the front loop of the stitch.  On this row you need to make sure that if the stitch from the previous row was in the front loop, this row needs to be in the back loop.  This creates the lovely texture and drape that makes this wrap so beautiful.  If you ensure your stitch count is even, it is easy to manage – you will always start the row in the BLO and finish in the FLO. So, HDCBLO in the first stitch, HDCFLO in the next.  Repeat across, CH2, turn.
  5. Repeat for a total count of 16 rows (or 16 cm – 1 row should be about 1cm high). Now we will make the first arm hole.  The first stitches of the row will form the collar height, so in the HDCBLO/FLO pattern, crochet 14 stitches.  Then CH15 and skip 15 stitches, HDCBLO into the next.  Then continue the FLO/BLO pattern all the way across.  CH3, turn.
  6. To close the sleeve, HDCBLO/FLO all the way across to the beginning of the chain from the previous row, then HDC 15 times around the chain, HDCBLO into the next stitch, and repeat the HDCFLO/BLO pattern to the top.
  7. Now you’ve closed the sleeve, you’re working across the back of the wrap.  Repeat the HDCBLO/FLO rows for another 25 rows, then repeat steps 5 and 6 for the second armhole.
  8. Crochet another 18 rows and then we will make the button hole.  This is a place where you can make a few personal adjustments – if the child is handy, you can do a fitting at this point, so see if it’s the right place to place the button hole.  A smaller child may need the button hole a few rows earlier, and larger children perhaps a few rows later.
  9. We’ll work from the bottom up to make the button hole for this size (if you add or subtract rows, you may need to work from the top, but the principle is the same). HDCBLO/FLO for 40 stitches, CH4, skip 4, HDCBLO in the next.  HDCFLO/BLO to the end, CH2, turn.
  10. HDCBLO/FLO to the chain, work 4 HDC around the CH4 from the previous row, then HDCFLO in the next.  HDCBLO/FLO across.
  11. Work another 4 rows (or until you run out of yarn), tie off and weave in the ends.

Wetblock using Eucalan, or another wool wash, pin out on blocking boards, stretching as needed, and wait impatiently for it to dry.

Below you can see the schematics  of the measurements of the entire wrap in the size that I have described above.  Using these measurement points, you can very easily customise the wrap to your own size.

To get the total height, take a tape measure and measure from the base of the skull to mid hip.  The button should sit over the breast/chest and the closure should be slightly off centre.

Schematic for the peekaboo button wrap by missneriss

Schematic for the peekaboo button wrap by missnerissThis design has been created with the specific use of Scheepjes Stone Washed XL in mind.

You can pick the yarn up at any great Scheepjes retailer in the Benelux, Wool Warehouse or Deramores internationally, and Paradise Fibers in the US.