Today I want to share with you some of my favourite flower motifs. All of these are free online tutorials and you can head directly to each by clicking on the designers names or the images.
The Japanese Flower was one of my first ever motifs when I relearned to crochet. I skipped the grannies and went straight to this. Not very well, obviously! Esther does a much better job.
The Game Changer. If you haven’t made a Sophie you’re missing out on the Trans Siberian of crochet – glorious surprises with each leg of the journey.
And Dedri has worked tirelessly to turn Sophie into a book! I’m getting my copy in a few weeks when I see Dedri in person (I must tell her), I can’t wait! You can get your own copy at Wool Warehouse*.
I think you’re going to love this one, it’s using another brand new yarn from Scheepjes.
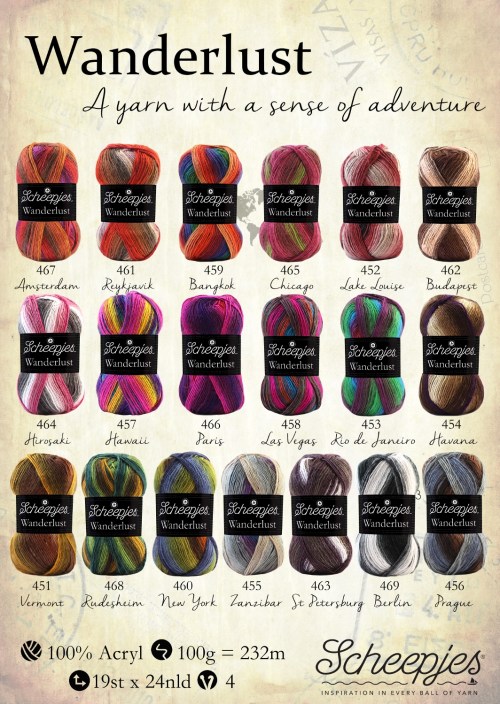
The yarn is called Wanderlust and it comes in 19 shades, all named for some of the coolest places on earth. However, there are no Australian places mentioned, so…..
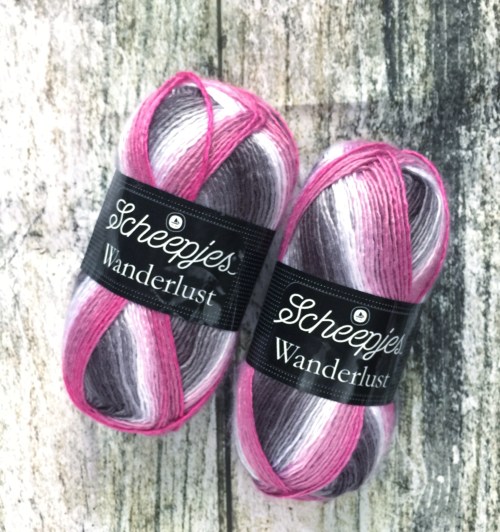
I’m using Hirosaki for this project, and it absolutely evokes the cherry blossoms of early spring, what do you think?
The yarn is 100% acrylic and is single spun, so it has a lovely silky shiny softness about it. I’m using a 5mm hook and it’s crocheting up very quickly, with minimal snagging and splitting. It’s a 100g ball, with 232 metres of yarn. And at around 4.75 euro a ball, it’s very budget friendly!
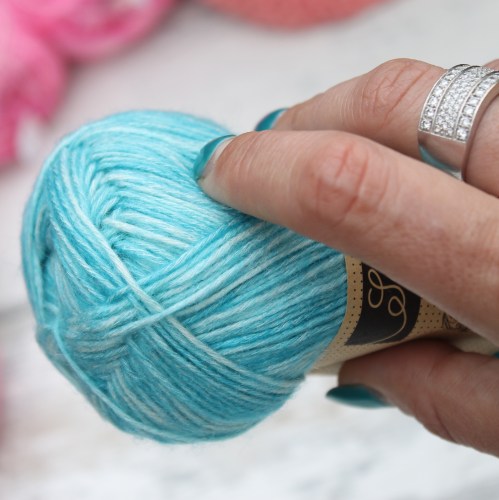
This is most definitely my favourite colourway, with Bangkok being a close second. I love the colour changes, let’s have a peek inside the ball
Next week I’ll have more pictures of my work in progress, and you can start stalking your favourite retailers as of the 26th, when it will be available to buy from places like Wool Warehouse* globally and Scheepjes retailers in the Benelux.
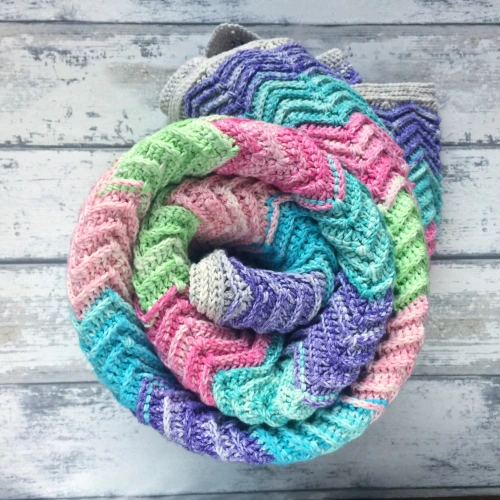
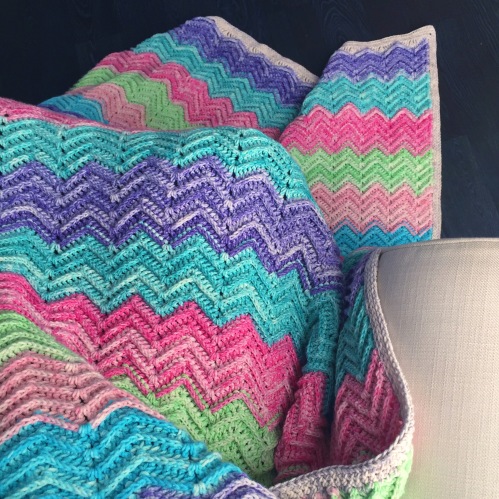
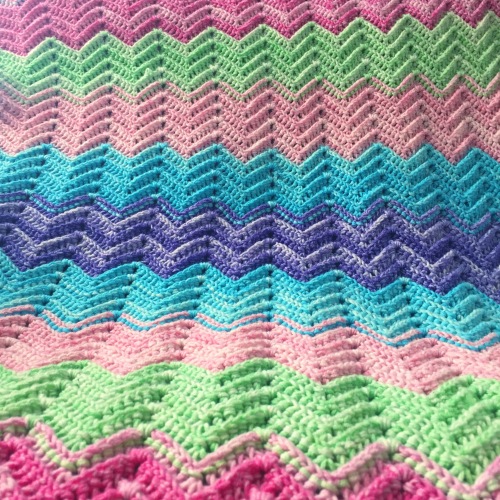
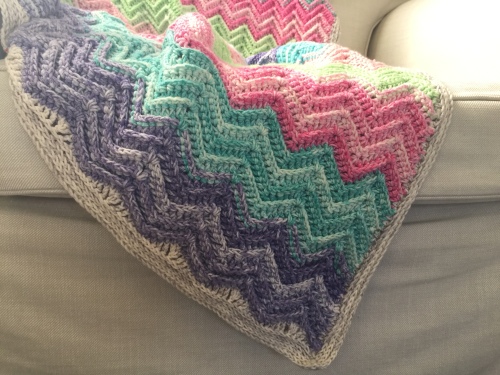
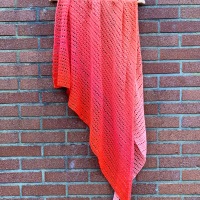
After months and months and months, I’ve finally finished my Textured Chevron Blanket!
And not only have I finished it, but I have the pattern ready as well. But first, look!
For this project I’ve been using Scheepjes Softfun Aquarel, which is one of my faves. It’s a cotton acrylic blend which is soft, squishy, warm and has outstanding stitch definition. Oh, and it’s durable too!
Note: All stitches are in US terms. There are a lot of them, so make sure you pay close attention to what needs to be used where. CH – Chain Stitch SS – Slip Stitch SC – Single Crochet DC – Double Crochet HDC – Half Double Crochet Tr – Treble Crochet 2HDCTog – Decrease 2 Half Double Crochet into 1 2DCTog – Decrease 2 Double Crochet into 1 3DCTog – Decrease 3 Double Crochet into 1 FPHDC – Front Post Half double Crochet FPDC – Front Post Double Crochet FPTr – Front Post Treble Crochet 2TrTog – Decrease 2 Treble Crochet into 1 3TrTog – Decrease 3 Treble Crochet into 1 FP2DCTog – Decrease 2 Front Post Double Crochet into 1 FP3DCTog – Decrease 3 Front Post Double Crochet into 1 FP2TrTog – Decrease 2 Front Post Treble Crochet into 1 FP3TrTog – Decrease 3 Front Post Treble Crochet into 1 FPextDC – Front Post Extended Double Crochet HDC3L – Half Double Crochet in the 3rd loop (camel stitch)
Tension
4 zigzag sets by 10 rows = 10cm
Notes
Each colour block uses about 1.5 balls of yarn, so you will need to join. Do take care to make your joins strong and tight and keep ends to weave in. If your join isn’t strong enough and it comes unraveled, it will be a disaster to fix!
Although the stitches and abbreviations all sound complicated, once you start working on the blanket it’s all very straight forward and easy.
Instructions
Using colour 809, CH 296 298. If you have too many chains on your hook, don’t start over, you can pull them out once you’re done.
2DCTog into the 3rd chain from the hook and the next 5 CH. DC, CH, DC into the next, DC into the next 5 CH, 3DCTog in the next. *DC in next 5 CH, DC, CH, DC, DC in the next, DC into the next 5 CH, 3DCTog in the next.* Repeat 19 times, but the very last stitch of the row will be 2DCTog instead of 3DCTog. CH2, turn.
CH2 (does not count as a stitch here or throughout), 2FPDCTog in the first 2, FPDC around the next 5 stitches, DC, CH1, DC into the CH space, FPDC into the next 5 stitches, 3FPDCTog in the next 3 (the stitch before the decrease, the decrease and the stitch after the decrease), *FPDC in the next 5 stitches, DC, CH1, DC in the CH space, FPDC in the next 5 stitches, 3FPDCTog in the next 3.* Repeat 19 times, except in the very last decrease, which will be 2FPDCTog instead of 3FPDCTog. CH2, turn.
Repeat Row 3 7 times.
Change to colour 810, repeat row 3 9 times.
Change to colour 803, repeat row 3 9 times
Change to colour 808, repeat row 3 9 times
Change to colour 807, repeat row 3 9 times
Change to colour 801, repeat row 3 9 times
Change to colour 809, repeat row 3 9 times
Change to colour 801, repeat row 3 9 times
Change to colour 807, repeat row 3 9 times
Change to colour 808, repeat row 3 9 times
Change to colour 803, repeat row 3 9 times
Change to colour 810, repeat row 3 9 times.
Change to colour 809, repeat row 3 9 times.
Change to colour 810, repeat row 3 9 times.
Change to colour 803, repeat row 3 9 times
Change to colour 808, repeat row 3 9 times
Change to colour 807, repeat row 3 9 times
Change to colour 801, repeat row 3 9 times
Change to colour 809, repeat row 3 9 times
Change to colour 801, repeat row 3 9 times
tie off and weave in ends.
Border
Join colour 804 to the top corner to work across and square off each end.
CH3, 2FPTrTog, FPtr, FPextdc, FPdc, FPhdc, sc in the next 3, FPhdc, FPdc, FPextdc, FPtr, 3FPTrtog, *tr, extFPdc, FPdc, FPhdc, sc in the next 3, FPhdc, FPdc, FPextdc, FPtr, FP3TrTog* repeat across. In the last set, FP2TrTog instead of 3. Cut and tie off. Rotate to join to the bottom corner to work across and square off.
Join with a sc, sc, *FPhdc, FPdc, FPextdc, FPtr, FP3TrTog (the 3 dc in one from the foundation row counts as 1 stitch), FPTr, FPextdc, FPdc, FPhdc, sc in the next 3*. Repeat across and instead of 3 sc, work 2. Turn 90 degrees to work down the side.
Working down each side is not an exact science; try to work 3 HDC per two rows. This will make sure that the border is not too tight, nor so loose that it will be wavy. It won’t matter if your count is a couple of stitches out, you won’t notice. Once at the next corner (working 1 stitch into the post of the 1st top border stitch), work a hdc, ch1, hdc into the 1st stitch to form the corner, then work a HDC3L in each stitch across the top. At the next corner,hdc, ch1, hdc into the last stitch, then turn the work, 90 degrees to work along the third edge. Repeat all the way around, for a total of three camel stitch rows. Don’t join and ch 2 at the end of each row, just keep going until you’re back to the top corner which is the start/finish point. The ends should have 4 rows of camel stitch at each end, and 3 down the sides.
Tie off, weave in ends and wet block aggressively.
There will be a lot of stretch in the blanket, making it perfect to tuck around your feet and body while bingeing on Outlander on Netflix.
Get the Yarn
There are loads of great stockists where you can get hold of Scheepjes Aquarel. In the Benelux go to Caro’s Atelier*, in South Africa head to Be Inspired.love and for everyone else can go to Wool Warehouse* as they offer global shipping and have great rates.
I can’t help it. The week leading up to Christmas is when I get all my inspiration. Why can’t it come in November like everyone else?!
This one is really fun, and is a great craft to do with kids. It’s how to make your very own yarn wrapped Christmas baubles. You can hang them in the tree, or you can string them onto a set of lights, like I have (make sure you use LED lights which don’t heat up!).
This took about an hour all up, and I left the baubles to dry overnight, although they were dry within a few hours.
What you’ll need
Two balls of Scheepjes Maxi Bonbon in your chosen colours, available from Wool Warehouse*. Hot pink and gold is my 2016 Christmas palette, but you can choose whichever colours you like.
White craft glue. I used what I had on hand, which was Mod Podge.
Sponge or brush to apply the glue.
Water balloons. If your summer was as good as hours, you’ll have plenty lying around unused.
Something to hang your baubles to dry – I used a coat hanger.
Battery operated LED fairy light string.
Instructions
Take your balloons and blow them up to be about 6cm in diameter, and tie them off making sure they are as round as you can possibly make them.
Take a little of the glue and dab it around the balloon. This makes it a bit sticky so the yarn will stay put.
Start wrapping the yarn. Hold a long tail in your hand, and hold onto the knotted end of the balloon and slowly wind the yarn around the balloon as if you’re winding a skein of yarn. Keep wrapping until you have good coverage, and still some space to allow light to shine through. Two balls of Bonbon will make 10 baubles.
Cut and tie the yarn off to the other end, leaving a long double stranded tail to hang up to dry later.
Take the glue and start dabbing it all over the bauble, until the yarn is completely soaked.
Hang them to dry overnight.
When dry, pop the balloons and pull them out of the bauble – this can be a bit fiddly as water balloons are meant to break easily, remember.
String them onto lights and hang as decoration.
Alternative glue option: you can soak the yarn in the glue before you start winding onto the balloon, but this also causes more mess. Which I don’t like.
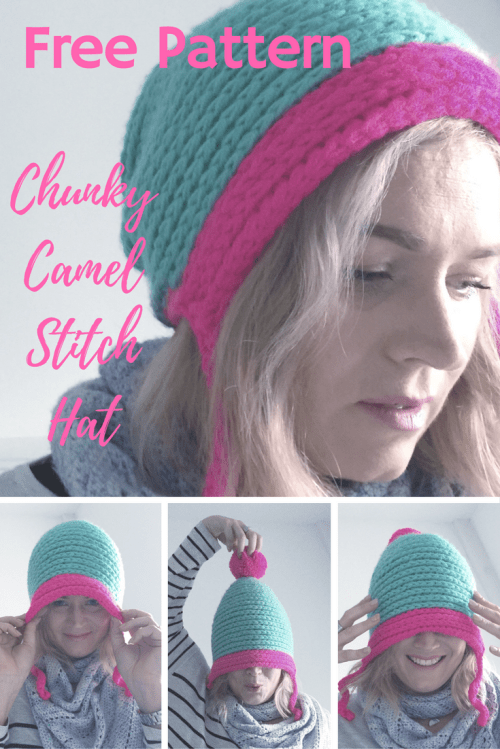
Here we go, it’s the pattern for the Camel Stitch hat that I’ve been sharing over the last few weeks.
I used the lovely Scheepjes Colour Crafter premium acrylic, which makes a wonderful hat. It’s soft, warm, hard wearing and comes in about a million colours.
Child: to fit from 4-10 years
Adult: to fit from 10 years
Abbreviations
(US Terms) ch chain st Hdc half double crochet Hdc3blo half double crochet in the third back loop only Hdc3flo half double crochet in the third front loop only Inc 2 half double crochet in one stitch Sc3blo single crochet in the third back loop only Sc3flo single crochet in the third front loop only ss slip stitch sts stitch(es)
Notes
This project is worked in the round, with no joining at the end of each round.
We will also be working with the yarn triple stranded. A video of the technique can be found here:
Instructions
Colour 1 Round 1 9 Hdc into a magic ring (9). Round 2 Inc in each stitch around (18). Round 3 *Inc in the first stitch, Hdc3blo in the next.* Repeat 8 times (27) Round 4 *Inc in the first stitch, Hdc3blo in the next 2 stitches.* Repeat 8 times (36) Round 5 *Inc in the first stitch, Hdc3blo in the next 8 stitches.* Repeat 3 times (40) Round 6 Child *Inc in the first stitch, Hdc3blo in the next 9 stitches.* Repeat 3 times (44) Round 6 Adult Hdc3blo in the next 5 stitches, *inc, Hdc3blo in the next 9 stitches.*Repeat 3 times, Inc, HDC3blo in the last 4 stitches. Round 7 *Inc in the first stitch, Hdc3blo in the next 10 stitches.* Repeat 3 times (48) For the child size, stop increasing here and skip to round 11. Round 8 Hdc3blo in the next 6 stitches, *Inc, Hdc3blo in the next 11 stitches.* Repeat 3 times, Hdc3blo in the last 5 stitches (52) Round 9 *Inc in the first stitch, Hdc3blo in the next 12 stitches.* Repeat 3 times (56) Round 10-19 Hdc3blo around (60). Attach colour 2 to continue around. For extra slouchiness, add a couple more rounds before starting the visor. However, for the adult size, there will be minimal yarn left, so feel free to just use it all and then start the visor.
Visor
Colour 2 Round 20 Sc3blo in the next 18 sts (the next 23 stitches for the adult size.). Hdc3blo in the around to where the sc round in colour 2 begins (the next 34). CH2, turn. Round 21 Hdc3flo in the first and next 33 sts (the HDC sts from the previous round). CH2, turn. Round 22 hdc3blo in the next 34 sts. CH2, turn. Round 23 hdc3flo in the next 34 sts. Round 24 CH20, Sc in the 2nd and next 17 CH sts. Continue Sc3flo in the next 34 sts. CH20. Sc in the 2nd and next 17 CH sts. Work 3 sc down the side of the visor and sc in each or the 18 Sc3blo sts from round 21. Work 3 sc into the side of the visor, and ss to join to base of the chain cord.
Assembly
Make the pompom and attach to the top of the hat.
Now, enjoy!
Do share your projects on Ravelry, your pictures on Instagram and tag me @miss__neriss (follow me while you’re at it) and pin the photos all over your Pinterest.
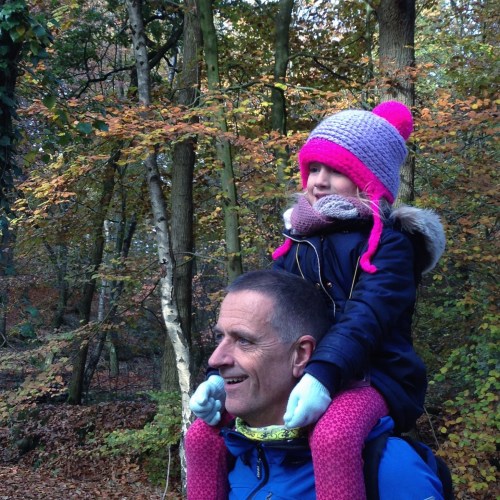
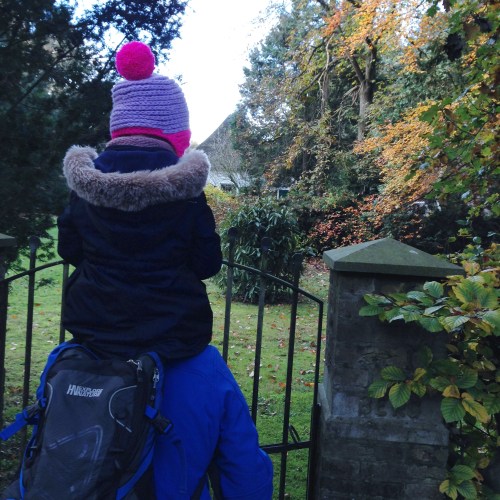
I have wanted to share photos of this hat for ages and ages, but I finally have it for you!
This is Raina with her Opa having the best time ever! Seriously, don’t you miss being small enough to ride on shoulders?
I managed to bribe her to sit still long enough to take one photo on her own, but she was way too busy searching for chestnuts, acorns and toadstools to pay much attention to me.
In the end I decided: If you can’t beat them, join them and went foraging too.
Now, the pattern is ready for this, and I’m going to post it in a few days. I’ll also have more pictures, this time in the adult size!
To get prepared and have the yarn ready, here’s where you can get hold of the yarn:
Last week I introduced you to the yarn for a new hat design that I’m working on in collaboration with Scheepjes and their lovely premium acrylic yarn, Colour Crafter.
This week I thought I’d share my work in progress.
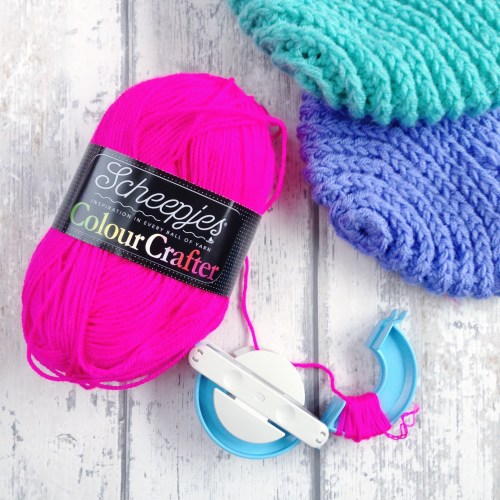
I’m using the neon pink for the edging and a gorgeous plump pom pom:
The pink is SO bright, I can’t get enough of it.
I could never figure out how to use the pom pom makers in the past, but now I have a handle on it I’ll never go back to cardboard circles ever again. This one was gifted to me by my Fibre Share partner, but you can find them at Wool Warehouse* or most local craft stores stock them too.
If you haven’t organised the yarn already, head to Wool Warehouse* or Deramores* (globally), or from any of the Benelux retailers. You’ll need a ball of Hilversum and either Eelde or Zwolle (or both if you want to make two hats like I have).
This is a new project that came about basically by accident. I was pulling out all the winter gear a few weeks ago and realised that all the winter hats I made my daughter last year are all too small! So it means with the colder weather, she really needs a new hat (or two).
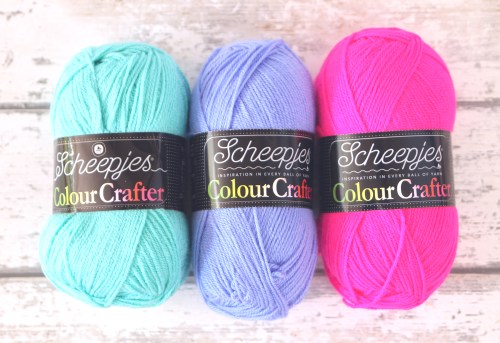
I decided to make it using the Scheepjes Colour Crafter, because being a premium acrylic it’s perfect for hats for kids. Plus, the colours are fabulous! I’ve chosen Eelde (left), Zwolle and Hilversum – all colours which are perfect matches for my daughter’s personality.
I’m using a technique which you’ll discover over the coming months is one of my favourite methods of turning a light weight yarn into something more bulky, and it’s seriously one you need in your crochet toolbox. I’ve even created a little video to illustrate it for you:
So for this hat project, you’ll need two balls of yarn. Well, one and a half really. I’ve used three of these balls to make two hats – one in a child’s size, and another for an adult. This means I’m all sorted for winter too!
I’m going to release the pattern in a few weeks, so in the meantime you can get yourself organised in advance by picking up the yarn from either Wool Warehouse* or Deramores* (globally), or from any of the wonderful Benelux retailers. Oh, and you’re also going to need a pompom maker*
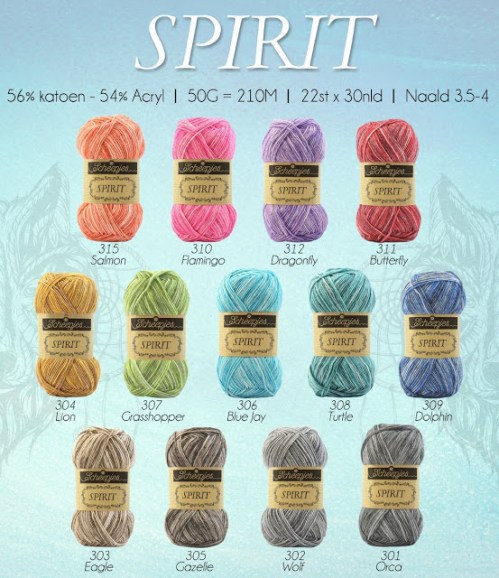
Some of the basics: Spirit is a 4ply yarn that looks and feels a lot like Stone Washed, plus it’s a centre-pull yarn, which we all know is the best idea ever. Each yarn is named after a spirit animal, and I’ve used Blue Jay and Flamingo.
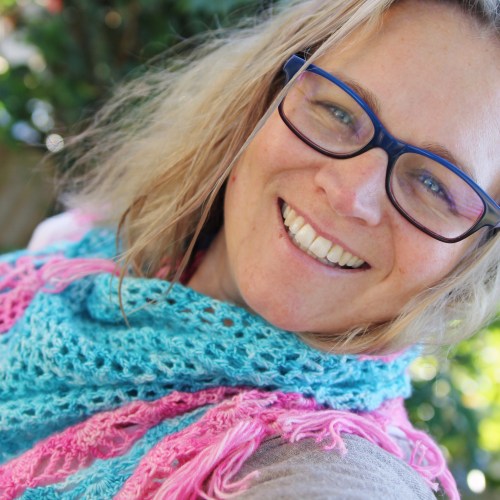
But back to the shawl. I absolutely loved making this. The yarn is lovely to work with (although it’s not fun to frog, so do take care) and the pattern is so easy and just beautiful
And now the colder weather is upon us it’s a staple in my wardrobe. Although, I just bought a new – red – coat so I’ll have to make another!
The only change I would make to this is to make it a bit bigger. I think my gauge must have been a bit off, so although it’s wonderful to wear around my neck, it’s not big enough for a shawl for me. But, you can see that the happiness factor is high!
My daughter is mad about Halloween. She’s been talking about this year’s costume since last Halloween. She’s been planning this longer than her birthday party!
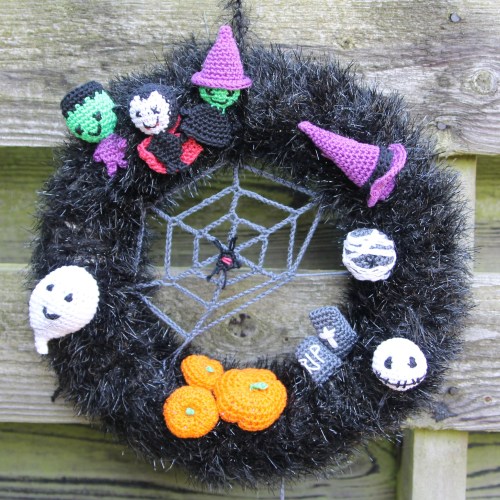
We’re away on holidays in the lead up to this year, so I won’t have the time to replicate last year’s epic La Muerte costume so instead this year I’ve channelled my energies into making a Halloween wreath.
I used a foam circle which I picked up at my local craft store, and a ball of the new Scheepjes Panda Sparkle and went for it!
I first wrapped the foam in the sparkle yarn (using about half of it) and then I made some cute little amigurumi Halloween critters for decoration.
I’m especially happy with the spider web and little redback spider in the middle.
Raina insisted on there being a vampire and a witch, and would have been happy if it had been completely covered in pumpkins, but one has to draw the line somewhere!
To make the amigurumis I picked up some Scheepjes Catona 25g balls in Halloween colours and rifled through my Catona stash for anything that I had missed (It’s quite the stash!). I only used small amounts, so this is where the 25g balls are just the best.
The Panda Sparkle is a great decoration or amigurumi yarn. It’s loads of fun and the wee one is already making more plans for the leftovers. A spooky spider garland, perhaps….