Tag Archives: haken

Crochet Chevron Cushion – Reveal

I was supposed to share this with you last week, but I had family visiting from Australia so I didn’t have the time (or inclination to be honest) to be writing blog posts.  When you only see family every 18 months or so, you make the most of it, right?

Here’s my chevron cushion, finished!

Chevron Cushion in Scheepjes Aquarel, design by MissNeriss

Chevron Cushion in Scheepjes Aquarel, design by MissNeriss

For the design I used Scheepjes Aquarel.  The design uses almost one ball of each colour (8 balls including the border) and the front is textured, while the back is flat.

In the next week or so I’ll release the pattern for you, and in the meantime if you’d like to get the yarn to be ready to go, head to Wool Warehouse* internationally or Caro’s Atelier in the Netherlands and grab yourself a ball each of your favourite colour combo.

*Affiliate Link

Last Dance on the Beach CAL – Week 4

Surely it’s not week four already?  Didn’t week three just start yesterday?!

This week it’s Atty’s turn, with her waves square.

Last Dance on the Beach CAL - week 4 by Atty

Atty’s designs are fabulous.  I love watching her create, it’s like her hands have minds of their own – the motifs grow and change and suddenly they’re there, and beautiful.

Atty of Atty's

Click here to download the pattern from the Scheepjes website.  As usual, Esther has created a fantastic series of videos in English, Dutch and for us lefties.

To help you with your gauge and tension, visit the Tips and Tricks document at the CAL home page, plus a great video, again by Esther here.

Do make sure you share your squares on social media so we can all see and comment on them.  Use hashtag #scheepjesCAL2016 or #lastdanceonthebeach all over the internet and I’ll be sure to find them on Insta or Twitter or Facebook.

Happy Hooking!

Last Dance on the Beach CAL – Week 3

We’re already into week three, the CAL is flying by!

This week it’s Tatsiana’s turn with her beautiful sunsets in the waves square.

Last Dance on the Beach CAL - week 3 by Tatsiana

Tatsiana is the seriously talented designer of Lilla Bjorn’s Crochet World, of which I’m sure you’re very familiar.  Her intricate overlay mandalas are beautiful, and so are the light knitted garments she creates.

Tatsiana of Lilla Bjorn's Crochet World

You can download this week’s instructions here.

Again, Amazing Esther of It’s all in a Nutshell has produced English, Dutch and lefthanded videos for this square:

Now, this square has been scaring people a bit.  It looks and sounds complicated, but I promise, the effort is worth it for the result.  Tatsiana has added some very important and useful tips to her blog post this week, so you should definitely visit that before you start.

Don’t forget to work with your gauge swatch again, you may have to go up a hook size for this one if your cabling is tight. Do try to keep your hands relaxed and you’ll be fine!  And remember, there are thousands of crocheters in the FB groups to help you out if you need it.

To help you with your gauge and tension, visit the Tips and Tricks document at the CAL home page, plus a great video, again by Esther here.

Do make sure you share your squares on social media so we can all see and comment on them.  Use hashtag #scheepjesCAL2016 or #lastdanceonthebeach all over the internet and I’ll be sure to find them on Insta or Twitter or Facebook.

I’ll be back in a couple of days with info on next week’s square, by Atty!

WIP -Textured Chevron Crochet

Textured Chevron crochet pattern in Scheepjes Aquarel

Last week I showed you the yarn that I’m using for my next project series, and this week I’m showing you the progress.

I love the texture of this stitch.  It’s a 3D crochet stitch that I’ve adapted and looks absolutely wonderful.  The Scheepjes Aquarel is perfect for the stitch pattern, the colours really come to life.

Textured Chevron crochet pattern in Scheepjes Aquarel

This project will become a cushion, and I love how it’s coming together.

The front of the cushion will have the 3D textured stitch, and the back will be flat.

Textured Chevron crochet pattern in Scheepjes Aquarel

You can pick this gorgeous yarn up from Wool Warehouse in the UK and internationally.  In the Benelux you can find the yarn at any Scheepjes retailer.

Next week: the reveal!

Last Dance on the Beach – Kick Off!

Here we are!  Finally, after what feels like years of waiting, we get to start the Scheepjes CAL 2016, Last Dance on the Beach!

ldotb

Week one kicks off with the square by Esther from Happy in Red.


Esther from Happy in Red

Photo credit: Dedri Uys.


Isn’t this a beautiful square?!  If you click on Esther’s pic above you can visit her blog and read about her inspiration for this design.

Last Dance on the Beach Scheepjes CAL 2016 week one - square by Esther from Happy in Red

You can download the instructions here.

Esther from It’s All in a Nutshell has also made comprehensive left and right handed videos for each week, and you can see this week’s here:

The Dutch and left handed versions can be found by visiting Esther’s channel here: It’s All in a Nutshell . Esther will be your best friend for the next 14 weeks, believe me!

If you haven’t done so already, you absolutely must make a gauge swatch for this CAL.  As each square is created by a different designer, the gauge is different every week.  You may find in week one you need a 4mm hook, but in week two you need a 5mm (or vice versa).  The hook size may vary anywhere between a 3mm and a 6mm hook, depending on your own tension.  So by making the gauge swatch first, you’ll be able to compare your squares each week to that, to see how you are progressing and if you need to go up or down a hook size.

To help you with this, there is a Tips and Tricks document at the CAL home page, plus a great video, again by Esther here.

Do make sure you share your squares on social media so we can all see and comment on them.  Use hashtag #scheepjesCAL2016 or #lastdanceonthebeach all over the internet and I’ll be sure to find them on Insta or Twitter or Facebook.

All right.  I’d best be off, I have squares to crochet and post on Instagram!


Peek-a-Boo Button Wrap for Kids – Pattern

Here we are, finally.  The kid’s version of my seriously popular Peek-a-Boo Button Wrap is ready.

Peek-a-boo button wrap for kids. Using Scheepjes Stone Washed XL, designed by MissNeriss.

Making this wrap reminded me just how much I love the Stone Washed yarn.  It is such a beautiful yarn to work with.  No splitting, froggable, soft, warm – oh so warm, and beautiful colours.  The soft Rose Quartz pink I used for this was the perfect choice for my daughter.  She’s a pink girl, through and through.

Right, let’s get on with it.

Peek-a-boo button wrap for kids. Using Scheepjes Stone Washed XL, designed by MissNeriss.

What You’ll Need

Scheepjes Stone Washed XL in 860 (Rose Quartz) – 5 balls (more if your gauge is different)
4 cm bamboo button – you can pick these up at any good craft store, or online
Size 5mm hook (or hook to obtain gauge).  My favourite is the Clover Amour.
Measuring Tape
Scissors
Tapestry Needle
Eucalan wool wash

Gauge

8 stitches x 5 rows = 5cm x 5cm
gauge across gauge up

Stitches

Note: All stitches are in US terms
Chain (CH)
Half Double Crochet (HDC)
Half Double Crochet Back Loop Only (HDCBLO)
Half Double Crochet Front Loop Only (HDCFLO)

Notes

In this tutorial I’m going to give the instructions on how to make a Peek-a-Boo Button wrap in a size to fit a 4-6 year old.  I will also give you a schematic so you can easily see what measurements you will need to make a wrap for older kids or younger kids.

My friend Esther from It’s all in a Nutshell has made a fantastic instructional video on how to create the stitch and her brilliant method of tracking her progress.  You can see it here:

Instructions

  1. Loosely, chain 74 for the base chain, plus 2 to start the 1st row.
  2. HDC into the 3rd loop from the hook, and all the way across.  The stitch count should be 74.  CH2 and turn.  Note, the CH2 does not count as a stitch.
  3. HDC into the back loop (HDCBLO) of the first stitch, then into the front loop (HDCFLO) into the next.  Repeat this alternating back loop/front loop pattern all the way across.  CH2 and turn.
  4. You should have ended the previous with your last stitch into the front loop of the stitch.  On this row you need to make sure that if the stitch from the previous row was in the front loop, this row needs to be in the back loop.  This creates the lovely texture and drape that makes this wrap so beautiful.  If you ensure your stitch count is even, it is easy to manage – you will always start the row in the BLO and finish in the FLO. So, HDCBLO in the first stitch, HDCFLO in the next.  Repeat across, CH2, turn.
  5. Repeat for a total count of 16 rows (or 16 cm – 1 row should be about 1cm high). Now we will make the first arm hole.  The first stitches of the row will form the collar height, so in the HDCBLO/FLO pattern, crochet 14 stitches.  Then CH15 and skip 15 stitches, HDCBLO into the next.  Then continue the FLO/BLO pattern all the way across.  CH3, turn.
  6. To close the sleeve, HDCBLO/FLO all the way across to the beginning of the chain from the previous row, then HDC 15 times around the chain, HDCBLO into the next stitch, and repeat the HDCFLO/BLO pattern to the top.
  7. Now you’ve closed the sleeve, you’re working across the back of the wrap.  Repeat the HDCBLO/FLO rows for another 25 rows, then repeat steps 5 and 6 for the second armhole.
  8. Crochet another 18 rows and then we will make the button hole.  This is a place where you can make a few personal adjustments – if the child is handy, you can do a fitting at this point, so see if it’s the right place to place the button hole.  A smaller child may need the button hole a few rows earlier, and larger children perhaps a few rows later.
  9. We’ll work from the bottom up to make the button hole for this size (if you add or subtract rows, you may need to work from the top, but the principle is the same). HDCBLO/FLO for 40 stitches, CH4, skip 4, HDCBLO in the next.  HDCFLO/BLO to the end, CH2, turn.
  10. HDCBLO/FLO to the chain, work 4 HDC around the CH4 from the previous row, then HDCFLO in the next.  HDCBLO/FLO across.
  11. Work another 4 rows (or until you run out of yarn), tie off and weave in the ends.

Wetblock using Eucalan, or another wool wash, pin out on blocking boards, stretching as needed, and wait impatiently for it to dry.

Below you can see the schematics  of the measurements of the entire wrap in the size that I have described above.  Using these measurement points, you can very easily customise the wrap to your own size.

To get the total height, take a tape measure and measure from the base of the skull to mid hip.  The button should sit over the breast/chest and the closure should be slightly off centre.

Schematic for the peekaboo button wrap by missneriss

Schematic for the peekaboo button wrap by missnerissThis design has been created with the specific use of Scheepjes Stone Washed XL in mind.

You can pick the yarn up at any great Scheepjes retailer in the Benelux, Wool Warehouse or Deramores internationally, and Paradise Fibers in the US.


Get Set, Go! – Last Dance on the Beach CAL packs on sale Today!

Today’s the day!  Today you can start getting your hands on the yarn packs for the upcoming Last Dance on the Beach CAL that I have the absolute honour of being a part of!

Scheepjes CAL 2016, Last Dance on the Beach. This is the beautiful Dance in the Sea colourway.

There are quite a few places  you can get your hands on the packs still, but hurry.  Seriously, they’ll be sold out faster than Adele concert tix.

If you’re in the Netherlands, head to Caro’s Atelier here in Almere or online to pick up the Colour Crafter pack for 43.40, or the Luxe pack for 159.90.

If you’re in the UK or international (like in Australia – I feel so bad for you guys, having no Scheepjes distributors yet), head to either Wool Warehouse or Deramores.

In the US, head to Paradise Fibers, and in South Africa, Be Inspired has you covered.

Just to remind you, here’s what’s in the kits.

Here's what's inside the Basic and Luxury kits for the Last Dance on the Beach CAL by Scheepjes and Marinke Slump

I don’t know about you, but I want that tote!!

I might have to jump on my bike later and head over to Caro’s Atelier to have a feel…

And if you can’t decide which fibre is right for you, check out this wonderful comparison by Sarah from Crafts from the Cwtch.  It’ll really help you make up your mind.

What are you still doing here?  Why haven’t you left to order your pack yet?

Oh, and if you want to assemble your own colour packs using Scheepjes yarns, you totally can.  The info on how many balls you’ll need has been released in the Facebook groups just now.  Dutchies head here, and internationals, this one is for you.

Go on, go!

Just a little note: this post does contain a couple of affiliate links.  So if you choose to purchase from Wool Warehouse or Deramores using my links, you’ll be helping me fund my yarn addiction.  Thanks very much for that! X

Peek-a-Boo Button Wrap – For Kids!

I’m really not a fan of Dutch winters.  I’ve had this wrap ready to show you for ages, but haven’t had any decent light-filled days to photograph it. Finally at the weekend there was glorious sunshine, so Raina and I spent the morning outside taking pics.

Peek-a-boo button wrap for kids. Using Scheepjes Stone Washed XL, designed by MissNeriss.

Raina really loves her wrap.  It looks cute on her, don’t you think?

Peek-a-boo button wrap for kids. Using Scheepjes Stone Washed XL, designed by MissNeriss.

Peek-a-boo button wrap for kids. Using Scheepjes Stone Washed XL, designed by MissNeriss.

Peek-a-boo button wrap for kids. Using Scheepjes Stone Washed XL, designed by MissNeriss.

The Scheepjes Stone Washed XL is also a seriously snuggly yarn.  Even though it’s a cotton/acrylic blend, it’s warm enough that Raina had no complaints about the cold when it was only 5 degrees outside!

I’m in the process of writing the instructions for kids sizes.  I need to get hold of a few different sized kids and a tape measure!

Stay tuned, the instructions and measurements are coming soon.

You can pick up the yarn at Scheepjes retailers all over the Benelux, or internationally from Wool Warehouse*.

*Affiliate Link

I saw This on Pinterest Today

Beautiful Free Crochet Flower Patterns – time to think spring!

#rusticlacesquare Blanket is Finished!

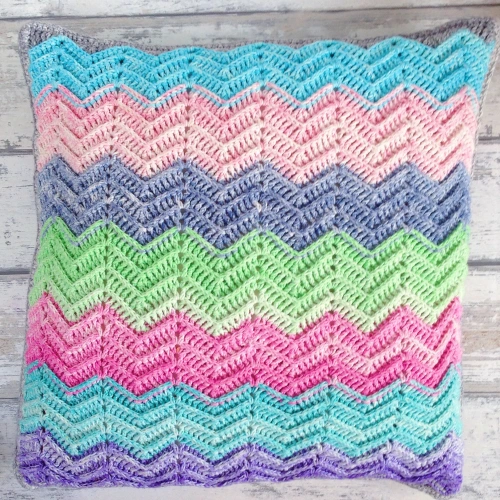
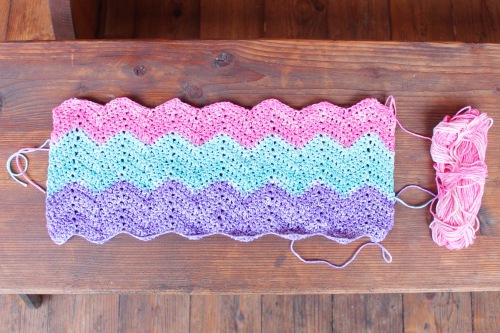
It has taken me months and months, but finally, it’s finished!

unnamed (55)

It’s absolutely beautiful.  Spectacular even.  I really struggled to capture the beauty in photographs, to be honest.

#rusticlacesquare blanket with edging border tutorial on missneriss.com

I used the joining method that Marianne from MaRRose-CCC came up with, which is essentially genius.  The blanket just grew beautifully and the joins are virtually invisible which I just love.  Especially as I hate joining motifs.

unnamed (52)

Once the blanket was done I had to come up with an border.  I searched the internet high and low for inspiration, but to be honest, there aren’t a lot of examples out there.  Cornel Strydom used a simple scalloped edging, which I loved, but wasn’t quite right for me.

In the end I went digging through my crochet stitch bibles, and found an edging that I liked, but wasn’t quite right either, so I decided to modify it slightly.
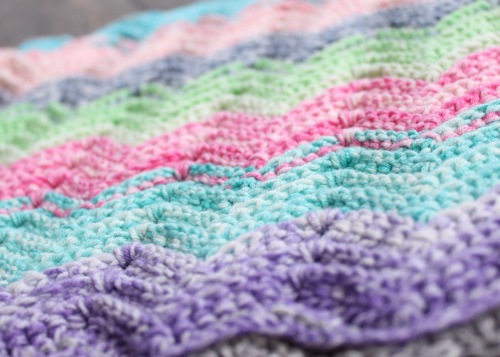
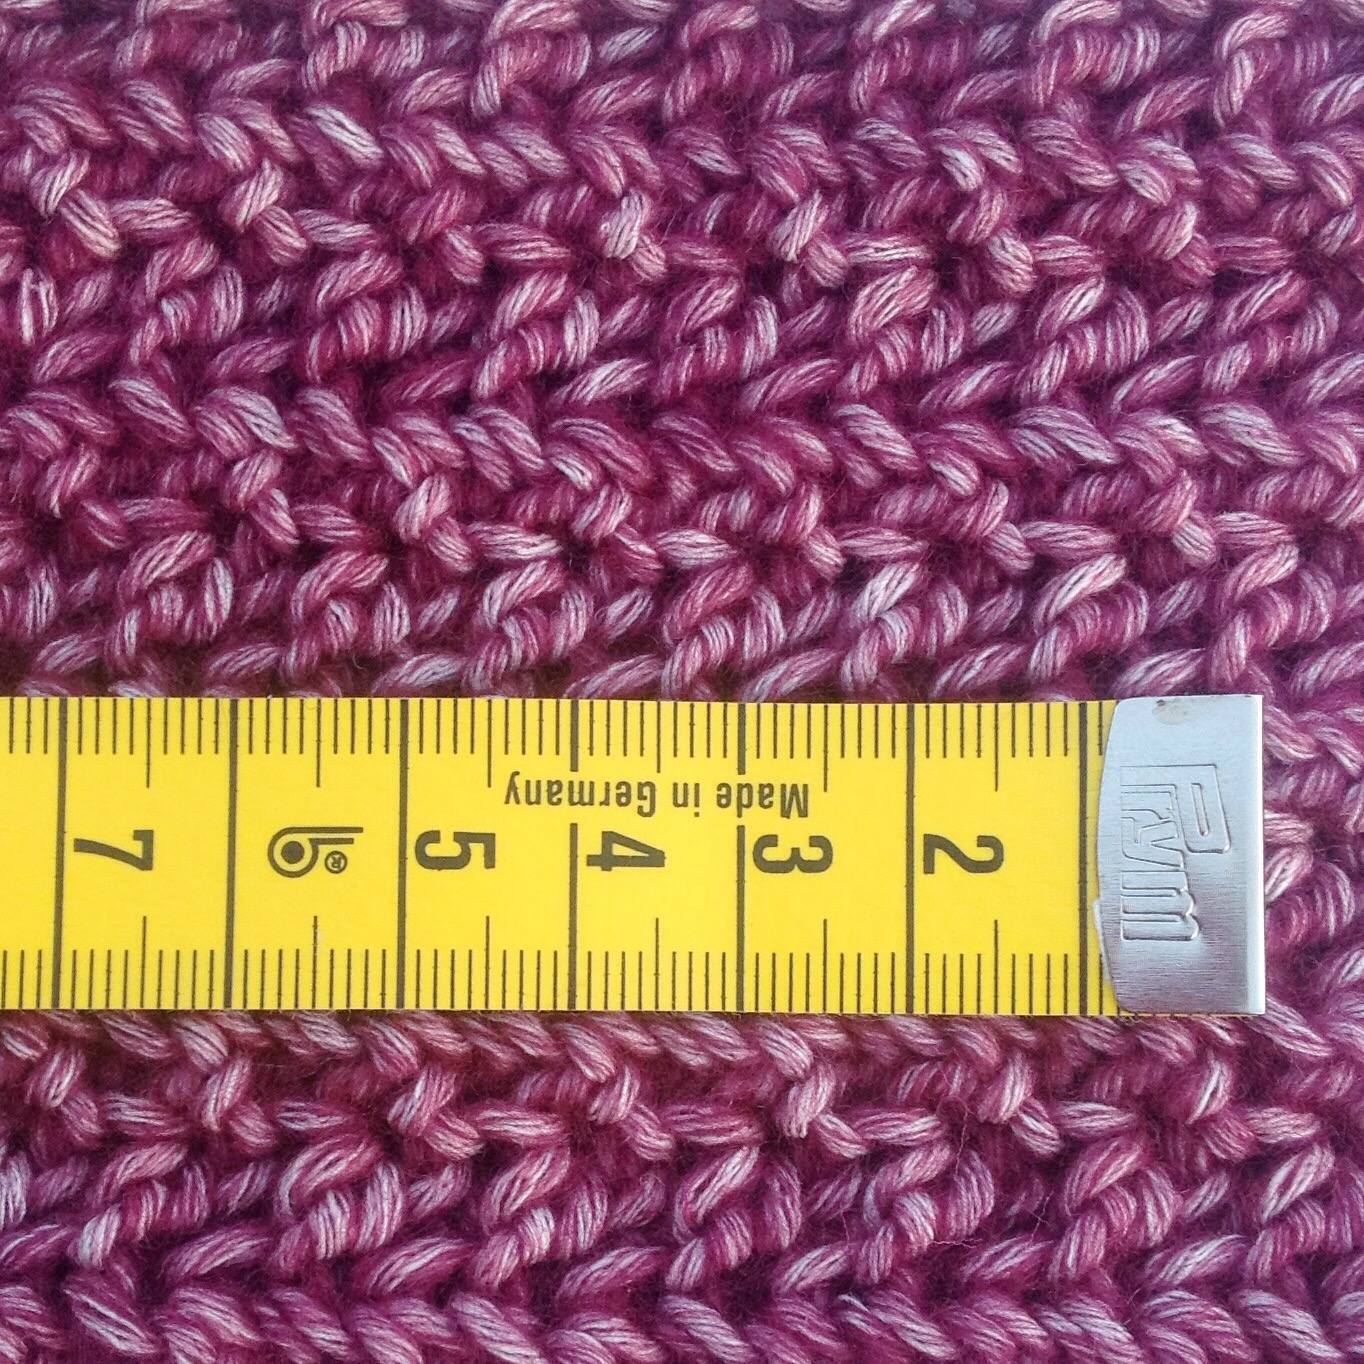
#rusticlacesquare blanket with edging border tutorial on missneriss.com

Here’s a close-up:

unnamed (51)

So how did I do it?  It’s really very simple.

The pattern works on a 10 stitch repeat, so first of all, what you need to do is do a lap around the blanket in single crochet stitches, to get the edging into multiples of 10.  Each finished square has loose loops at the corners, I joined those with one SC around both loops.  I had to fudge it a little bit, because the squares themselves don’t have quite the right stitch count.  I crocheted into each stitch, and in the chain sections I crocheted one stitch less than the chain.  So when the last round of the square has a chain 3, I single crocheted 2 stitches into that space.  Make sense?  Otherwise the edging will become too ruffly.

On the second round, start at a corner, skip the next 4 stitches, Treble Crochet into the fifth.  Chain 1, and TC, Ch1, 4 more times.  Skip 4 stitches, SC into the next, skip 4 stitches, TC, CH1 5 times into the next.  Repeat that fan pattern all the way around.  there should be a SC at each corner, so there is a fan on each side of the corner.

The third and final round, start at a corner and Double Treble, CH2 8 times into the SC in the corner of the previous round.  SC into the middle TC from the previous round, CH2, DTC (Double Treble Crochet), CH2 4 times into the SC stitch between fans from the previous round. SC into the middle TC from the previous round.  Repeat this all the way round, making sure that you have the 8 DTC stitches in each corner.  If you take a look at the pic above, you’ll see what I mean.

I cobbled together a chart.  It’s not fabulous because I’m still getting my head around the Stitchworks software, but it will help you get the idea.

C:UsersNerissa MuijsDesktop2016-02-17_1145.png

I’m so happy with the results, I just love the blanket. I just want to wrap myself in it, with a cup of tea and enjoy the sunshine.  You know what?  I’m going to do just that. #enjoyeverymoment


#rusticlacesquare blanket with edging border tutorial on missneriss.com

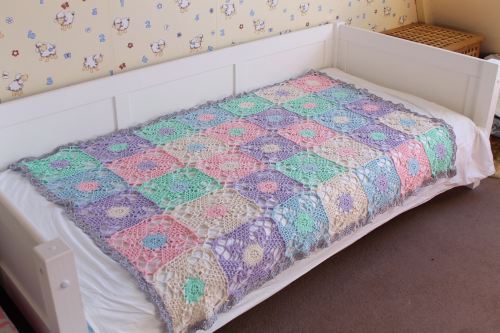
For this project I used Scheepjes Linen Soft.  I used almost 5 balls of each colour, and just over two for the border.  I have enough yarn leftover to make at least one matching cushion, when I get the chance.

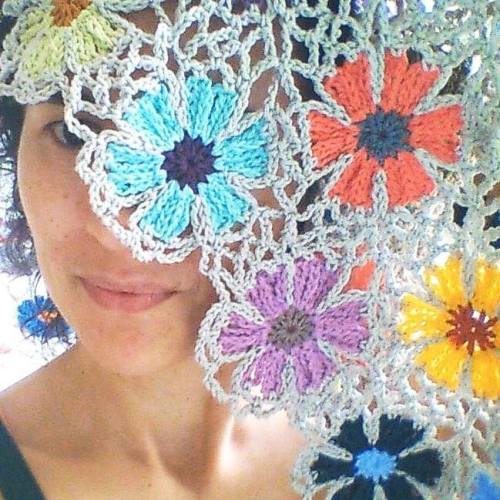
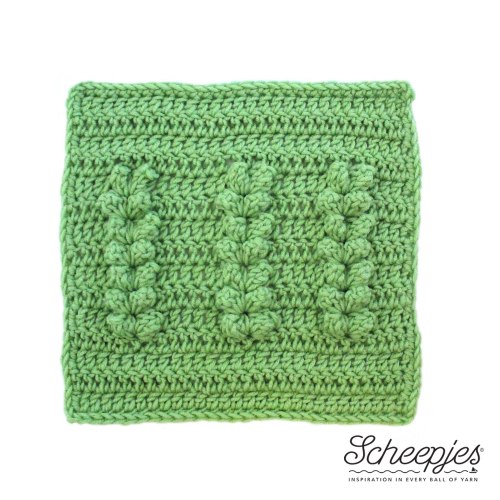
ETA:  If you haven’t seen or made the square for yourself already, here’s the chart:

wpid-4493016b2e75b00c4f3e080b2d64b3fc.jpg

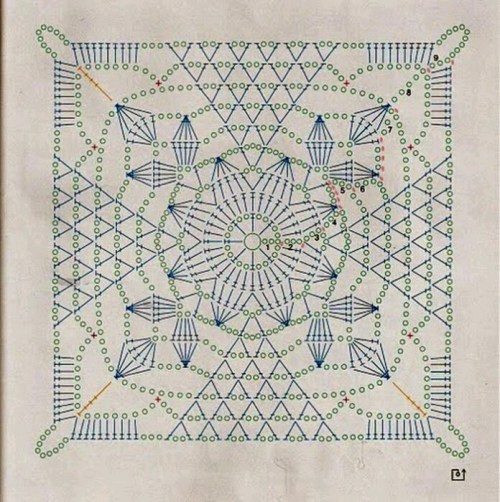
If you don’t read charts, I’ve found a written description by Crochet Tea Party on Ravelry.

You can pick up the yarn at Scheepjes retailers all over the Benelux, or internationally from Wool Warehouse.