Category Archives: Projects

2014 was Amazing, 2015 will be Better!

I’ve had one of the best years of my life in 2014.  My daughter well and truly left baby-hood behind and seems to be bypassing being a toddler and diving straight into threenager territory.  My husband just keeps getting more handsome as he gets older (poor thing’s quite a bit younger than me), my mortgage paying job is going from strength to strength with the most growth this year than in the last five combined, and crochet has just been an absolute joy.

Because I’ve had such a great time this year, I want to reflect on some of the most fun I’ve had, and my favourite projects.  Let’s get to it, shall we?

No.5 Rhinka the Rhino

Rhinka the Rhino, faux-taxidermy amigurumi pattern by Pepika. Spotted by @missneriss
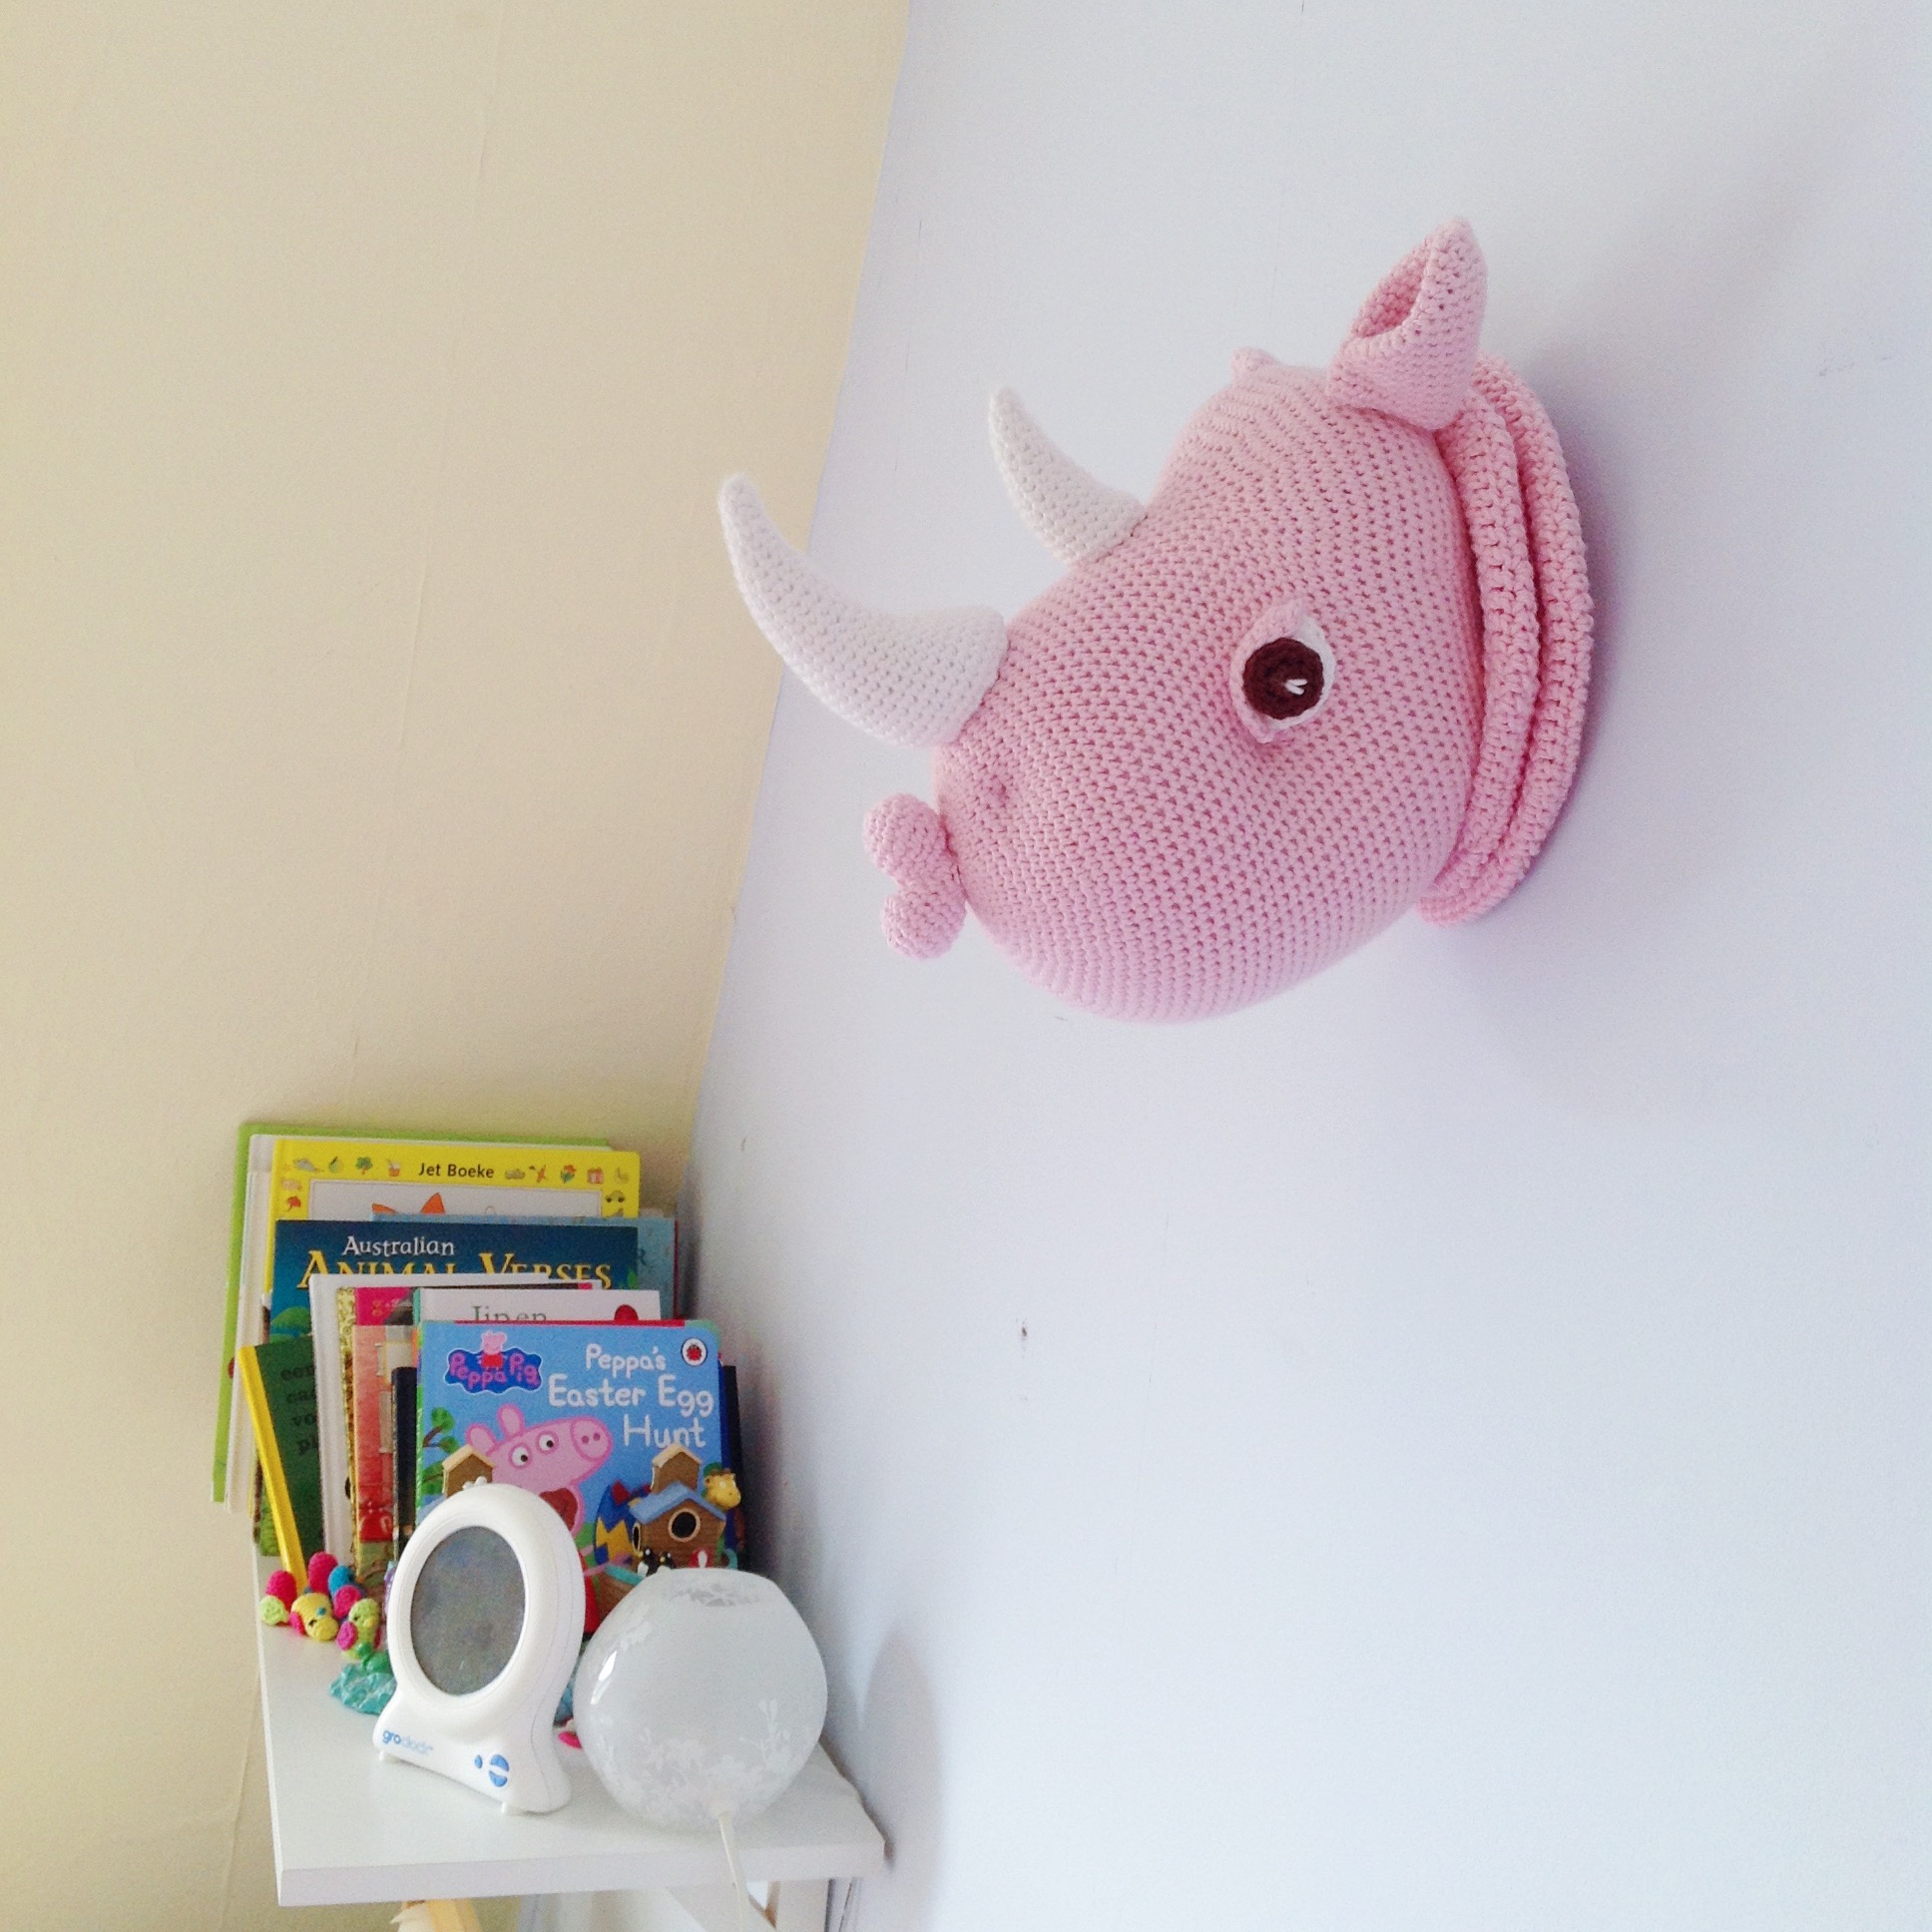
I had such a blast making this faux-taxidermy rhino.  Every time I look at this photo I have a little chuckle.  The ridiculousness of a crochet animal head hanging off my wall is only equalled by the ridiculousness of hanging an actual stuffed animal head off the wall!

No.4 The Bucketful of Sunshine Hat

Bucketful of Sunshine hat on missneriss.com, made with Scheepjeswol Cotton 8. #scheepjeswol #cotton8 #scheepjesThis was one of my first original designs.  Well, as original as a crochet hat can be, anyway!  I made it as a sun hat for my daughter, who wore it all summer long.  It was also the start of my ombre obsession.

No.3 My Christmas Wreath

Christmas Wreath for the Scheepjes Christmas Blog Hop - see all ten amazing designs and their free patterns, including how to make this wreath for yourself!I love this so much that I’m not going to take it down!  I love that it can be Christmassy, yet can be everyday welcome at the same time.  I think I’ll hang it above my desk, actually.

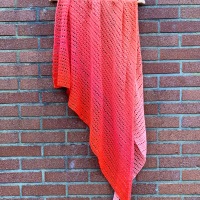
No.2 The Spring Shawl

Spring Shawl made with Malabrigo Silky Merino on missneriss.com #crochet #yarnI’ve made about half a dozen of these now, but this one remains my favourite.  I filled it with all the love I have and sent it to my dearest friend whom I haven’t had much contact with lately thanks to life getting in the way.  I hope that when she wears it she feels all the love that it contains.
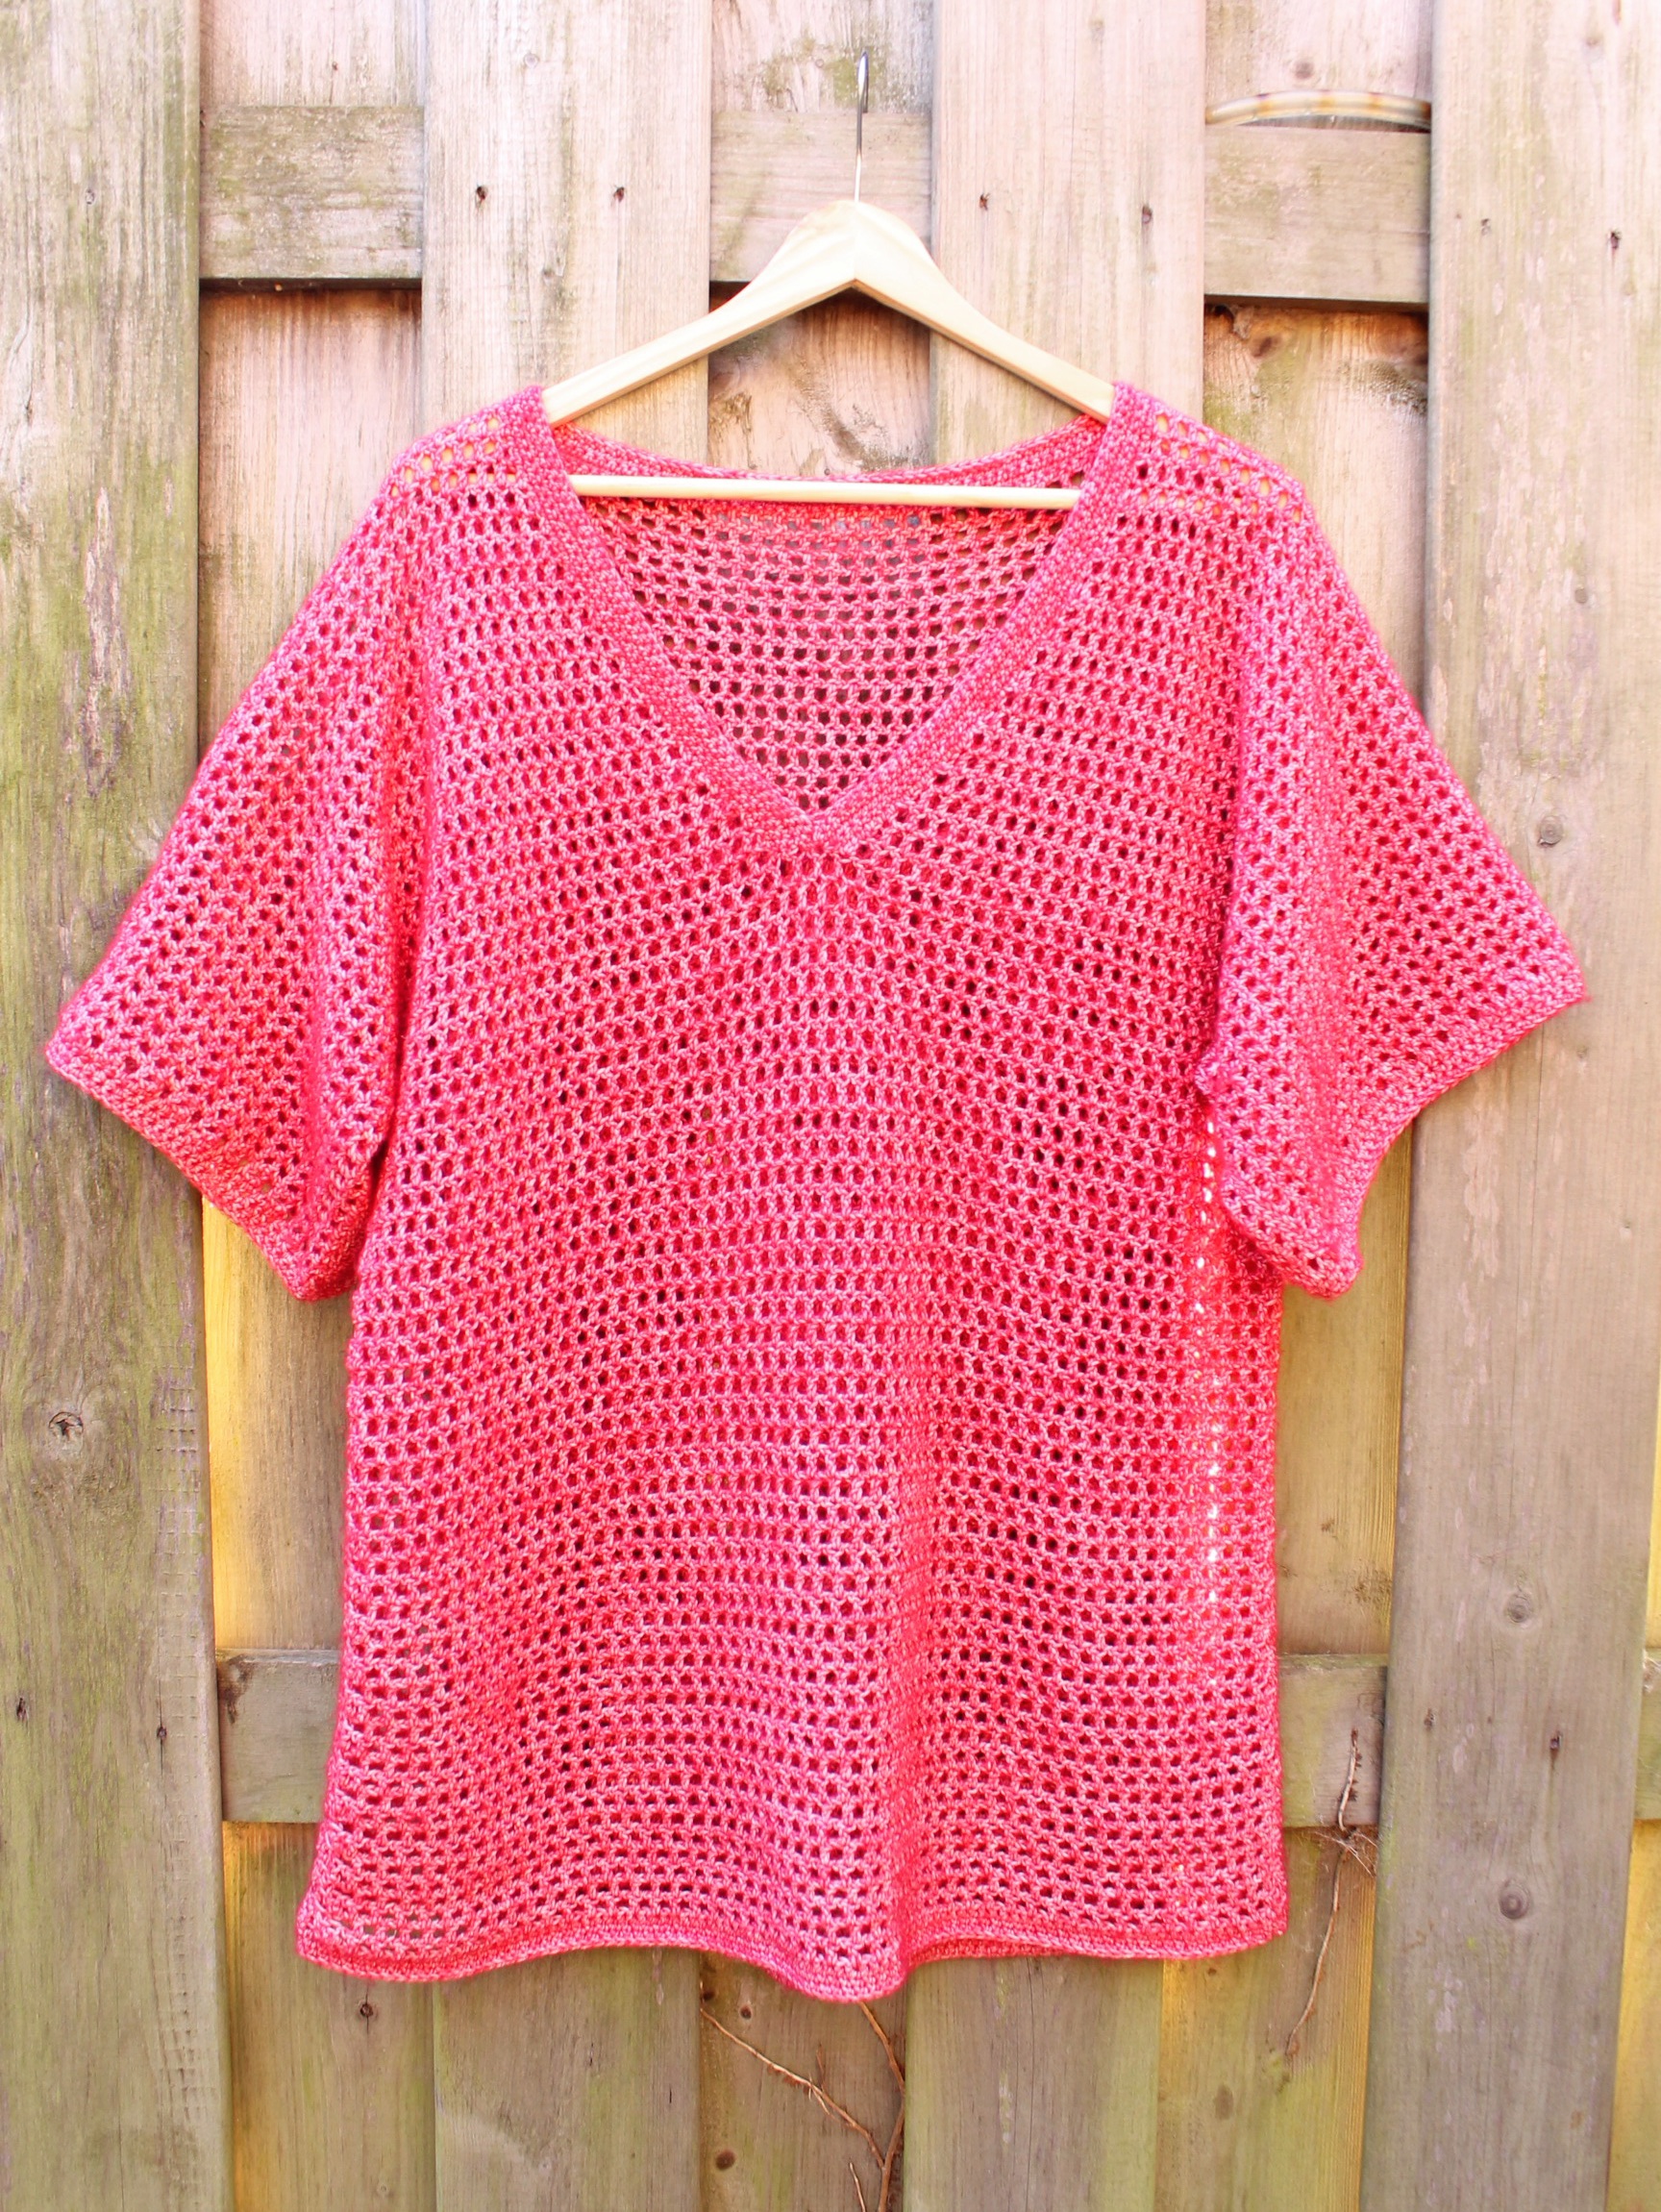
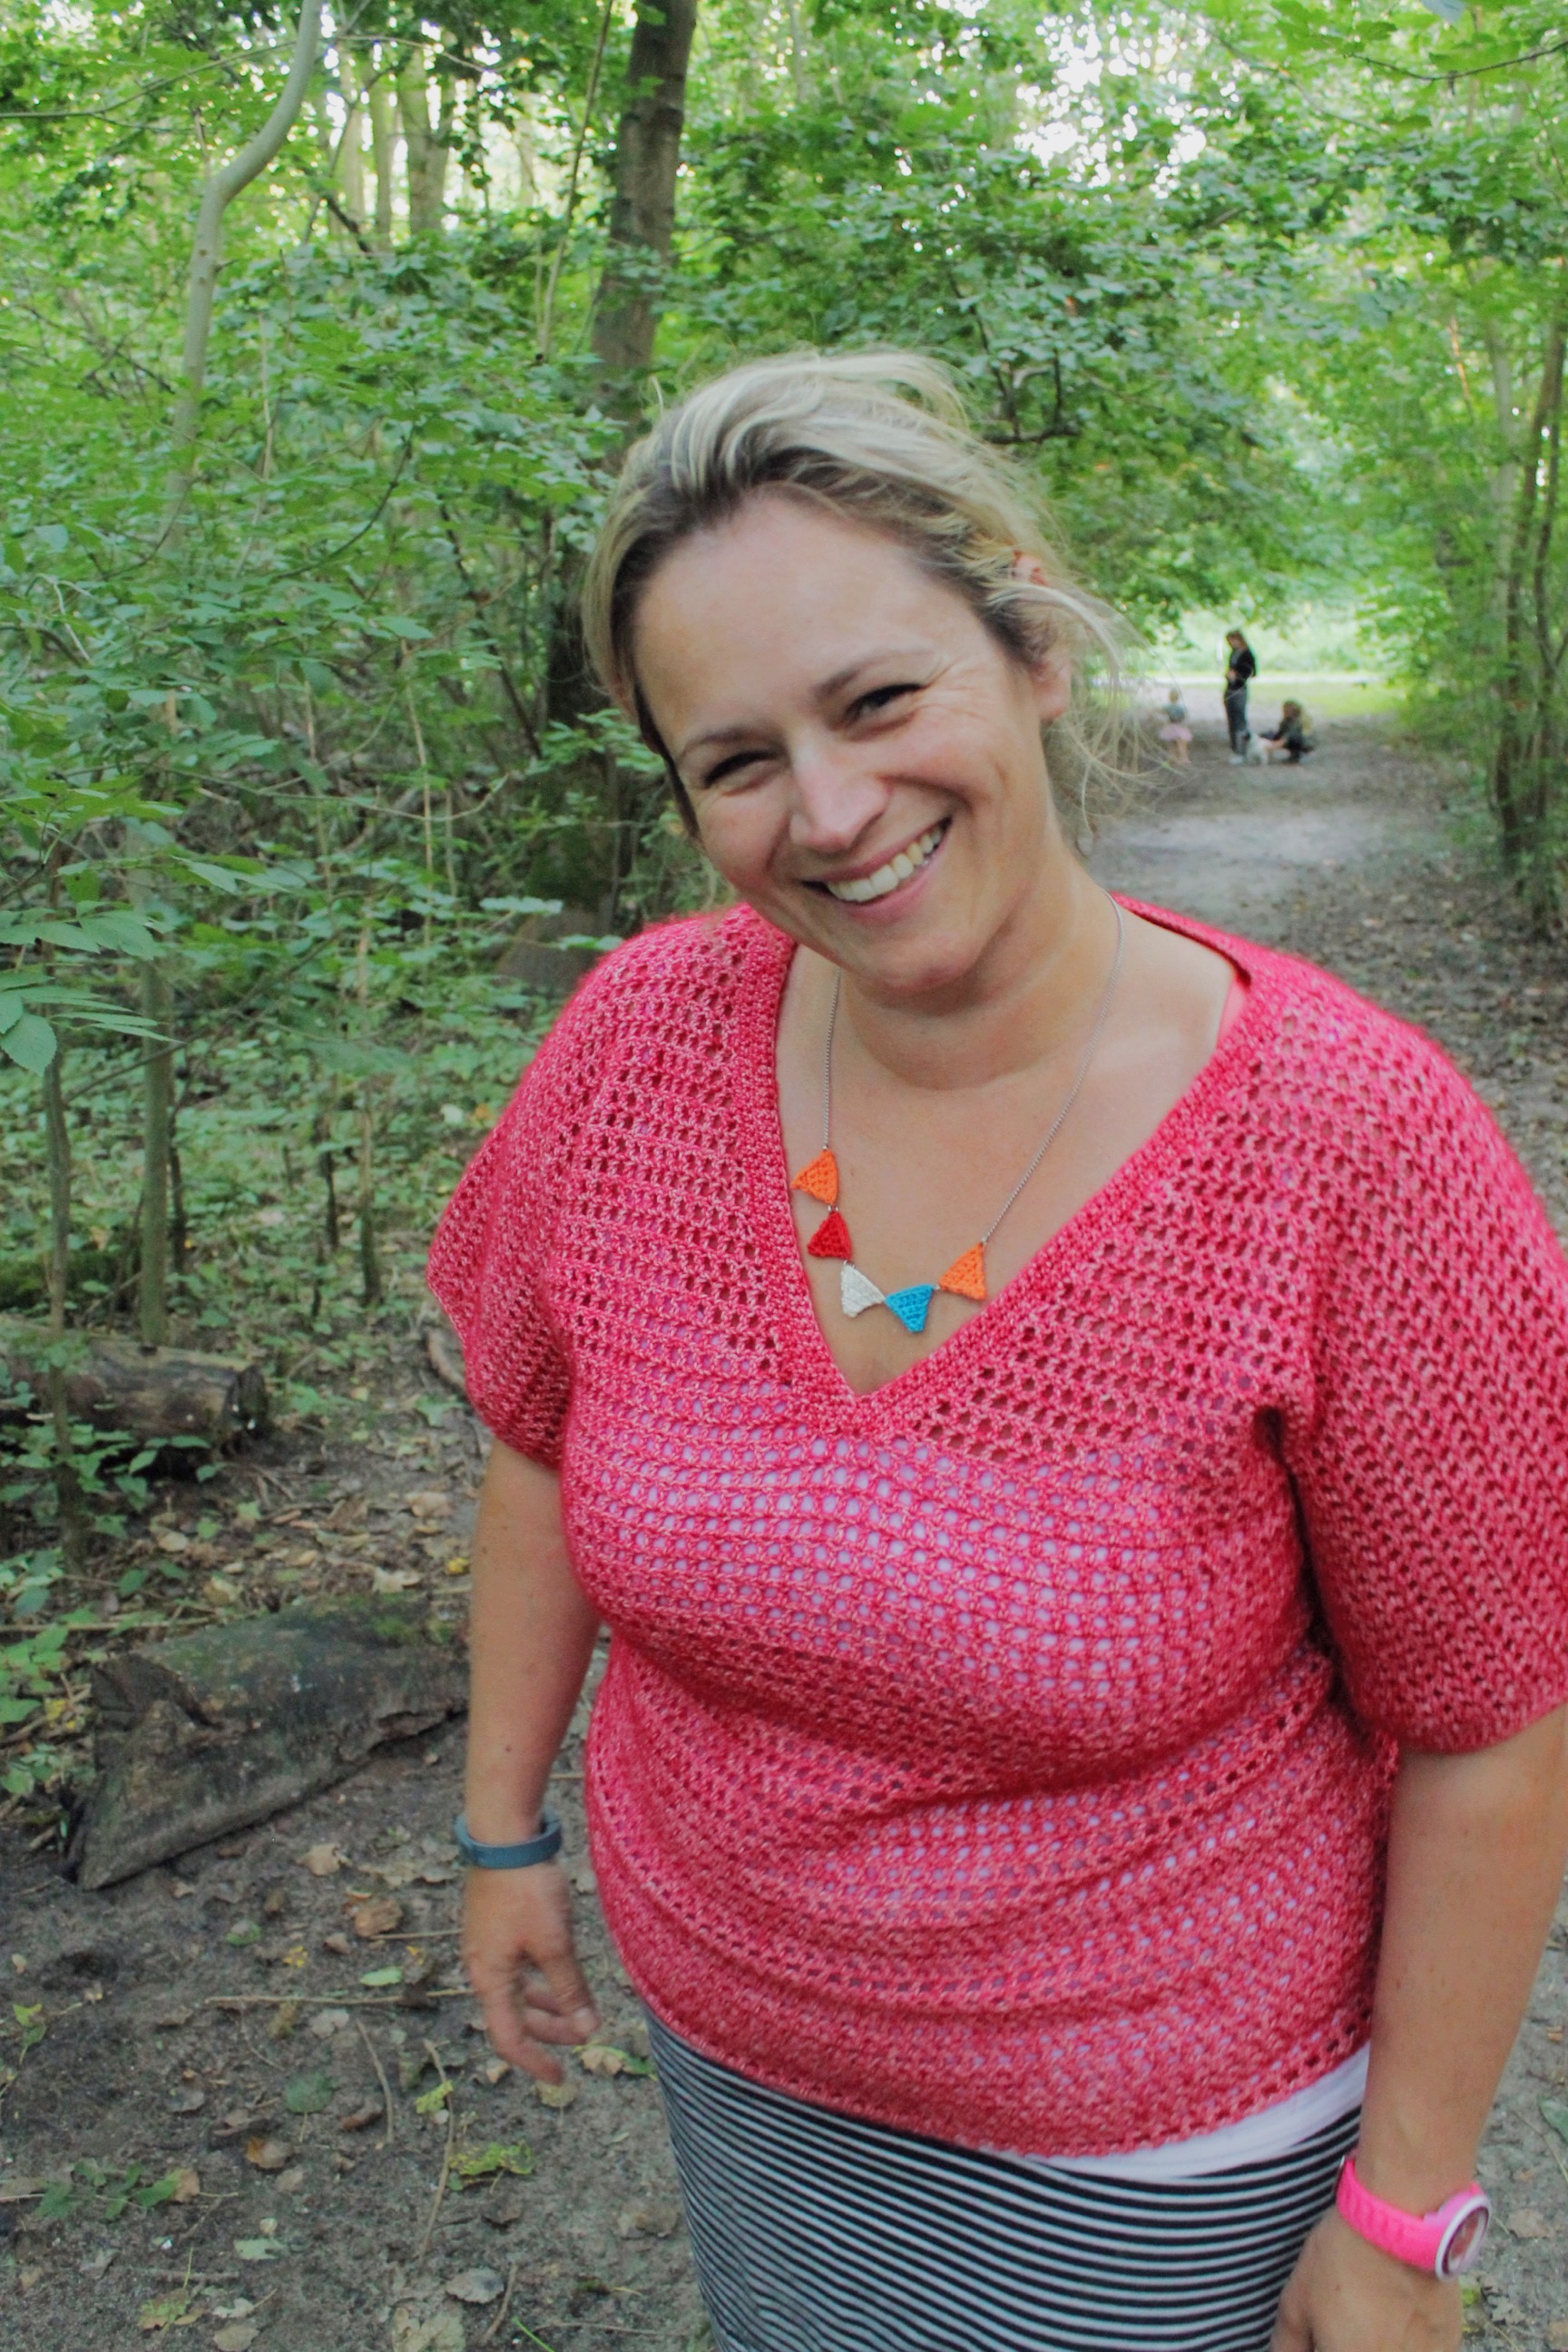
No.1 The Jasper V

This was a seriously steep learning curve for me!  It was my first time making a complete garment, and even more ambitiously, I designed it myself!  I wear it all the time, and always receive comments about it.  It’s just a great top.  I’m supposed to be making one for my aunt, and as I’m going to see her in a few weeks I’d better get cracking!

And as for 2015, I know it’s going to be even better.  This coming year is the Year of the Sheep (or Ram, or Goat) and I’m a sheep myself, so it’s going to be an even luckier year for me.  And then on top of that, the new Chinese Year begins on my birthday (feb 19), so I’m going to be the luckiest sheep in town. Baa!

Happy New Year!  Enjoy the fireworks, wherever you are, and don’t forget to pop the Champagne.  I will be!

Seriously Simple Granny Square

And now for the tutorial I promised of the granny I created while on holiday recently.

CH 4, SLS to join.  CH 2, DC x 11, SLS to join.  CH 2, DC into same stitch, Increase around, SLS to join.  CH 3, *DC into next stitch, CH 2, 2 x DC into the same stitch, DC into next, HDC in next 3 stitches, DC into next.*  Repeat what's between *_* three times.  SC around, CH 1 in each corner.  Be sure to click to see the original, and the extended photo tutorial!
It’s really so simple, you will be whipping these up in no time!

First of all, I’ll share a quick step by step photo to show you how it grows, then below I’ll give you the row by row.

CH 4, SLS to join.  CH 2, DC x 11, SLS to join.  CH 2, DC into same stitch, Increase around, SLS to join.  CH 3, *DC into next stitch, CH 2, 2 x DC into the same stitch, DC into next, HDC in next 3 stitches, DC into next.*  Repeat what's between *_* three times.  SC around, CH 1 in each corner.  Be sure to click to see the original, and the extended photo tutorial!
Simple, right? Now, let’s go.

For this project I used Scheepjeswol Cotton 8*. It’s a sport weight yarn and I used a 3mm hook. You can use whatever yarn you like, and the hook to match. Gauge isn’t important in this one. If you use my recommended yarn and hook, your finished square should measure 5.5 x 5.5 cm.

First of all, chain 4 and join with a slip stitch. Usually I prefer a magic ring because I like the centre to be as tight as possible, but in this case it doesn’t matter. There are a lot of stitches into the ring, so the chain 4 foundation will have a nice tight circle anyway.

Now, for row 2 (I’m counting the ring as the first row), chain 2 and double crochet 11 times into the ring, joining with a slip stitch to finish with 12 stitches into your ring. This is because we want to make a square eventually, so need a total that is divisible by 4. Finally, almost 20 years after I left school I’m using maths!

IMG_1926.JPG

If you’re changing colours after each row, you’ll want to cut and tie off your yarn, leaving a tail to weave in. I like to work the ends in as I go, to minimise the amount of weaving in at the end – I hate weaving in ends, have I mentioned that?

Row 3 – chain 2, double crochet into the same stitch so you have two double crochets in one stitch and stitch two double crochets into each stitch around, leaving you with 24 stitches once you slip stitch to join. If you’re not changing colours, chain 2, stitch two double crochets into the next stitch and each stitch around, with one into the last stitch, which is the same stitch that your starting chain came from.

IMG_1925.JPG

Row 4 – here we create the square. Chain 3, two double crochet stitches into the next stitch, chain 2, and two more double crochets into the same stitch. This creates the corner. Double crochet into the next, half double crochet into the next three stitches and then double crochet into the next. Now comes the time to repeat the corner stitch (two double crochets, chain 2, two double crochets into the same stitch), then repeat the row (DC, 3xHDC, DC) until you come back round to the start. Slip stitch into the top of the chain of the first stitch.

IMG_1924.JPG

Row 5 – Single crochet in each stitch around, with two stitches, a chain 1 and two more stitches into each corner, and you’re done!

IMG_1923-0.JPG

I joined the top side of my camera strap using single crochets, and the back side with a whip stitch so that it would sit flat and not annoy my husband’s neck, but you can use your favourite joining method. Once I had made enough squares to cover the entire length of the camera strap (13 in my case) I joined the two sides together with a single crochet into each corresponding stitch up each side, leaving the ends open so you can feed the strap through once you’re finished. This size granny is a perfect size for a camera strap, and it looks fantastic!

Ombre Camera Strap in action

Ombre Camera Strap

*Affiliate link

Ombre Addict – Camera Strap

This ombre look is just the best. It started with me wanting that ombre hair effect, and it’s been slowly infiltrating my crochet designs more and more. The Bucketful of Sunshine hat is a great example. And so is Miniman’s Nursing Necklace.

Once I had finished The Miniman I noticed that I had a lot of yarn left over. Usually this wouldn’t bother me as there is always another project, but it seems that my yarn cupboard is completely full of left over yarn that will hopefully come in handy one day, so I just wanted to use it straight away, instead of effectively wasting it. And as I was on holiday I thought I would make a great holiday accessory – a camera strap!

As my photographer friend Rudi says, why give Canon free advertising? I’d been wanting to make one for ages, but hadn’t had the yarnspiration, but now with this leftover Cotton 8 from Scheepjes in ombre shades, I could really go to town!

Firstly though, I had to start with a square. But I had no internet on holiday, and hadn’t taken any pattern books with me to the south of France, so necessity being the mother of invention, I designed one!

Ombre Mini Granny square by @missneriss. Check the free photo tutorial at missneriss.com

I started with a circle, then turned it into a square and changed colour on each round. I thought that it would be a great colour combo for my husband (as it’s his camera and I’m not sure if he would really enjoy a hot pink or rainbow strap) so I made a bunch of them. Thirteen, infact. The finished square is 5.5×5.5cm (unblocked) and I single crocheted them all together in a row. On the back I made solid squares and joined those together, starting with the lightest blue at the outer ends and the darkest blue in the middle (so if it’s a really hot day the manly sweat won’t discolour the strap).

Mini Granny square by @missneriss. Check the free photo tutorial at missneriss.com

It was a great project to work on in the car on the way back – it distracted me from the mad French freeways!  And when I arrived home, my daughter was for once, very happy to model it for me!

Ombre Mini Granny square camera strap by @missneriss. Check the free photo tutorial at missneriss.com

Ombre Mini Granny square camera strap by @missneriss. Check the free photo tutorial at missneriss.com

Ombre Mini Granny square camera strap by @missneriss. Check the free photo tutorial at missneriss.com

Ombre Mini Granny square camera strap by @missneriss. Check the free photo tutorial at missneriss.com

Come back in a few days, I’ll have a tutorial of the square for you.

Ombre Mini Granny square camera strap by @missneriss. Check the free photo tutorial at missneriss.com

Big Reveal – Miniman’s Nursing Necklace


A quick smile for the camera before I shove this in my mouth! Minimans Nursing Necklace - tutorial

I just had to share this photo first.  Isn’t that the cutest face you’ve ever seen, and can you even imagine that this baby has an identical twin?!  It’s almost too much to bear!

Am I allowed to put this in my mouth? I am, right... Minimans Nursing Necklace - tutorial

Introducing Miniman’s Nursing Necklace.  Unfortinately Miniman himself doesn’t live in the neighbourhood to pose for pictures himself, so I borrowed one of my friend Stephanie’s adorable babies for the morning so you could see for yourself how this wonderful necklace works.

This will keep me interested for ages, mum! Minimans Nursing Necklace - crochet tutorial

The idea is that mama wears this while baby is nursing, or playing, or snuggling, or generally making mischief and it keeps those fingers occupied and out of mama’s hair, earrings, necklaces and from scratching sensitive skin.  It also helps baby focus on the task at hand (essentially: feeding) and minimises distractions from the surrounding environment.  When I took these pics, there were two toddlers running wild, another twin and also a dog around the place, but the necklace firmly captured this little one’s attention.  Even when there was a real distraction, she wasn’t letting those beads go!

Distracted, but not so distracted to let go of the beads! Minimans Nursing Necklace tutorial

And…straight back again.

This will keep me interested for ages, mum! Minimans Nursing Necklace - crochet tutorial

Next week, I’ll show you step-by-step how you can make one of these for yourself.  You don’t have to be a nursing mama to wear one of these either – they are a lovely stylish accessory even if you don’t have one of these adorable twins to share!

Minimans Nursing Necklace isnt just for nursing mamas! Its a beautiful accessory in its own right! Free crochet tutorial

The tutorial is now live, you can get it here!

P.S. I’ve also added this to the really cool Hookin on Hump Day link sharing party.  Go check out all the great projects!

What is this Baby Project..?

So here it is.  A work in progress.  Wooden beads, blue yarn, what will it be?

IMG_1826.JPG

I love working with this Scheepjes Cotton 8, it really is becoming one of my favourite yarns.  Although, for it to be perfect, it would be DK weight. I just like to use a bigger hook and heavier yarn, so projects work up quicker. But that’s just my instant gratification personality shining through!

IMG_1846.JPG

I’m busy covering the wooden beads with the yarn.  In the past I’ve just made balls and stuffed them with filling, but the roundness was just lacking a bit, and by using a wooden bead it just adds the right amount of weight and shape.

IMG_1845.JPG

And look who I caught trying to run steal one as I was taking pictures.  Isn’t that chubby little hand delicious?  No wonder she’s always covered in kisses and cuddles!

IMG_1847.JPGIt’s nearly finished and ready to be shipped to its new home in America, but you’ll have to wait until next week to see the end result!


Two Shawls in a Week?

I’m a bit late to the shawl game. I spent a long time making hats, scarves and amigurumis, and only really started making shawls a few months ago. Mainly because I just don’t have the patience for the big projects. But something has happened. Suddenly I finished two shawls within the space of a week! The first was a really quick project that I saw in a recent edition of Simply Crochet because I had some gorgeous Malabrigo Silky Merino that needed to become something, and the other was a Spring Shawl I promised to make my gran back in March!

Gran requested a shawl in blues and turquoise, and I found the perfect bamboo yarn by Turkish brand Alize. The yarn is so incredibly soft and light and the drape is perfection. The weight is just perfect. It won’t slip of Gran’s shoulders and will be perfect for the chilly evenings as summer approaches in South Australia.  I wonder if I can use Perfect in a sentence again..?

The Spring Shawl in turquoise and blue, using Bamboo Batik by Alize. Pattern: https://missneriss.com/2014/03/20/spring-scarf-pattern/
It’ll be lovely as a scarf too.

The Spring Shawl in turquoise and blue, using Bamboo Batik by Alize. Pattern: https://missneriss.com/2014/03/20/spring-scarf-pattern/

Isn’t the colour gorgeous? The only superficial complaint I would have is that perhaps the colour change is a bit too regular. I can see that it’s not hand dyed yarn, but I think the colour blend is beautiful.

I found the yarn at yarnstreet.com which has a huge selection of yarns from Turkey, and has fantastic prices. I used a 4.5mm hook and the yarn has loads of stretch, so when I blocked it the shawl almost doubled in size. I started it back in March, but so many other projects got in the way it took six months to complete!

I have this habit of buying yarn for the sake of having beautiful yarn, so when I saw a shawl in a recent Simply Crochet edition I decided to give it a go to actually use some of it.

Limpe Pickle shawl on missneriss.com

I love design that works is way through, and the silky merino is really my favourite shawl yarn. I used a 4.5mm hook, and two full skeins of the Silky Merino. Before blocking the shawl was very small because my stitches are always so tight, so I really had to stretch it out while blocking. Now it has a lovely lavender aroma from the Eucalan I used.

Limpe Pickle shawl on missneriss.com

I’m not too sure what to do with it though. I already have more scarves than I can possibly wear, so I might put this one in my Etsy store. It’s a bit too soft though, I don’t really want to part with it.

Jasper V Pattern – All the Sizes!! (S, M, L, XL)

Here it is!  The biggest and most daunting crochet project I have ever undertaken, completely finished!

Here it is!  The Jasper V is available in sizes S through to XL, all Free!  #scheepjes #scheepjeswol #stonewashed

I have to say, I’m a bit sad that it’s all over and I can move on to focus on the next big project, but I’m so relieved to have all the sizes worked out and ready to go.

What I have done for the smaller sizes is to update the diagram only.  I’m not re-writing the entire pattern; instead that can be used as a guide to get started, and the diagram has all the stitch and row counts, which is the clearest description.  The edging is so straight forward that I feel what is written in the original pattern will get you through.

Remember though, if you need any help at all, please just contact me.  I’ve added a contact form below so you can do it painlessly.

1407176460.178020.IMG_8114

Here we go!

The original pattern post with all the written instructions is found at this link.

The attachments with the different sizes are all attached to this post as pdf files.  You will need a program such as Adobe Reader (or similar) to be able to read this file.

Jasper V Size Small

Jasper V Size Medium

Jasper V Size Large

Jasper V Size XL

Please, please do note: the only size that has been tested by me is the XL – the smaller sizes have been created using mathematical magic and are not tested.  I’m relying on your help for that!  If you’re making the top and it feels like it will be a little tight, please don’t panic – the stitch has a lot of give; a good 5-10 cm! Think about the yardage of the smaller sizes, you won’t need as much as I did making the XL size (about 1100 metres).

I do value any and all feedback, but please don’t be mean.  And remember above all that this is a free pattern – together we can improve it.

This is an original design by Nerissa Muijs.  Please do not reproduce this pattern or sell this pattern as your own work.  Please share it on your social networks, linking it back to the original source.  Please also feel free to sell items made from this pattern and please credit me by linking my website: missneriss.com.  All images are the property of Nerissa Muijs, and if you would like to repost the originals, please send me a message to ask my permission before the fact.

Most importantly though, please share pictures of your work with me, by adding them to Ravelry or to my Facebook page, or even via an email.

Enjoy!

Need help, or want to ask a question, go for it here:

Go back

Your message has been sent

Warning
Warning
Warning

Warning.

Image

Taking Over

This is my “Office”.

I have so many projects on the go at once I’m a bit buried in yarn and, well, stuff.

20140806-201845-73125493.jpg
Oh how I’d love one of those Pinterest Perfect studios, but alas, I have 115 square metres of house and most of it is taken up by toys, records and more toys!

What does your crochet space look like?

The Big Reveal!


The Big Reveal!  The labour of love that has been my #stonewashed top is finally ready!  Pattern is coming soon! #Scheepjes #Scheepjeswol #missneriss

This has been one almighty labour of love and a huge learning curve.  It’s the first time that I’ve designed something that I can wear that’s not a hat or a shawl.  Can you tell how proud I am?The Big Reveal!  The labour of love that has been my #stonewashed top is finally ready!  Pattern is coming soon! #Scheepjes #Scheepjeswol #missnerissThe first thing that really strikes me is how warm it is!  When I first started rolling the idea around in my head I thought perhaps it could be something for the beach, but no!  This is really something for chilly mornings or late summer evening BBQs.  I’m sitting at my laptop in my garden wearing it this morning while there’s still a slight chill in the air and it’s perfect.

I love the wide open V-neck and how versatile it will be.  I already wore it walking the dog this morning, and I also plan to wear it when I go out for dinner next, paired with my favourite jeans and a white top.  For the first time I have an outfit ready!

I’m so happy that I chose the Scheepjeswol Stone Washed for this project.  I love the Red Jasper, but I have to be honest, I chose this colour  when it first came available and if I had to choose now, I don’t know what I would do as the collection has since doubled in size, with so many amazing colour choices!

Here are a few more photos for you to get an idea of the texture and how the colour-play works together.

The Big Reveal!  The labour of love that has been my #stonewashed top is finally ready!  Pattern is coming soon! #Scheepjes #Scheepjeswol #missneriss The Big Reveal!  The labour of love that has been my #stonewashed top is finally ready!  Pattern is coming soon! #Scheepjes #Scheepjeswol #missneriss

Isn’t the V-Neck just fantastic?The Big Reveal!  The labour of love that has been my #stonewashed top is finally ready!  Pattern is coming soon! #Scheepjes #Scheepjeswol #missneriss

It didn’t stay hanging over that chair for long this morning, believe me!The Big Reveal!  The labour of love that has been my #stonewashed top is finally ready!  Pattern is coming soon! #Scheepjes #Scheepjeswol #missneriss

And now comes the almighty task of putting the pattern together!  I’ll have to dig though pages and pages of notes to make it more concise for you to be able to follow, and I’ll be figuring out a few sizes while I’m at it.

But first, I need your help!  This design does not have a name yet and I have no idea what I should call it.  What do you think?

If you want to get your hands on the Stone Washed there are loads of options within the Netherlands.  Scheepjeswol has a list of stockists on their website and for those of you who aren’t lucky enough to live in Holland, you can pick it up via Deramores!


Project Monday

This is what I’m up to this week.  Can you guess what it’s going to be?