How-To: DIY Photography Backdrop

If you’re anything like me, you have backdrop envy.  You see photos all over Pinterest and ask yourself: How do they have such beautiful surfaces?  How come my yellow flowery tablecloth isn’t this nice?  Well, that’s because it’s magic.  Magic and lies I tell you!

My beautiful shabby chic

It had never occurred to me for one second that people were faking it, I honestly thought I was the only person in the entire world with an ugly table/floor that was totally unsuitable to use for photographing my projects. (I have a lovely floor, by the way.  My husband laid it himself which makes it all the better!)

Well, no more! I’ve just finished my own fabulous “Fakedrop” and I’m going to show you how I did it.  I spent weeks searching Etsy and other sites for perfect vinyl sheets to use as backdrops, but they’re fairly pricey and I couldn’t find anything local, meaning I’d likely be stung for import duty on top of the cost of the backdrop and then shipping.

So I decided that I could do this and I jumped on my bicycle and headed to the local hardware store to see what was on offer.  I went straight to the wallpaper aisle and found a great white worn timber print, along with a roll of seriously strong double sided tape and a sheet of the cheapest lightweight plywood I could find.  It was the sort of wood that you find in caravans, you know the stuff?

I then proved to the world how dutch I am by carrying a huge sheet of wood home under my bike under my arm.  I should have picked up a bunch of flowers on my way home, just for fun.

Here’s what you need:What you need to make your DIY Photography Backdrop: Sheet of lightweight plywood, wallpaper, double-sided tape and a Stanley Knife
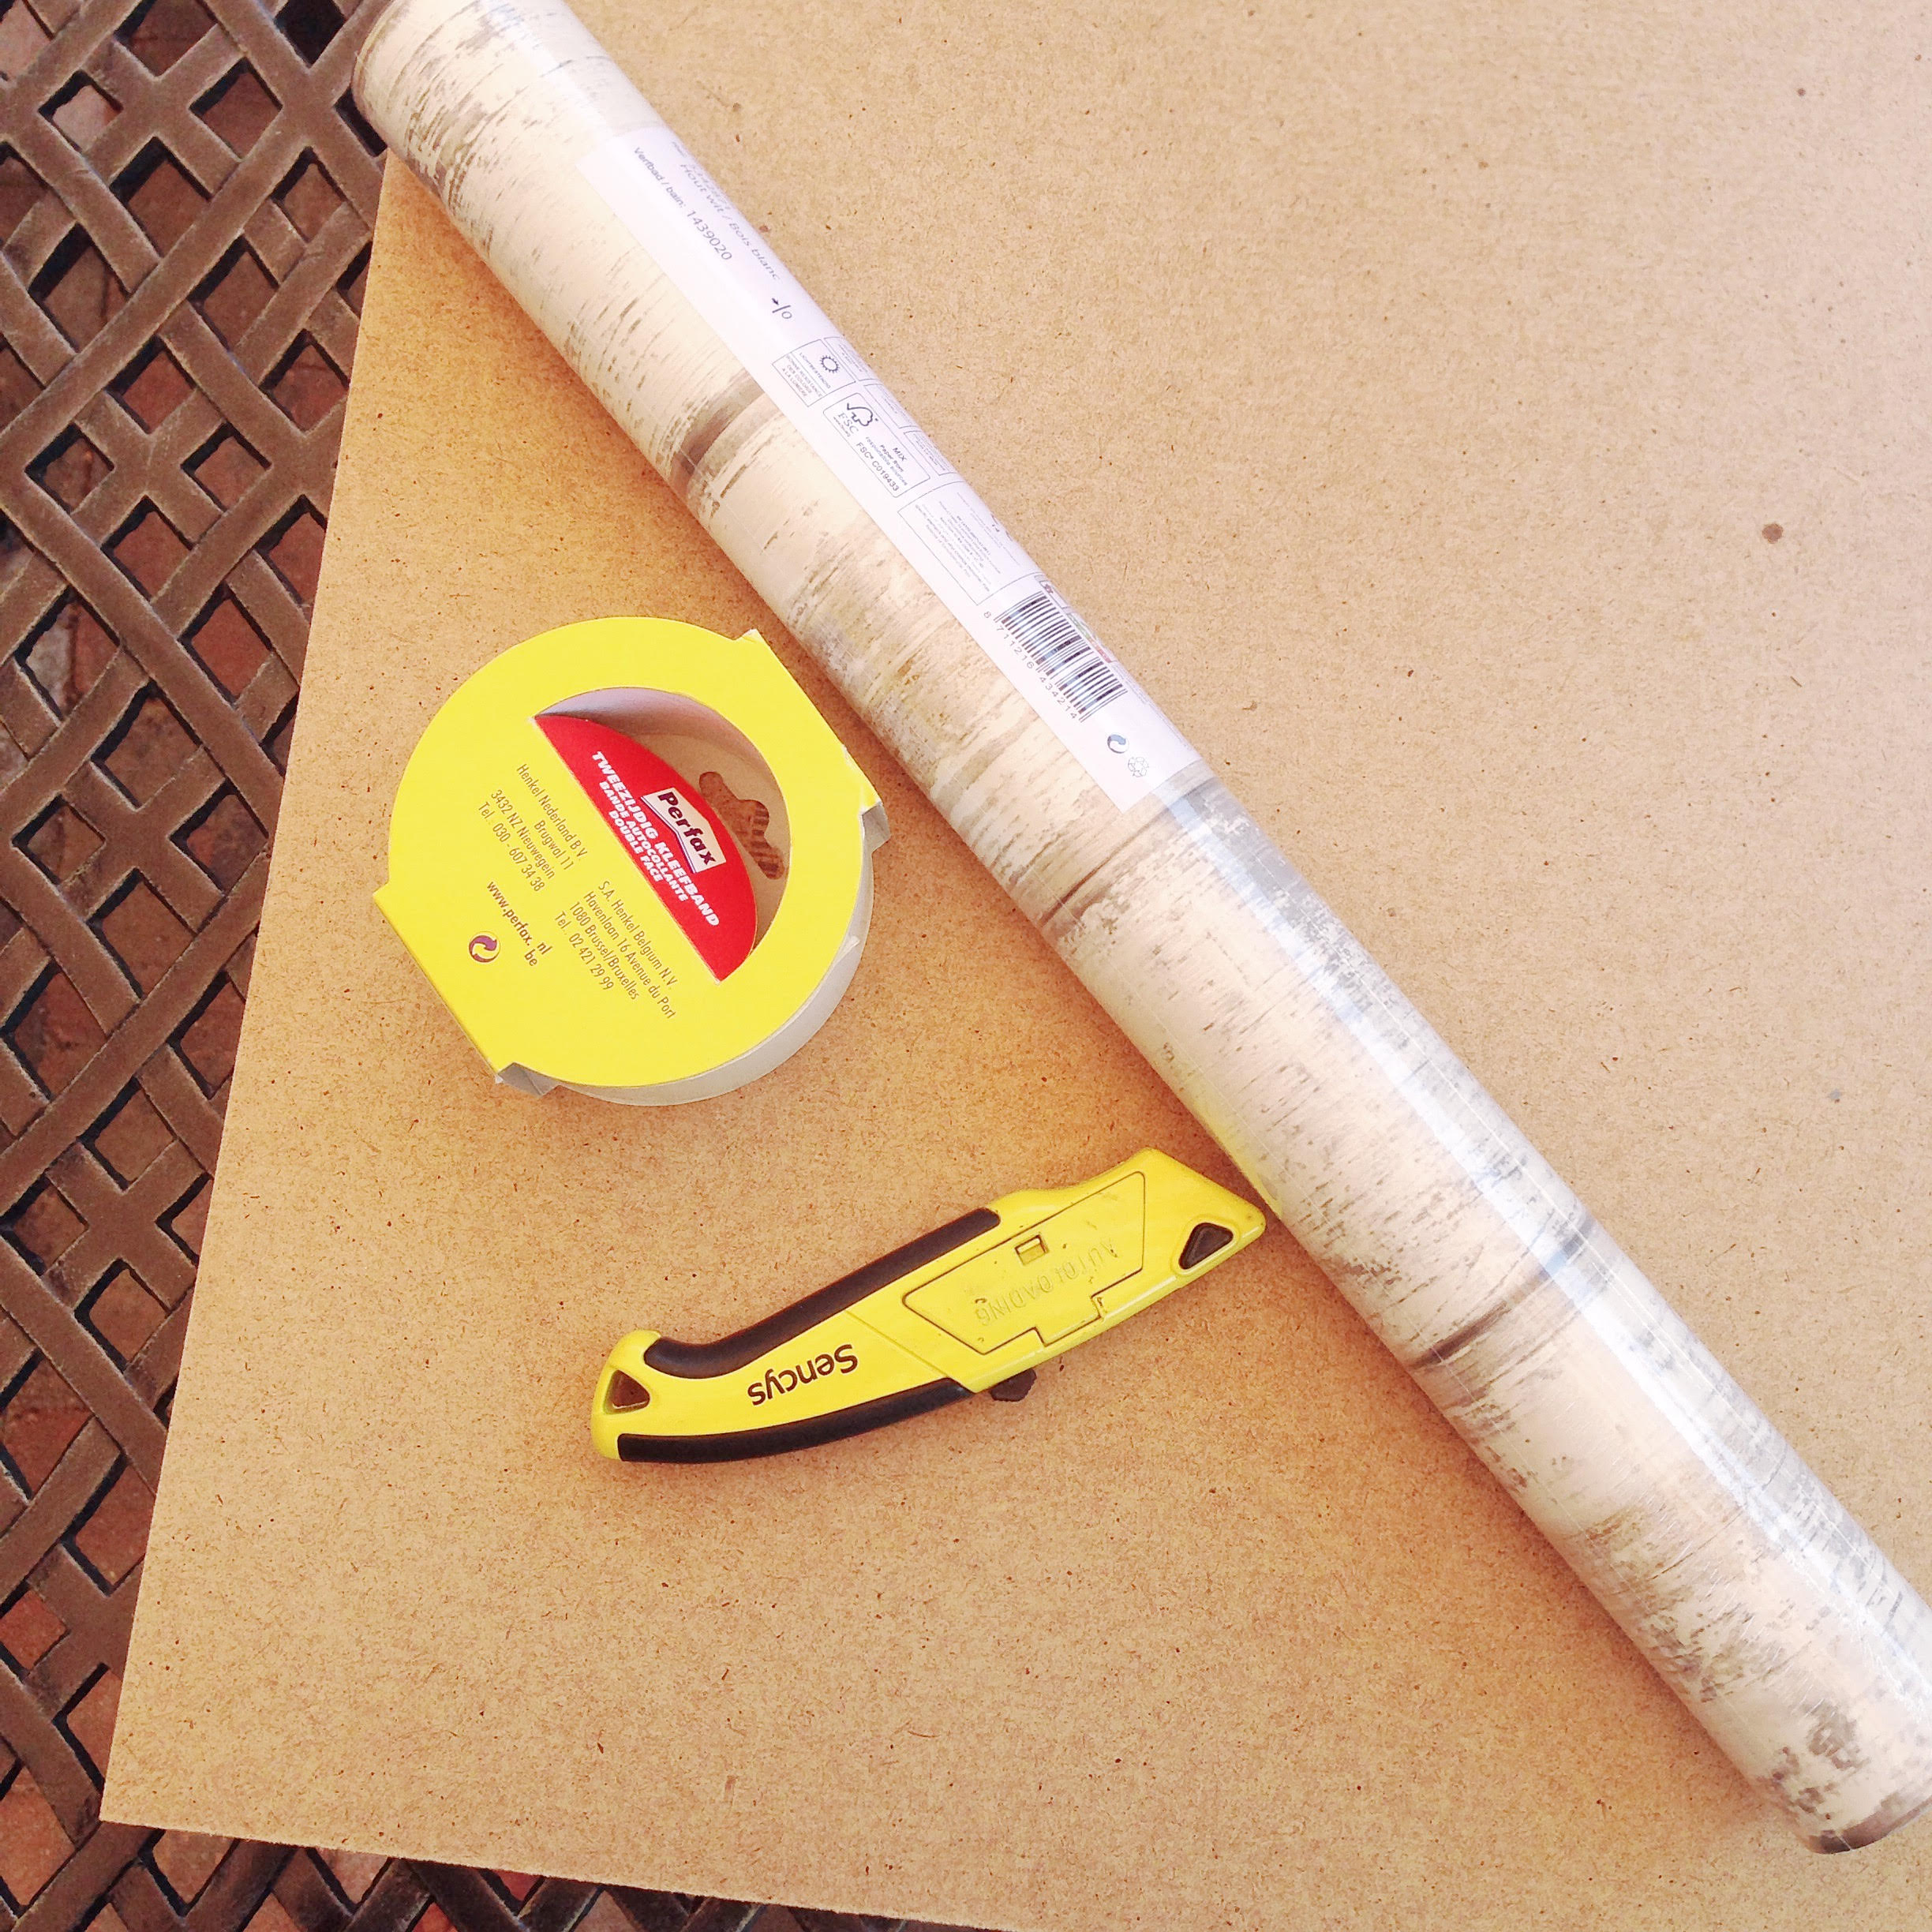
A sheet of lightweight plywood, a roll of wallpaper that you love, a stanley knife to cut it all, plus some double sided tape.  You could also use wallpaper glue, but I didn’t want to wait around for it to dry, or clean up the mess.  You’ll also need some gaffer tape to hold it down on the back.

So what I did first was cut the length of ply in half, because it was about 1mx2m, so I really didn’t need something that large.  I just used the Stanley knife for that, so you don’t need a saw or anything, but watch your fingers!  Then I edged the ply with the double sided tape before cutting lengths of the wall paper (about 10cm overhang at each end).

stick the double sided tape down ready to apply the wallpaper

Then I carefully laid the wallpaper out so that it was square to the plywood then made sure it was pulled tight.  I folded it over the edges and taped it all down with gaffer tape.

the finished photography backdrop

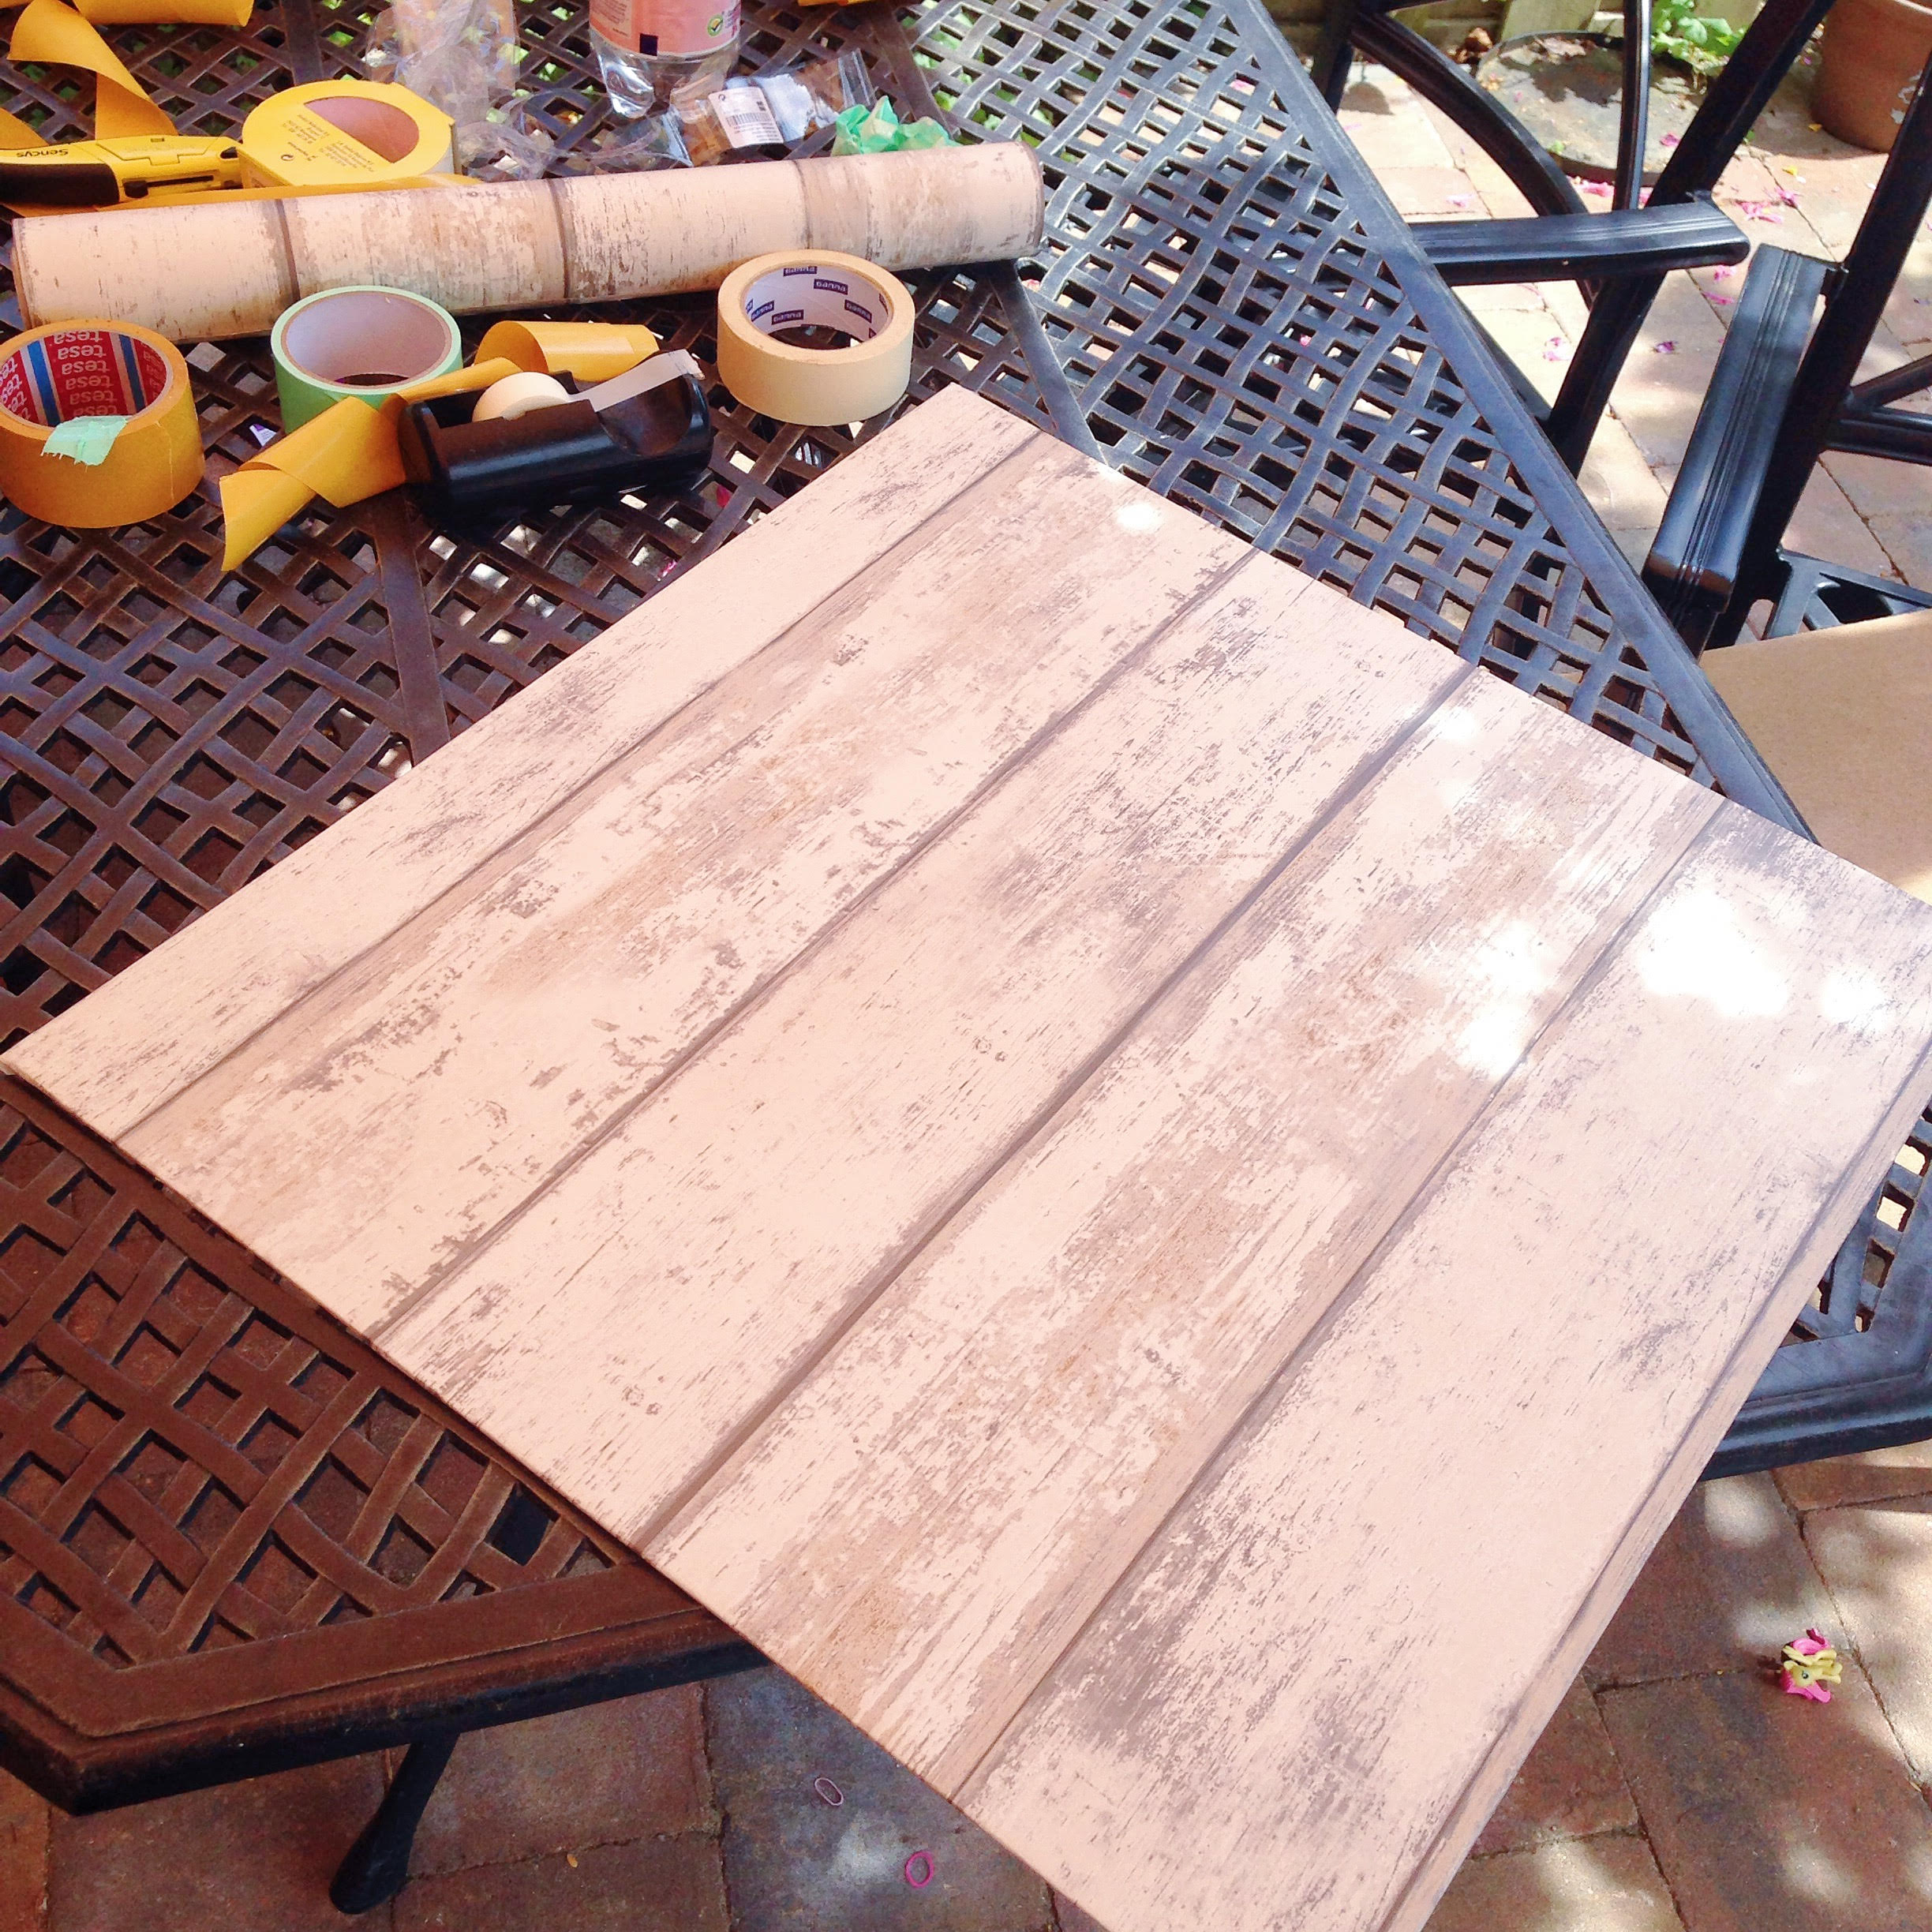
I also used some clear tape at the corners to protect the paper a bit – it might not last too long kicking around my living room otherwise!

And all that was left was to start taking photos!

My beautiful shabby chic

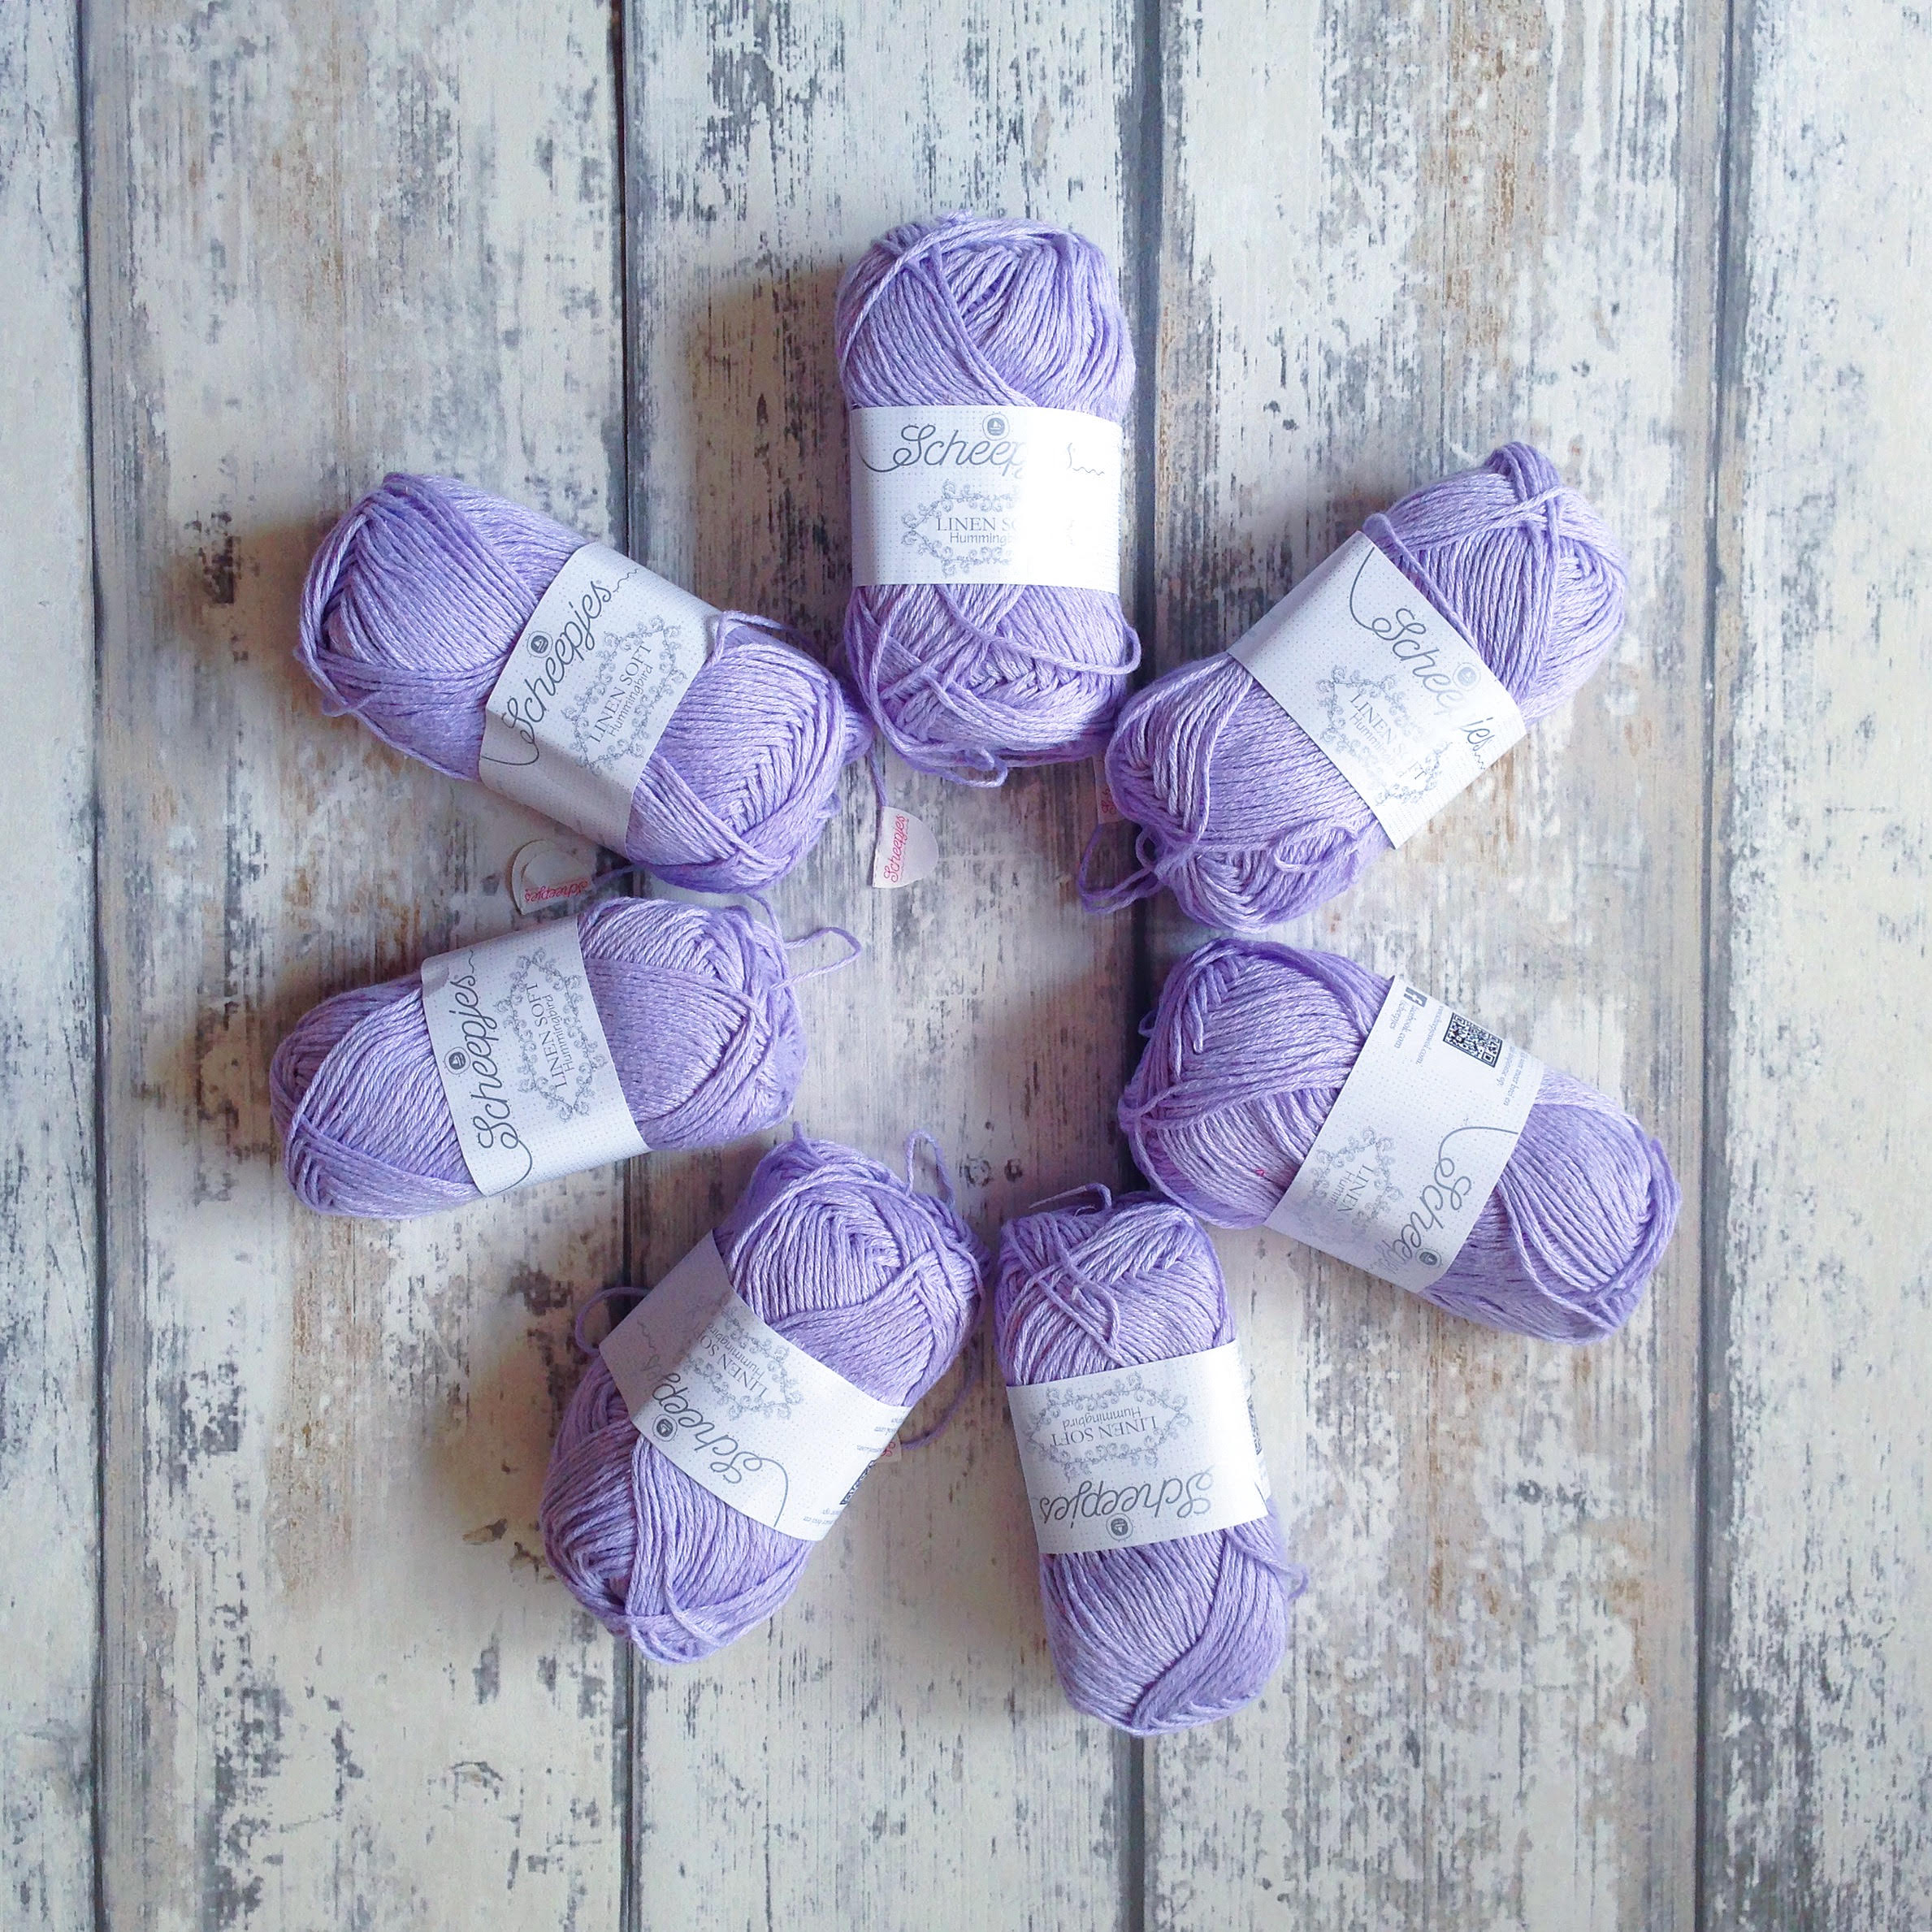
And see how fake it is?

My beautiful shabby chic

You’re welcome!

All in all it cost me about 30 euros to make.  The wallpaper wasn’t cheap, but I’m sure you can find it cheaper at a large hardware store or online.  I wanted to make it while I was motivated, so didn’t mind the price tag.  And plus, if this one wears out I can make another.  Or I can use the wallpaper to cover something else!  I did use the leftover piece of timber to create a white reflector board too actually.  I just attached the wallpaper facedown instead.  Perfect!

Don’t forget to follow me on Social Media.  Instagram is where I hang out most, so I’d love to see you there!  Come share your Fakedrops if you have any, don’t forget to tag me: @miss__neriss

Never miss a post!

Enter your email address to subscribe to this blog and receive notifications of new posts by email.

XN

The Colour Block Knitted Baby Blanket for Beginners – Free Pattern

Last week I showed you the Colour Block Knitted Baby Blanket, and today I have the instruction for you.

Colour Block Knit Blanket for Beginners using @Scheepjes Sunkissed by MissNeriss

Now, let me tell you, this is absolutely the simplest knitted design you’ve ever come across.  It is the perfect  beginner project, because let’s face it.  That’s precisely what I am!  So, if you’re looking for a simple project that looks fabulous and is not a scarf – I don’t know how many knit one purl one scarves I made as a kid – this one is perfect.  And best of all, it’s not expensive because all you need to complete this is four skeins of Scheepjes Sunkissed, and you’re going to use every metre of those skeins.

Sunkissed by Scheepjes

Scheepjes Sunkissed Knitted Baby Blanket

What You’ll need
Four skeins of Scheepjes Sunkissed in 3, 7, 9, 10
3.5mm needles (I used 80cm circulars)
A tapestry needle to weave in your ends
Blocking boards and wires (or pins)
Eucalan (because it softens everything and smells amazing)

The final measurement of this blanket will be about 60 x 85 cm, so it’s a good buggy size, or snuggly swaddle size.  It’s also lovely and stretchy, and the Sunkissed is soooooooft.

Let’s Go!

Cast on 150 stitches.  I like to use the Slingshot Long Tail Cast on.  When I was starting, I had no clue how to cast on, but my friend Tammy recommended this method and it’s very easy.

Once you’ve cast on your stitches, you need to start making the border.  The design of this blanket is a stockingette stitch body with a garter border.  Essentially a giant swatch!

Colour Block Knit Blanket for Beginners using @Scheepjes Sunkissed by MissNeriss

Rows 1-5 knit in the garter stitch (knit), then we will start with the body of the blanket.

The first and last five stitches of every row will be in garter stitch and the body (middle 140 stitches) are in stockingette stitch.

Row 6: knit 5, purl 140, knit 5

Row 7: knit 150

Repeat rows 6 and 7 until you’ve finished your first skein of yarn (or until you know you cannot finish another row with the remaining yarn).  Attach the second colour and continue the row 6 and 7 repeat through all four of the colours.

Colour Block Knit Blanket for Beginners using @Scheepjes Sunkissed by MissNeriss

Each colour block will measure about 21 cm, so when you get to about 19 cm of the final colour, you will need to start working on the top border.  The way I figured this out for myself was to fold the blanket with the join of the fourth colour matching up with the join of the first and second colour so I could see how far I had to go before I should start on the border.  This is because I’m not yet a great judge on how much yarn a row will use.

Knit the final 5 rows of the border, then cast off.  The feeling of accomplishment will be amazing, especially once you block it.

unnamed (11)

You can find the yarn at any great yarn store here in the Netherlands and Belgium, otherwise Deramores ships it world wide!

Colour Block Knit Blanket for Beginners using @Scheepjes Sunkissed by MissNeriss

I hope you enjoy making this, and do please share your projects on Ravelry, my Facebook page or on Instagram with hashtag #missneriss and #scheepjes

XN

Wearing Flowers in My Hair

Today I had another post scheduled.  I was going to share the tutorial for the Colour Block Baby Blanket I knitted, but today is not the day for that.  Today instead I’ll be wearing flowers in my hair for Wink.

Today a family is laying their beautiful daughter to rest.  Their daughter who inspired thousands, no – hundreds of thousands of people all over the world.  Their daughter who loved colour and lived music.

Wink was one of the first crochet bloggers that I found when I first started out, and I was even more excited to discover that she lived close by (well, kind of).  I felt connected.  Like we were bound to be besties.  Just because we both crocheted, and lived within 100km of one another (I know, lunacy right?).

I was terribly nervous when I met her for the first time, expecting her to be aloof, too cool for me. Instead I discovered a girl who was warm, who’s smile and presence made a space come alive.  I expected to not know what to say to her as I was so dazzled, but I needn’t have worried.  Being with Wink was easy.  I felt we had known each other forever.  That we really could have become besties.  I think anyone who met Wink would have felt like that.

But then she slipped away.  I was busy up to my armpits in my own life dramas and hadn’t realised she wasn’t really present any more.  Then when she couldn’t make our recent blogger weekend I knew something was seriously wrong.  But still life got in my way.  Everyday I thought: I must reach out.  I must remind her how amazing she is.  But I didn’t.

And suddenly she was gone.

Today a family lays their beautiful daughter to rest.  I’ll be wearing flowers in my hair for Wink.

A fun selfie taken at an event last year.  That pic won Wink a rubbish bin, isn’t that hilarious?  I can still see her bemused face on stage receiving her “award”, wondering how to get it home on the train…

If you want to wear flowers in your hair for Wink today, here is a tutorial she created recently:  http://crafts.tutsplus.com/tutorials/how-to-make-a-crochet-flower–cms-20976

Wink’s family have set up a beautiful memorial site where you can leave messages, post photos, share your love.  There are other social media events ongoing as well, via  #mandalasforwink, #mandalasformarinke and #wearingflowersinmyhairforwink

The Colour Block Knitted Baby Blanket – Ta Da!!

Colour Block Knit Blanket for Beginners using @Scheepjes Sunkissed by MissNerissTa Da!!!!!

I seriously can’t believe that I can knit.  I just knitted a baby blanket!  And she’s a beauty.

Colour Block Knit Blanket for Beginners using @Scheepjes Sunkissed by MissNerissI used Scheepjes Sunkissed for this project in colours 3, 7, 9 and 10. (There are currently 11 colours available, but don’t be surprised if you see more coming soon!)

I can’t tell you how much I love working with this yarn. I love the texture of the cotton, I love the colourways, I love the drape.  For me it’s about as close to the perfect yarn as you can get.  Knitters, you’re going to make some beautiful clothes with this yarn, let me forewarn you.

Colour Block Knit Blanket for Beginners using @Scheepjes Sunkissed by MissNeriss


The finished blanket, at 60x85cm is just the perfect size for a cradle or buggy, and it’s exactly the right weight for this ridiculously cool summer that we’re “enjoying” here in Holland right now.

Colour Block Knit Blanket for Beginners using @Scheepjes Sunkissed by MissNeriss

Next week: the tutorial!


Peek-A-Boo Button Wrap – Gratis Nederlands Patroon

Finally, the Peek-a-Boo Button Wrap has been translated into Dutch.  Well, actually the pattern was translated ages ago by my new friend Peggy (more about her shortly), but it has taken me a while to post it here for you.

I’m completely bowled over by the positive response that I’ve had to this design.  It was such a pleasure to make, and I love the buzz that has surrounded it.

Now, let me tell you about Peggy.  For you Dutch girls, Peggy curates a wonderful Facebook group called Dutch Crochet Talent, which is essentially THE Dutch language crochet group.  I mean, there are lots of different groups, but this one is my favourite.  It’s a great atmosphere in there.  Lots of beautiful designs being shared and positivity all round.  I’ve always been to afraid to post in Dutch speaking groups, but I’m made to feel so welcome that my heart wants to burst!

It’s thanks ultimately to Peggy that this translation came about.  She asked me if I would translate it, and when I told her that I didn’t know where to start she offered to do it for me.  Seriously, a woman that I’ve not (yet) met in person just offered.  Offered!

So, without further ado, dank aan Peggy voor de vertaling, gaan we!

Crochet body warmer

Wat heb je nodig?

Garen: Scheepjeswol Stone Washed XL kleur Garnet (850)
Elk bolletje Stone Washed XL is 75 meter
Small:  10 bollen
Medium:  12 bollen
Large:  15 bollen
XL:  17 bollen
Haaknaald: 5mm
Knoop: 7cm diameter (evt van bamboe) verkrijgbaar in de betere handwerkwinkel of online
Schaar- Rolmaat – Naald – Eucalan Wasmiddel

Steken verhouding van 8 hst x 5 toer = 5 x 5 cm

gauge up gauge across

Gebruikte Steken

Losse (L)
Half stokje (HST)
Half stokje  in de achterste lus (HSTA)
Half stokje in de voorste lus (HSTV)

Patroon voor Medium

Toer 1: Haak 117 + 2 lossen (of tot 70 cm).  Let op!  Niet te strak haken, of gebruik een grotere haaknaald om de lossen te maken.

Toer 2: Haak een Half stokje (HST) in de 3e losse vanaf de naald, daarna 116 halve stokjes.  Je hebt nu 117 halve stokjes (of 70cm lang).

Toer 3: Keerlosse, Halve stokje in de achterste lus (HSTA), daarna halve stokje in de voorste lus van de volgende steek (HSTV).  Herhaal tot het einde van de toer (HSTA daarna HSTV enz.)

Tip: Het is belangrijk dat je een oneven aantal steken hebt dan bereik je op een eenvoudige manier de textuur van het vest. Eindig je in de achterste lus dan start je in de voorste en vice versa. Het effect ervaar je naarmate de toeren zich opvolgen.

Effect wordt anders wanneer je voorste- en achterste lus niet aanhoudt.

Herhaal toer 3 tot 25cm.

Nu starten we met  de eerste mouw. Keerlosse, volg de HSTA/HSTV steken tot de 20e steek (dit word de begin van de mouw) , haak 35 lossen, 35 steken overslaan, en herhaal daarna de HSTA/HSTV steken tot het einde van de toer.

Keerlosse, HSTA/HSTV tot de losse van de vorige toer.  35 Gewoon HST in de losse, ga daarna verder met the HSTA/HSTV steken tot het eind.

Herhaal toer 3 voor een verdere 37 cm en daarna maken we de 2e mouw. Let op!  Begin de mouw van de bovenste kant (korter boven de mouw).  Dit zal de achterkant van  jouw wrap worden.

Herhaal de instructies van de eerste mouw.

Ga verder met de 2e paneel aan de voorkant, voor 25 cm, begin daarna aan het knoopsgat. Haak van de bovenkant 37 HSTA/HSTV, daarna 7 lossen, 7 steken overslaan, en verder met de HSTA/HSTV tot het einde van de toer.

Haak nog  7 toeren (of tot het bolletje op is) en je bent klaar!

Naai de knoop 9 cm van het eind en 25 cm van bovenkant op de voorkant tegenover de knoopsgat.peek-a-boo Button crochet body warmer

Werk de draden weg en block je wrap vest.

Tip: Let op met het  meten, je kunt altijd en toer toevoegen of verwijderen als het nodig is om de juiste maat te vinden.

SMALL MEDIUM
CM Toeren CM Toeren
Lengde 70 Lossen 117 + 2 70cm Lossen
117 + 2
Achterkant 32 32 37 37
Voorkant 
(knoop)
20 20 25 25
Voorkant 
(knoopgat)
27 27 32 32
CM Steken CM Steken
Begin Mouw (vanaf bovenkant) 12.5 20 12.5 20
Eind Mouw (vanaf bovenkant) 20 32 22.5 35
Begin Knoopgat (vanaf bovenkant) 23 37 23 37
Knoopsgat maat 7 7
LARGE X-LARGE
CM Toeren CM Toeren
Lengde 75cm Lossen
123 + 2
75cm Lossen
123 + 2
Achterkant 42 42 47 47
Voorkant 
(knoop)
30 30 35 35
Voorkant 
(knoopgat)
37 37 42 42
CM Stitch Count CM Stitch Count
Begin Mouw (vanaf bovenkant) 15 24 17.5 28
Eind Mouw (vanaf bovenkant) 25 39 27.5 43
Begin Knoopgat (vanaf bovenkant) 25 40 25 40
Knoopsgat maat 7 7

printvriendelijk formaat hier: Pattern-Peekabo-Wrap-Vest-NL (dank ook aan Peggy!)

Volg mij:

Facebook
Instagram
Pinterest
Ravelry

XN

Enter your email address to subscribe to this blog and receive notifications of new posts by email.

That Moment When You Find Your Crafty Blogger Tribe

This last weekend I had The Most Amazing Experience.

Myself, along with a group of absolutely fabulous yarny bloggers was invited to Yarn Paradise; AKA Scheepjes HQ in Tynaarlo.

I was lucky enough to be able to grab a ride with Gorgeous Atty and her mum as they whizzed past on their way from Amsterdam, and upon arrival it was all squeals and hugs and a bit of OTT carry on as we all caught up again or met for the first time in person.

First order of business was a tour of the warehouse.  Now, I’m lucky enough to have done this before, so I knew what a treat the others were in for.  They were all rolling their eyes at my anticipation of the buttons, but when they arrived in the first of the button aisles for themselves, finally they understood!

Buttons buttons and more buttons!  At @scheepjes HQ Buttons buttons and more buttons!  At @scheepjes HQSuddenly it was lunch time, so we all reluctantly dragged ourselves outside into the glorious sunshine.  But Oh Wow we were in for a treat!

Scheepjes Director of Design, Anita, put on the best spread you could imagine. Gluten free brownies that once you’ve eaten, you’ll never eat normal brownies again. Not to mention the Lemon Drizzle Cake.  I won’t lie, I did have one of each!

Lunch - gluten free brownies made by Scheepjes Design Director Anita

In the afternoon, Esther from Happy in Red hosted a terrifically insightful workshop into some of the nuts and bolts of blogging and we all chatted about how we could improve our blogs before we were able to finally talk about the elephant in the room that was all the new yarns!

All the yarn!  I wanted to make Yarn Angels in it! At @Scheepjes HQ

Look at them!!

We could touch and smoosh and rub our faces on the yarn to our heart’s content.  You could feel the room crackling with the energy from the inspiration and ideas zooming around and bouncing off each other.  I came away with no less than three concrete design ideas, so there will be a lot of pretty impressive designs emerging with the new Linen Soft, Catona, Softfun Denim and new Stone Washed colours!

We finally managed to drag ourselves out of HQ where we all went out for dinner at a cute little restaurant in Assen and by the end of the evening I was just exhausted, and my face hurt from laughing so much.  By the end of the weekend my face was pretty much frozen in this position:

Smiles don't get much bigger than this. At the @scheepjes blogger event in Drenthe.

On day two, just when you think that all the highlights have passed, Dedri from Look What I Made cracked out her Sophie and I thought I might faint from the excitement.  Seeing her in the flesh, wow.  She has changed the crochet universe. (See what I did there?)

Sophie's Universe by Dedri of Look What I Made

We spent the day enjoying a high tea while crocheting and chatting, and filming Carmen’s Jean Luc the fox devouring one of her Blue Tits in super slow-mo.  Let’s just say, you probably had to be there…

All in all, I had the most wonderful time, and can’t wait to spend more time in real life with the wonderful group of bloggers that came along.  Thanks so much to Anita and Job at Scheepjes for being the best hosts you could imagine, and be sure to visit all the amazing bloggers.  You won’t regret it.

All the highlights from the @scheepjes blogger weekend in Tynaarlo

Kirsten at Haak Maar Raak
Annelies at Vicarno
Jellina at Jellina’s Creations
Carmen at Crafty Queens
Maria at 50 Shades of 4Ply
Atty at Atty’s
Dedri at Look What I Made
Esther at Happy in Red
Heike at Made With Loops
Sarah at Crafts From the Cwtch

And an honourable mention for Tammy and Wink, who couldn’t make it.  You were missed girls!!

Enter your email address to subscribe to this blog and receive notifications of new posts by email.

How to Use IFTTT to Share an Instagram Photo to Your Facebook Page

We all have our little tricks to make our social media life easier, and this one is my absolute favourite.  If you haven’t heard of IFTTT (if this then that) then you need to get onto it straight away.  You can connect pretty much any channel thanks to the wonderful world of APIs.

One of the most common themes that came up over the weekend I’ve just had with an amazing group of bloggers (more about that later), is “How do I share my crochet photos from my Instagram to my Facebook page, rather than my own private Facebook?” Instagram only allows you to choose either your timeline OR your Page, and if you’re like me you don’t always want to choose.  I don’t want to bombard my friends with crochet photos – they see enough!  Just like my crochet family isn’t that excited about toddler pics.

So, what you need is an IFTTT recipe.  And lucky for you, I have set one up that works perfectly.

Hashtagged Instagram to Facebook Page album Notes: Change the hashtag and specify the album.


https://ifttt.com/recipes/299465-if-instagram-crochet-then-facebook-page

Basically what you need to do is click that image above (thanks for providing it ifttt.com), create an account within a few quick steps, and activate your Instagram and Facebook pages there as channels.  I won’t tell you how to do this because IFTTT is so intuitive you don’t need my help.

All you have to do is check that recipe, double check the hashtag you want to use, and activate it.  I have set #crochet as my hashtag, so whenever I post an Instagram and tag it on the image itself or in the comments, it will automatically upload to my MissNeriss Facebook page.

Here’s an example:

I posted the below photo on Instagram while on holiday, and because I thought those people who follow me on Facebook but are not on Instagram might like it, I tagged it #crochet.

Using IFTTT to upload your instagram to your Facebook page

And here you see it, also on Facebook, with the same caption and a link to the original Instagram.Using IFTTT to upload your instagram to your Facebook pageNow, I know that it’s possible to choose your Facebook page as your connected Facebook account rather than your timeline, but this tool allows you to have both your timeline and your page linked and you don’t have to do anything.  You don’t have to click the little Facebook button on the image editor in Instagram, you don’t have to rely on a good enough wifi connection for the image to upload to both locations (like I was on holiday).  IFTTT is a background rules engine, and will take care of everything for you.

Consider this little how-to an introduction to the engine, because once you dive in, you’ll be hooked.  Trust me. Want to save your Instagrams to your Dropbox?  Want to congratulate yourself when you meet your Fitbit goal? Want a message if it’s going to rain tomorrow?  IFTTT does it all.

Pinterest Loves The Peek-a-Boo!

Crikey, look at the repins on this baby!

In only a few short weeks it’s been pinned more than 1200 times! I’ve had a couple of other images that have been pinned a lot, but they took months and months to get to hit 1000, not a month!

Can you see me doing the happy dance over here?

Meanwhile I’m very busy dreaming up new projects and searching for the right yarns, alongside working on a couple of WIPs, including this gorgeous design which will become a cushion very soon:

Alize Bamboo cushion

I love the changing colours and the pixel effect that the tiny blocks have.  I’m using the Alize Bamboo which I LOVE.  Bamboo is without a doubt my favourite fibre to work with.  It’s so soft and so light, and can fold up to almost nothing.  AND best of all, it’s completely sustainable!  What’s not to love?

What are you working on?

Sunkissed Knitted Project, Status Update

A super quick post today, I just want to update you on where I’m at with my knitting project.

I’ve used all three colours that I had chosen for this project, and I definitely needed one more colour block.  I really wanted to use a yellow shade, which would have been the perfect spring colour, but it’s not (yet) available from Scheepjes so instead I chose purple (10), which is just as lovely.

Scheepjes Sunkissed Knitted Baby Blanket
Don’t you love my little yarn cake? I was attempting a centre pull but had a major Yarn Vomit, so made it into a cake. I love making yarn cakes almost as much as I love working with yarn!

Now I really have the hang of knitting, I’ve managed to work up the purple fairly quickly, and I’ve managed to finish it off and it’s on the blocking board right now.  Thankfully there has been some warm weather so it hasn’t taken long to dry.

Scheepjes Sunkissed Knitted Baby Blanket

I can’t wait to show you the finished product, I really can’t.  I’m so impressed with my ability to knit when only a few months ago I wouldn’t have even attempted a simple garter stitch scarf.  Now I’m lusting after knit patterns on Ravelry like nobody’s business!

Do you have a favourite knitting project you can recommend to slake my thirst?

Scheepjes Bloom Green Gate Inspired Poncho

I’ve had this beautiful selection of Scheepjes Bloom for a couple of months now, but haven’t had any ideas as to what I should do with it.  The colours are so vibrant, and there are so many, I honestly felt a little overwhelmed.  I mean, look at this colour selection:

Scheepjes Bloom Colour Selection

It wasn’t until this week that I was doing a bit of Facebook browsing of an evening when I saw this gorgeous poncho WIP by Meet Me At Mikes and realised that I had found the perfect project for my Bloom.  The only problem was, I didn’t have enough of one colour to be able to recreate this one exactly and nor did I have the patience to wait for yarn to arrive if I was to order it, so I thought I would do a bit of browsing for something similar and came across this fabulous poncho design by Sewchet.  And even better, it had a free tutorial!

It’s a really cool design, and although I didn’t follow the pattern to the letter, the idea is essentially the same.

Green Gate inspired poncho made with Scheepjes BloomAnd then of course I had to block it, which while absolutely necessary, is the most tortuous stage of any project.  The waiting, and waiting and waiting drives me bonkers!

But the wait was totally worth it.  My daughter is seriously irresistible in her new poncho.

Green Gate inspired poncho made with Scheepjes Bloom Green Gate inspired poncho made with Scheepjes Bloom Green Gate inspired poncho made with Scheepjes Bloom

I’m still lusting after the vibrant colours of Meet Me At Mike’s poncho, and I reckon if I dig through my stash I’ll be able to find the yarn.  But first I need to finish about six other projects. As usual!

What’s on your hook?