Tag Archives: tutorial

Jasper V Pattern – All the Sizes!! (S, M, L, XL)

Here it is!  The biggest and most daunting crochet project I have ever undertaken, completely finished!

Here it is!  The Jasper V is available in sizes S through to XL, all Free!  #scheepjes #scheepjeswol #stonewashed

I have to say, I’m a bit sad that it’s all over and I can move on to focus on the next big project, but I’m so relieved to have all the sizes worked out and ready to go.

What I have done for the smaller sizes is to update the diagram only.  I’m not re-writing the entire pattern; instead that can be used as a guide to get started, and the diagram has all the stitch and row counts, which is the clearest description.  The edging is so straight forward that I feel what is written in the original pattern will get you through.

Remember though, if you need any help at all, please just contact me.  I’ve added a contact form below so you can do it painlessly.

1407176460.178020.IMG_8114

Here we go!

The original pattern post with all the written instructions is found at this link.

The attachments with the different sizes are all attached to this post as pdf files.  You will need a program such as Adobe Reader (or similar) to be able to read this file.
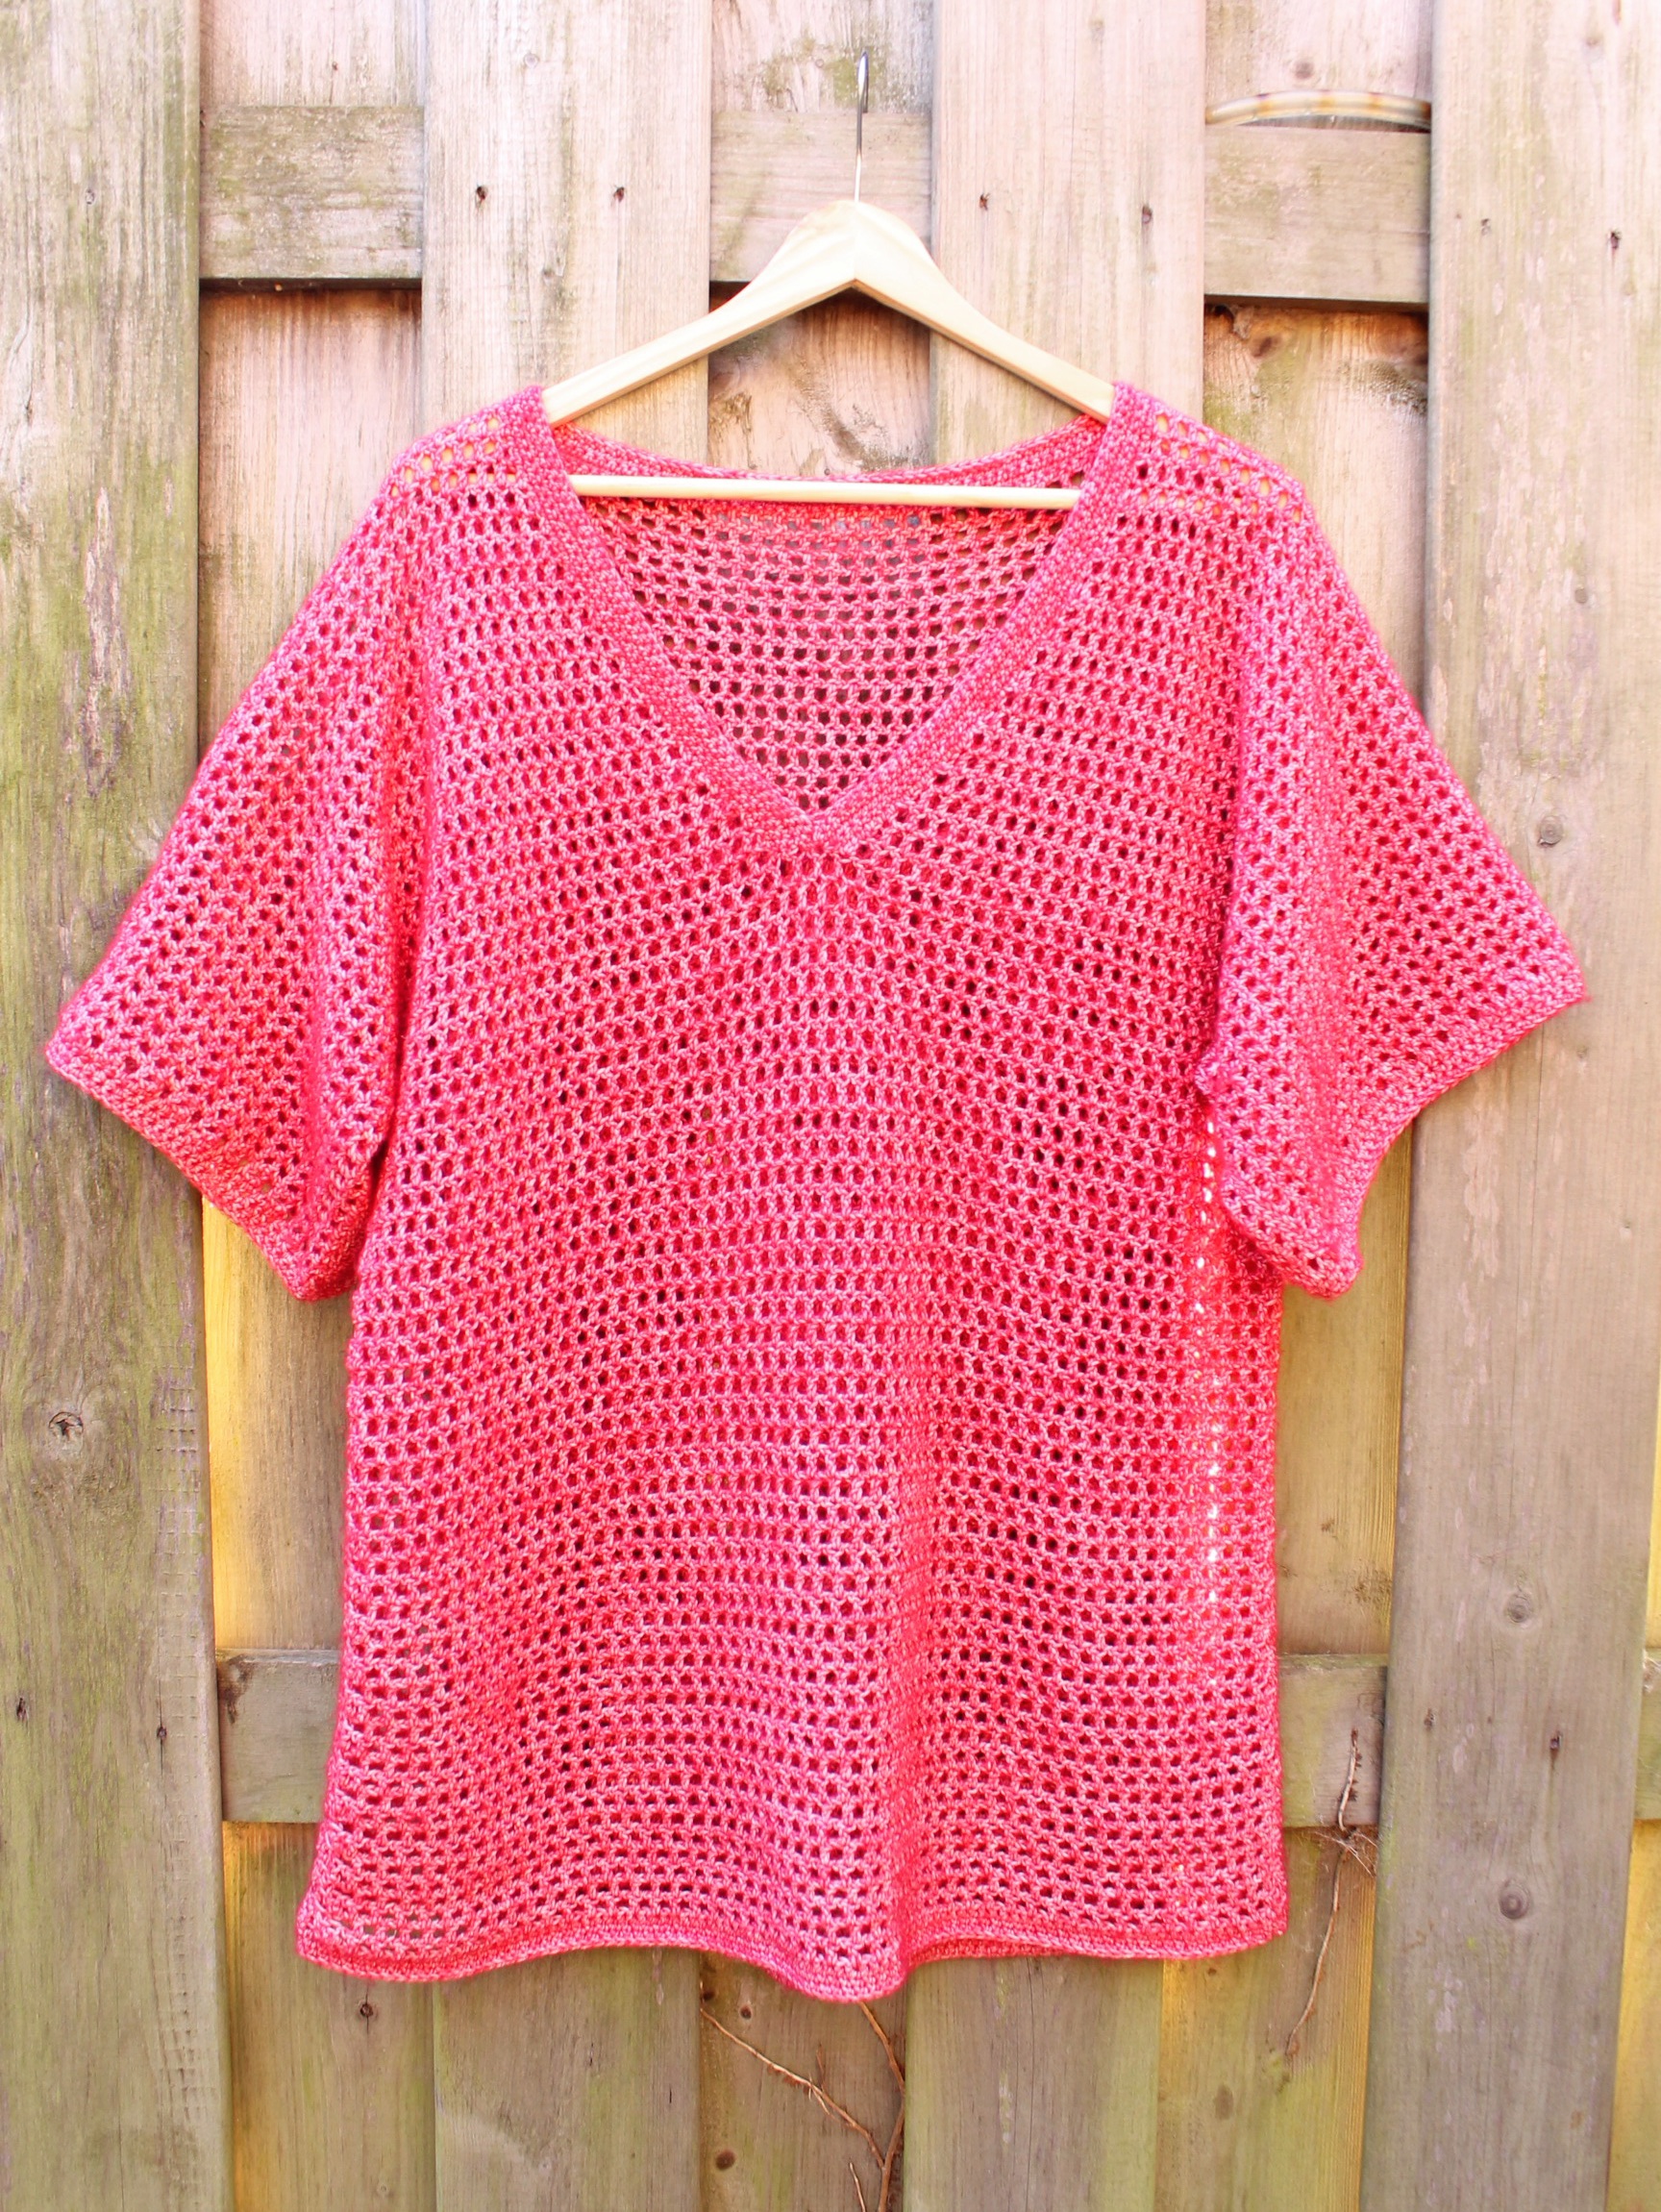
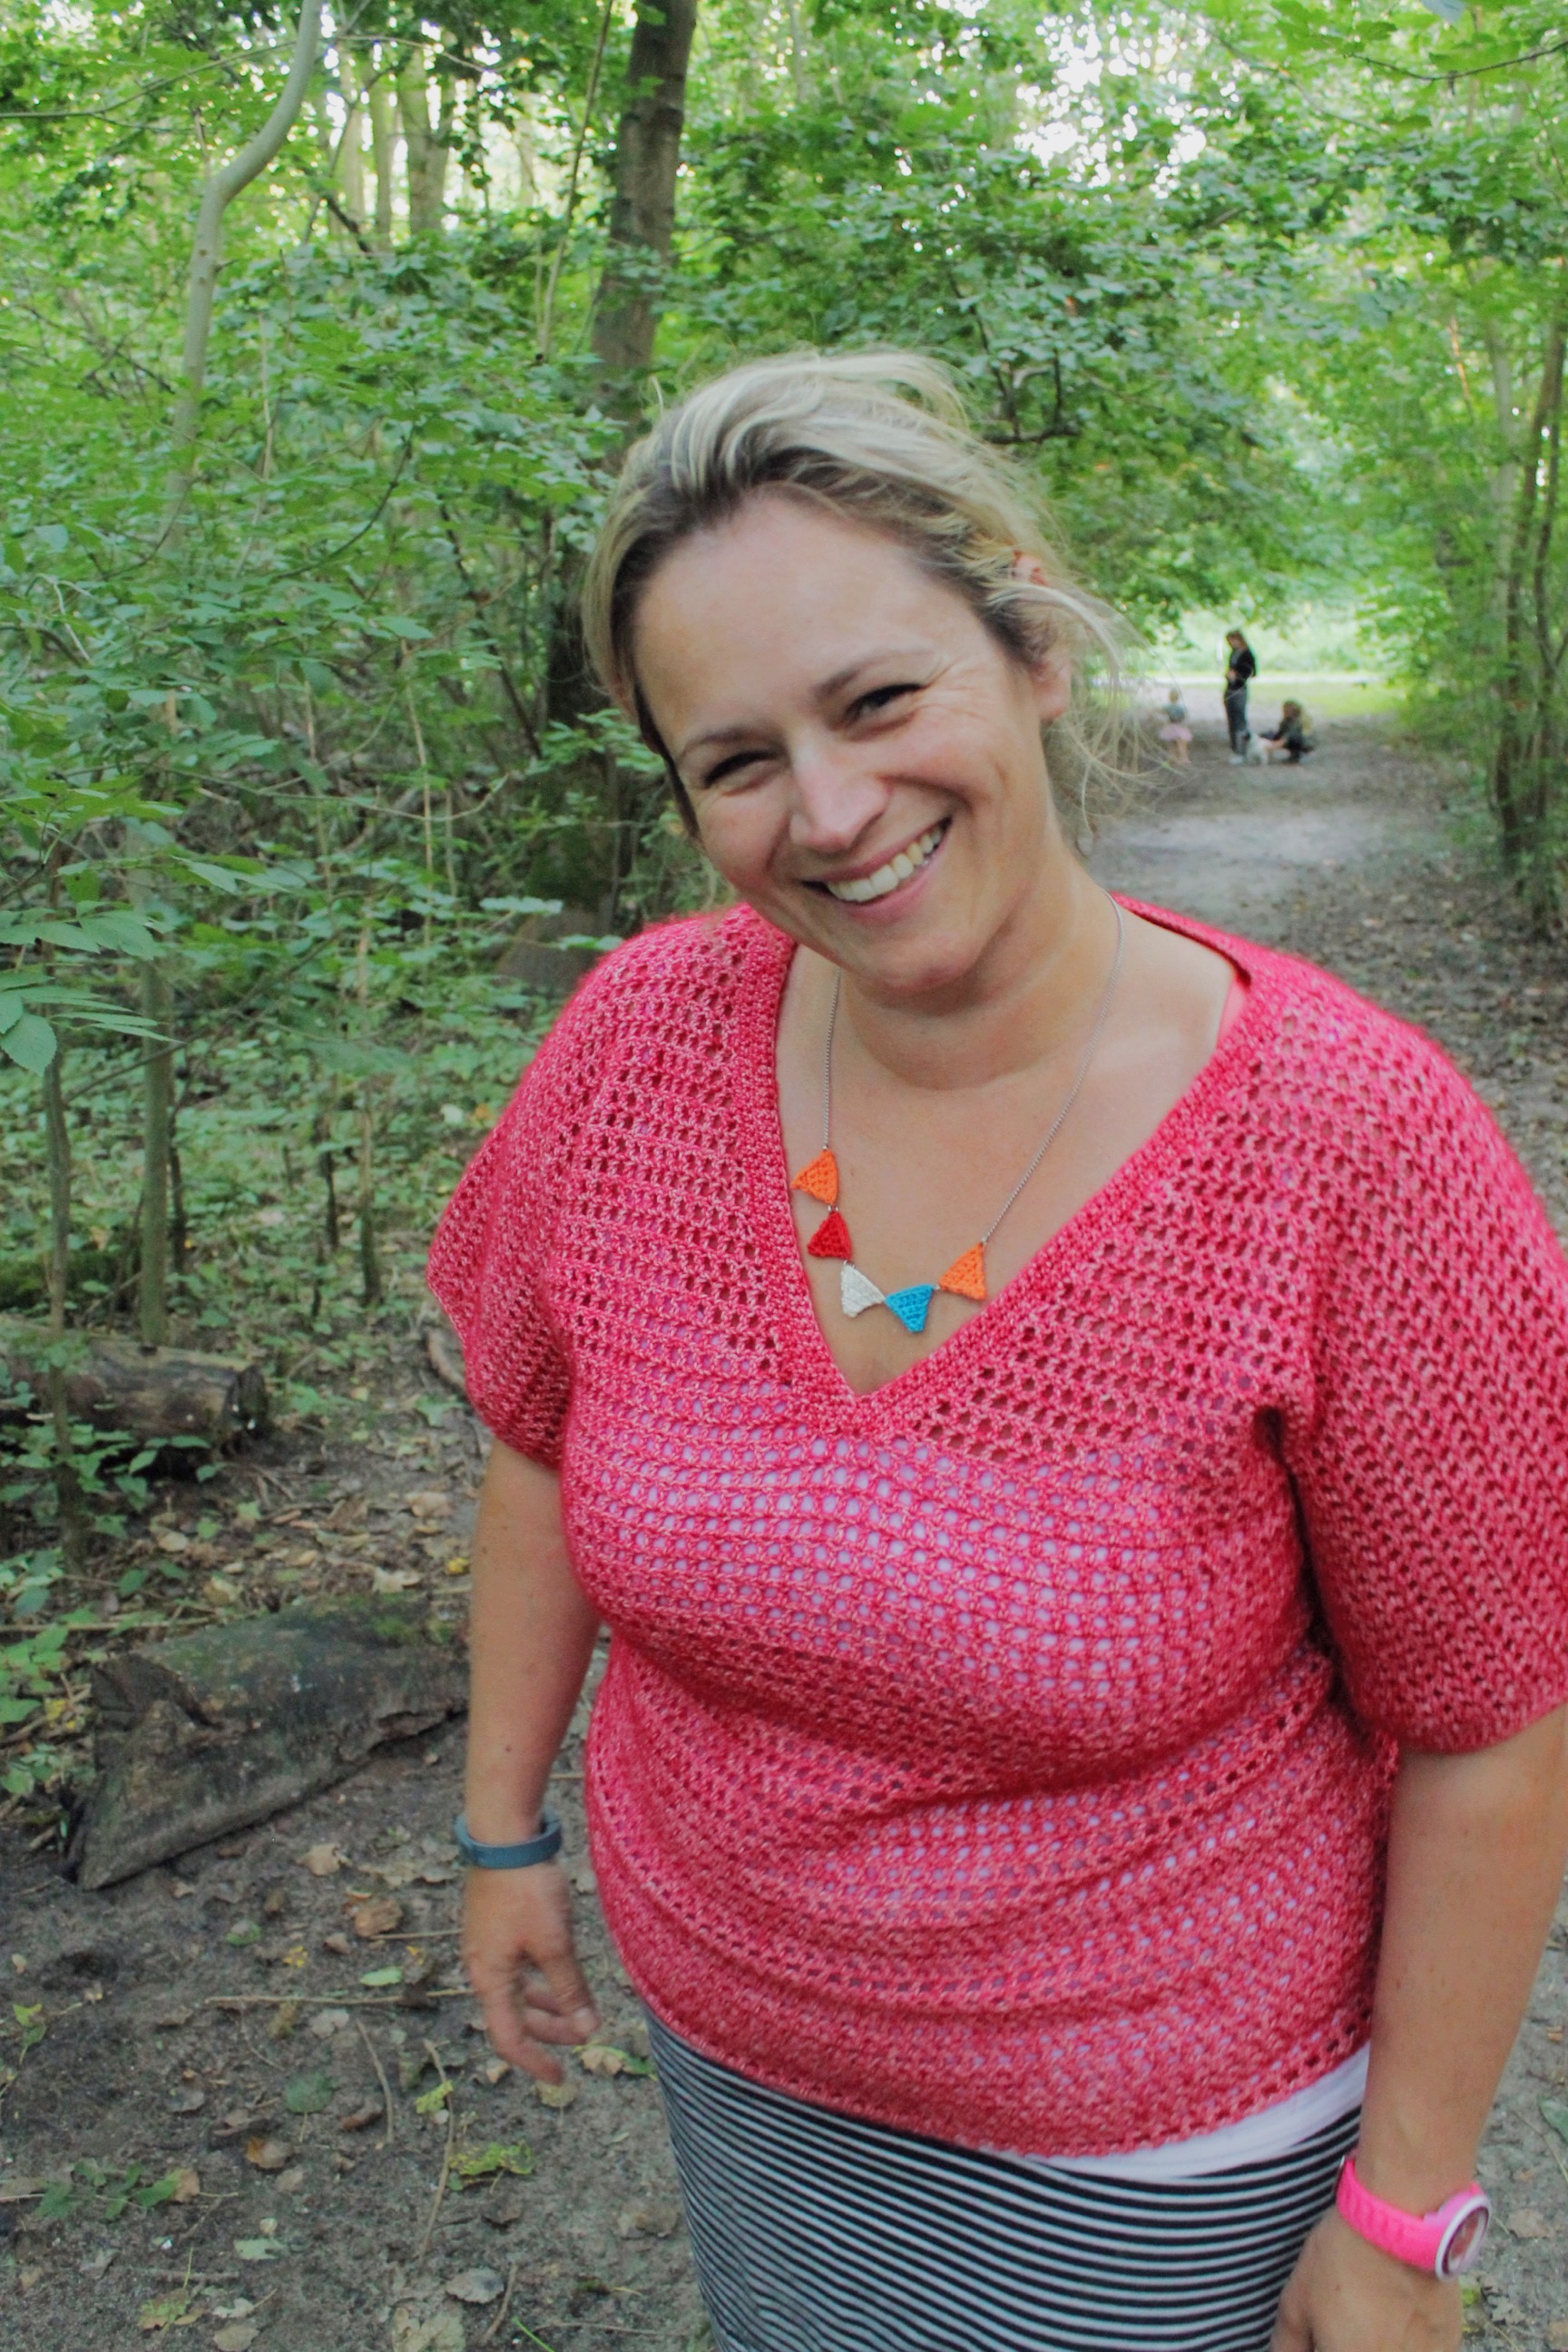
Jasper V Size Small

Jasper V Size Medium

Jasper V Size Large

Jasper V Size XL

Please, please do note: the only size that has been tested by me is the XL – the smaller sizes have been created using mathematical magic and are not tested.  I’m relying on your help for that!  If you’re making the top and it feels like it will be a little tight, please don’t panic – the stitch has a lot of give; a good 5-10 cm! Think about the yardage of the smaller sizes, you won’t need as much as I did making the XL size (about 1100 metres).

I do value any and all feedback, but please don’t be mean.  And remember above all that this is a free pattern – together we can improve it.

This is an original design by Nerissa Muijs.  Please do not reproduce this pattern or sell this pattern as your own work.  Please share it on your social networks, linking it back to the original source.  Please also feel free to sell items made from this pattern and please credit me by linking my website: missneriss.com.  All images are the property of Nerissa Muijs, and if you would like to repost the originals, please send me a message to ask my permission before the fact.

Most importantly though, please share pictures of your work with me, by adding them to Ravelry or to my Facebook page, or even via an email.

Enjoy!

Need help, or want to ask a question, go for it here:

Advertisement

An Ever Evolving Love Affair with Stone Washed

Last week I shared the beautiful Scheepjes Stone Washed that arrived in time to start my next project and today I’m showing you how beautiful it is as a garment.

But first, look at the texture.  The colour is just beautiful and the way the stone washed effect works is just ingenious.  The colour is wound around a white core and it really needs to be used in a project where texture is the hero.

The texture, I love it! #scheepjes #scheepjeswol #stonewashed #missneriss #crochet

Originally, it was my goal to make a hoodie for myself, then to write down and share the pattern with you, for free. As the top has evolved, it became very clear to me that a hoodie is not the way to go this time.  I definitely think that it’s worth exploring in th future, but the Scheepjes was just telling me that it needs to become a classy v-neck, not a summer hoodie.

I made the top all in one piece, starting at the bottom of the front, then working up, over the shoulders, and then down the back.  It makes for a great, almost seamless effect and I’m really happy with it.

Having said that, it wasn’t all roses – there was also a lot of frogging involved trying to get everything just right!  The Stone Washed isn’t the best for frogging either.  Luckily it’s nice and strong, so bears up nicely, but because it’s nice and fluffy sometimes the yarn gets stuck.  But that’s a common problem, not anything particular to the Stone Washed.

Soaking in Eucalan, waiting to be blocked #scheepjes #stonewashed #missneriss #crochet

I think I’ve finally finished the bulk of the work; the edging looks great.  Here it is, soaking in Eucalan and smelling wonderful – I’m on the home stretch!

Right now the top is all pinned out on the blocking board.  I managed to score a set of Knit Pro Blocking Wires last week when I visited the Scheepjeswol HQ so I’ve used them for the first time on this project.  They could not have arrived at a better time to be honest.  I could just thread the wire through the edges of the top and lock it in place with the blocking pins instead of using about ten thousand pins around the outside.On the blocking board, using my new Knit Pro blocking wires - what a cool idea! #scheepjes #stonewashed #missneriss #crochet #scheepjeswol

Making sure the V sits just right... #scheepjes #scheepjeswol #stonewashed #missneriss #crochetAnd the beautiful V-neck, which has become my favourite feature of the top.Wasn't this supposed to be a hoodie? Not any more! #scheepjes #scheepjeswol #stonewashed #missneriss #crochet #freepatternNow I expect this to take a couple of days to dry properly, considering the weather outside is dark, grey and wet (welcome to summer in the Netherlands) so stay tuned for the big reveal next week (if it’s dry)!

Crochet Hack: Straight Edge Double Crochet

You know how much I love a good crochet hack.  I love a good foundation single crochet, and I LOVE Moogly’s Chainless Starting Double Crochet so much that I use it exclusively.  Well, I did.  Now I have a new love.  It’s Mamachee’s Double Crochet Hack! Seriously, this hack has revolutionised my crochet style!  Let me show you some examples.

I’ve been working on this Convergence top for about a month now, and for the first half of the back side, I used Moogly’s version, but on the top half I started using Mamachee’s.  Can you spot the difference?Straight edge double crochet

Both are excellent methods, but you can see the edging to the right is almost perfectly straight. And firm.  It’s going to be excellent when the time comes (in another month or so?) to sew the sides together.

You can really see the difference on the feature rows of the top.  Here’s the Moogly version:Convergence Edging - Moogly version


And here’s the Mamachee version:Convergence edging - Mamachee version

Great, isn’t it!

Want the hack? Get it here:

How to double crochet a better square

Image from mamachee.com

Moogly’s Chainless Starting Double Crochet

While making my beautiful Candace Scarf in the last couple of weeks, I decided to incorporate this new technique that I learned from being a regular visitor to the Moogly Blog.

In pretty much every single pattern you read, when crocheting to the end of the row the instruction will be “Chain 2, turn,” which is a great, fast and simple way to keep going when making items that are worked in rows.  However, the down side is that there are always holes where the chain 2 is.  Now, this probably isn’t noticeable at all to the wearer, unless they crochet.  But to me it’s basically like a pair of dog’s bollocks.  Fairly obvious.

Here’s what the standard chain 2 turn begin looks like:

Big gap, using chain 2 begin to a rowAnd here’s how it looks when you use the Chainless Starting Double Crochet:

No gap, using chainless starting double crochet

And to compare:

The two methods side by side

For the instructions you can head over to Youtube and watch the tutorial made by Tamara from Moogly:

Or you can check out the photo tutorial here.  Obviously if you’re a lefty like me you have to flip everything over in your mind’s eye for it to make sense.

I love it when I come across these little hacks, so I’ll be sure to share more of them with you as I find them.

Irresistible Owly Cat Toy – Tutorial

Ive been dreaming about this really cool project for a few weeks. As you already know, I’m a huge fan of A Morning Cup of Jo Creations and I’ve been making dozens of her mini owls (want one? Leave a comment or message me via my Facebook and I’ll be in touch ASAP). But aside from looking cute, what can these owls be used for?

A bouncy cat toy, of course!

20130402-174701.jpg

Let me explain how I made it. That’s right, it’s my first ever how-to!

First things first. Go to Craftsy and download Josephine’s Baby Owl Ornaments pattern. It’s free!

You can see from her pattern that the owls are indeed very mini, but it’s very easy to upsize the owls by using a heavier yarn. For my toy I used Katia Nevada #27 (purple) and a 6mm hook (US 9-10).

Once you’ve finished your owl, added eyes (I used 8mm safety eyes) stuffed him and sewn him up, don’t tie off. Instead, chain 8, single crochet into the other end of the top seam. Then slip stitch through 4 stitches of the chain that you just made so that you are now in the middle of the chain.

20130402-203400.jpg

Now chain 35, or as long as you’d like to make your bouncy chord.

20130402-203740.jpg

To make the handle you will need to use a foundation single crochet. If you don’t know how to do this stitch, Tamara from Moogly Blog has a great simple video tutorial to show you how. FSC the right length to be able to wrap around your handle. I created 35 stitches, then joined with a slip stitch at the top of my chain.

20130402-203842.jpg

Continue back down your chain, with 4 single crochet per chain, creating a bouncy spiral. Once you reach the beginning of the chain, slip stitch down the last 4 stitches to the body of the owl. Finish off and hide the loose ends in the body of the owl.

To make the Owly Bouncy Cat Toy extra irresistible, add a bag if catnip and a small bell and you’re ready to play!
20130402-203952.jpg

If you have any questions, please don’t hesitate to ask.  And if you spot mistakes, please let me know!

Apologies that the photos aren’t the best.  I plan to make this again very soon, so will add better photos.